This guide explains how to fill out a checklist that contains the new table component.
1. Navigating and Answering a Table #
The table within a checklist is treated like a category. You can navigate to it using the category buttons at the top.
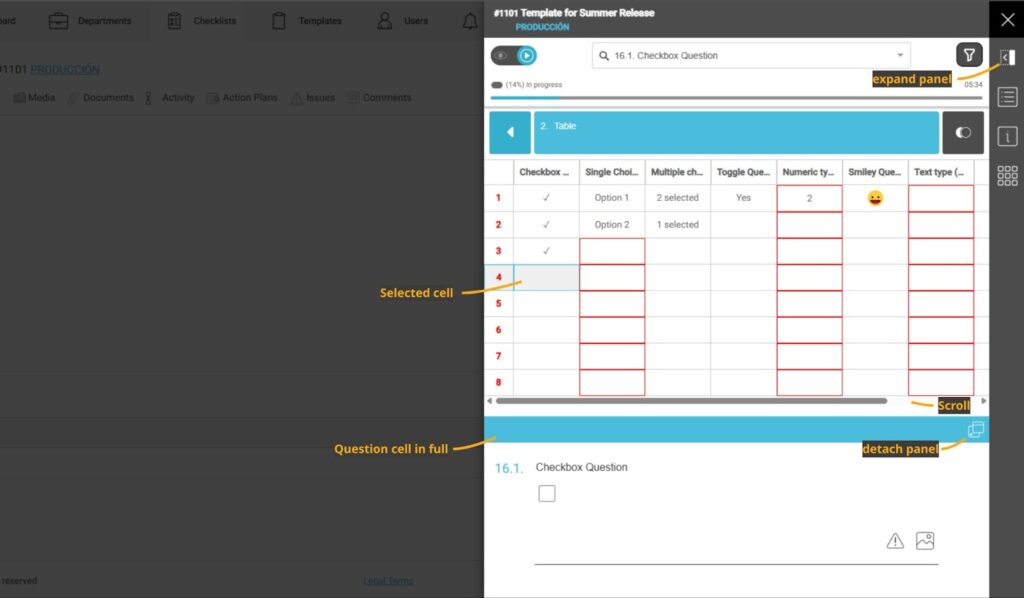
- Each Cell is a Question: Each individual cell in the table is a question that needs to be answered.
- Access the Full Question: Click on a cell to select it. The full question and its details will appear in a panel beneath the table.
- Scroll for More Content: If the table has many rows or columns, you can scroll vertically and horizontally to see all of the content.
2. The Question Panel #
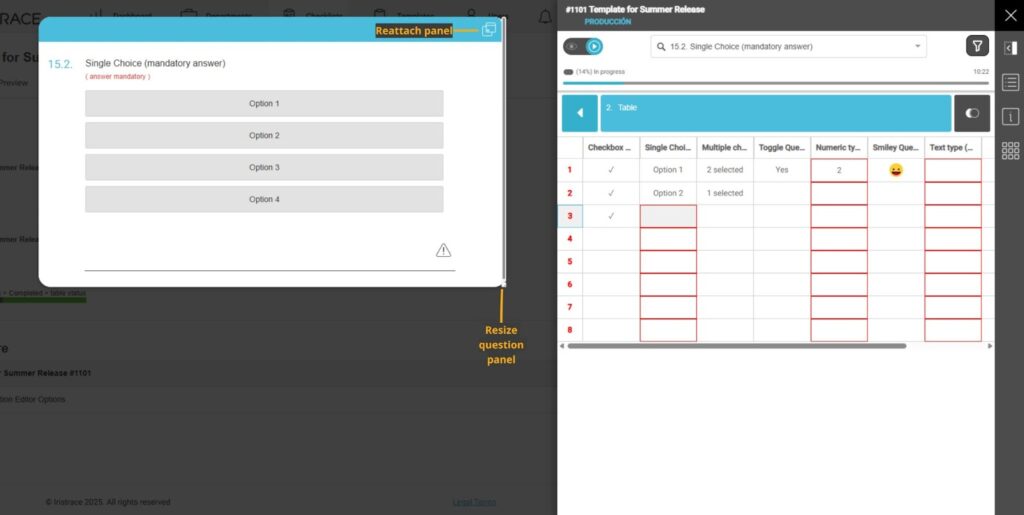
The question panel gives you a larger view of the question and its associated options.
- Detach and Resize: You can detach this panel from the bottom of the screen by clicking the detach icon in the top-right corner. You can then resize and move the panel to a location that works best for you.
3. Understanding Table Indicators #
The table uses several visual indicators to help you understand what’s required and what has been completed.
- Mandatory Actions (Red Borders): Cells with a red border indicate that a mandatory action is required. This could be answering the question, adding a photo, leaving a comment, or attaching a table. You must complete these actions to finish the checklist.
- Content Indicators: A small blue indicator in the top-right corner of a cell shows that content has been added to the question (e.g., a comment, a photo, an attached table).
- Issue Indicators: A red warning triangle will appear in a cell if a triggered issue is associated with that question.

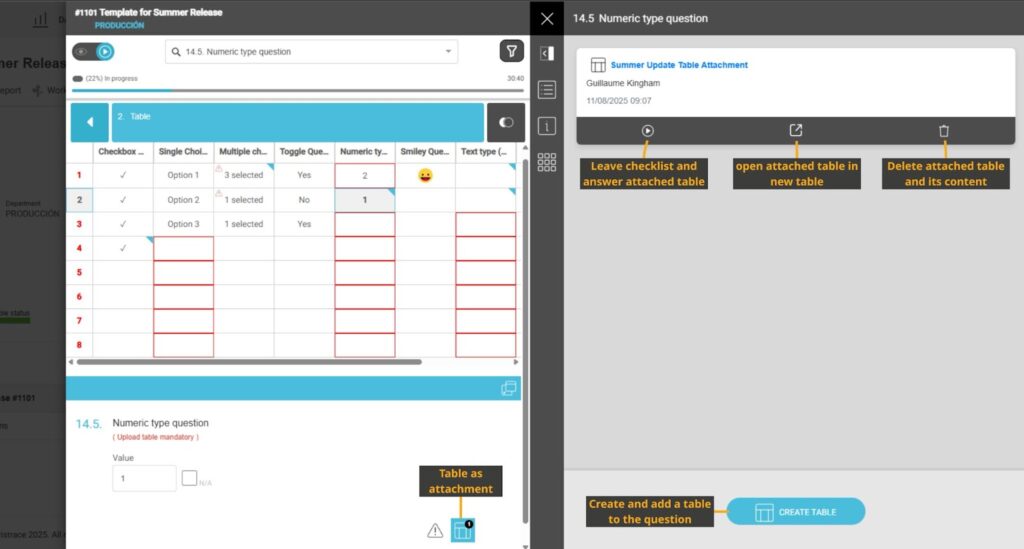
4. Adding Tables as Attachments #
Some questions may require you to attach a table.
- How to Add: If a question requires a table attachment, a small table icon will appear on the question panel. Click this icon to add the predefined table.
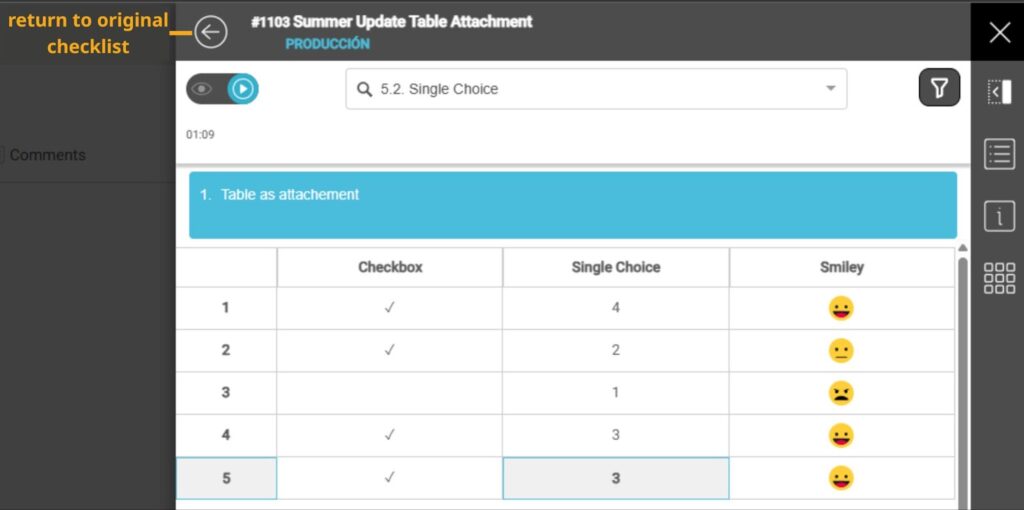
- Working with the Attached Table: After adding it, you can open the attached table to fill it out. The attached table has a “back” arrow at the top that allows you to return to the main checklist once you’re done.