Before starting to answer checklists #
Checklists are built around three core elements: categories, questions, and question contents. The following sections will explain each of these in detail.
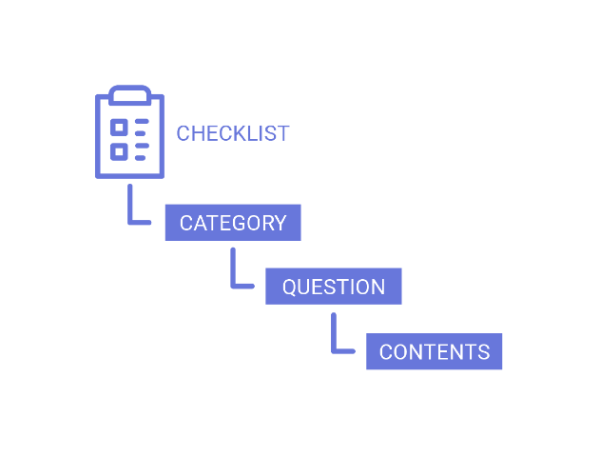
Categories #
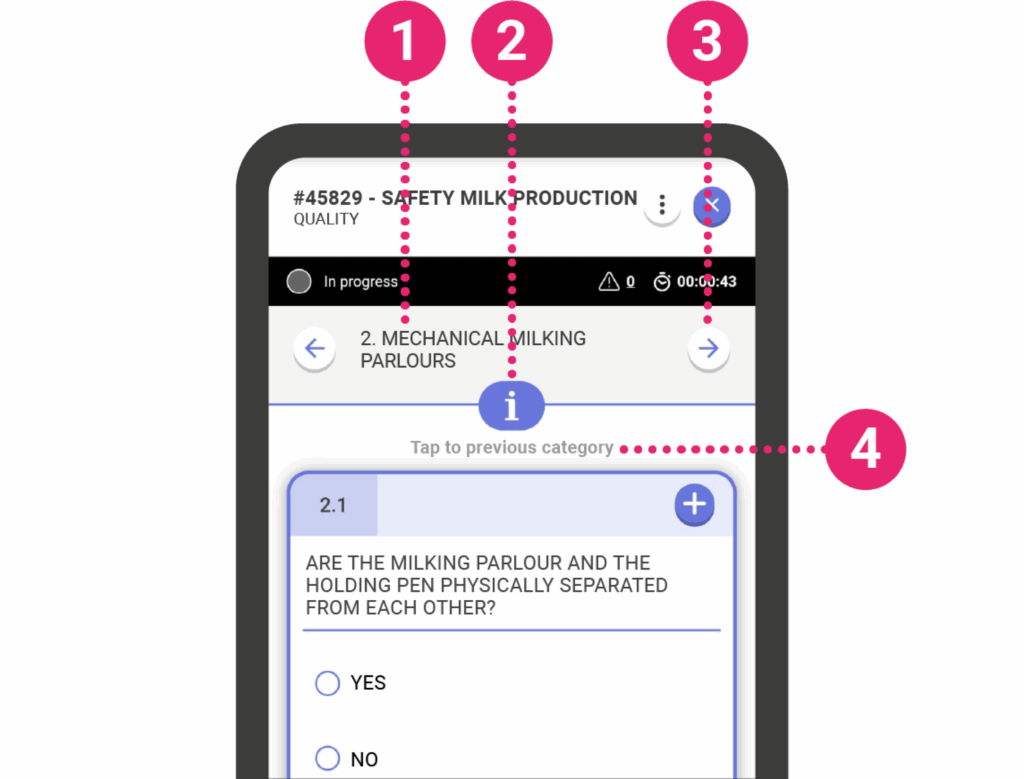
Categories group related questions and appear at the top of the screen. Each category has a title (1) and can contain multiple questions.
A category may have more info which you can see by pressing the info button (2) beneath the title.
Use the arrows on the category bar to navigate between categories (3).
At the end of a category, you can move to the next one by clicking on ‘Tap to go to the next category’ The same logic applies to return to the previous category (4).
Questions #
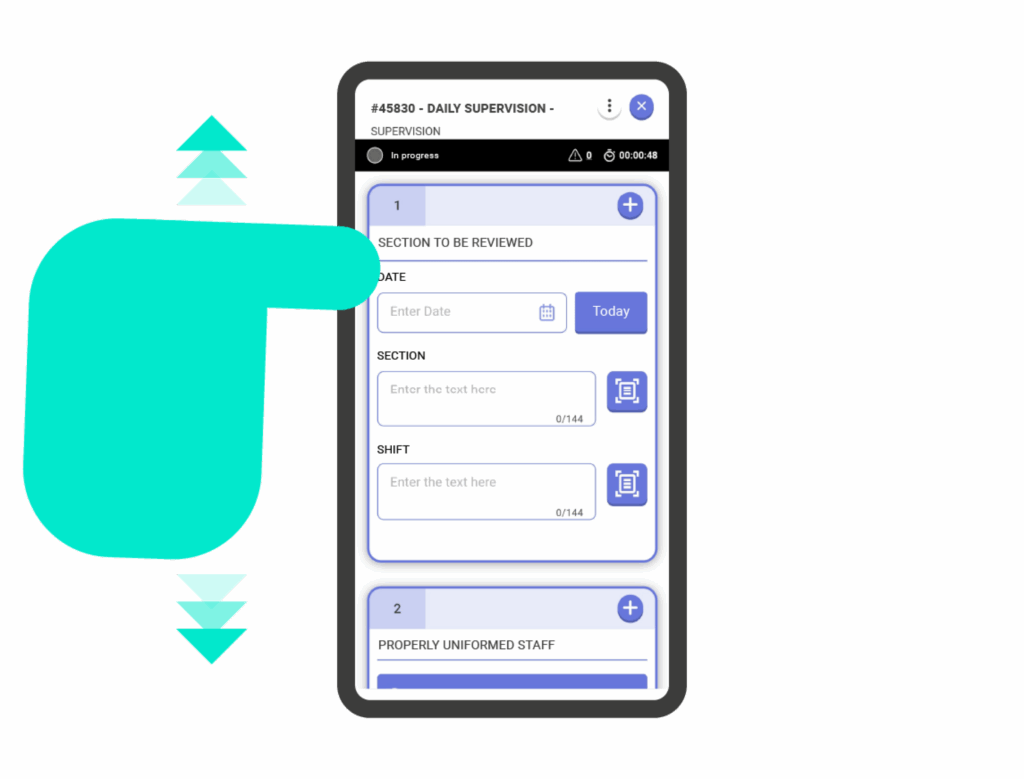
Inside each category are the questions, although some questions can exist outside of categories. Each question is represented by a card. Within a category, navigate between questions by swiping up and down. IRISTRACE offers a wide variety of question types:
- Checkbox
- Single Choice
- Multiple Choice
- Question Multiple Toggle
- Numeric
- Text
- Smileys
- Slider
- Draw
- Signature
- Info
- Formula
Mandatory questions #
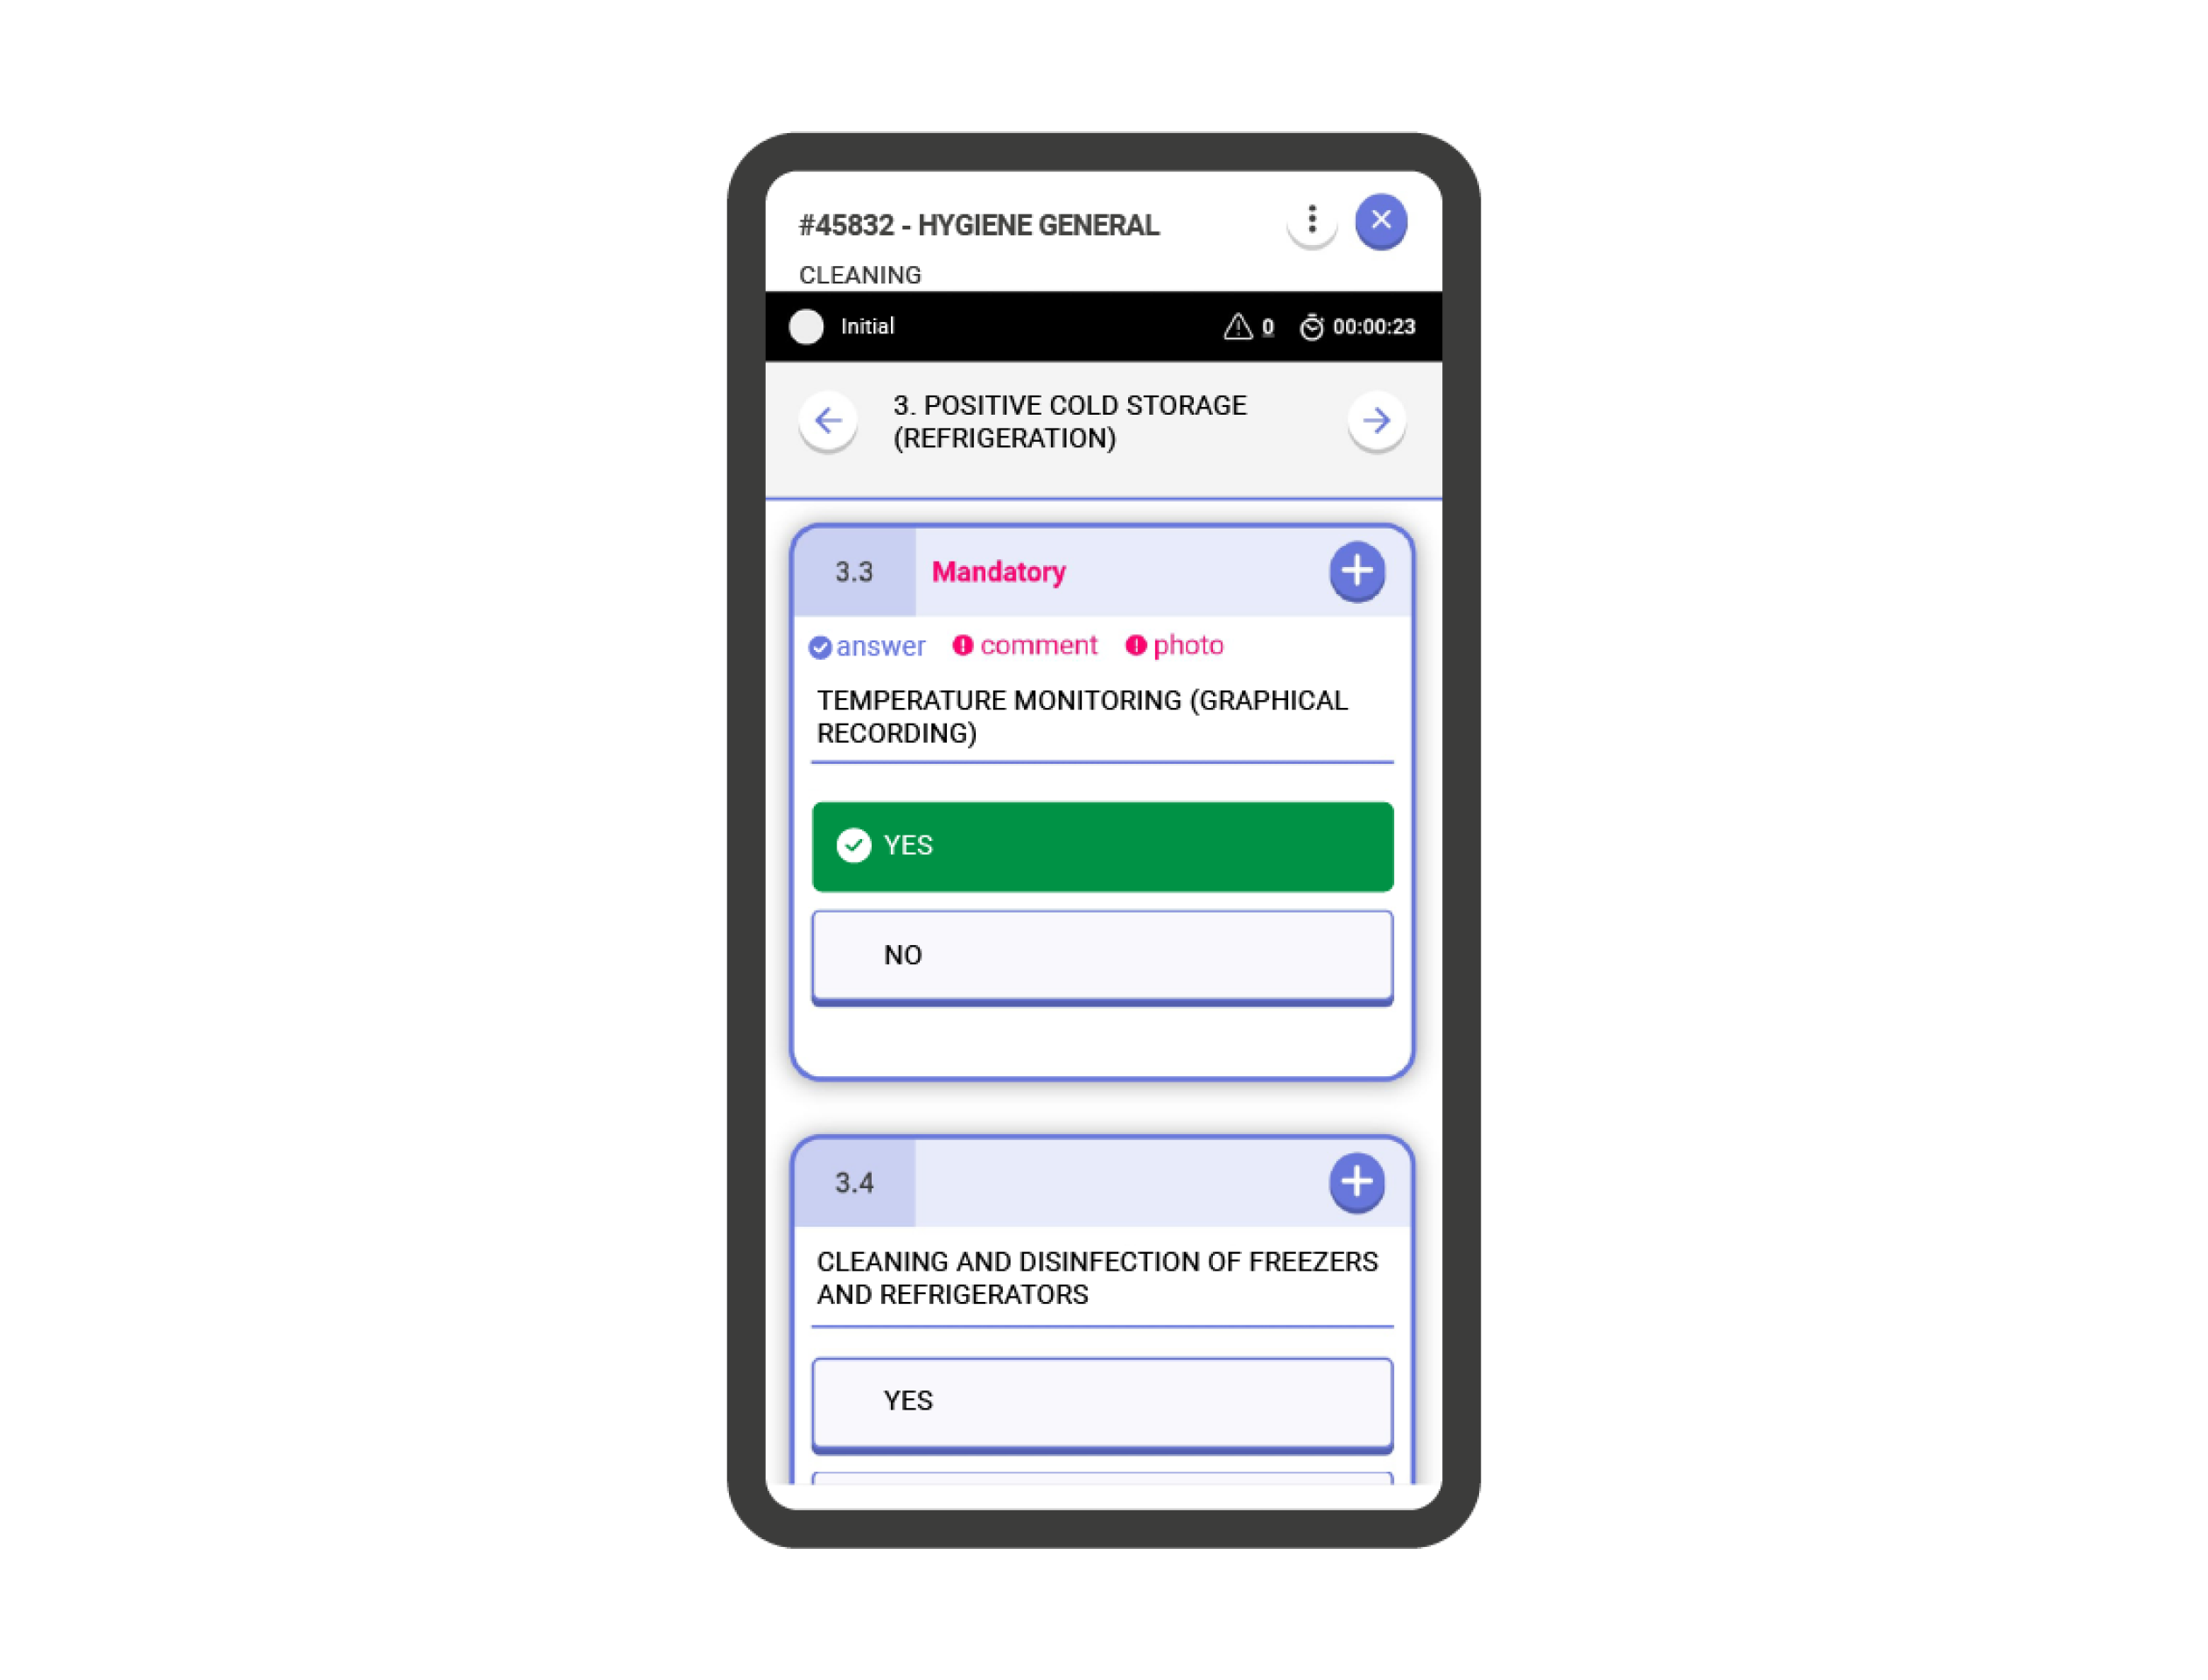

Some questions require specific actions to be completed. If a question is mandatory, a message and indicators will appear at the top of the question card. These indicators will change color as the mandatory requirements are met.
- Mandatory Answer: You must answer or select one of the options for the question.
- Mandatory Comment: You must add at least one comment.
- Mandatory Photo: You must attach at least one photo.
Important! To complete the checklist, all mandatory actions must be performed for every question.
Content of the questions #
Questions in IRISTRACE can contain additional information.
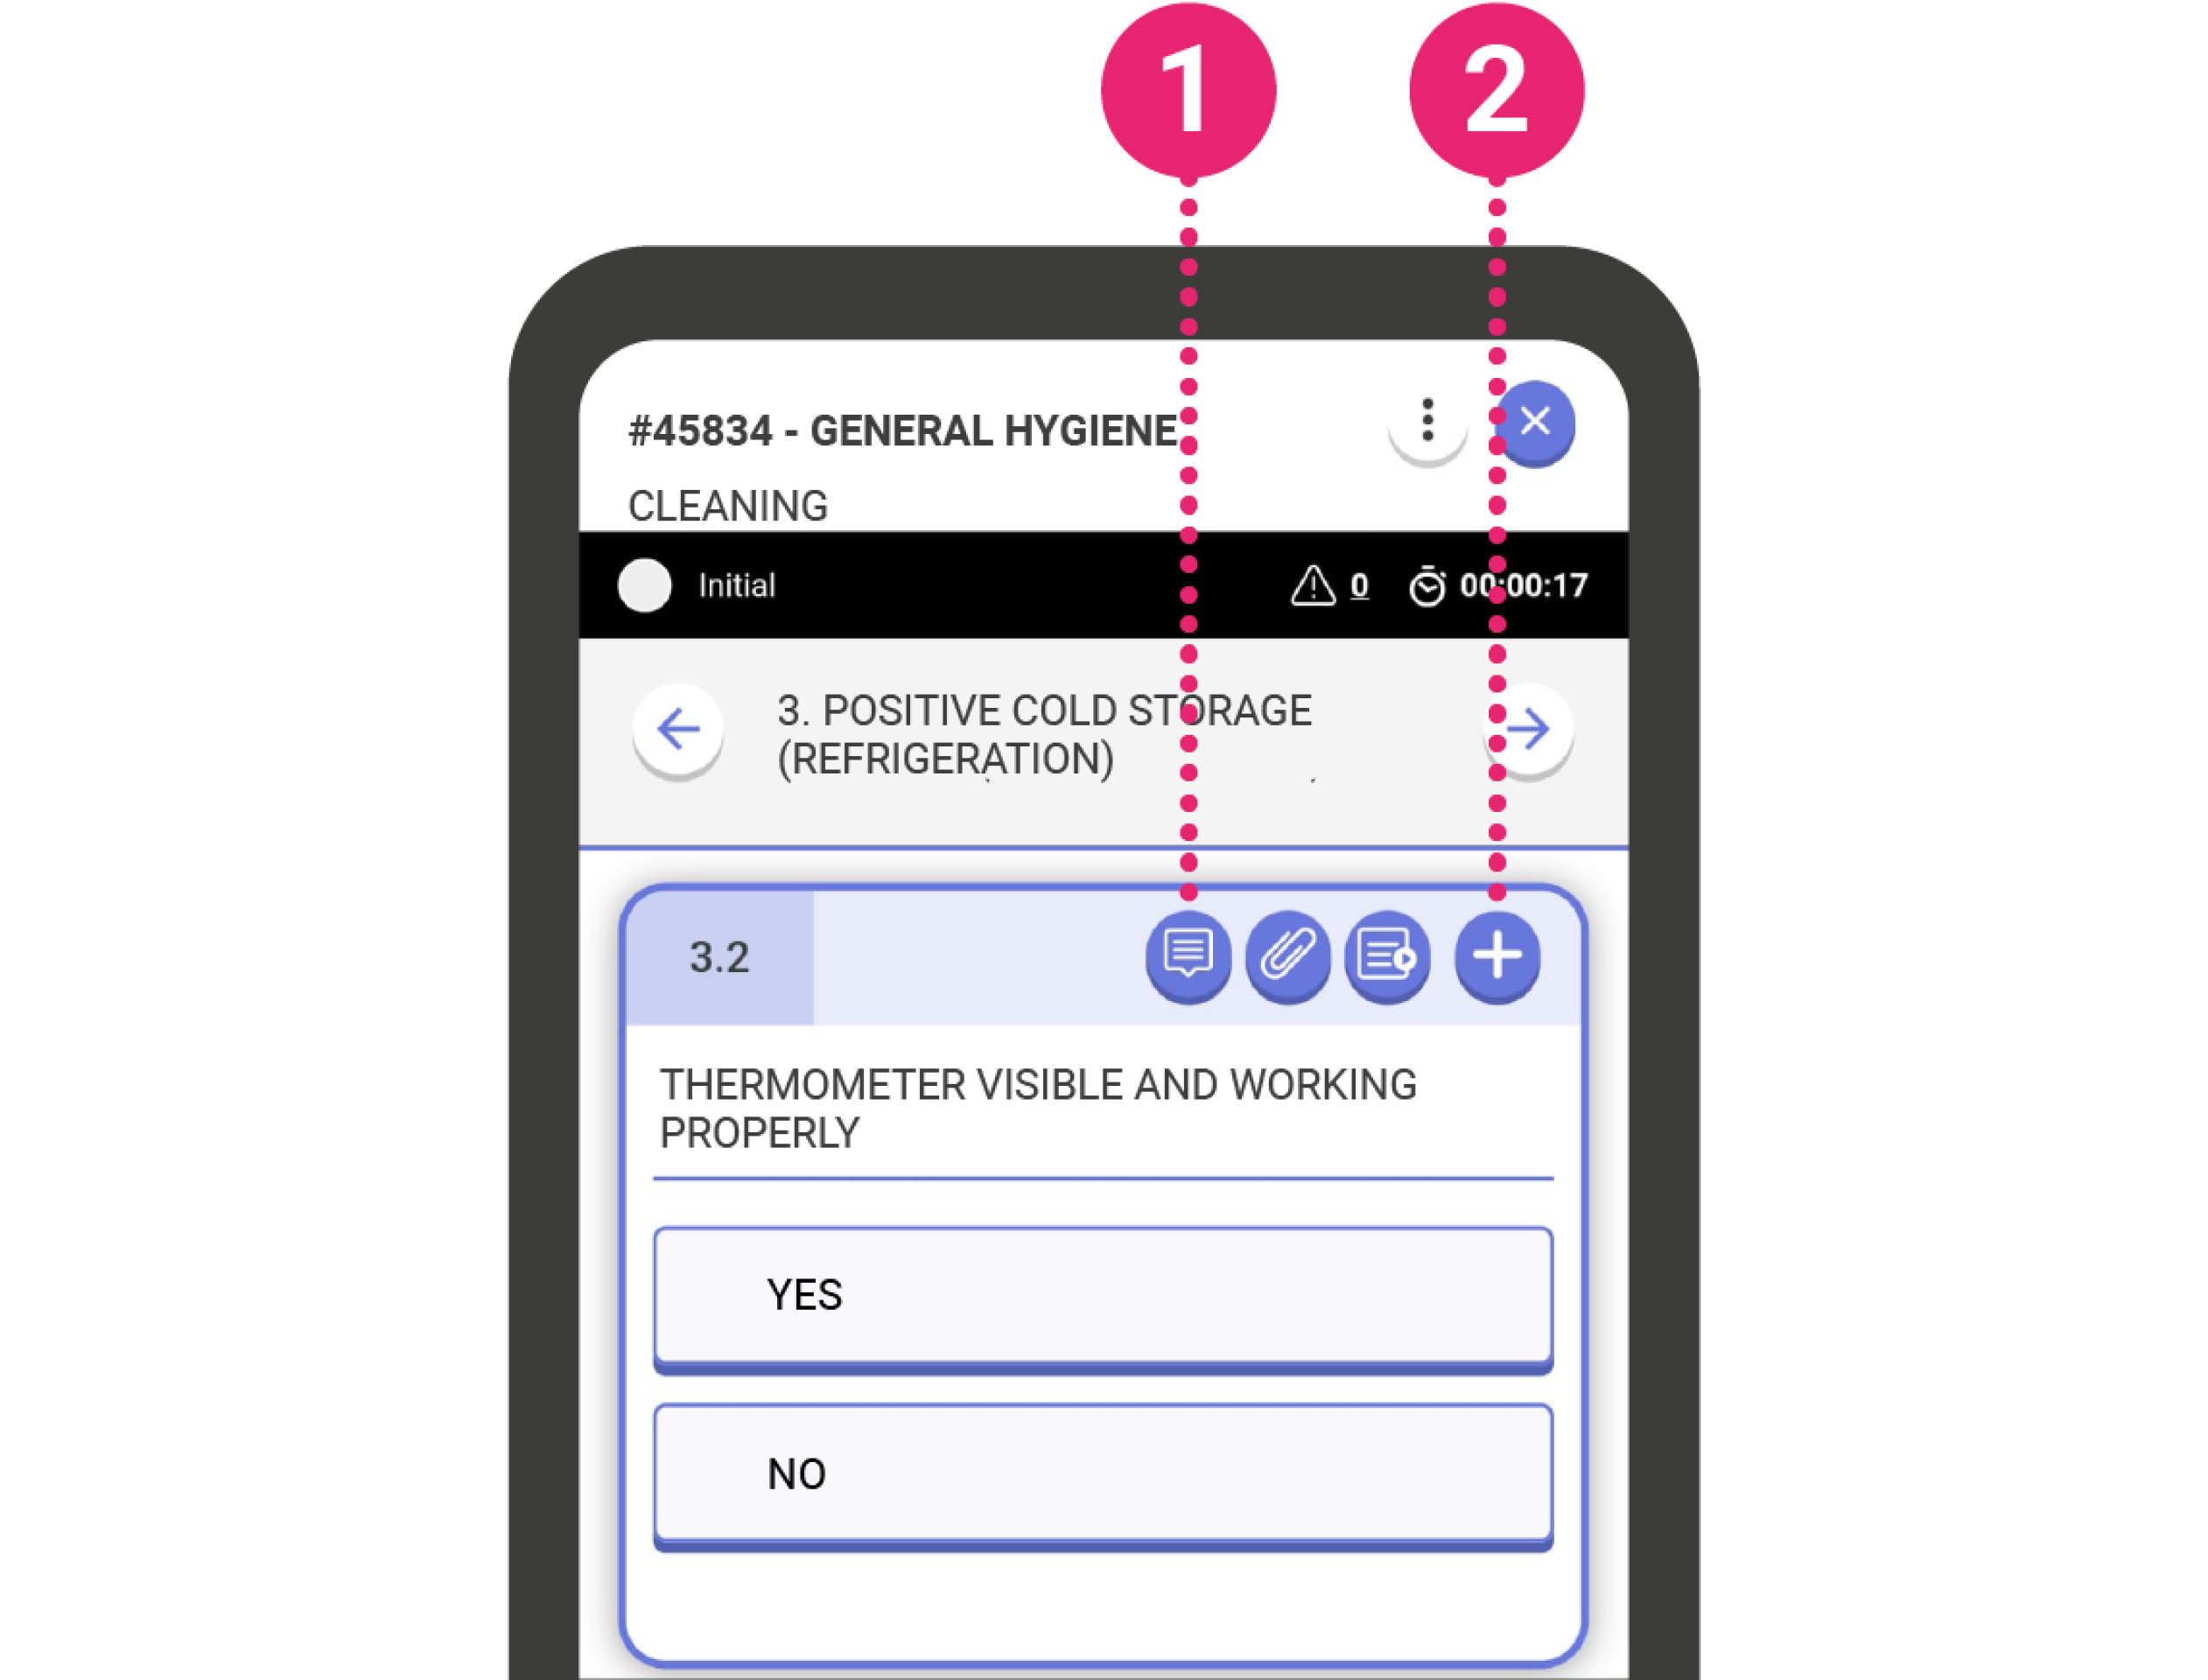
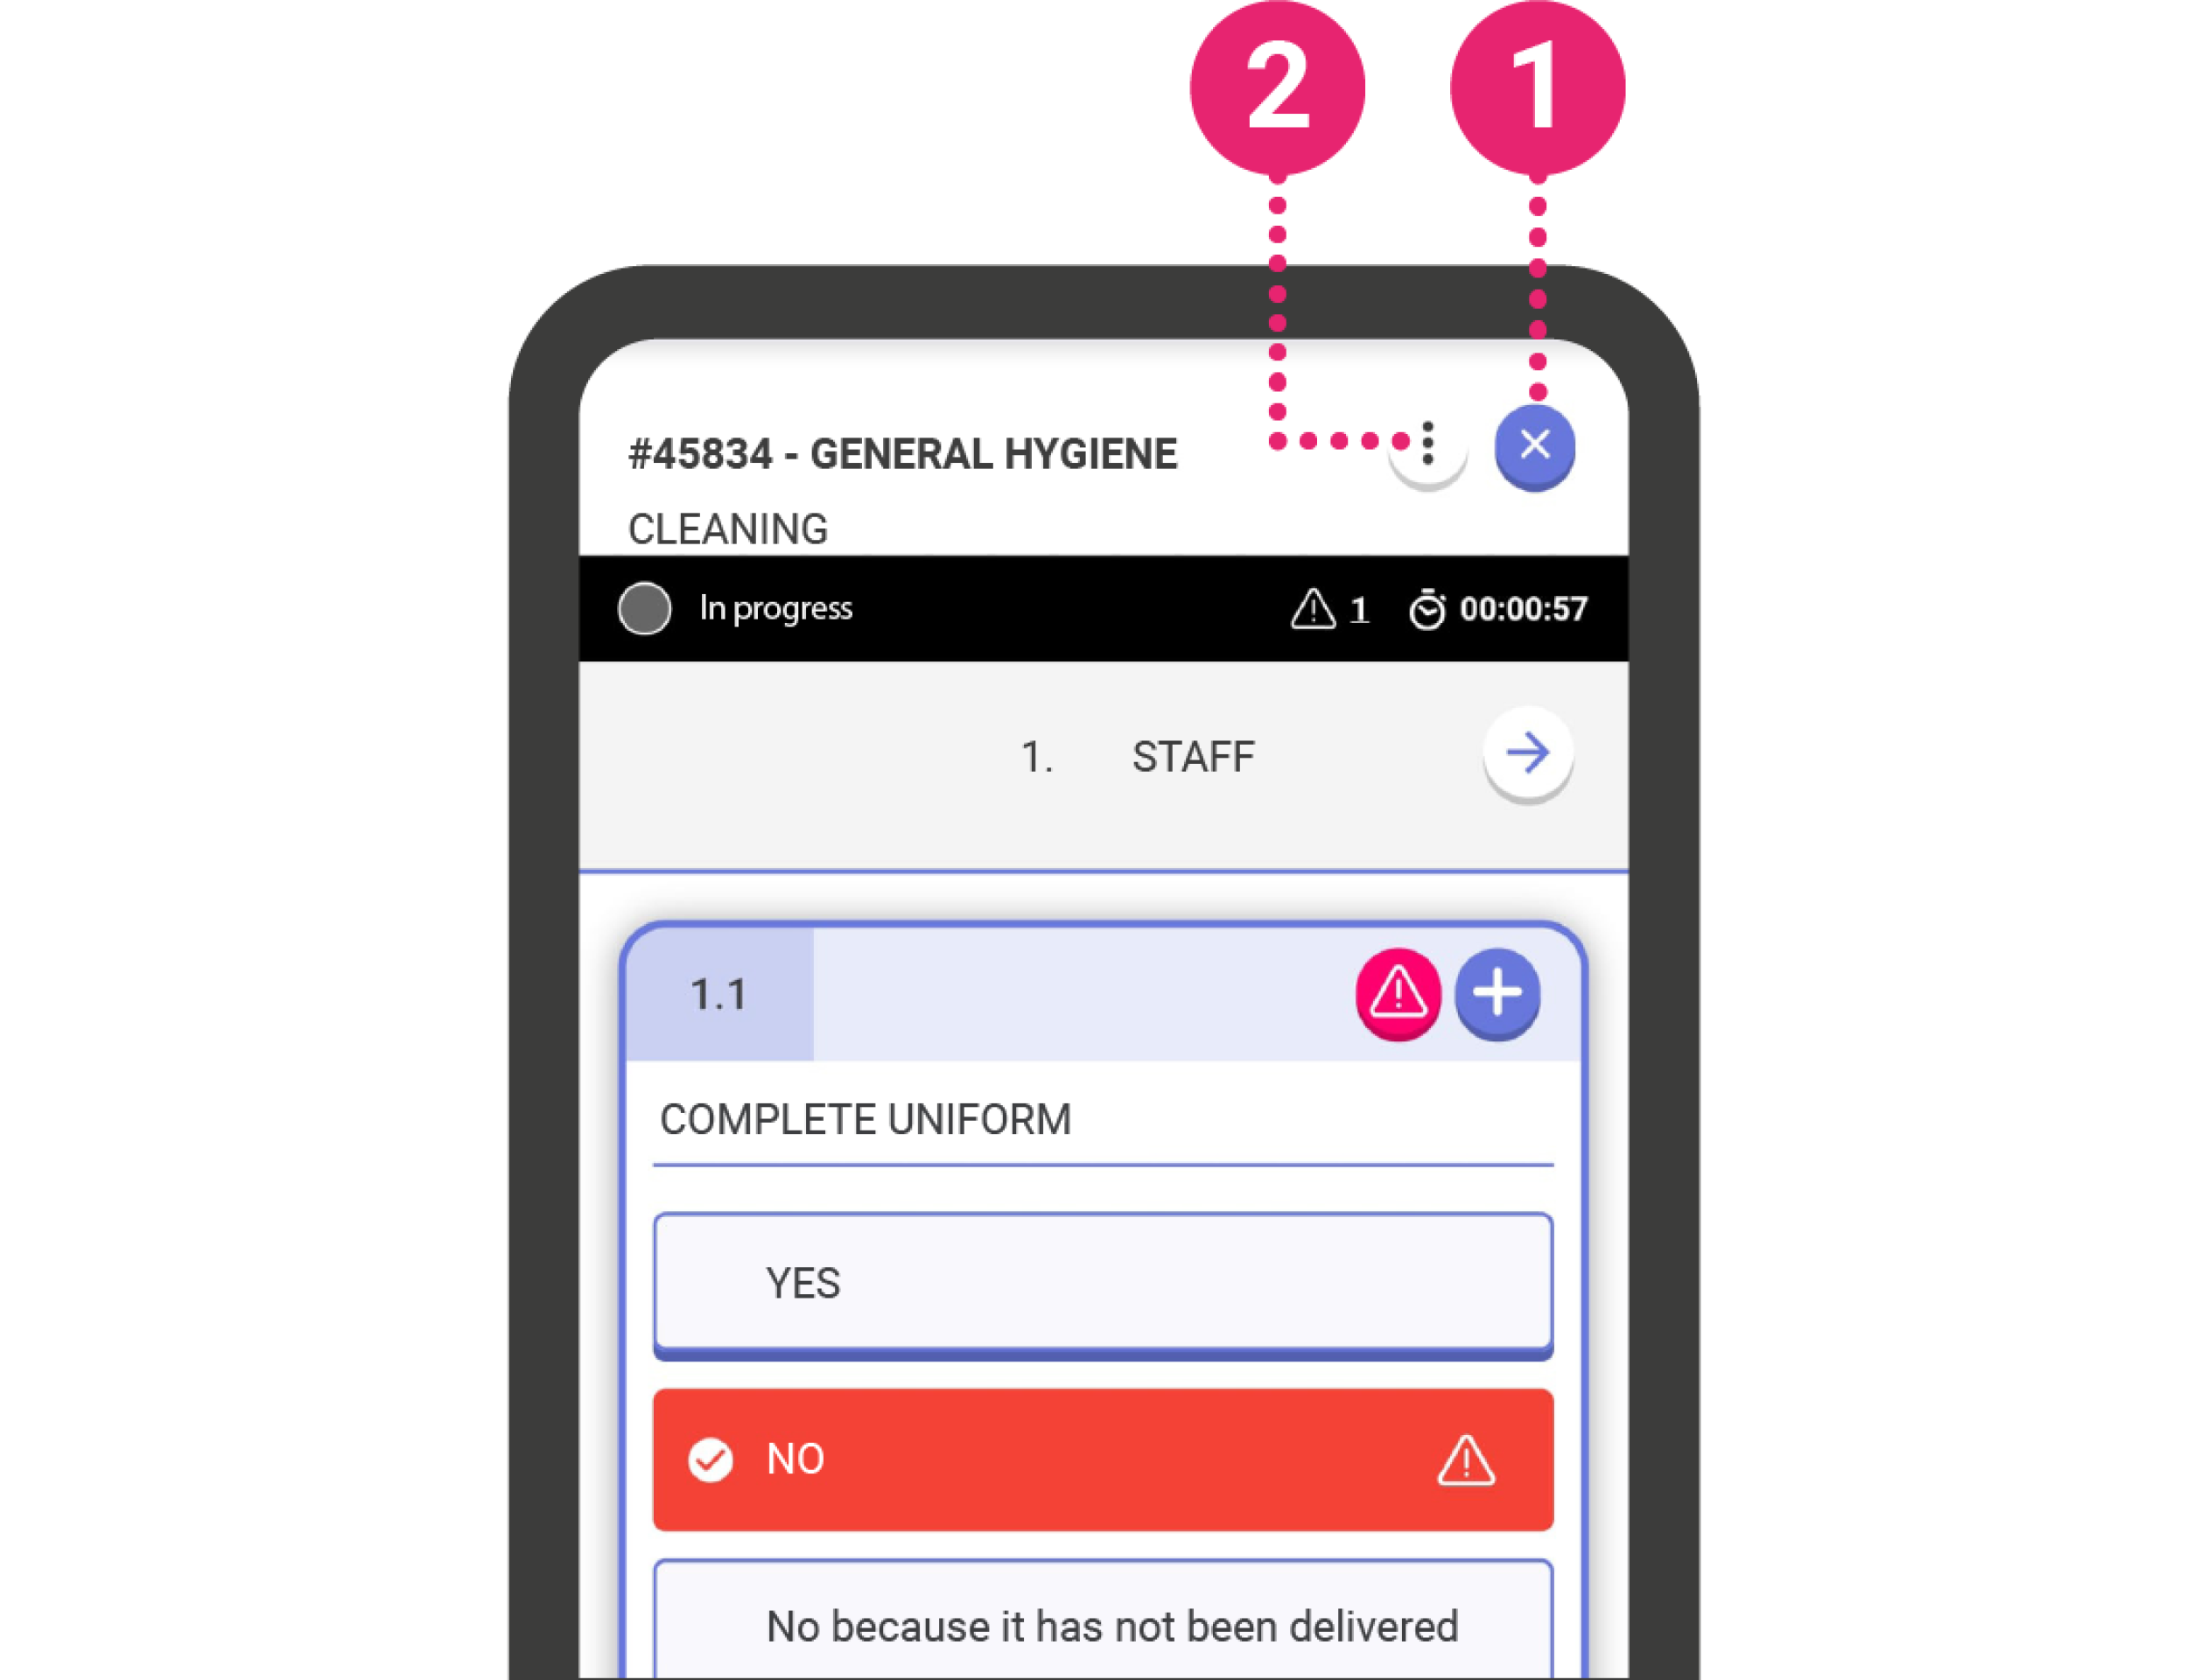
Added contents to a questions can be accessed immediately by tapping the corresponding content icon that appears in the question’s header (1.1). To add content, use the ‘+’ button on the right side of the header and select the content type (1.2).
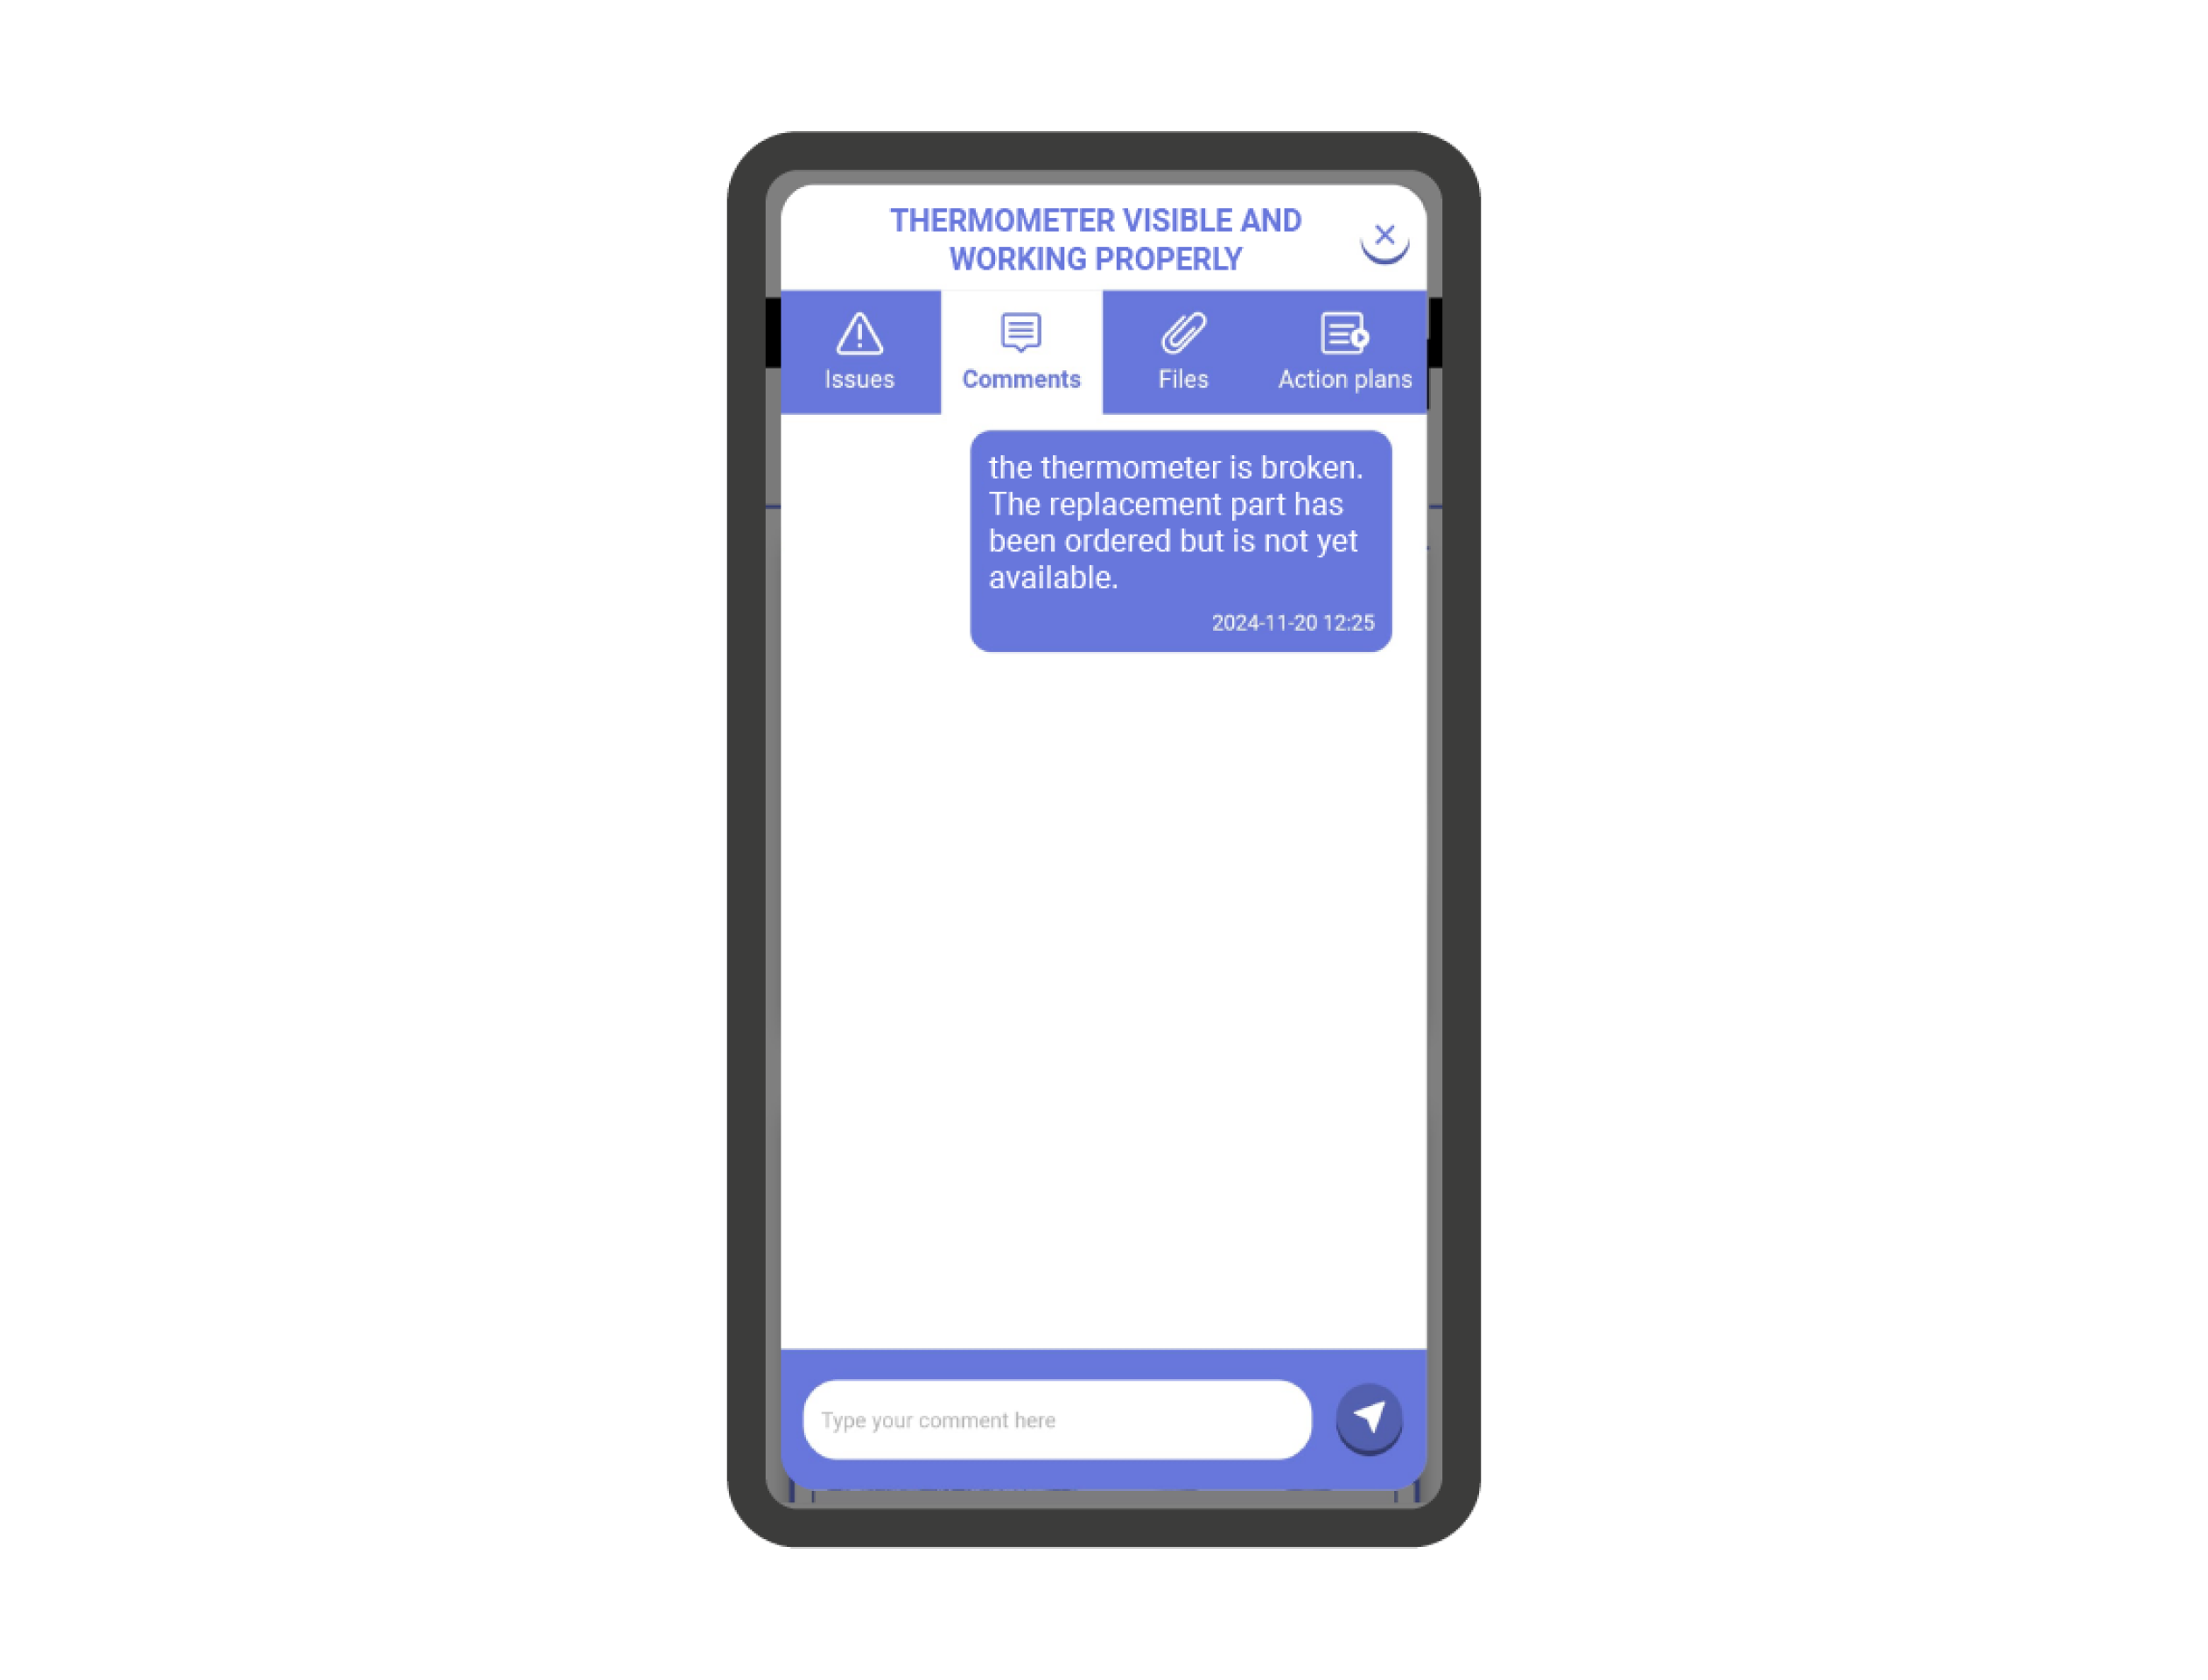
- (2) Comments: Add a comment in a chatbox that is exclusive to the question that other users with access can see and react to.
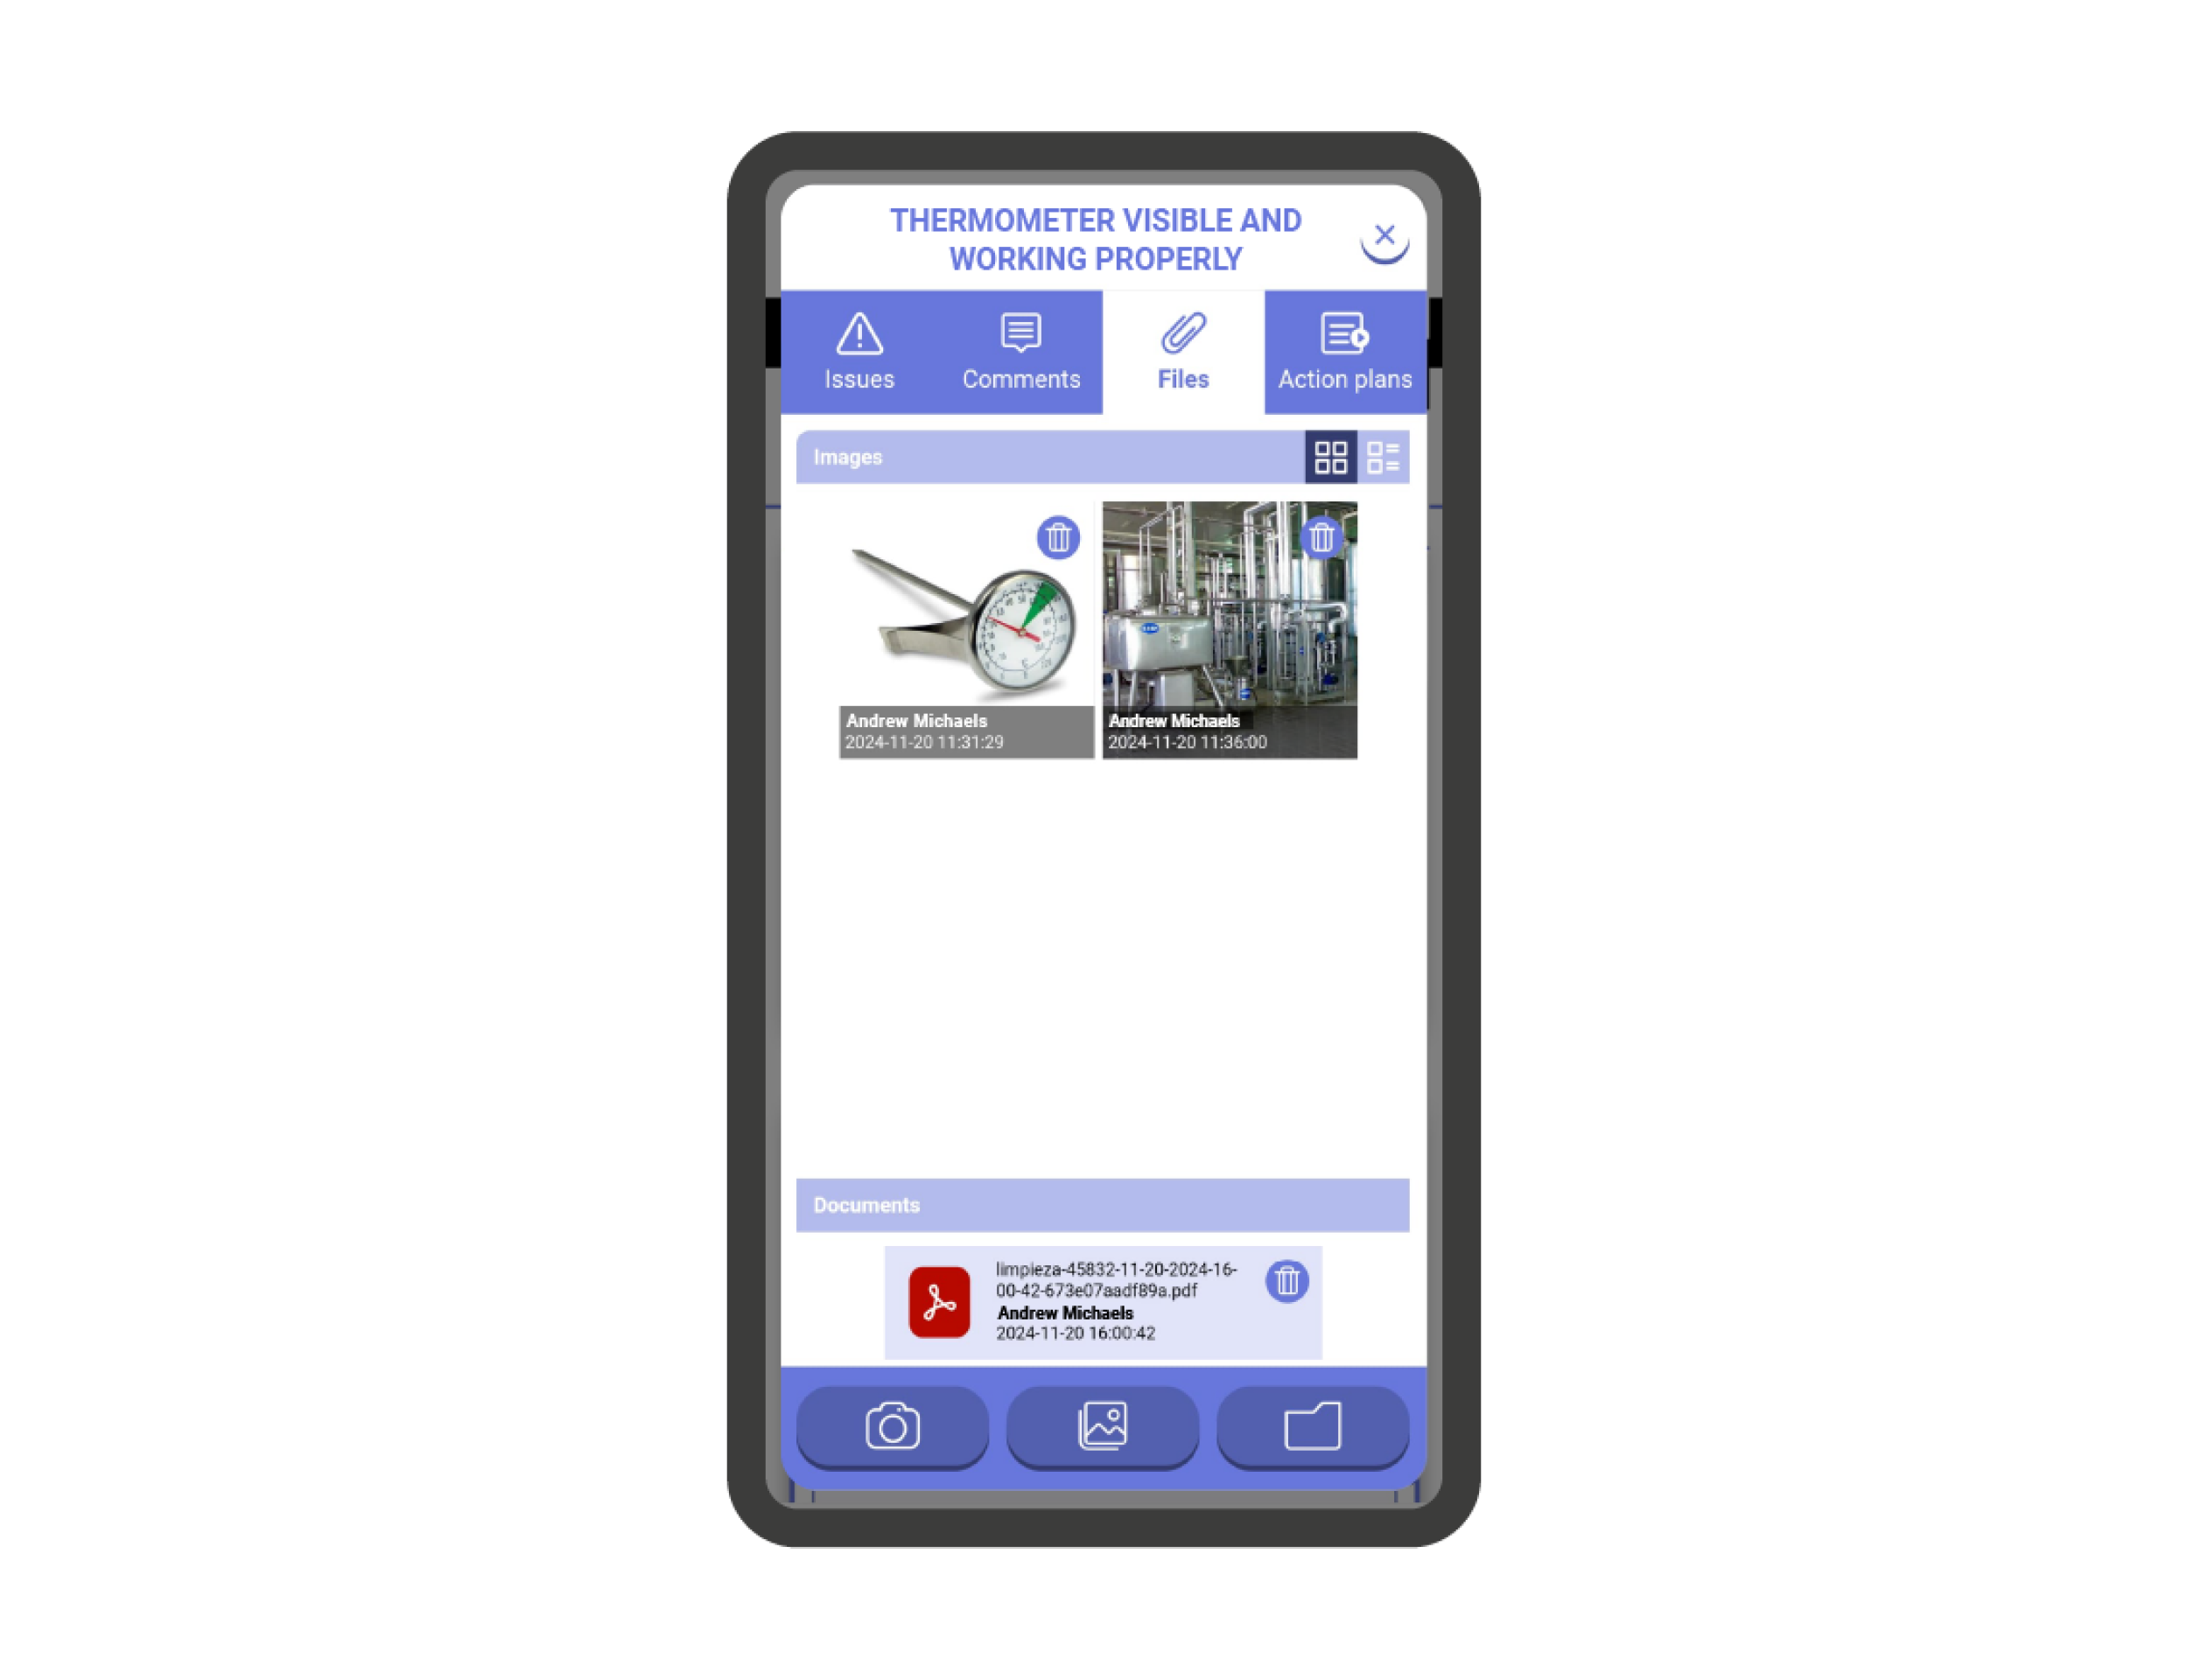
- (3) Files: Take photos with your camera, add images from gallery (if permitted) or upload documents (it is not recommended to upload files larger than 100mb) such as pdf, doc, zip, etc. The file gallery will show all attachments in one place.
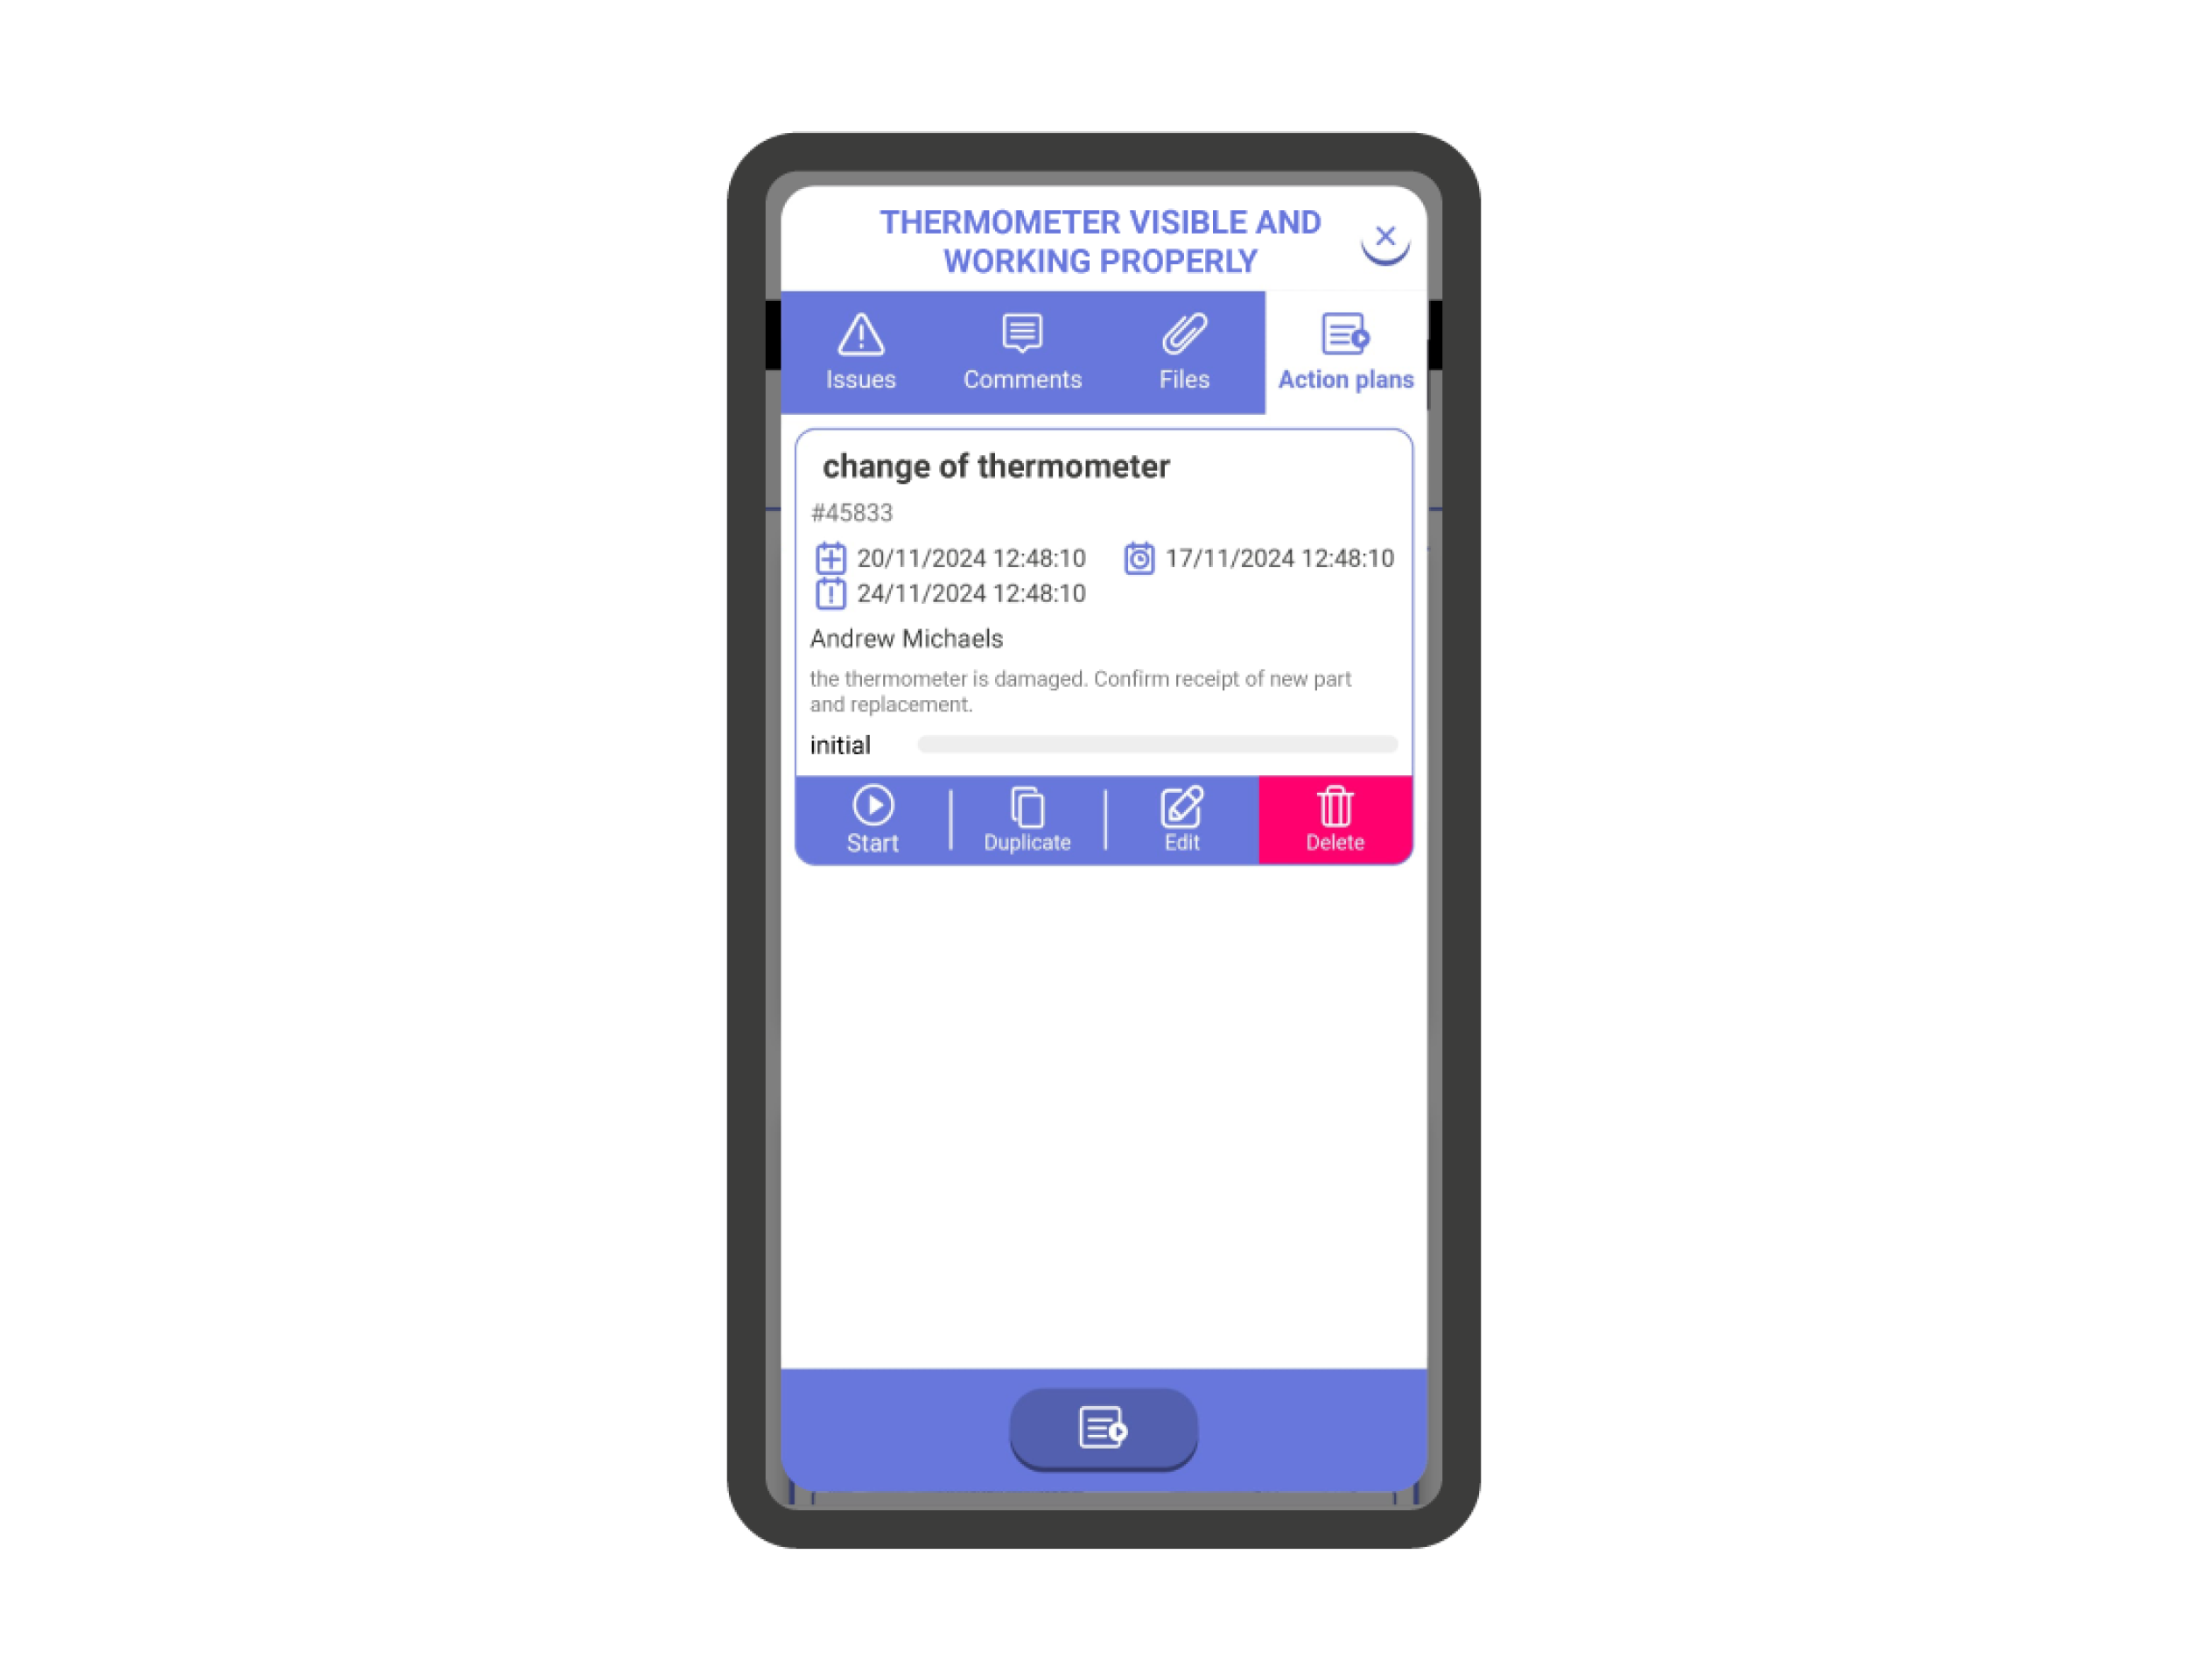
- (4) Action plans: Action plans are essentially sub-checklists attached to a question inside the main checklist. Just like checklists they may have their own data, assigned departments and users.
Detailed explanations for each content type and the left-out issues tab can be found in the chapter “Question Contents”
Close the checklist #
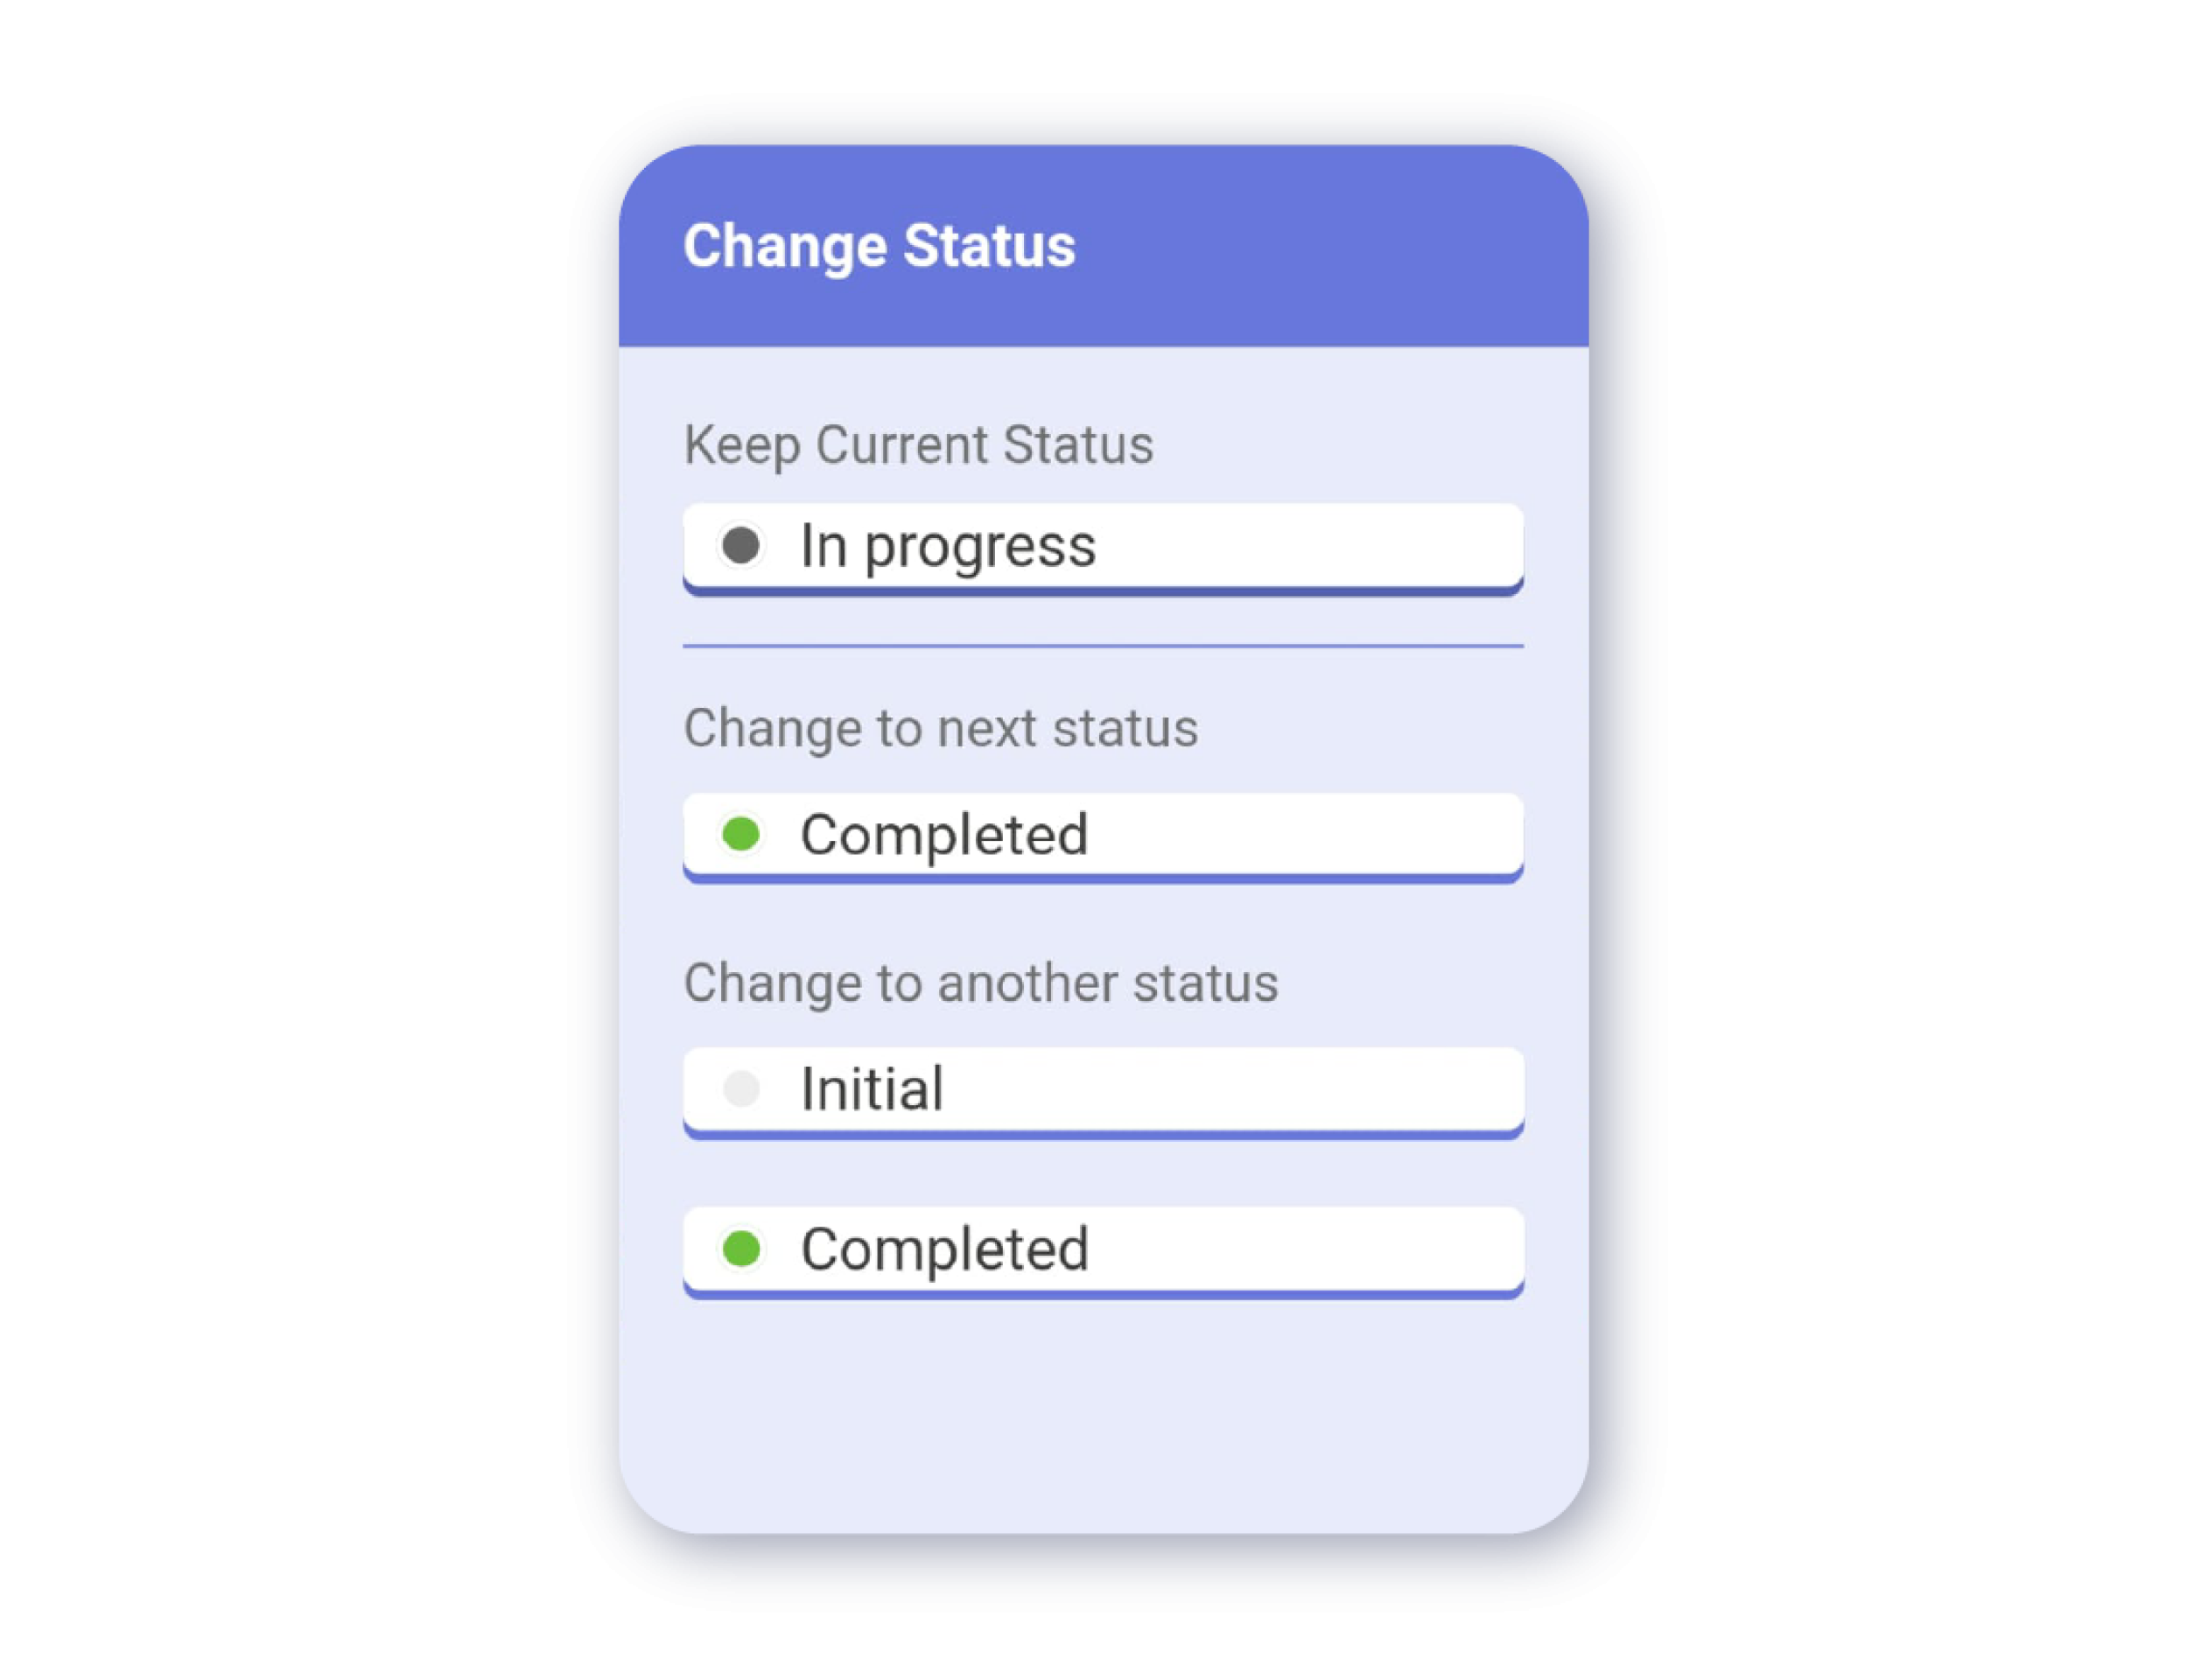
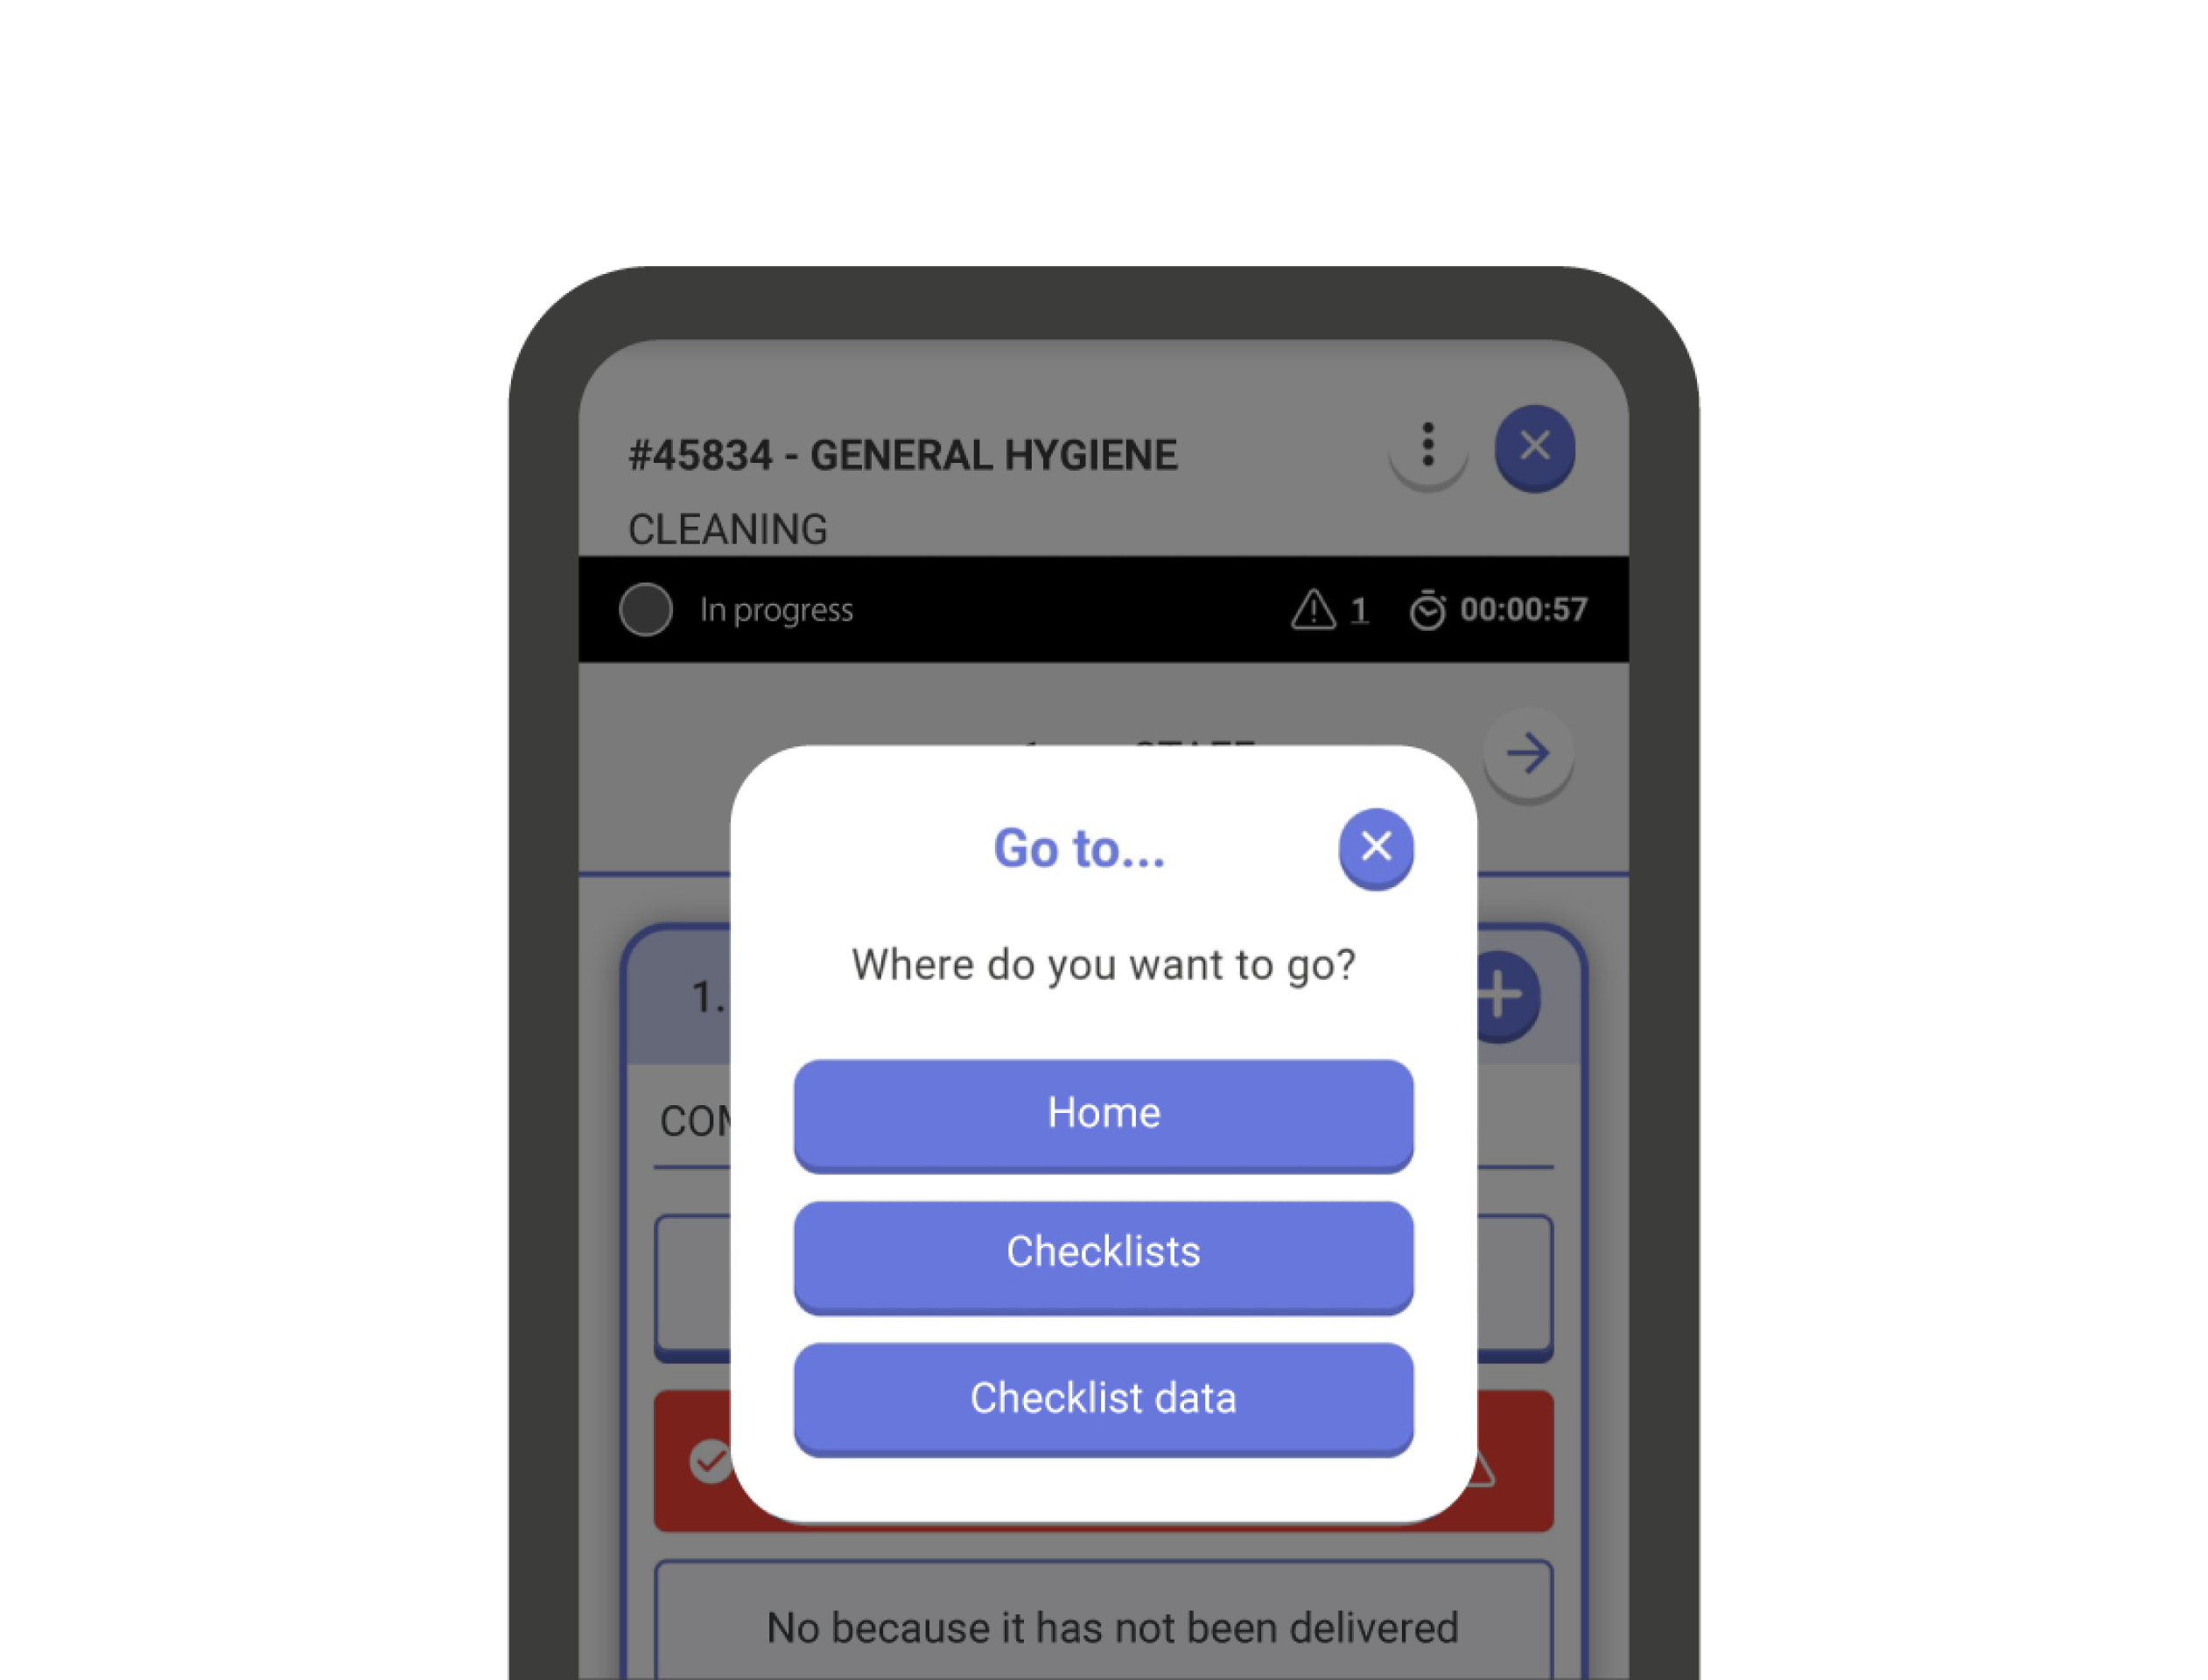
1. Close the Checklist: Use the button with the ‘X’ symbol or select an option from the checklist options menu.
2. Define Status: Select a status for the checklist (maintain current, progress to the next, or choose another available option).
3. Choose Destination: Select your desired screen: HOME, CHECKLISTS, or CHECKLIST DATA (Summary page of the checklist).
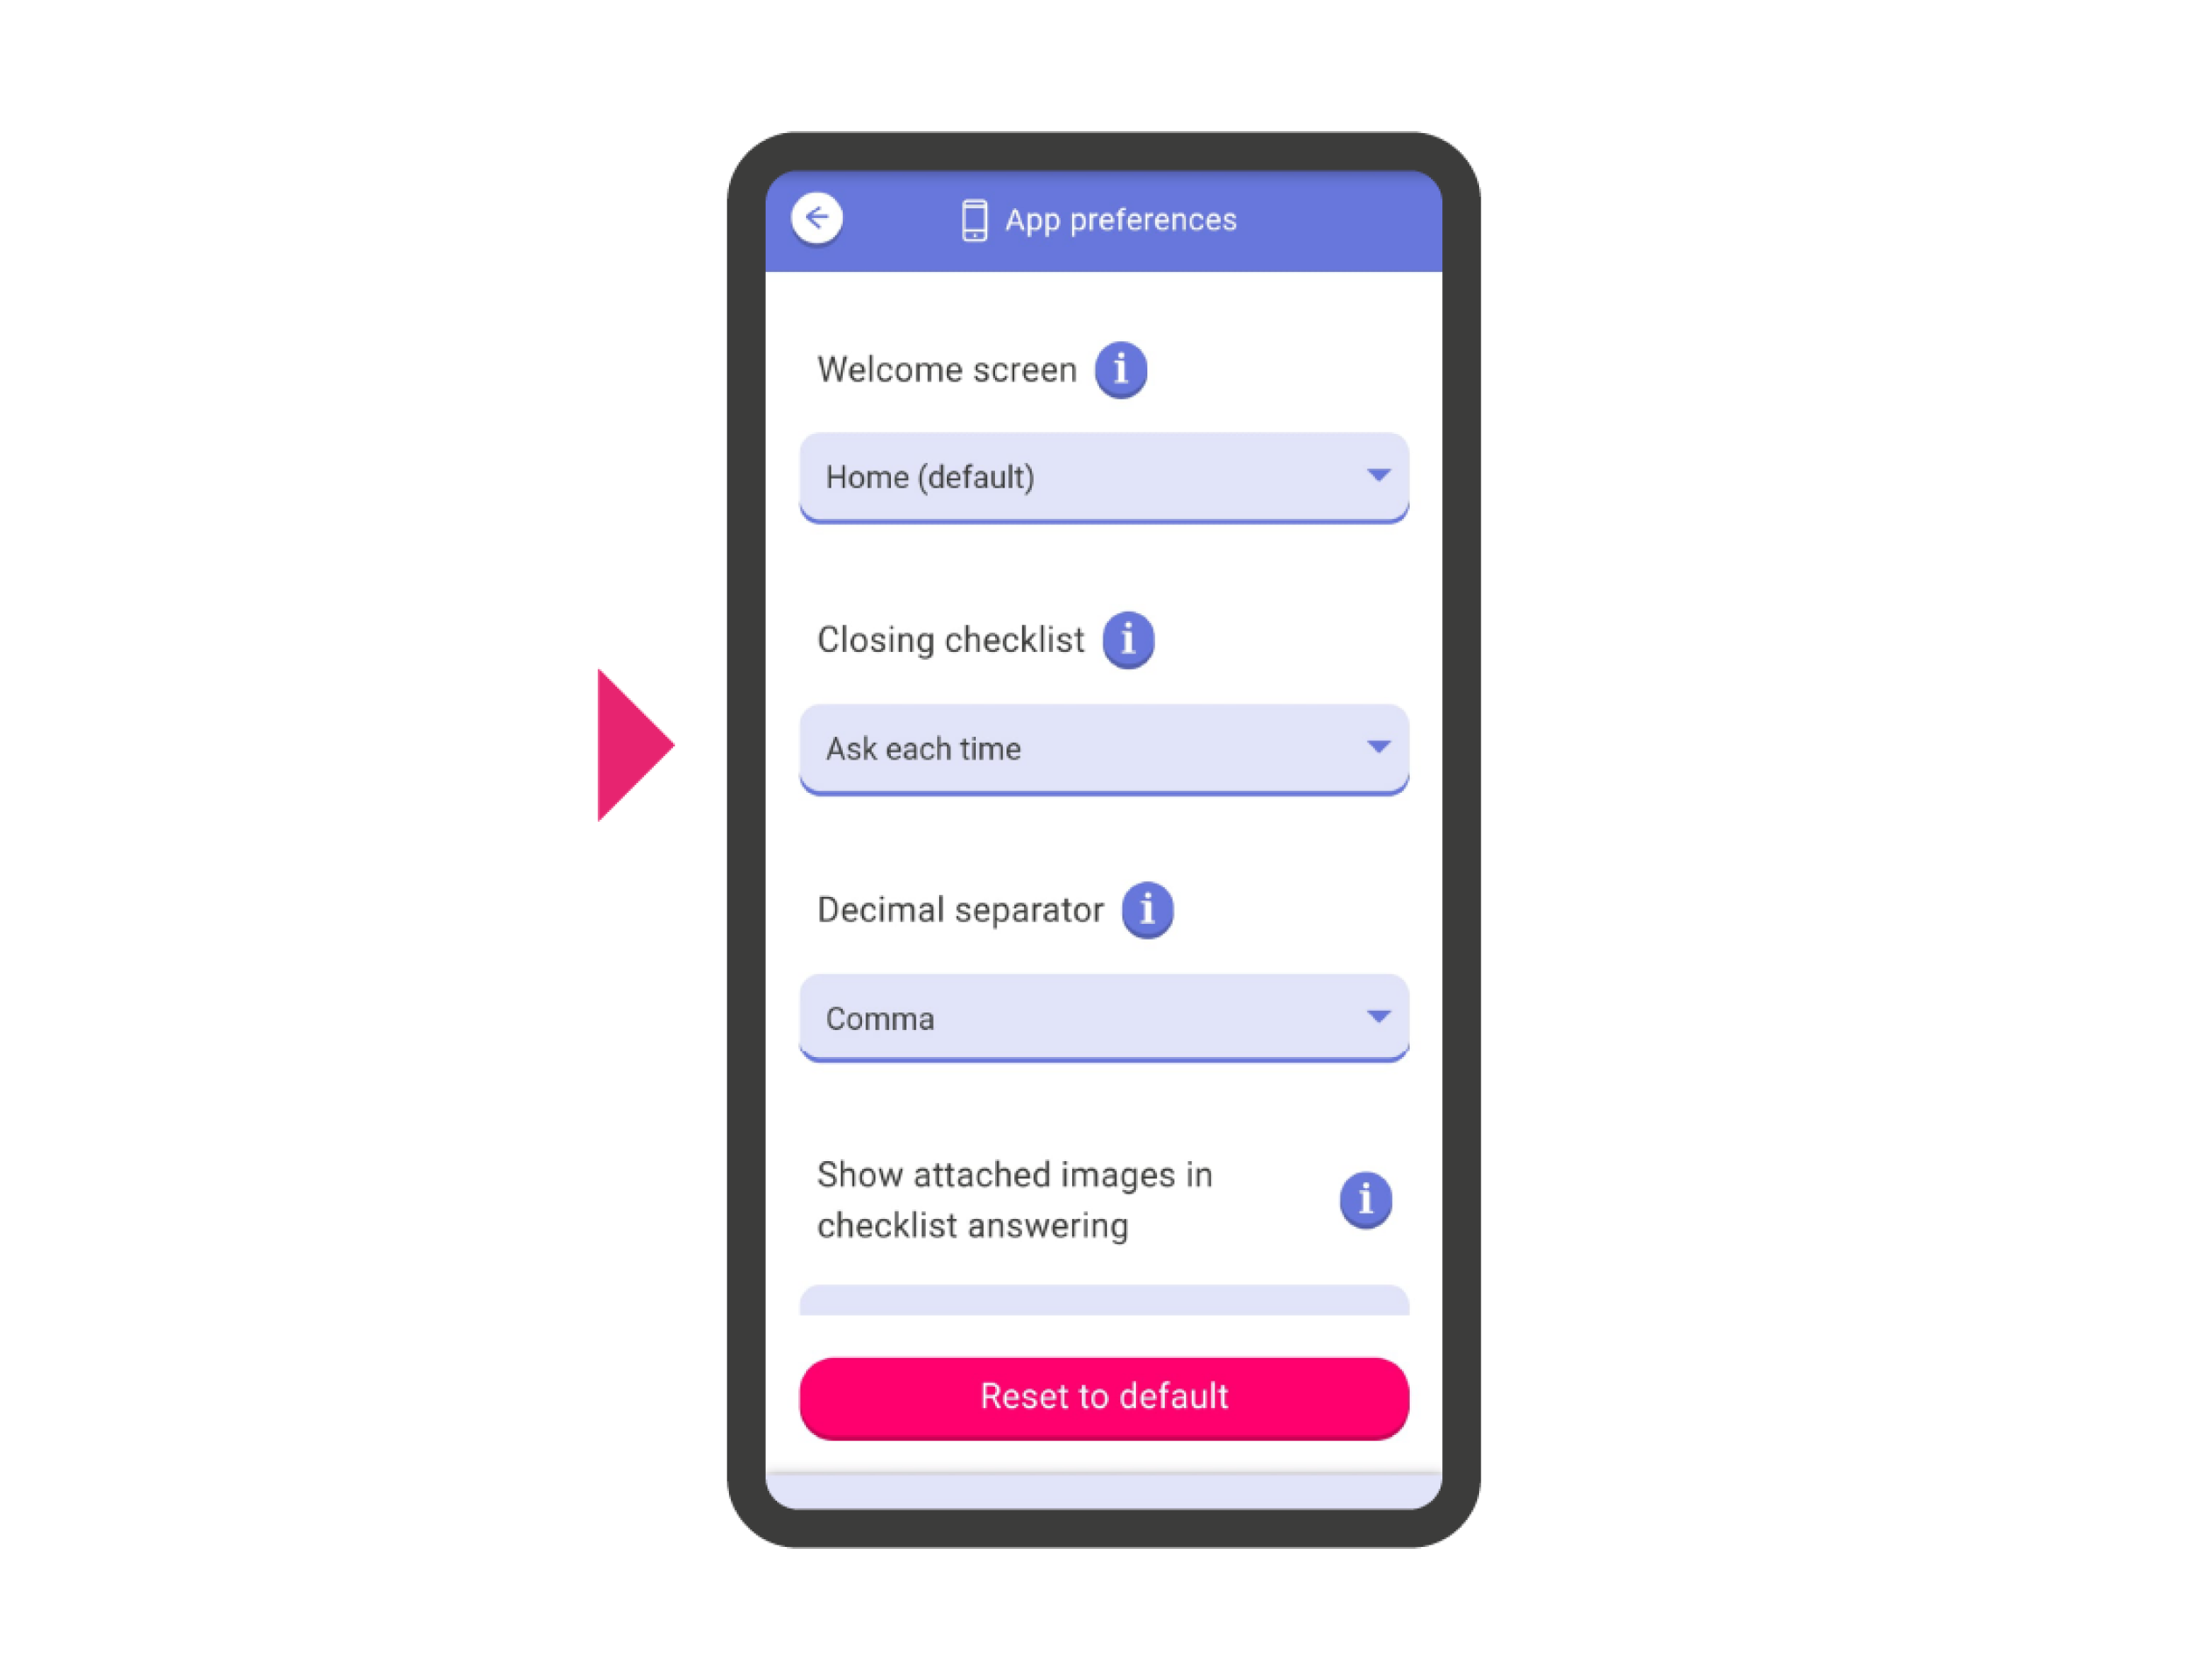
TIP: Skip step 3 by setting a default closing destination in the application preferences (HOME > Settings > App Preferences > Closing checklists).