Checklist List Interface #
On this screen, you will find all the checklists you are involved in (created, assigned, or shared) in an organized manner.
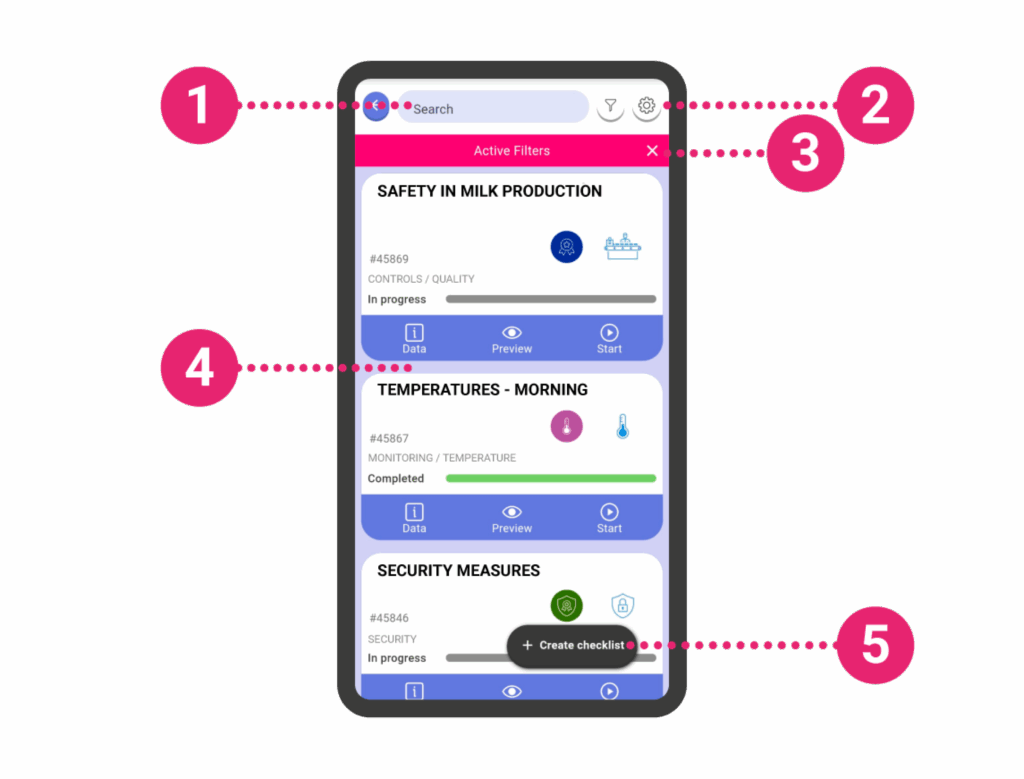
1.- Search in checklists: Here you can quickly search for checklists by name, date, etc.
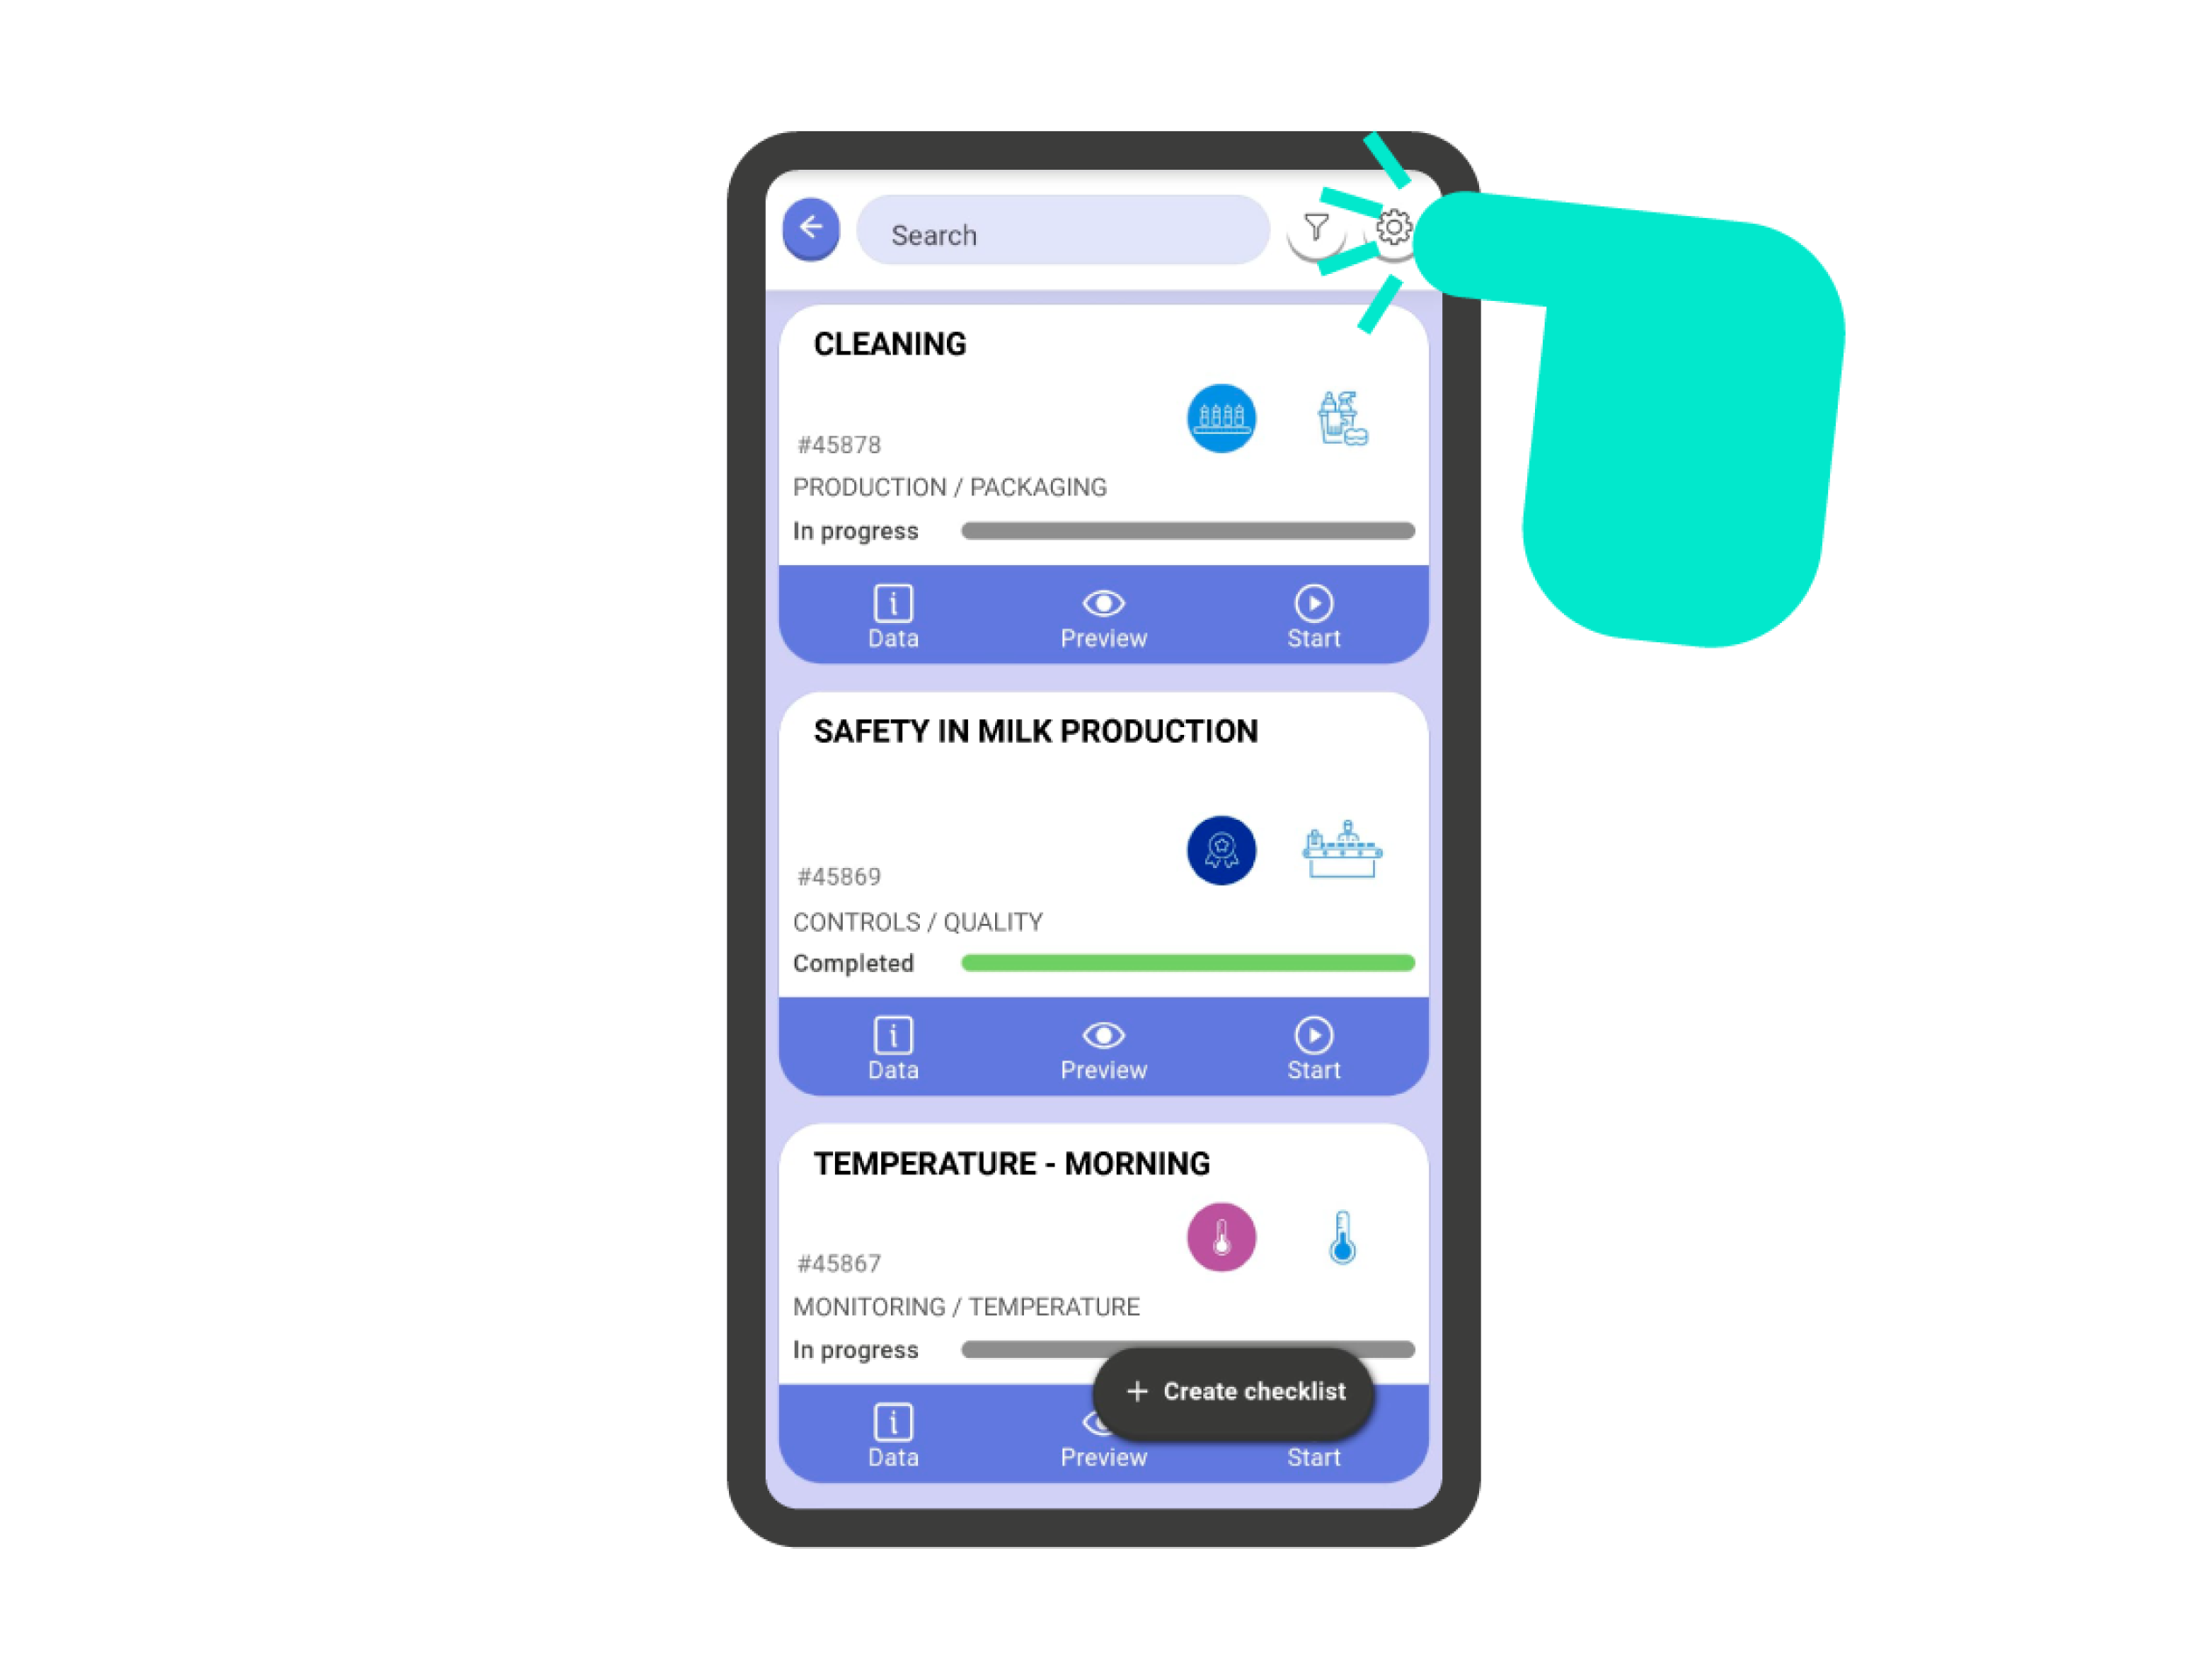
2.- Checklist Options and Filters: In the button with a gear icon, you will find the different checklist configuration options. Right next to it is the filters button, where you can filter and sort your checklists based on different criteria.
3.- Filter Bar: This bar indicates that the checklist list is affected by a filter. If you click on the ‘X’, you will deactivate all the applied filters.
4.- Checklist Cards: In this area, you will see all checklists in individual card format. Each card is a checklist, and by clicking on it or its action buttons, you can interact with it.
5.- Create Checklist: With this button, you can create checklists from departments, templates, or QR codes.
Information on a Checklist Card #
On the checklist card, you can find a wealth of information about the checklist. All the information you see on the card is fully configurable so that you can generate the card view that best suits your specific needs.
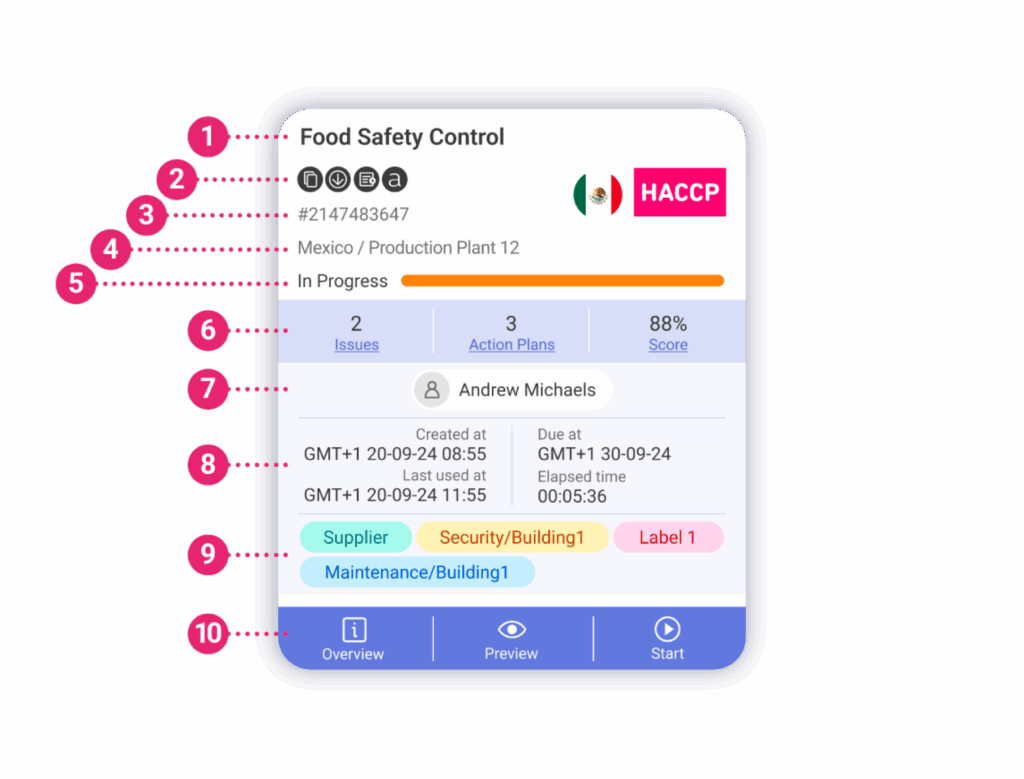
The checklist card can provide you with the following information:
- 1.- Name of the checklist.
- 2.- Department and template icons.
- 3.- Indicators: to show if the checklist is a copy, is downloaded to the device, is an action plan, or is part of an audit.
- 4.- Checklist ID.
- 5.- Department and Sub-department: where the checklist is located.
- 6.- Status of the checklist.
- 7.- Quick information and access: on incidents, action plans, and scoring.
- 8.- Users assigned to the checklist.
- 9.- Checklist dates.
- 10.- Checklist tags.
- 11.- Quick actions for the checklist: Access attachments (description), Preview, and Start a checklist.
Modify the Information Displayed on Cards #
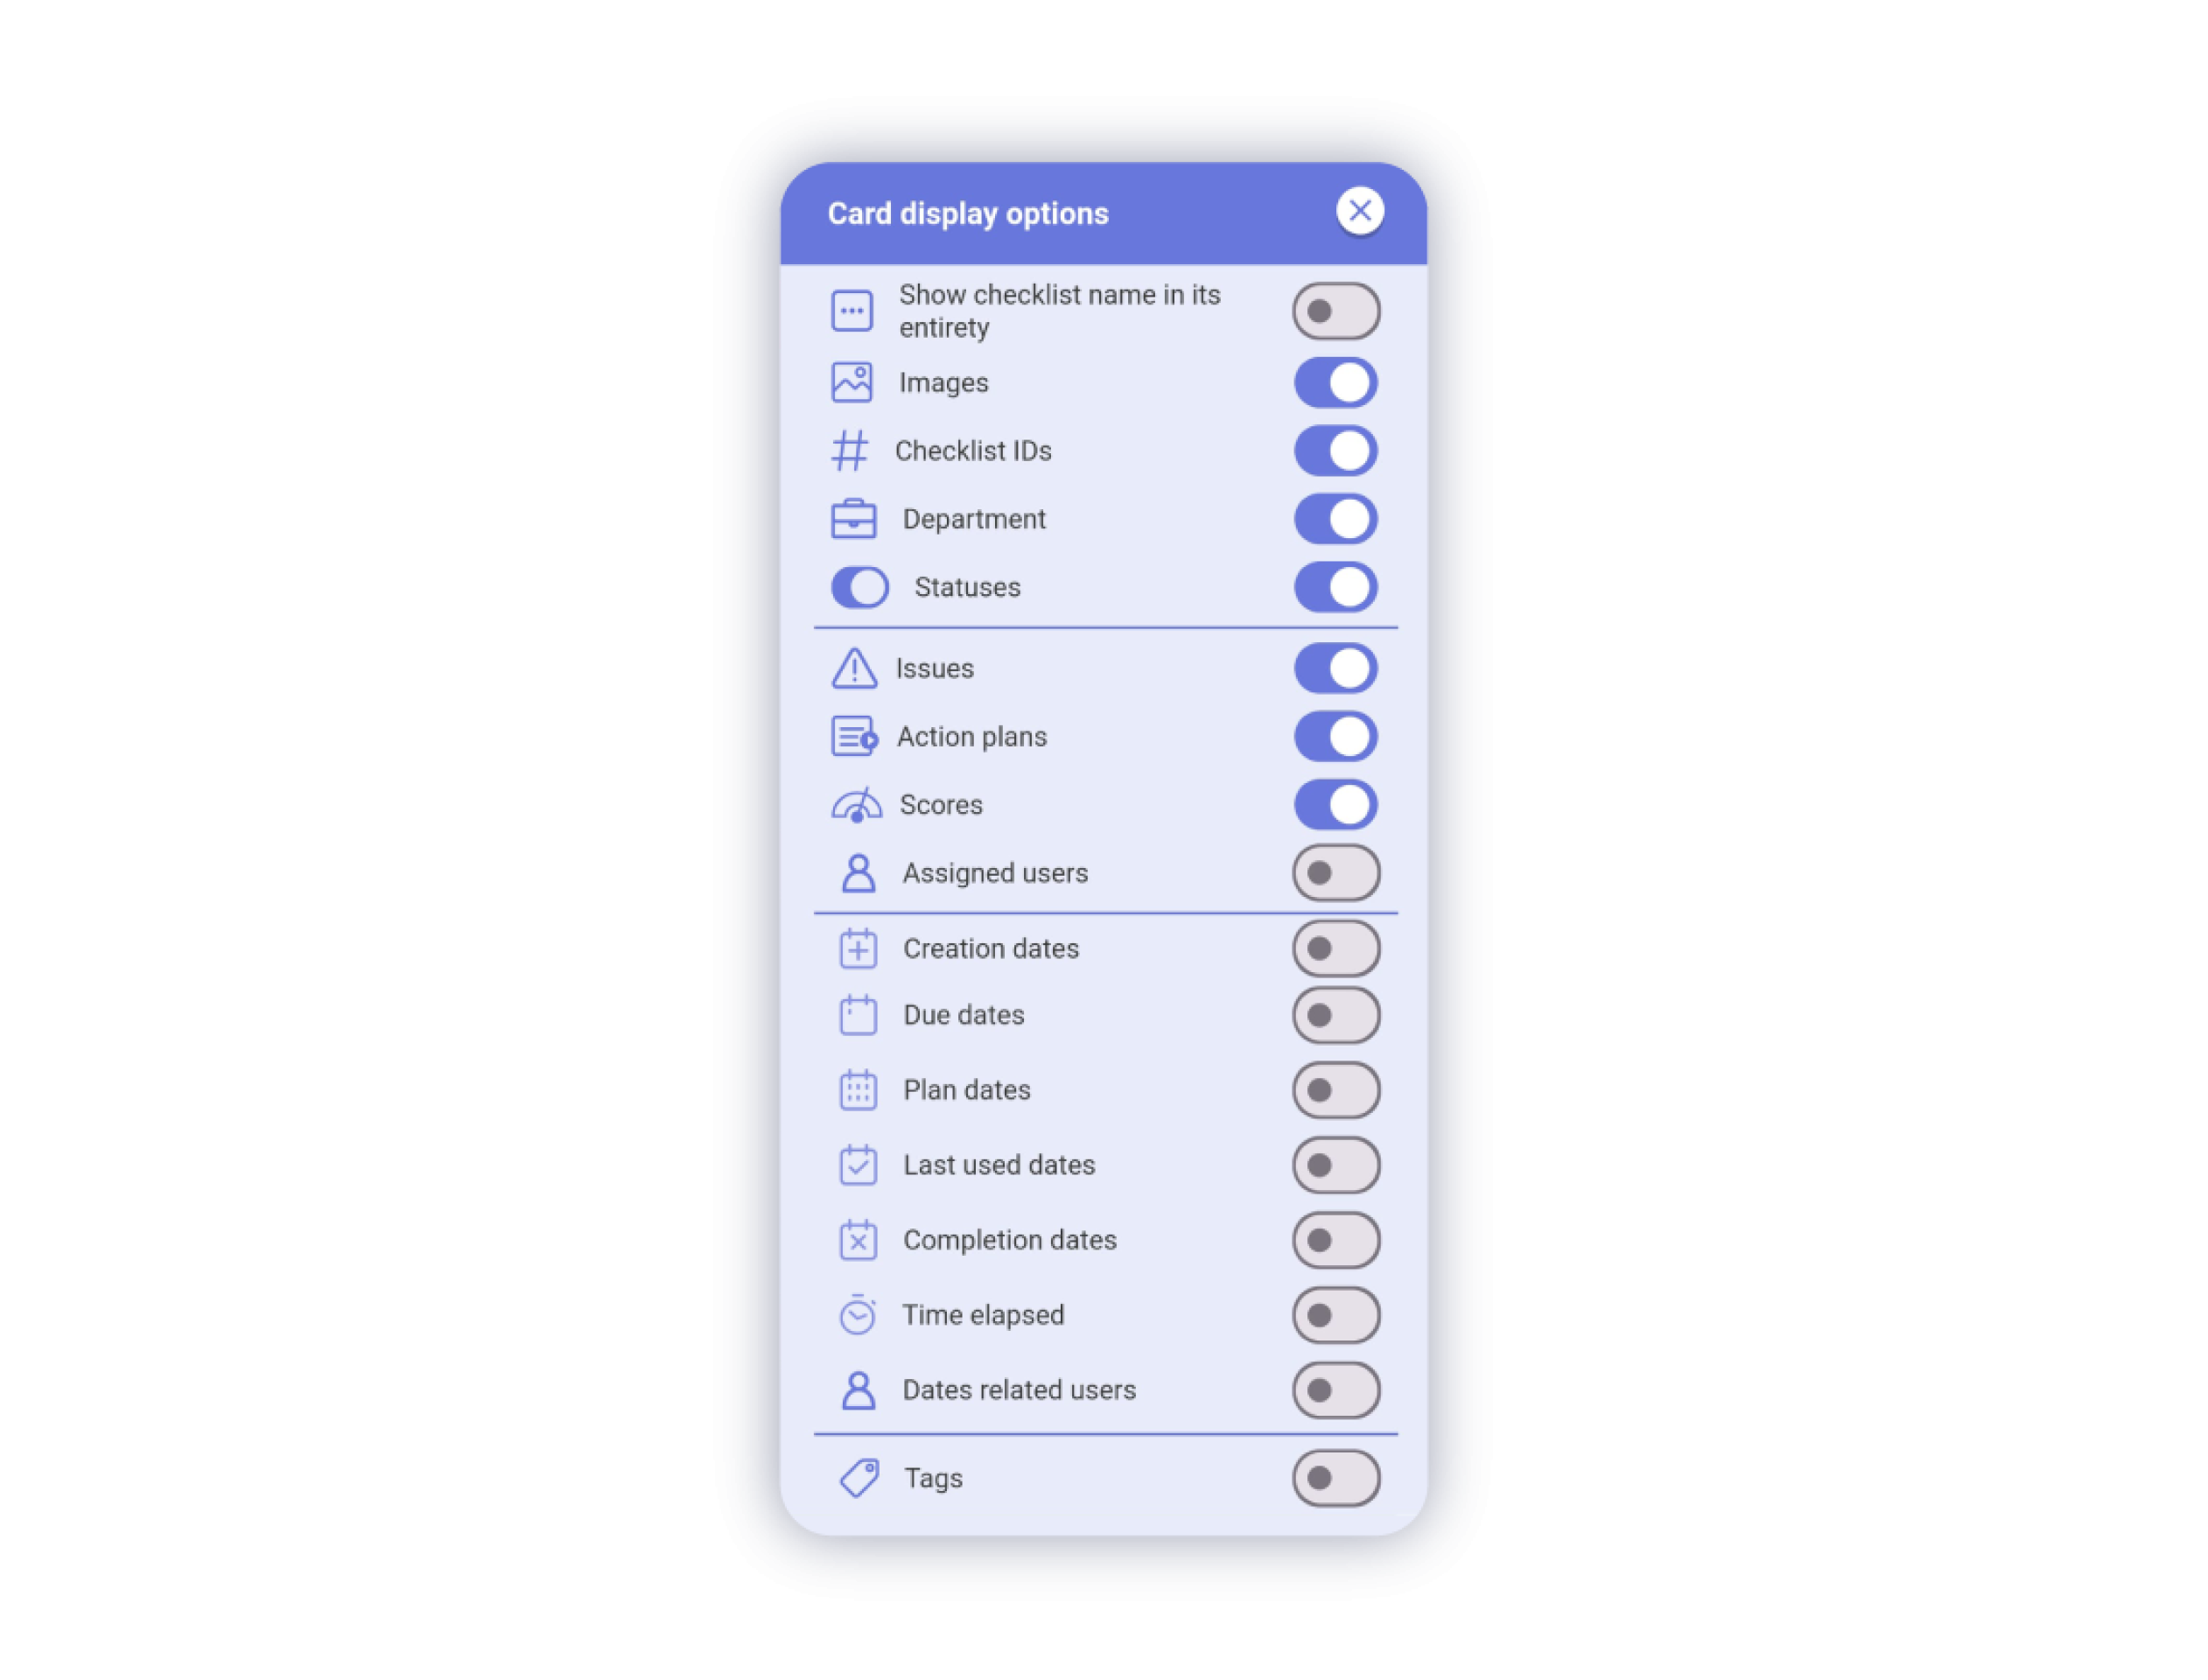
All the information displayed on the front of the checklist cards is fully configurable. To access the configuration panel, click on the gear icon on the checklist listing screen.
In this panel, you can configure the following items:
- Expand the checklist name completely: With this switch enabled, you will see the full name of the checklist on the card, regardless of its length.
- Image preview: Show or hide the template and department icons.
- Checklist ID: Show or hide the checklist identification number.
- Department: Show or hide the department and sub-department where the checklist is located.
- Status: Display the status of the checklist.
- Issues: Show or hide information and quick access to issues.
- Action Plan: Show or hide information and quick access to action plans.
- Score: Show or hide information and quick access to the checklist score.
- Assigned Users: Show or hide users assigned to the checklist.
- Creation Date: Show or hide the creation date of the checklist.
- Expiration Date: Show or hide the expiration date of the checklist.
- Planning Date: Show or hide the planning date of the checklist.
- Last Use Date: Show or hide the last use date of the checklist.
- Completion Date: Show or hide the completion date of the checklist.
- Elapsed Time: Show or hide the elapsed time in executing the checklist.
- Users related to dates: Show or hide the names of users involved in the creation, expiration, planning, last use, and completion of the checklist.
- Tags: Show or hide the tags assigned to the checklist.
Important!: The settings will apply to all cards in the checklist listing.