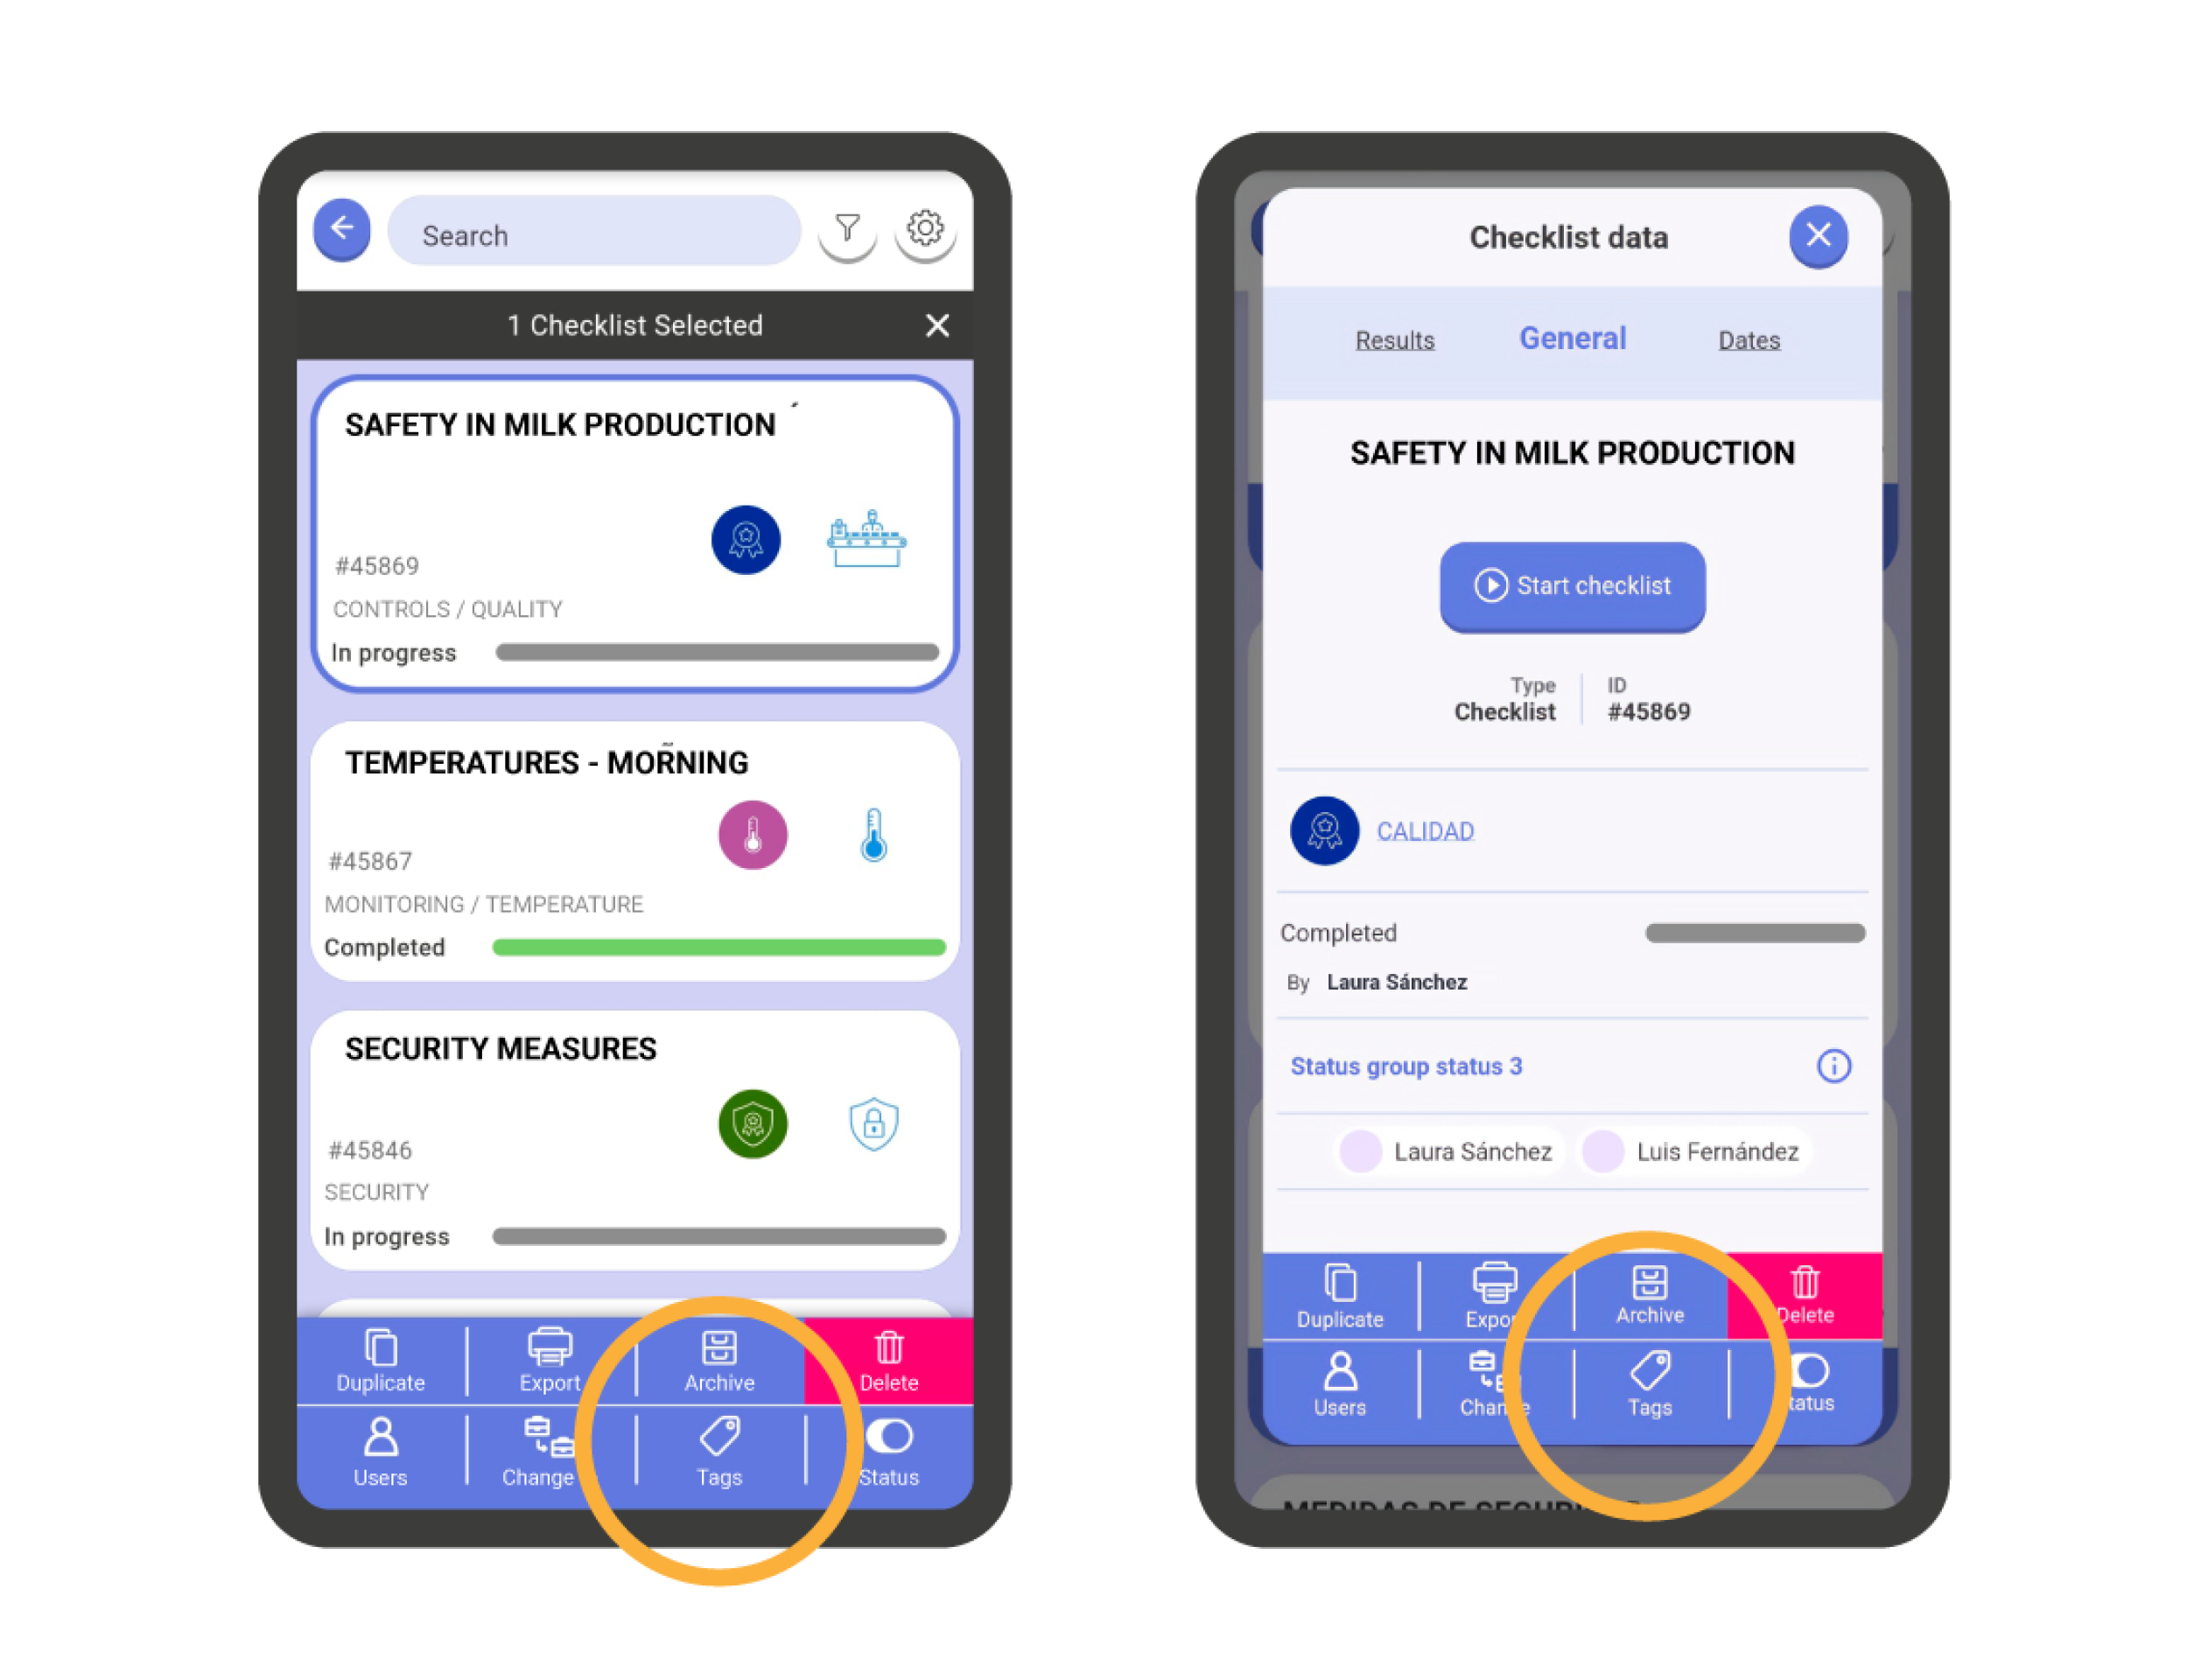
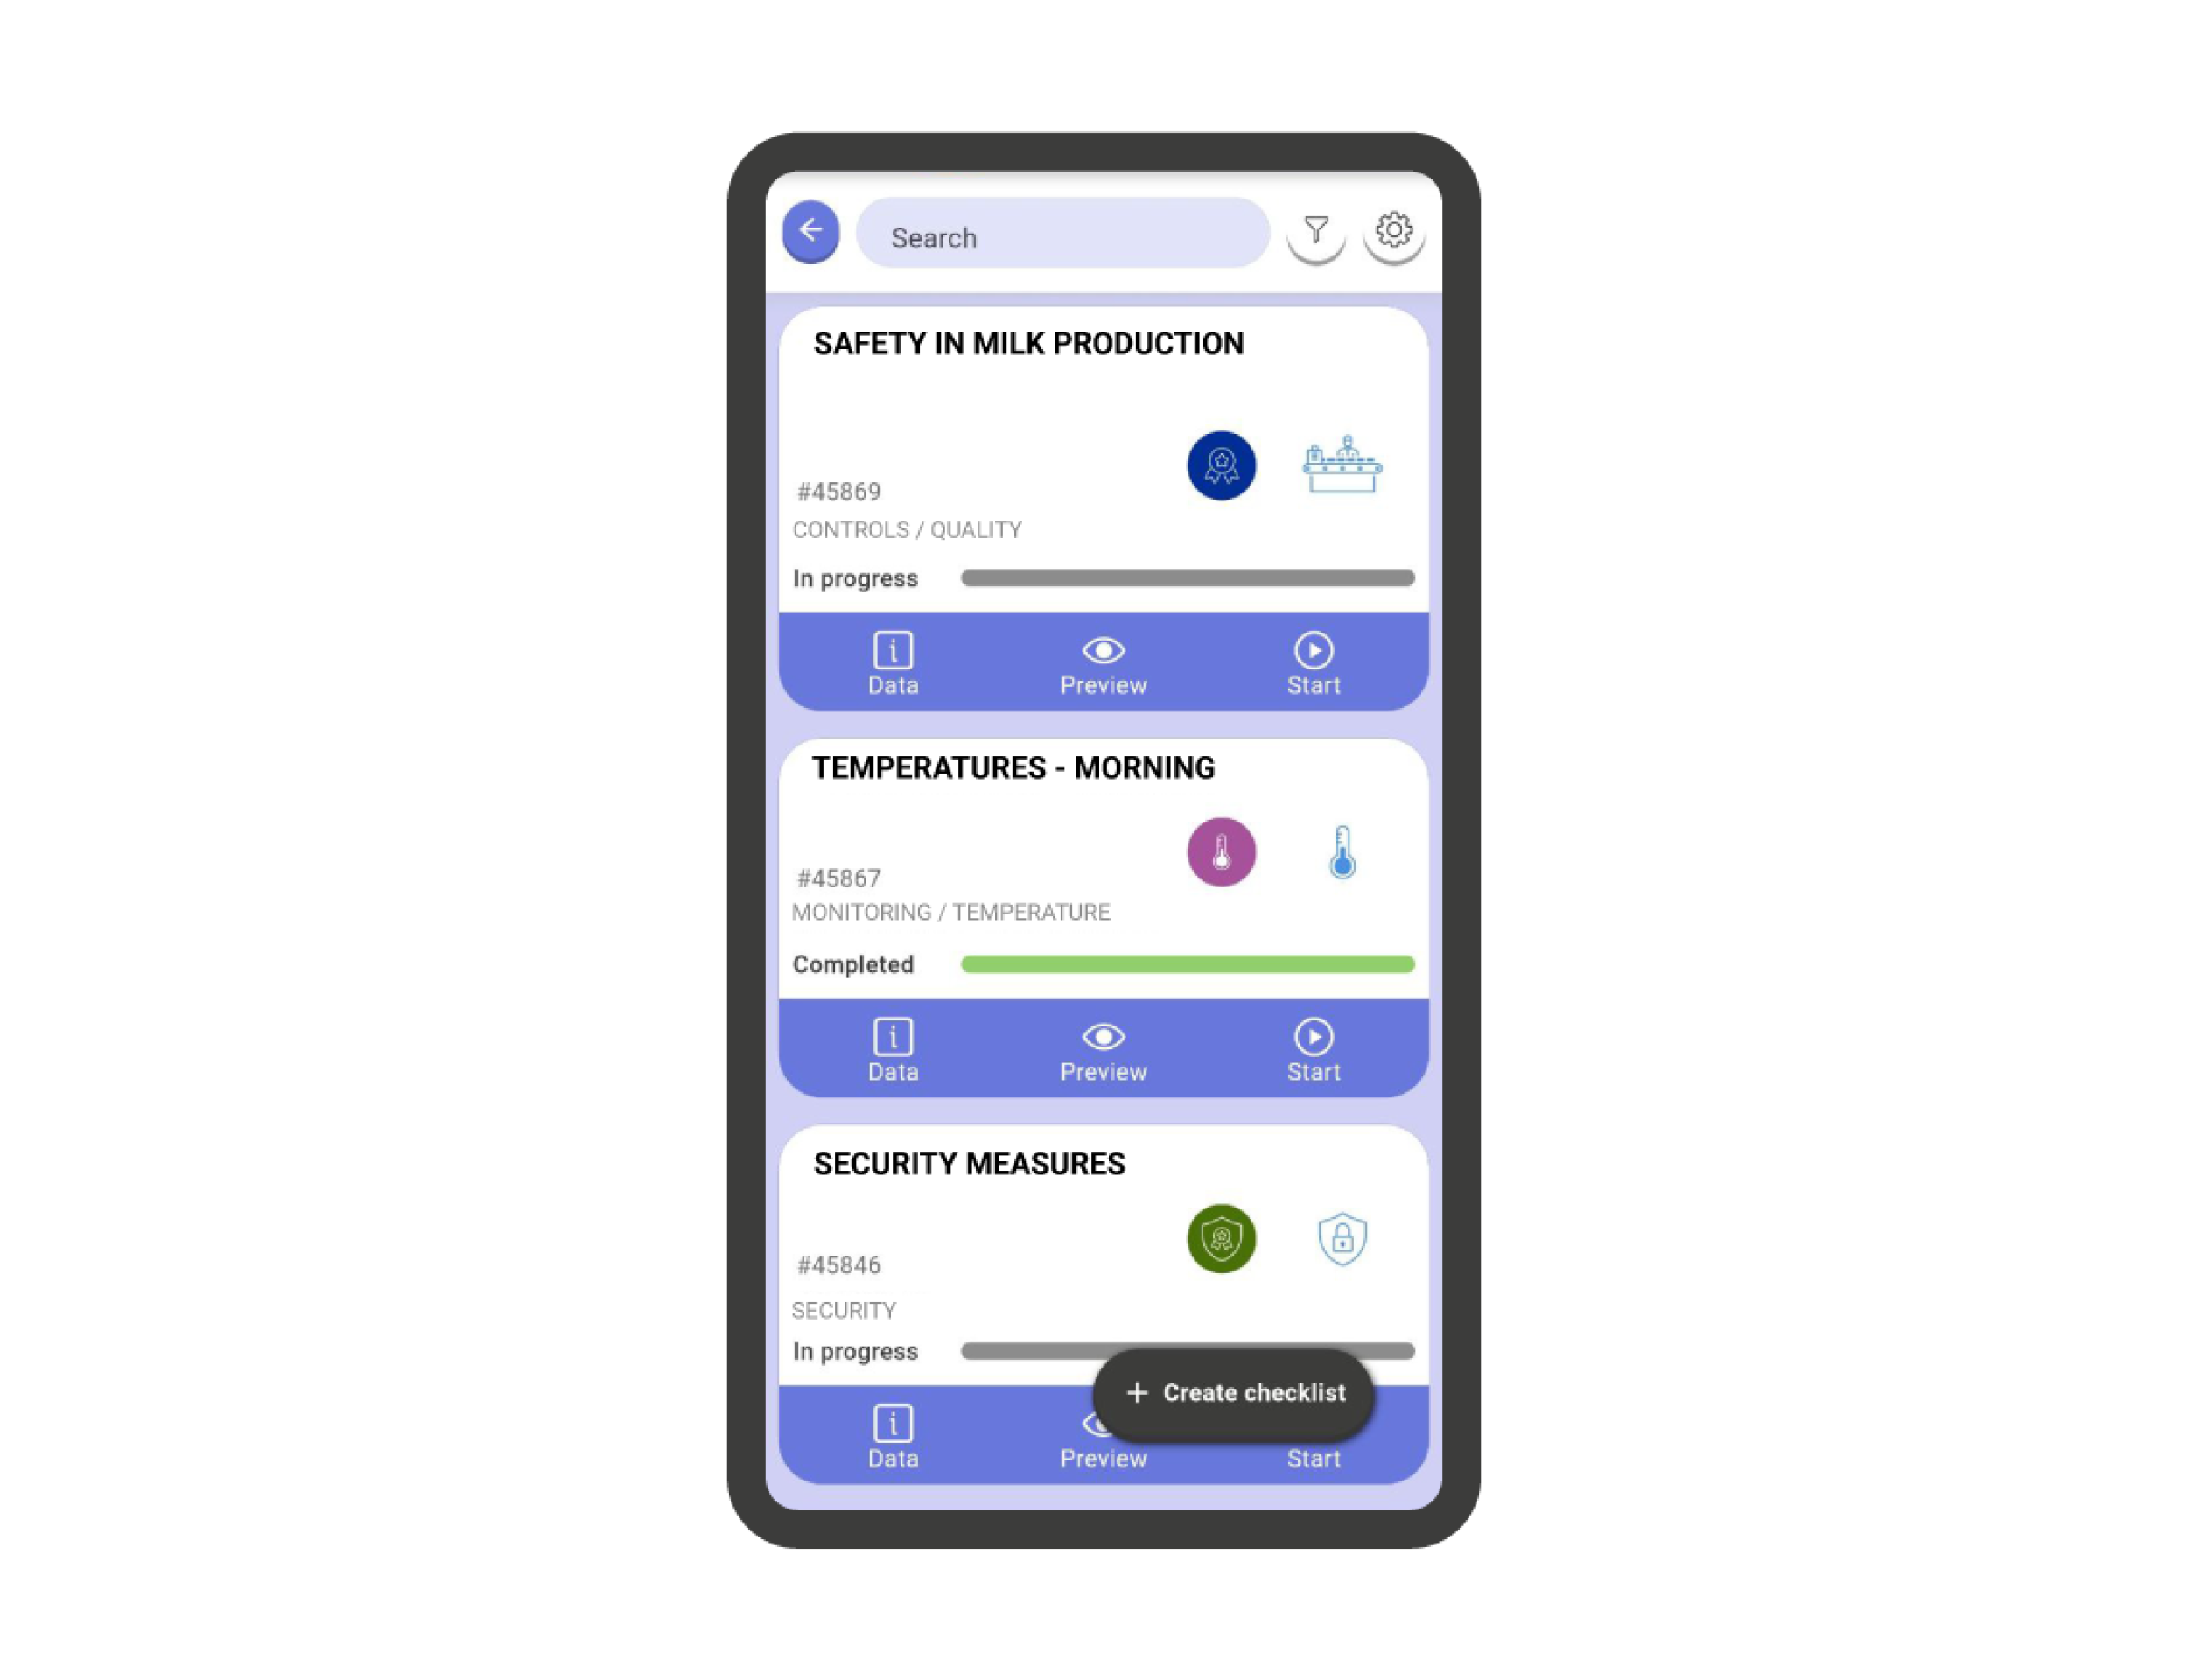
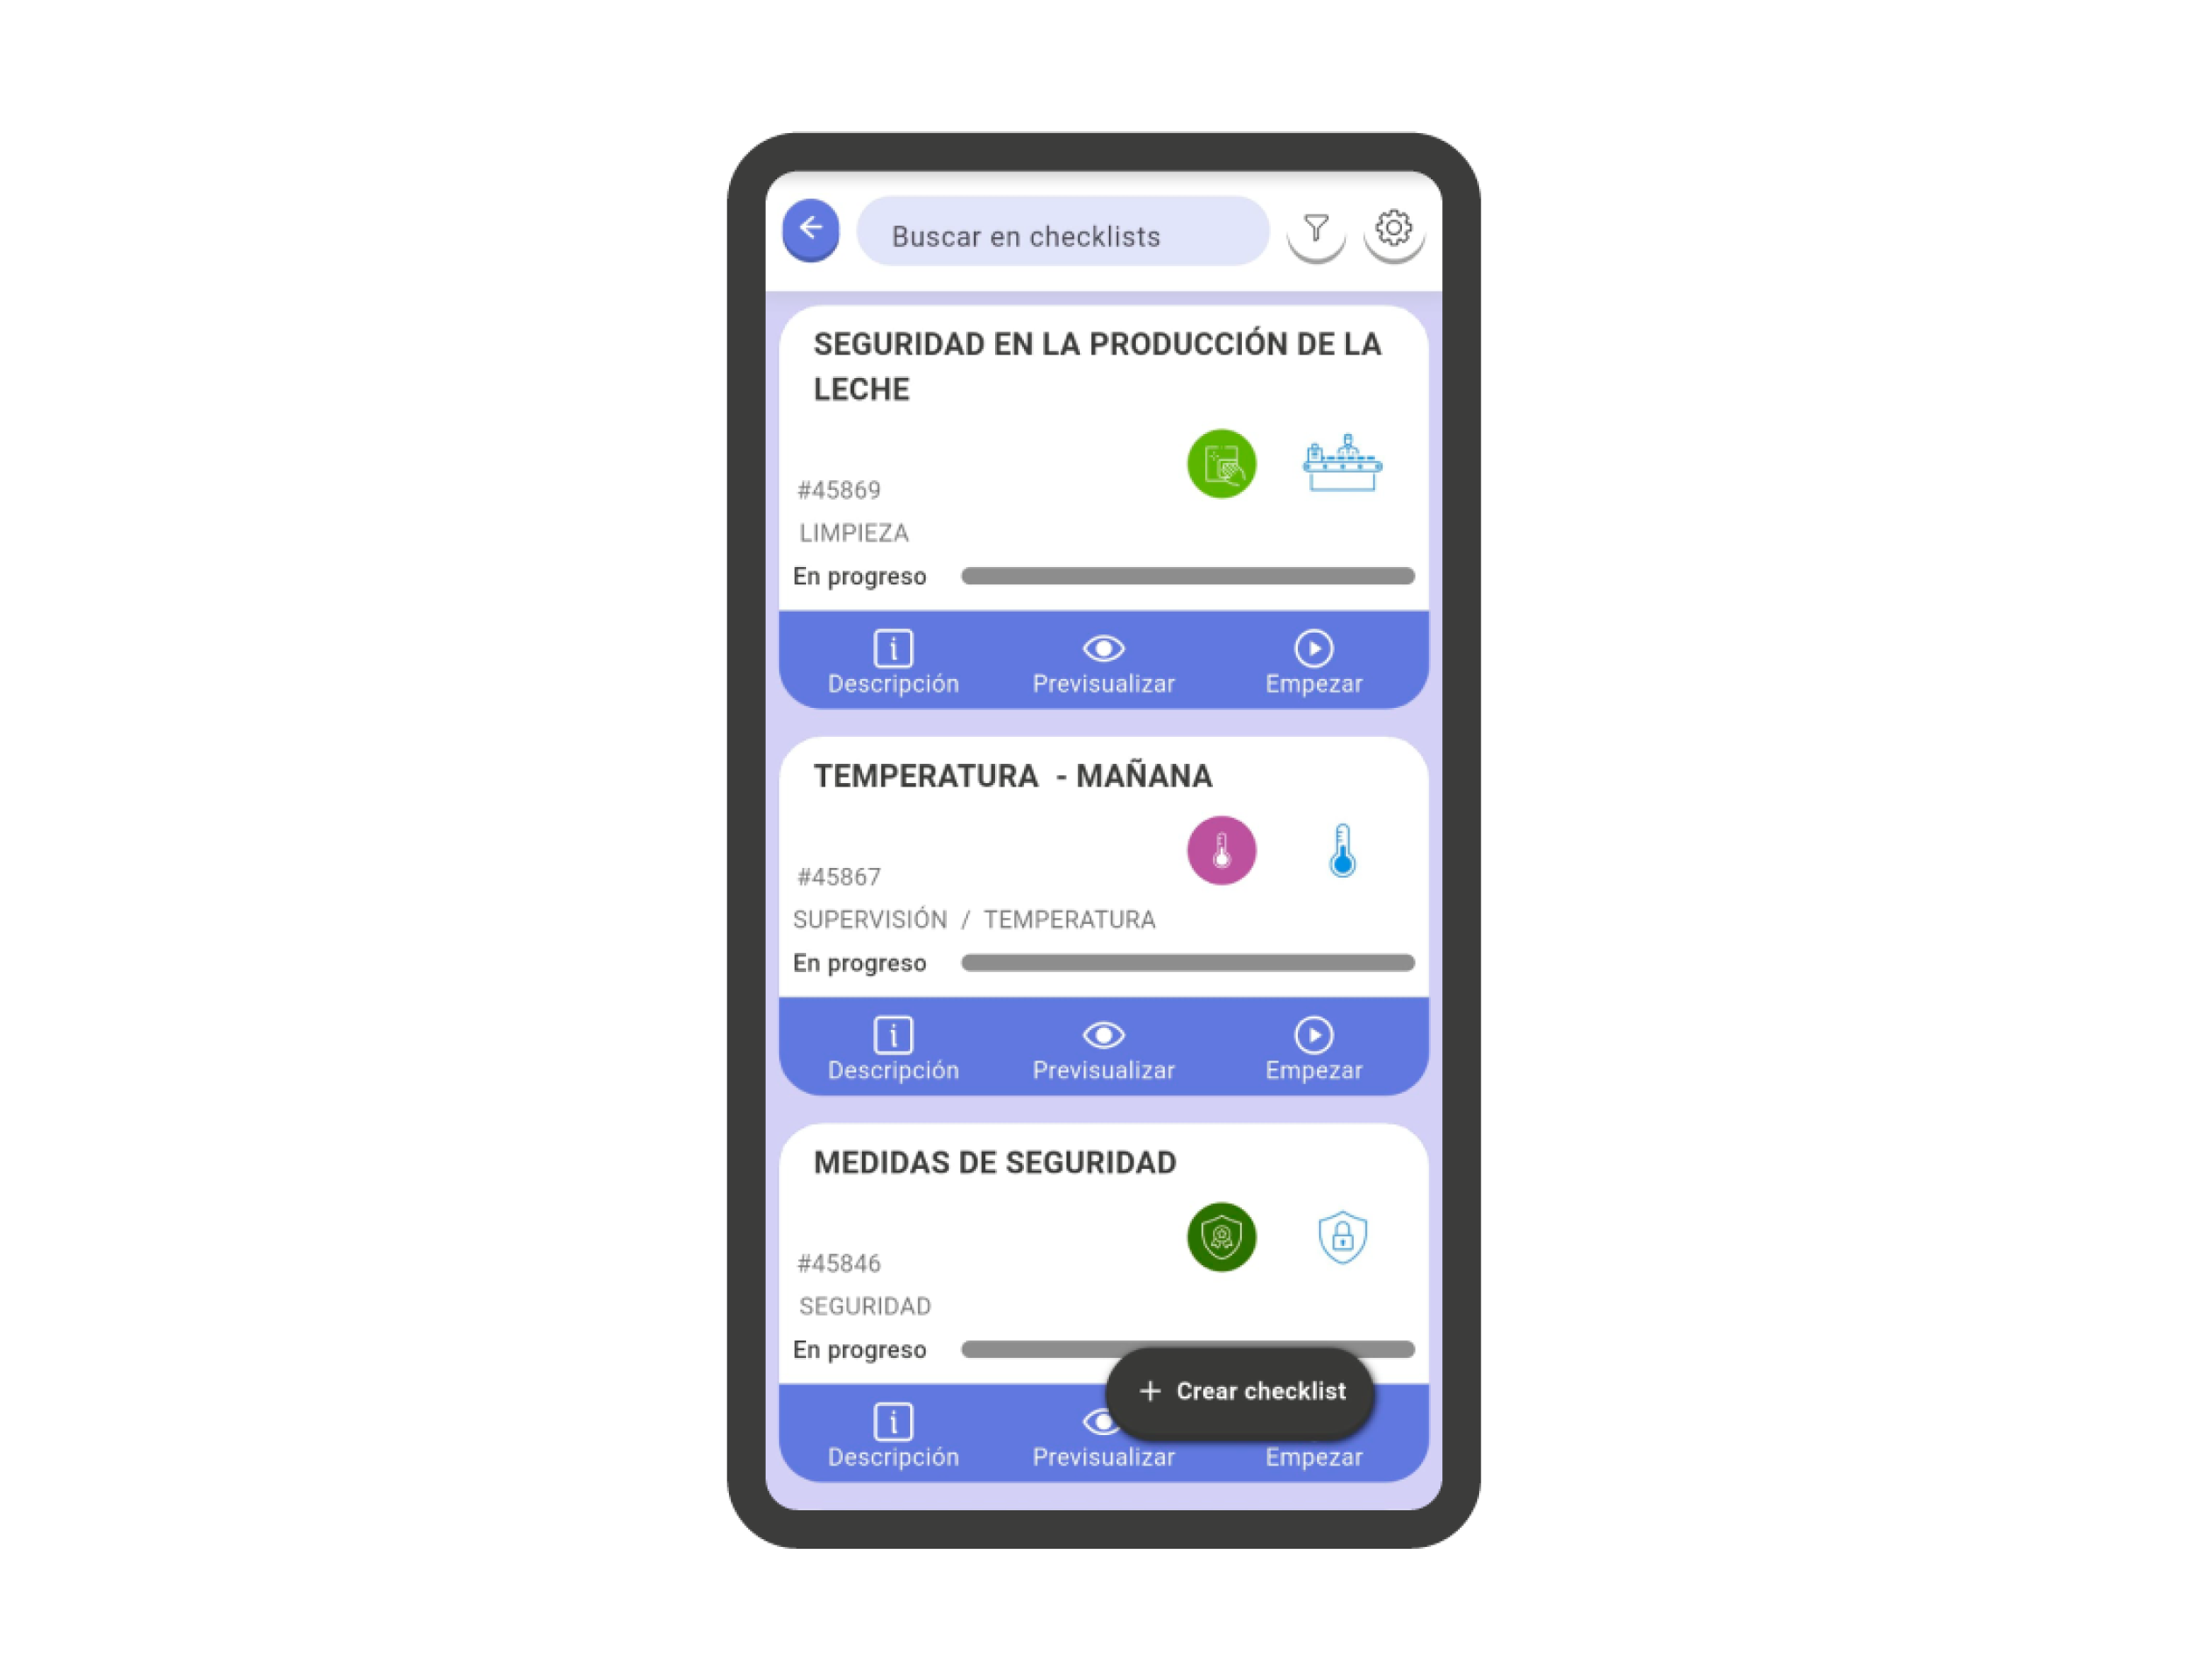
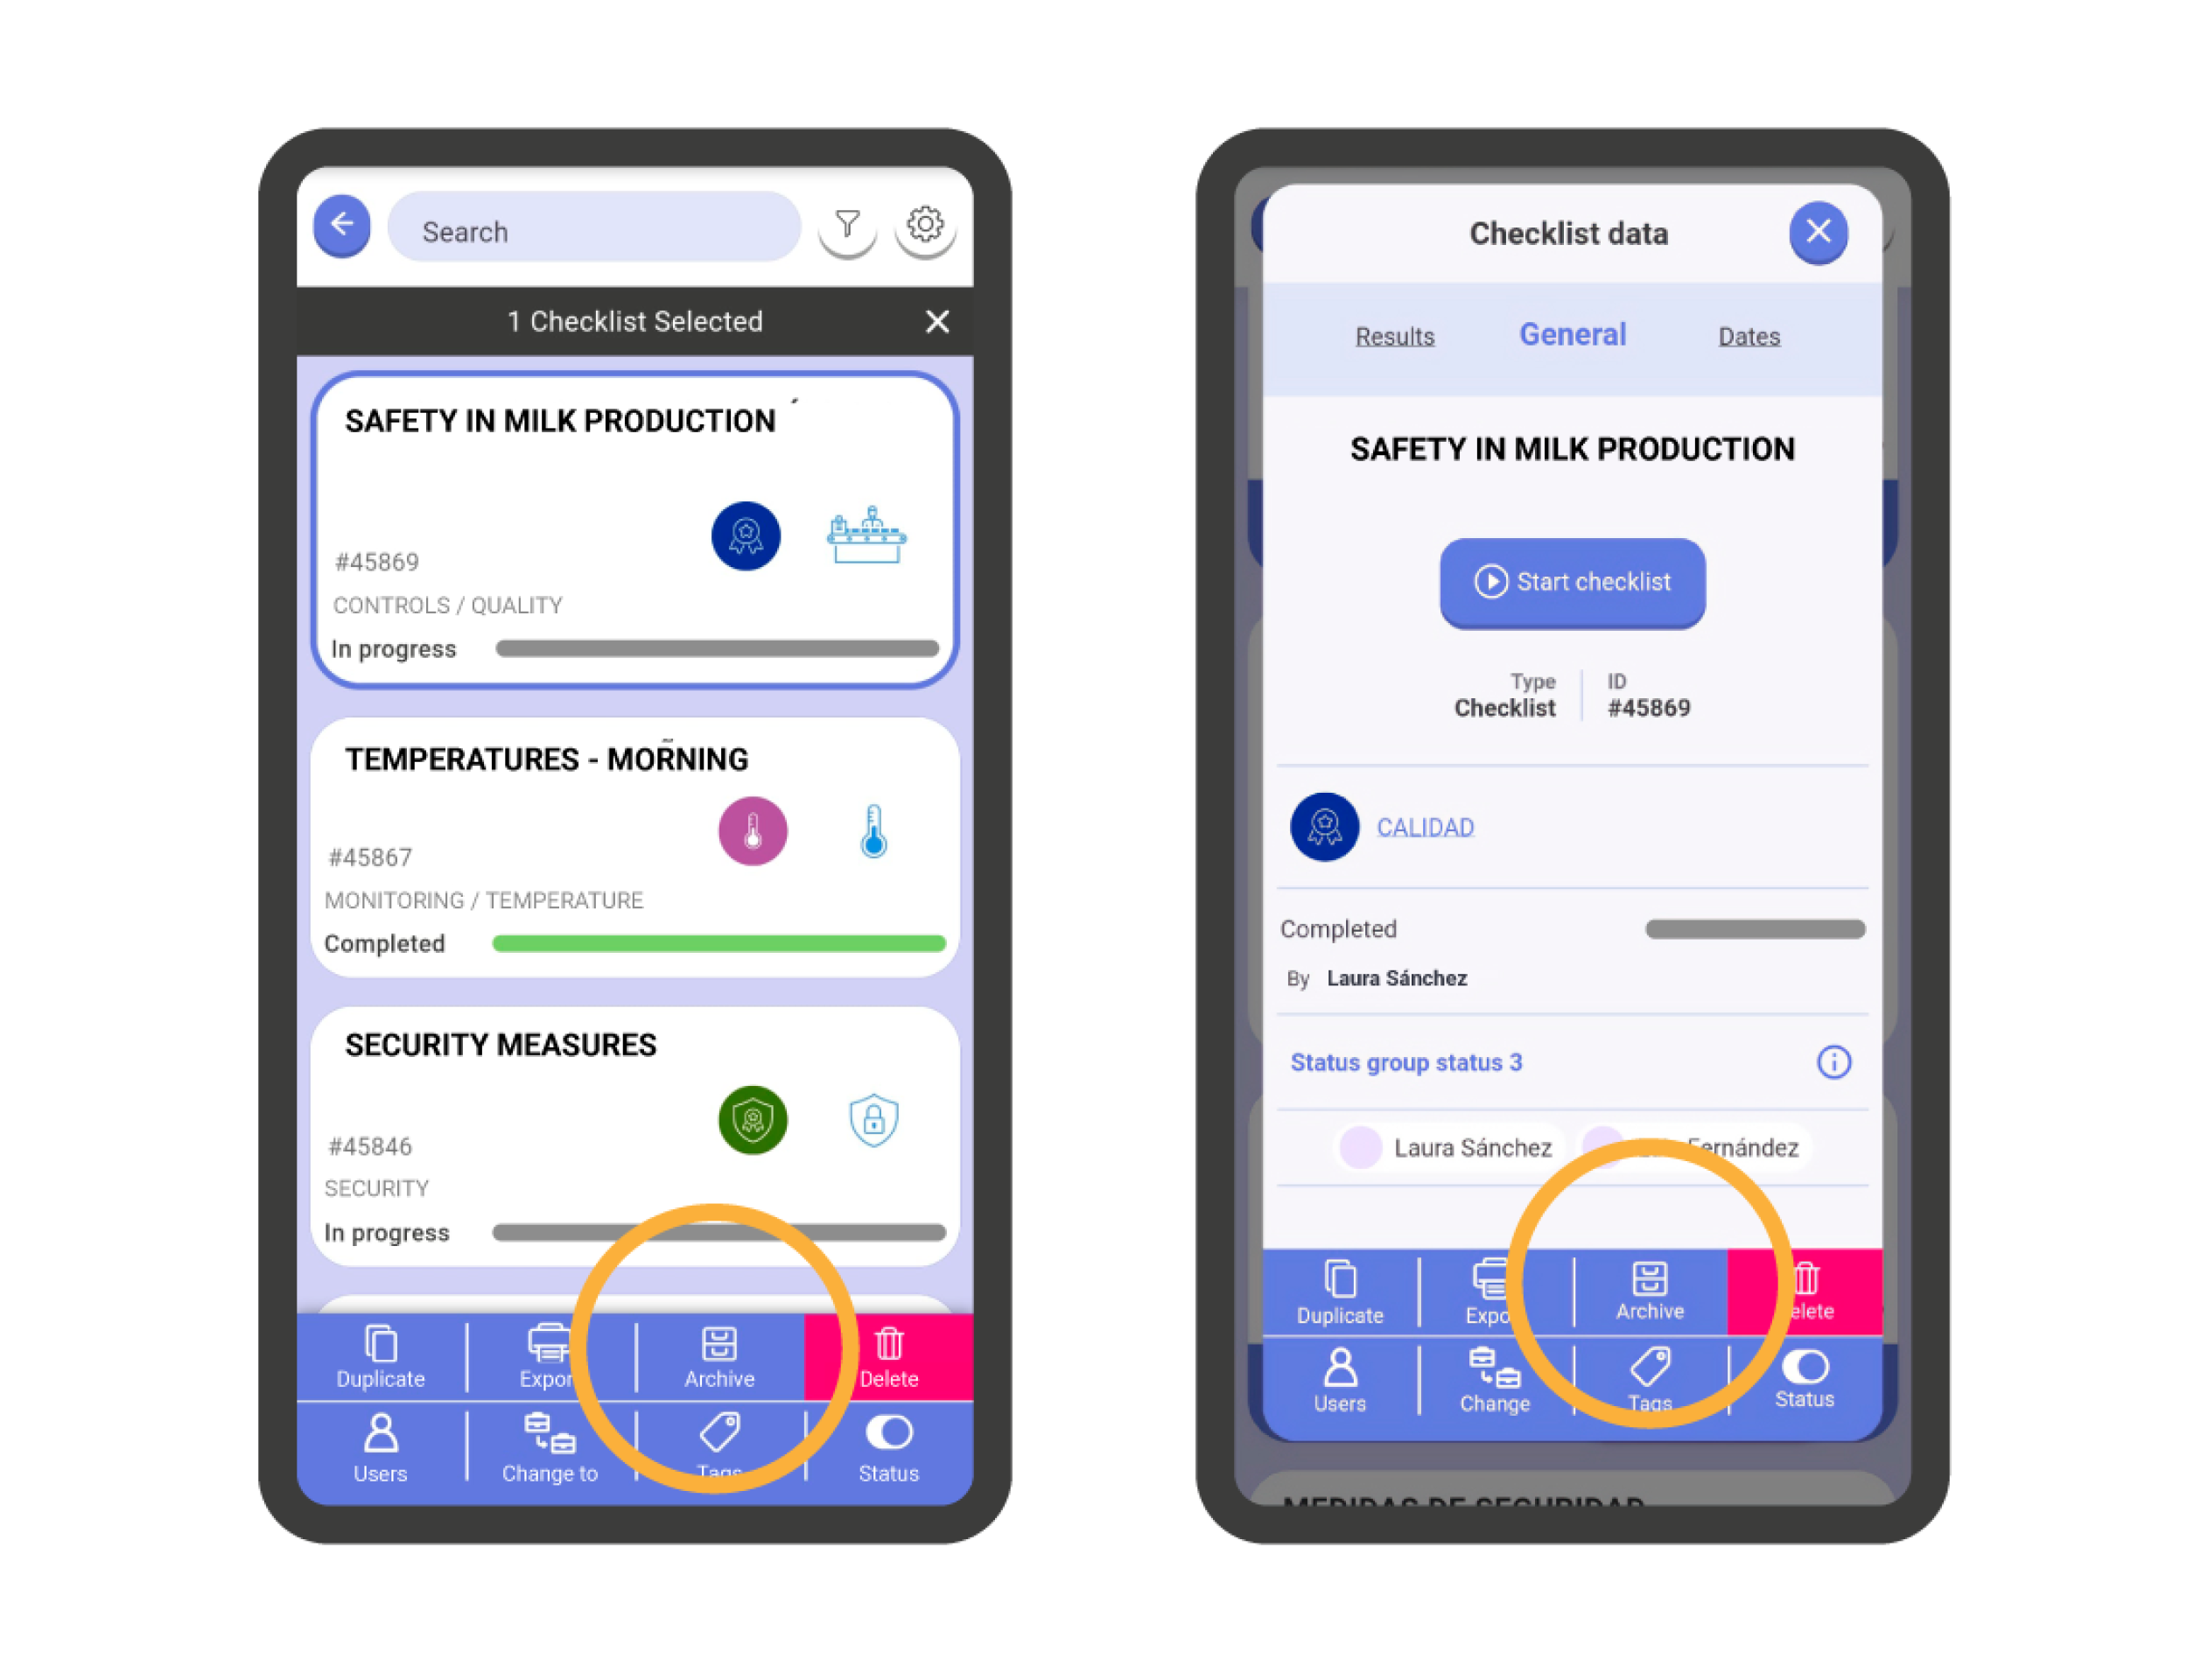
Actions and Checklist Selection #
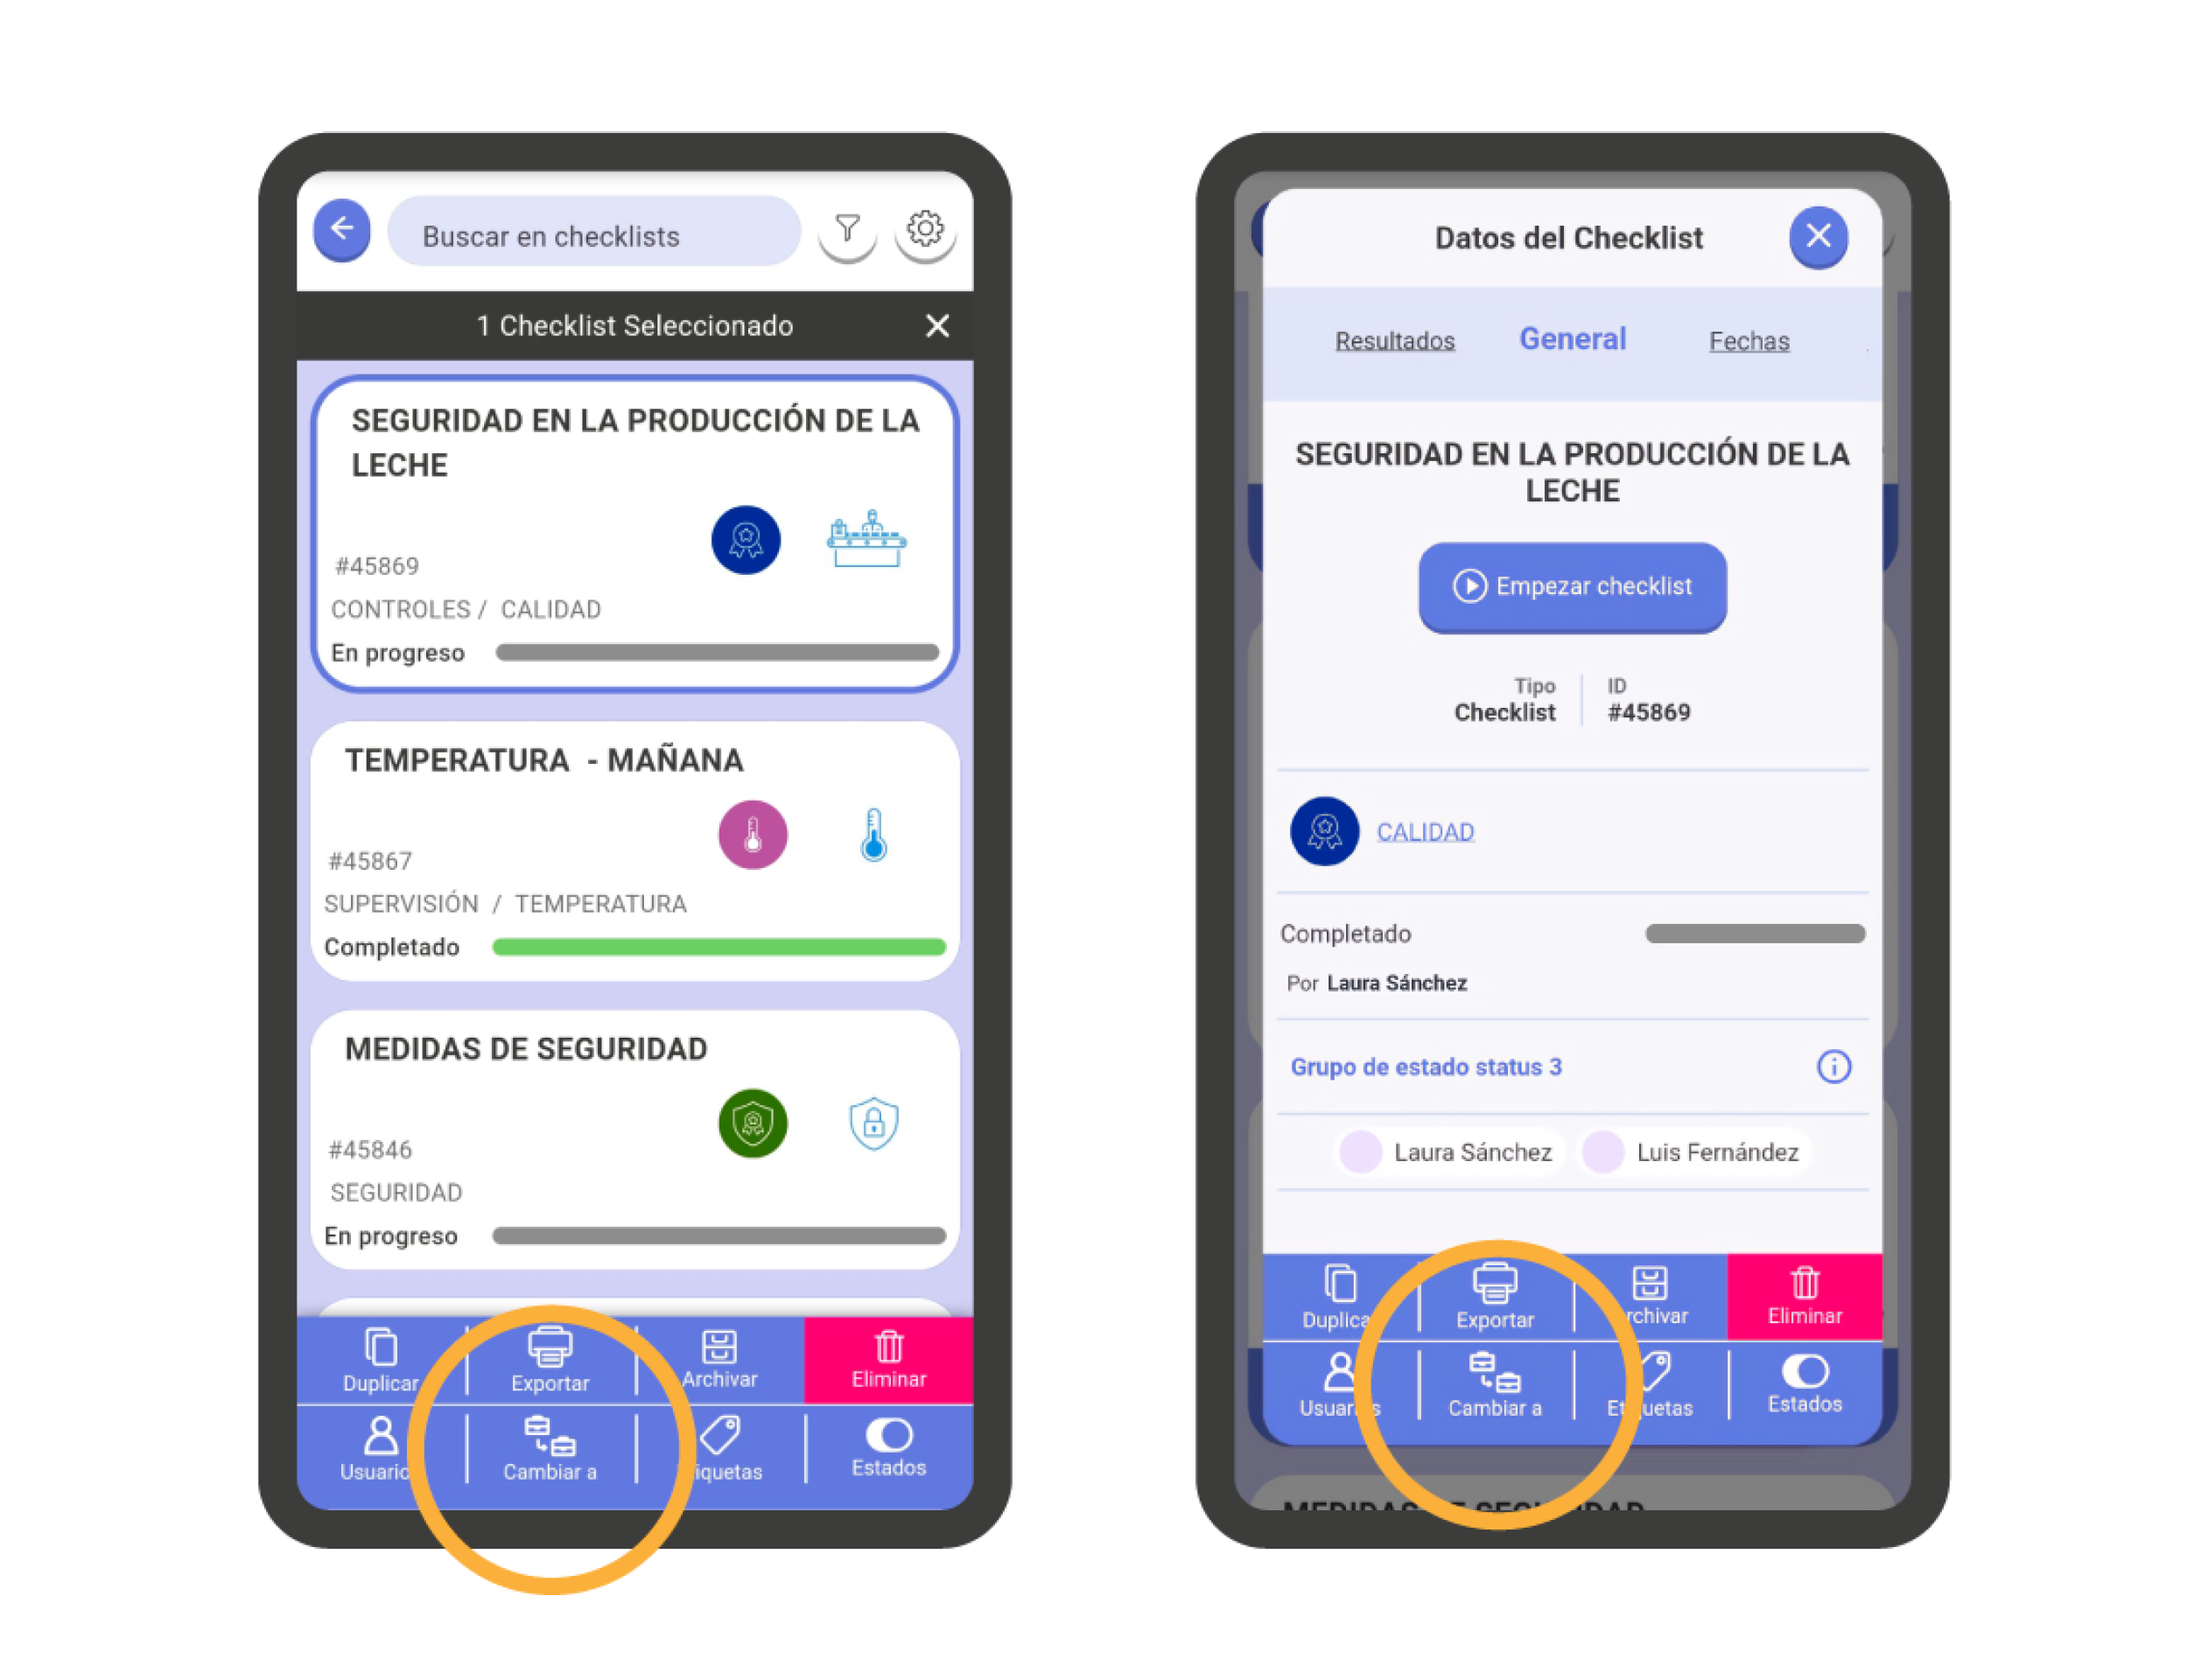
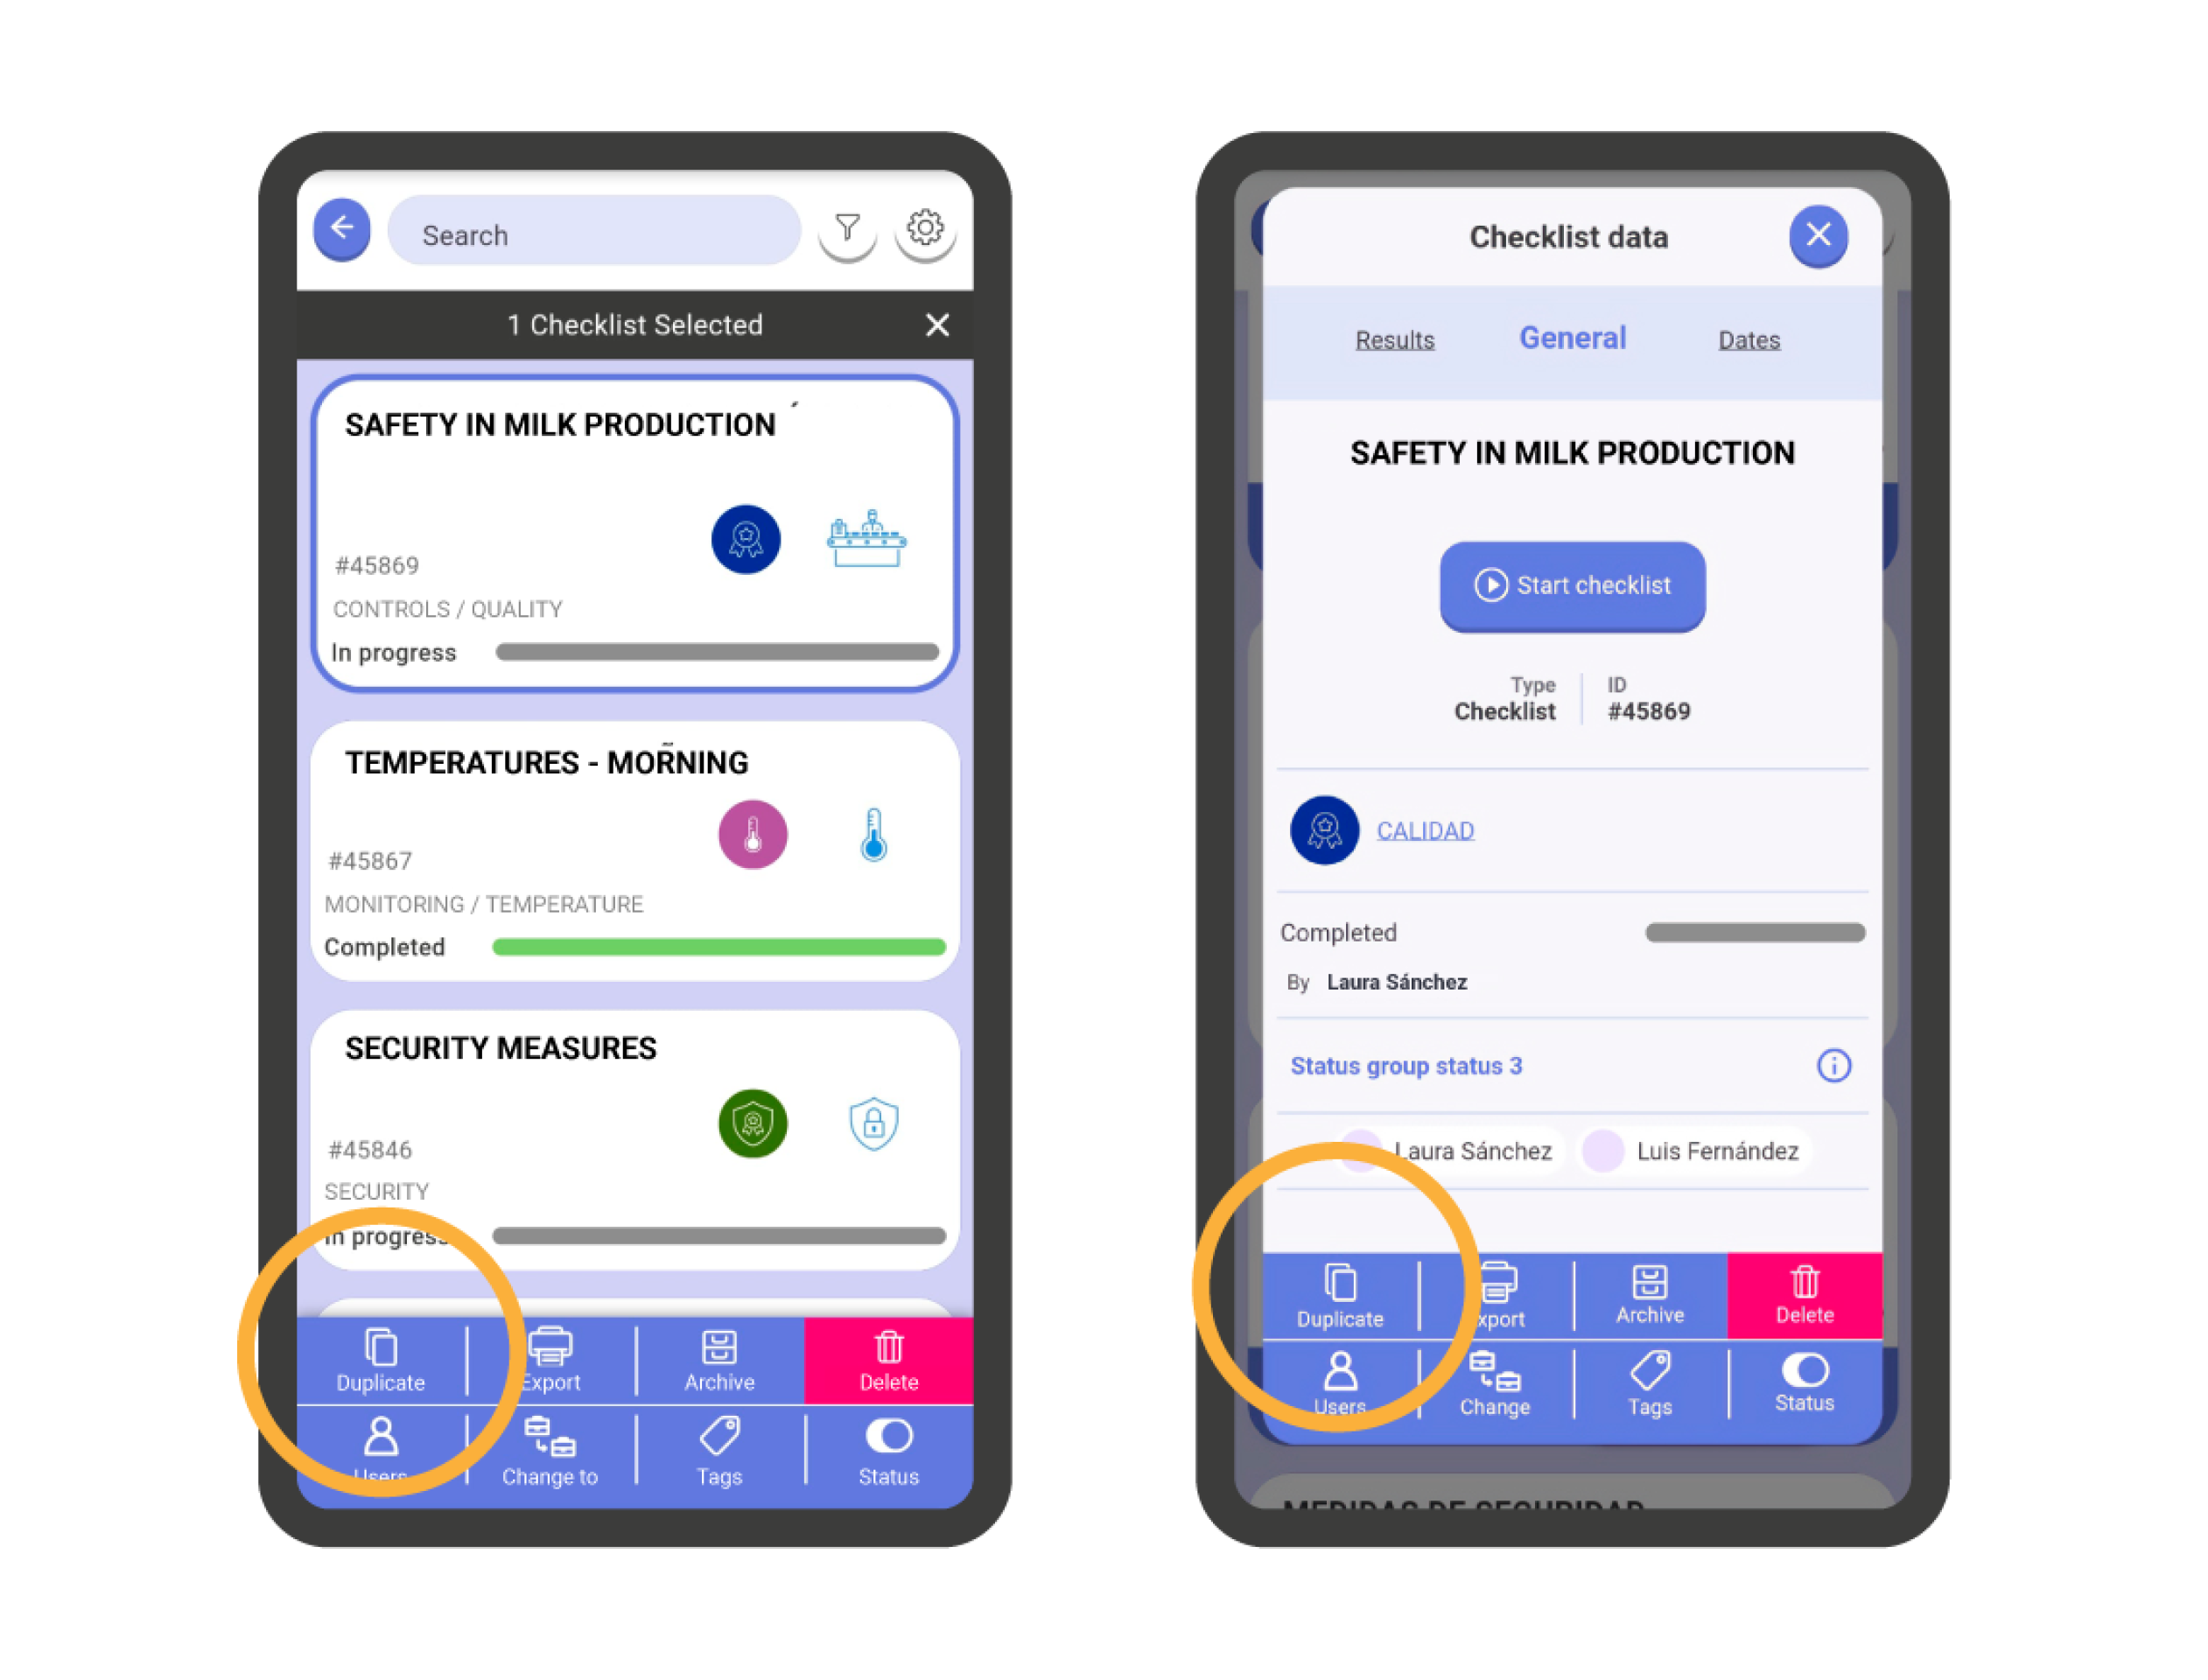
Checklists in IRISTRACE can be managed as elements, allowing us to perform certain actions on them. The actions are divided into two categories: Individual Actions and Multiple Actions. To perform actions on the checklists, you first need to select the ones you want to manage.
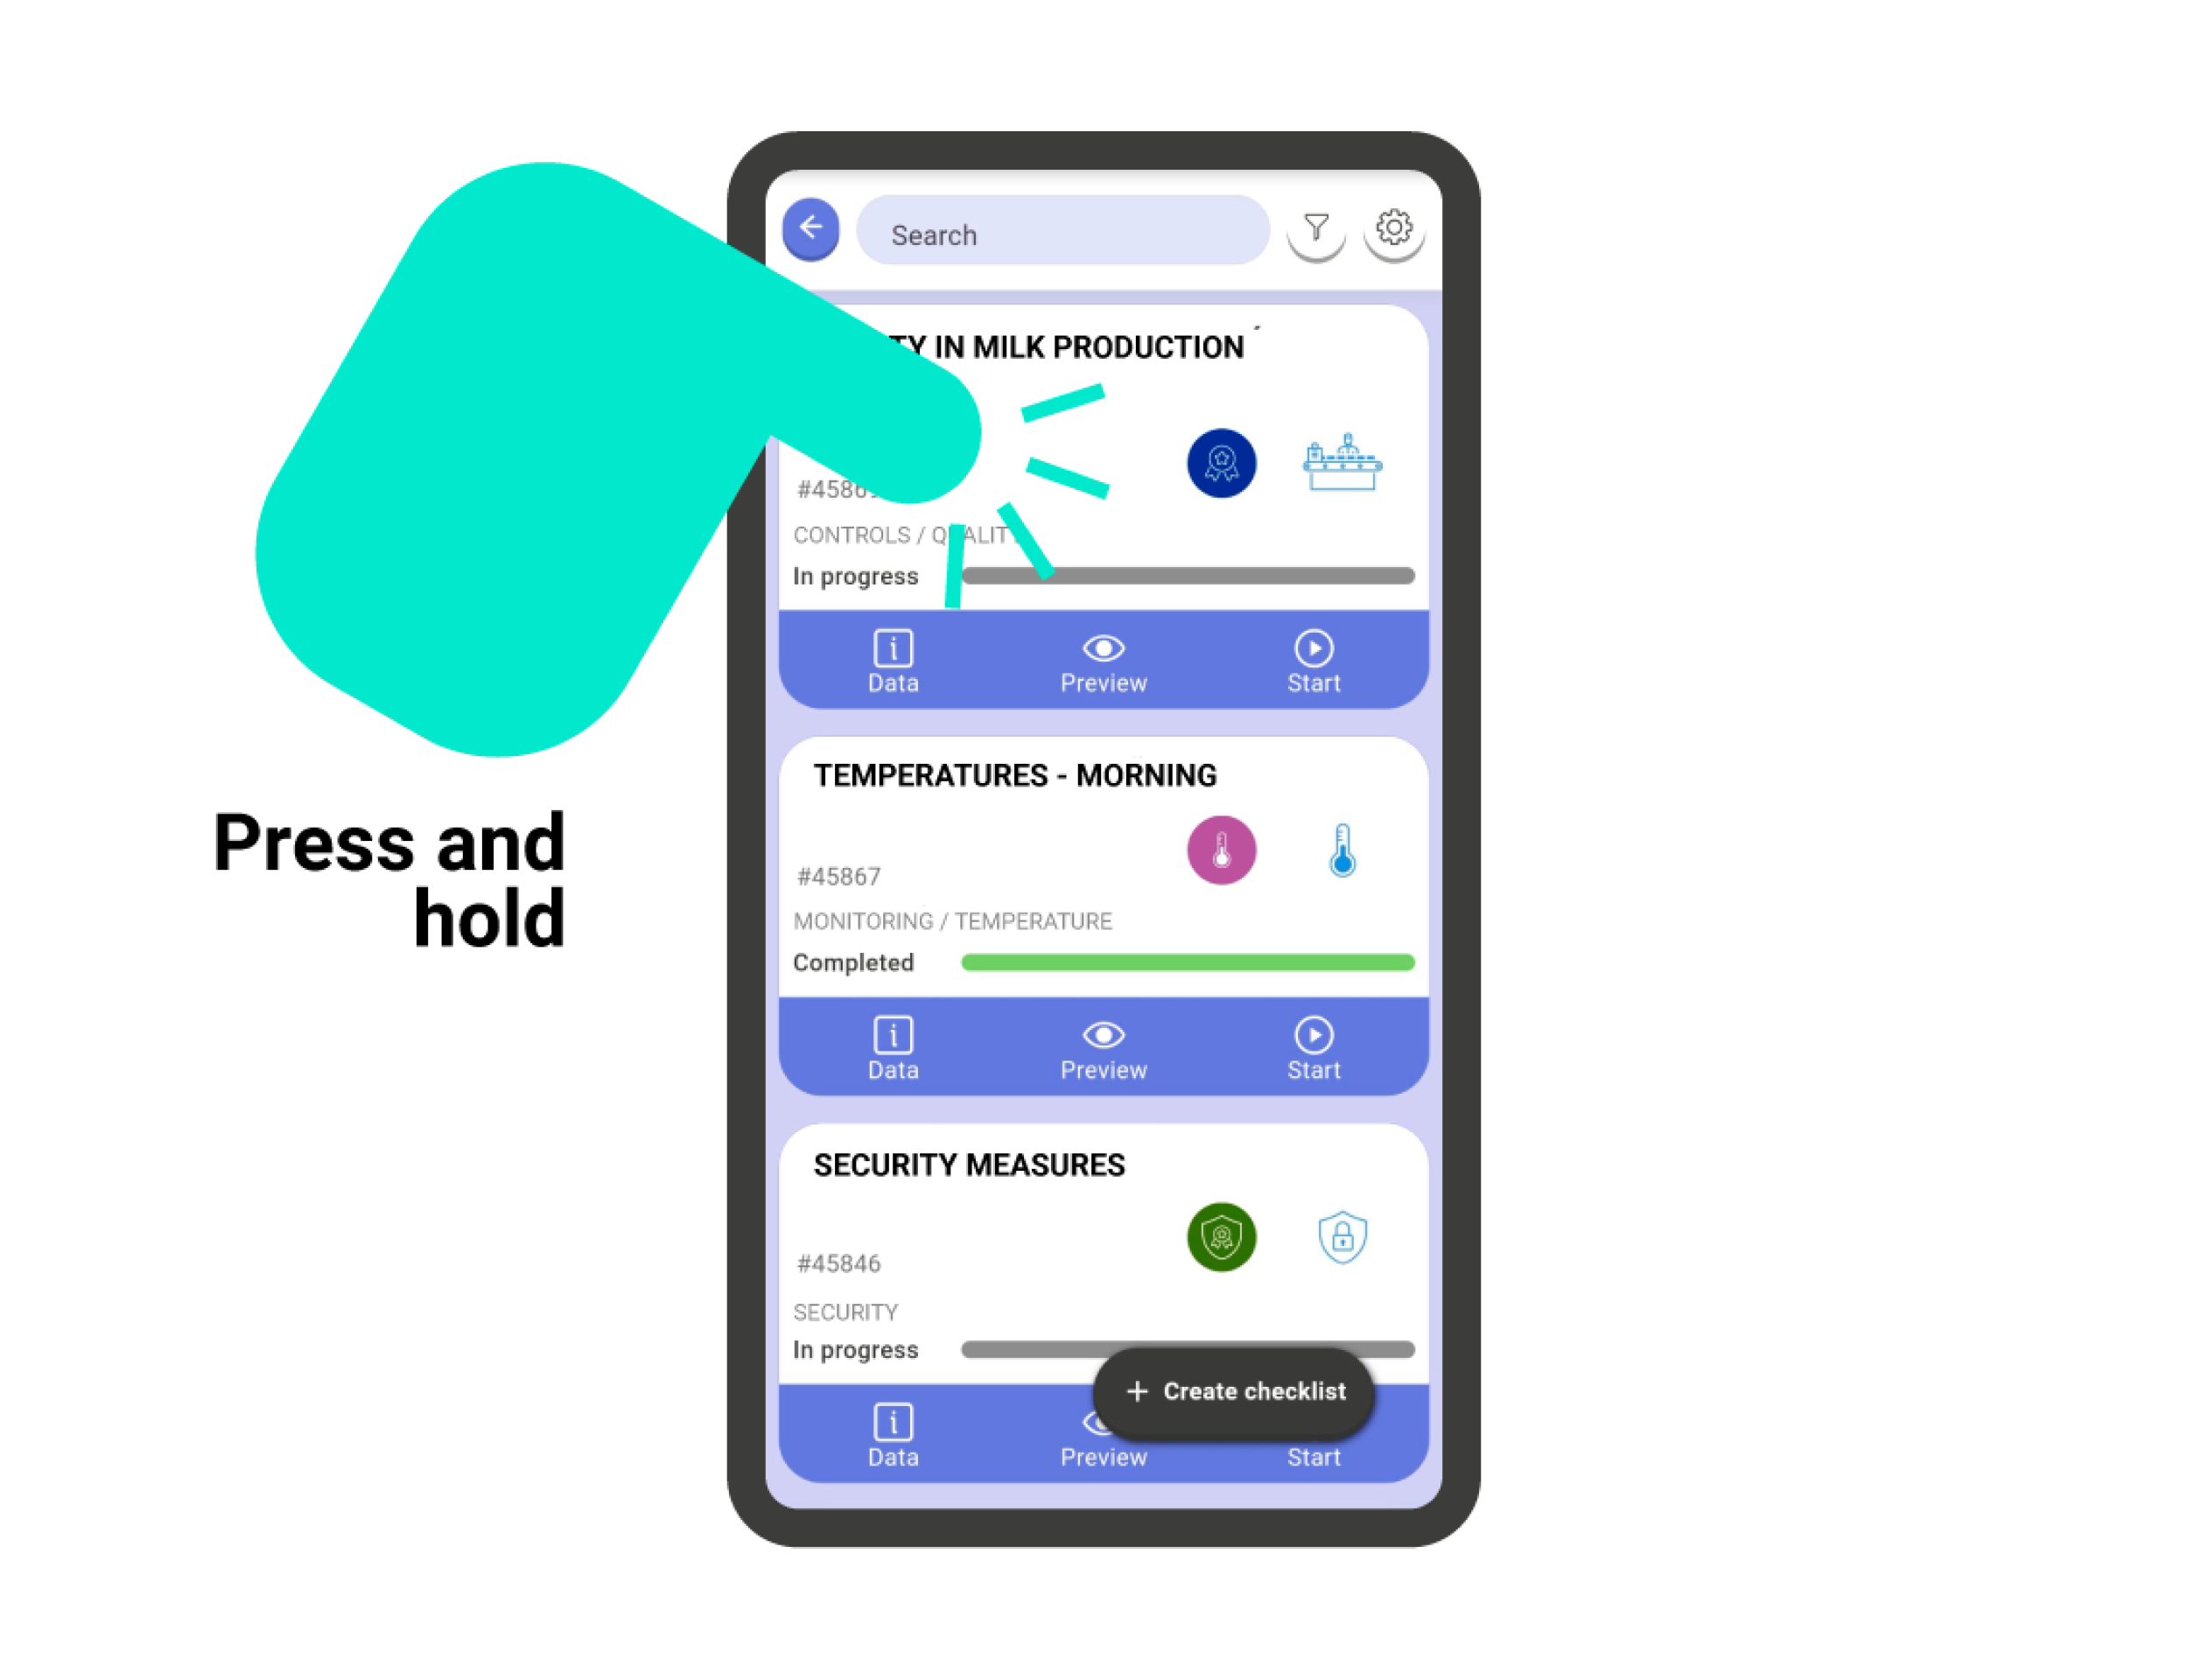
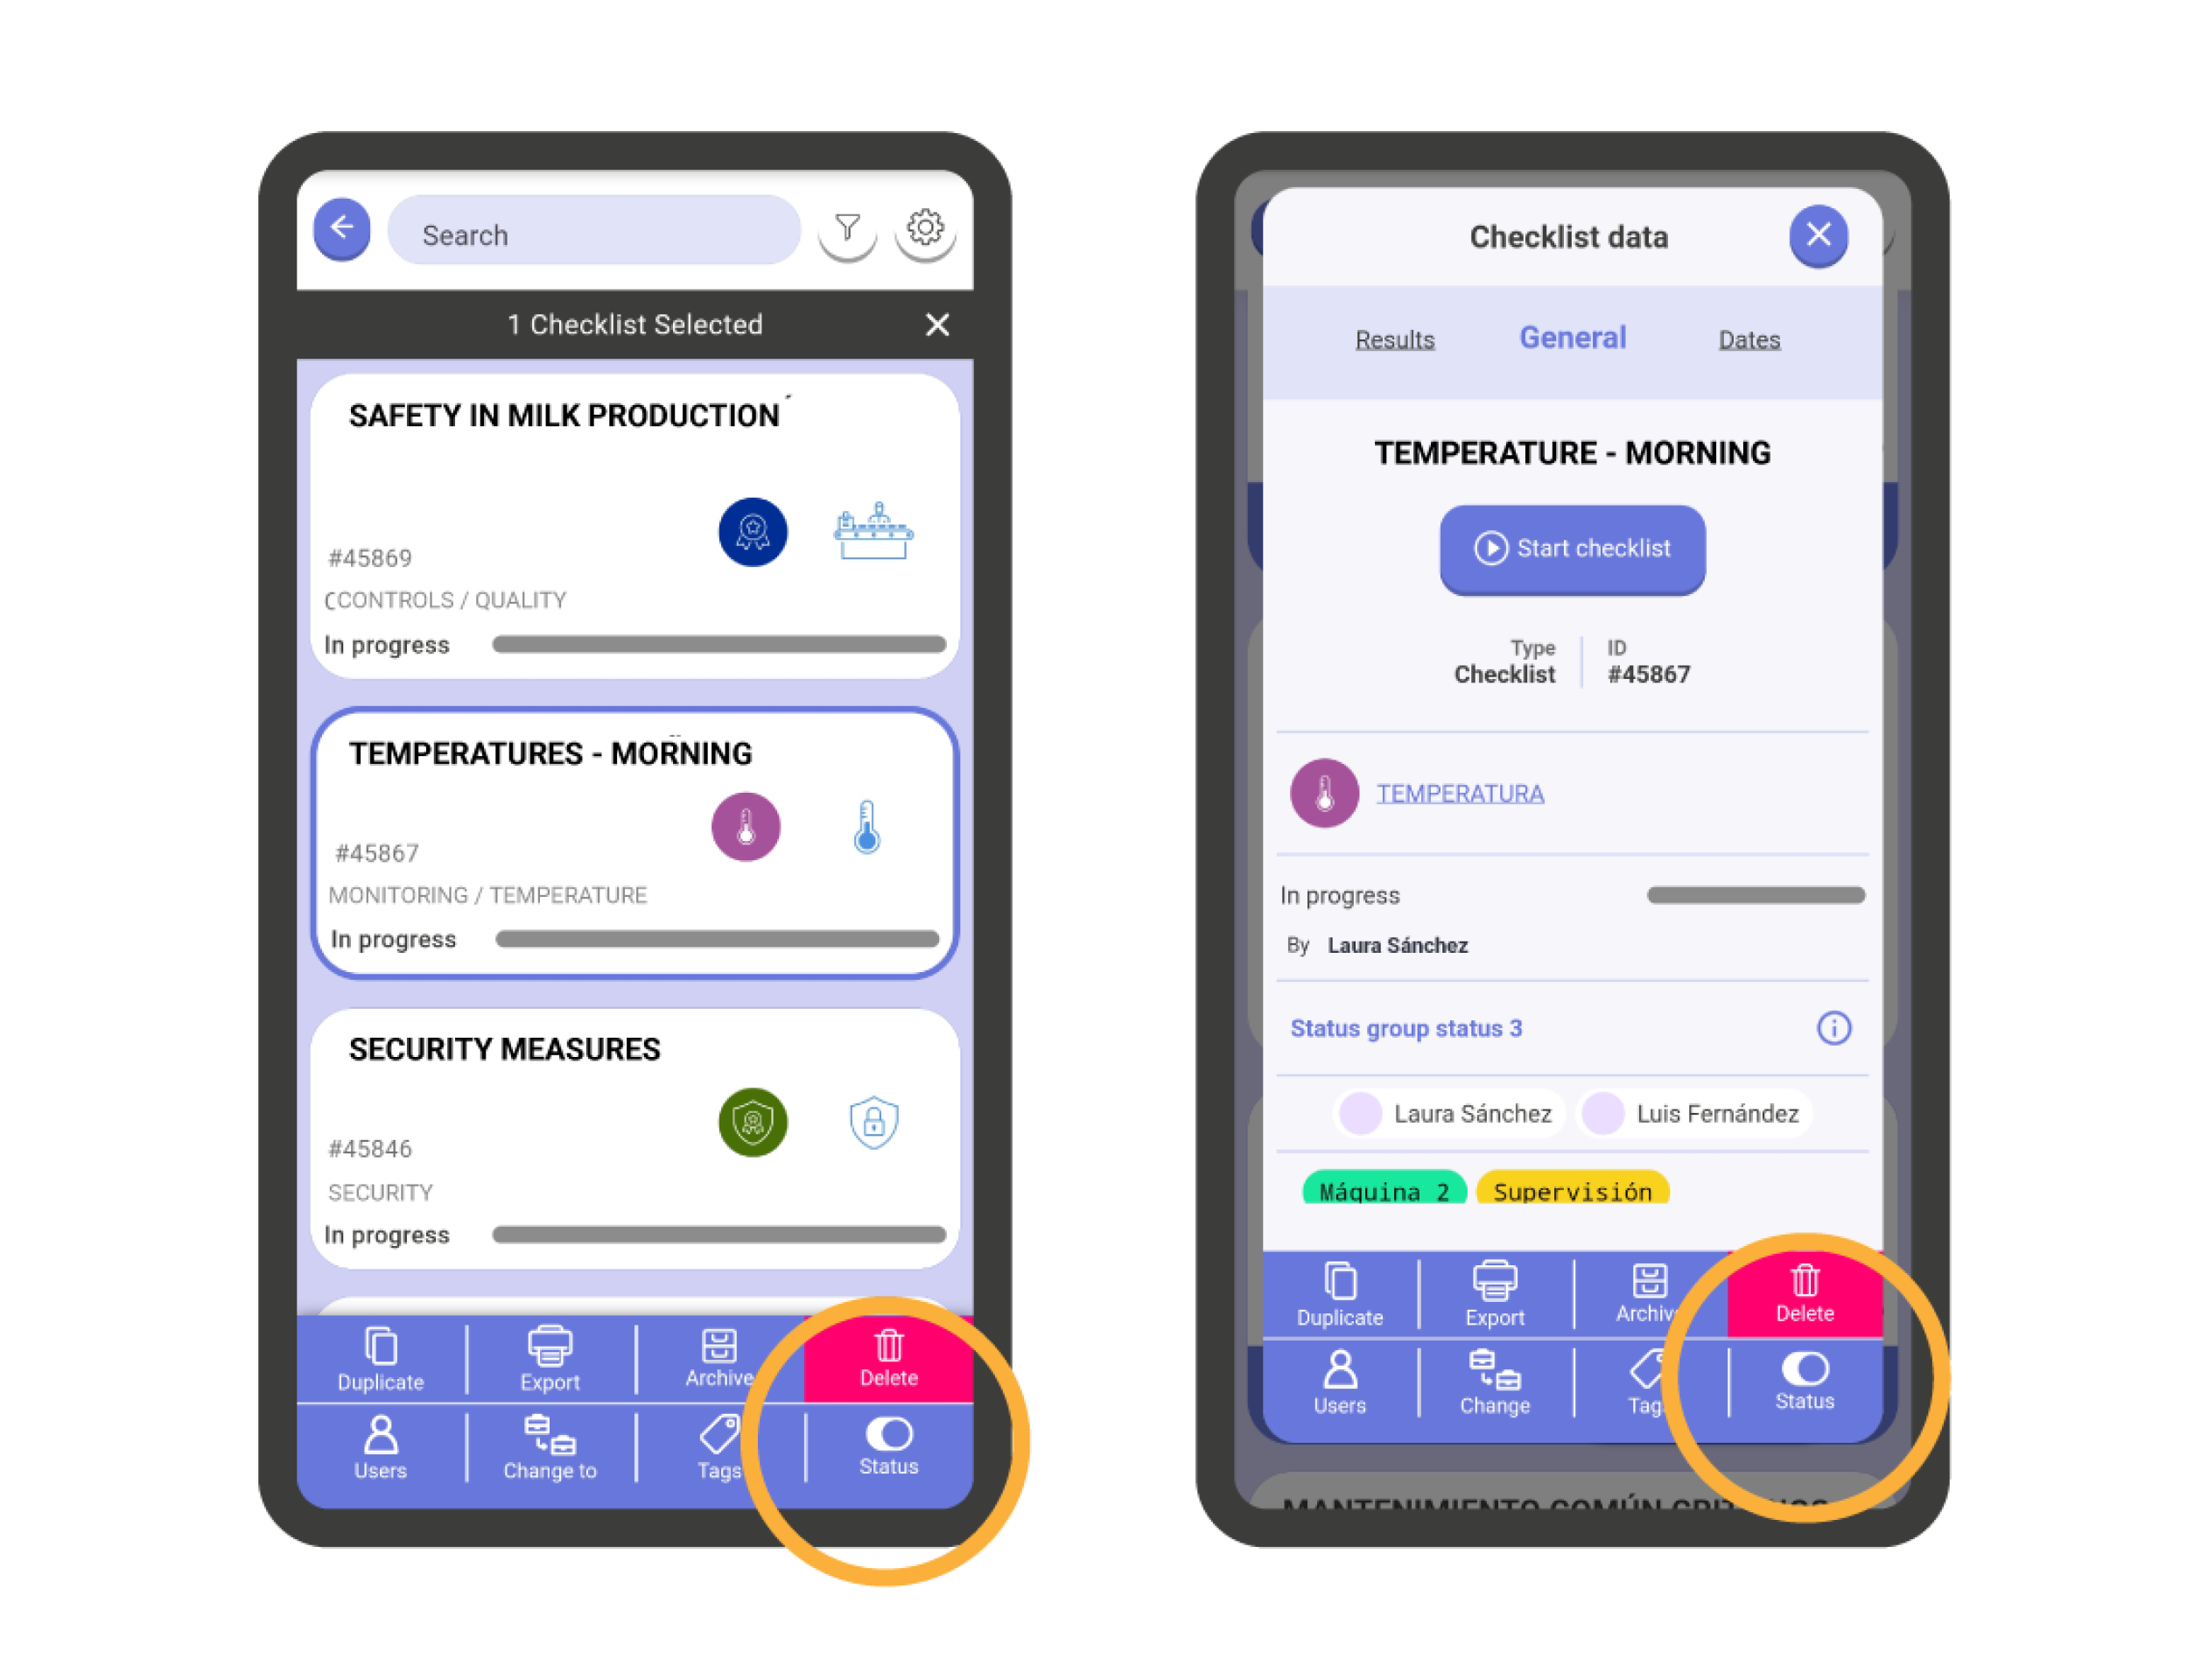
To select a checklist card, tap on the white part of it and hold your finger down for one second. You will see a colored border appear around the card. This means the card is selected. If you want to select more cards, tap on the ones you want to select.
If you want to deselect a card, tap it again. If you want to deselect all cards, tap the ‘X’ on the info bar where the number of selected checklists is displayed.
Individual Actions These are the actions that are carried out on a single checklist. The available individual actions are:
- Duplicate
- Export
- Archive
- Delete
- Add Users
- Change Department
- Manage Tags
- Manage States
Multiple Actions When more than one checklist is selected, the available actions are reduced compared to individual actions. The available multiple actions are:
- Duplicate
- Export
- Archive
- Delete
- Manage Users

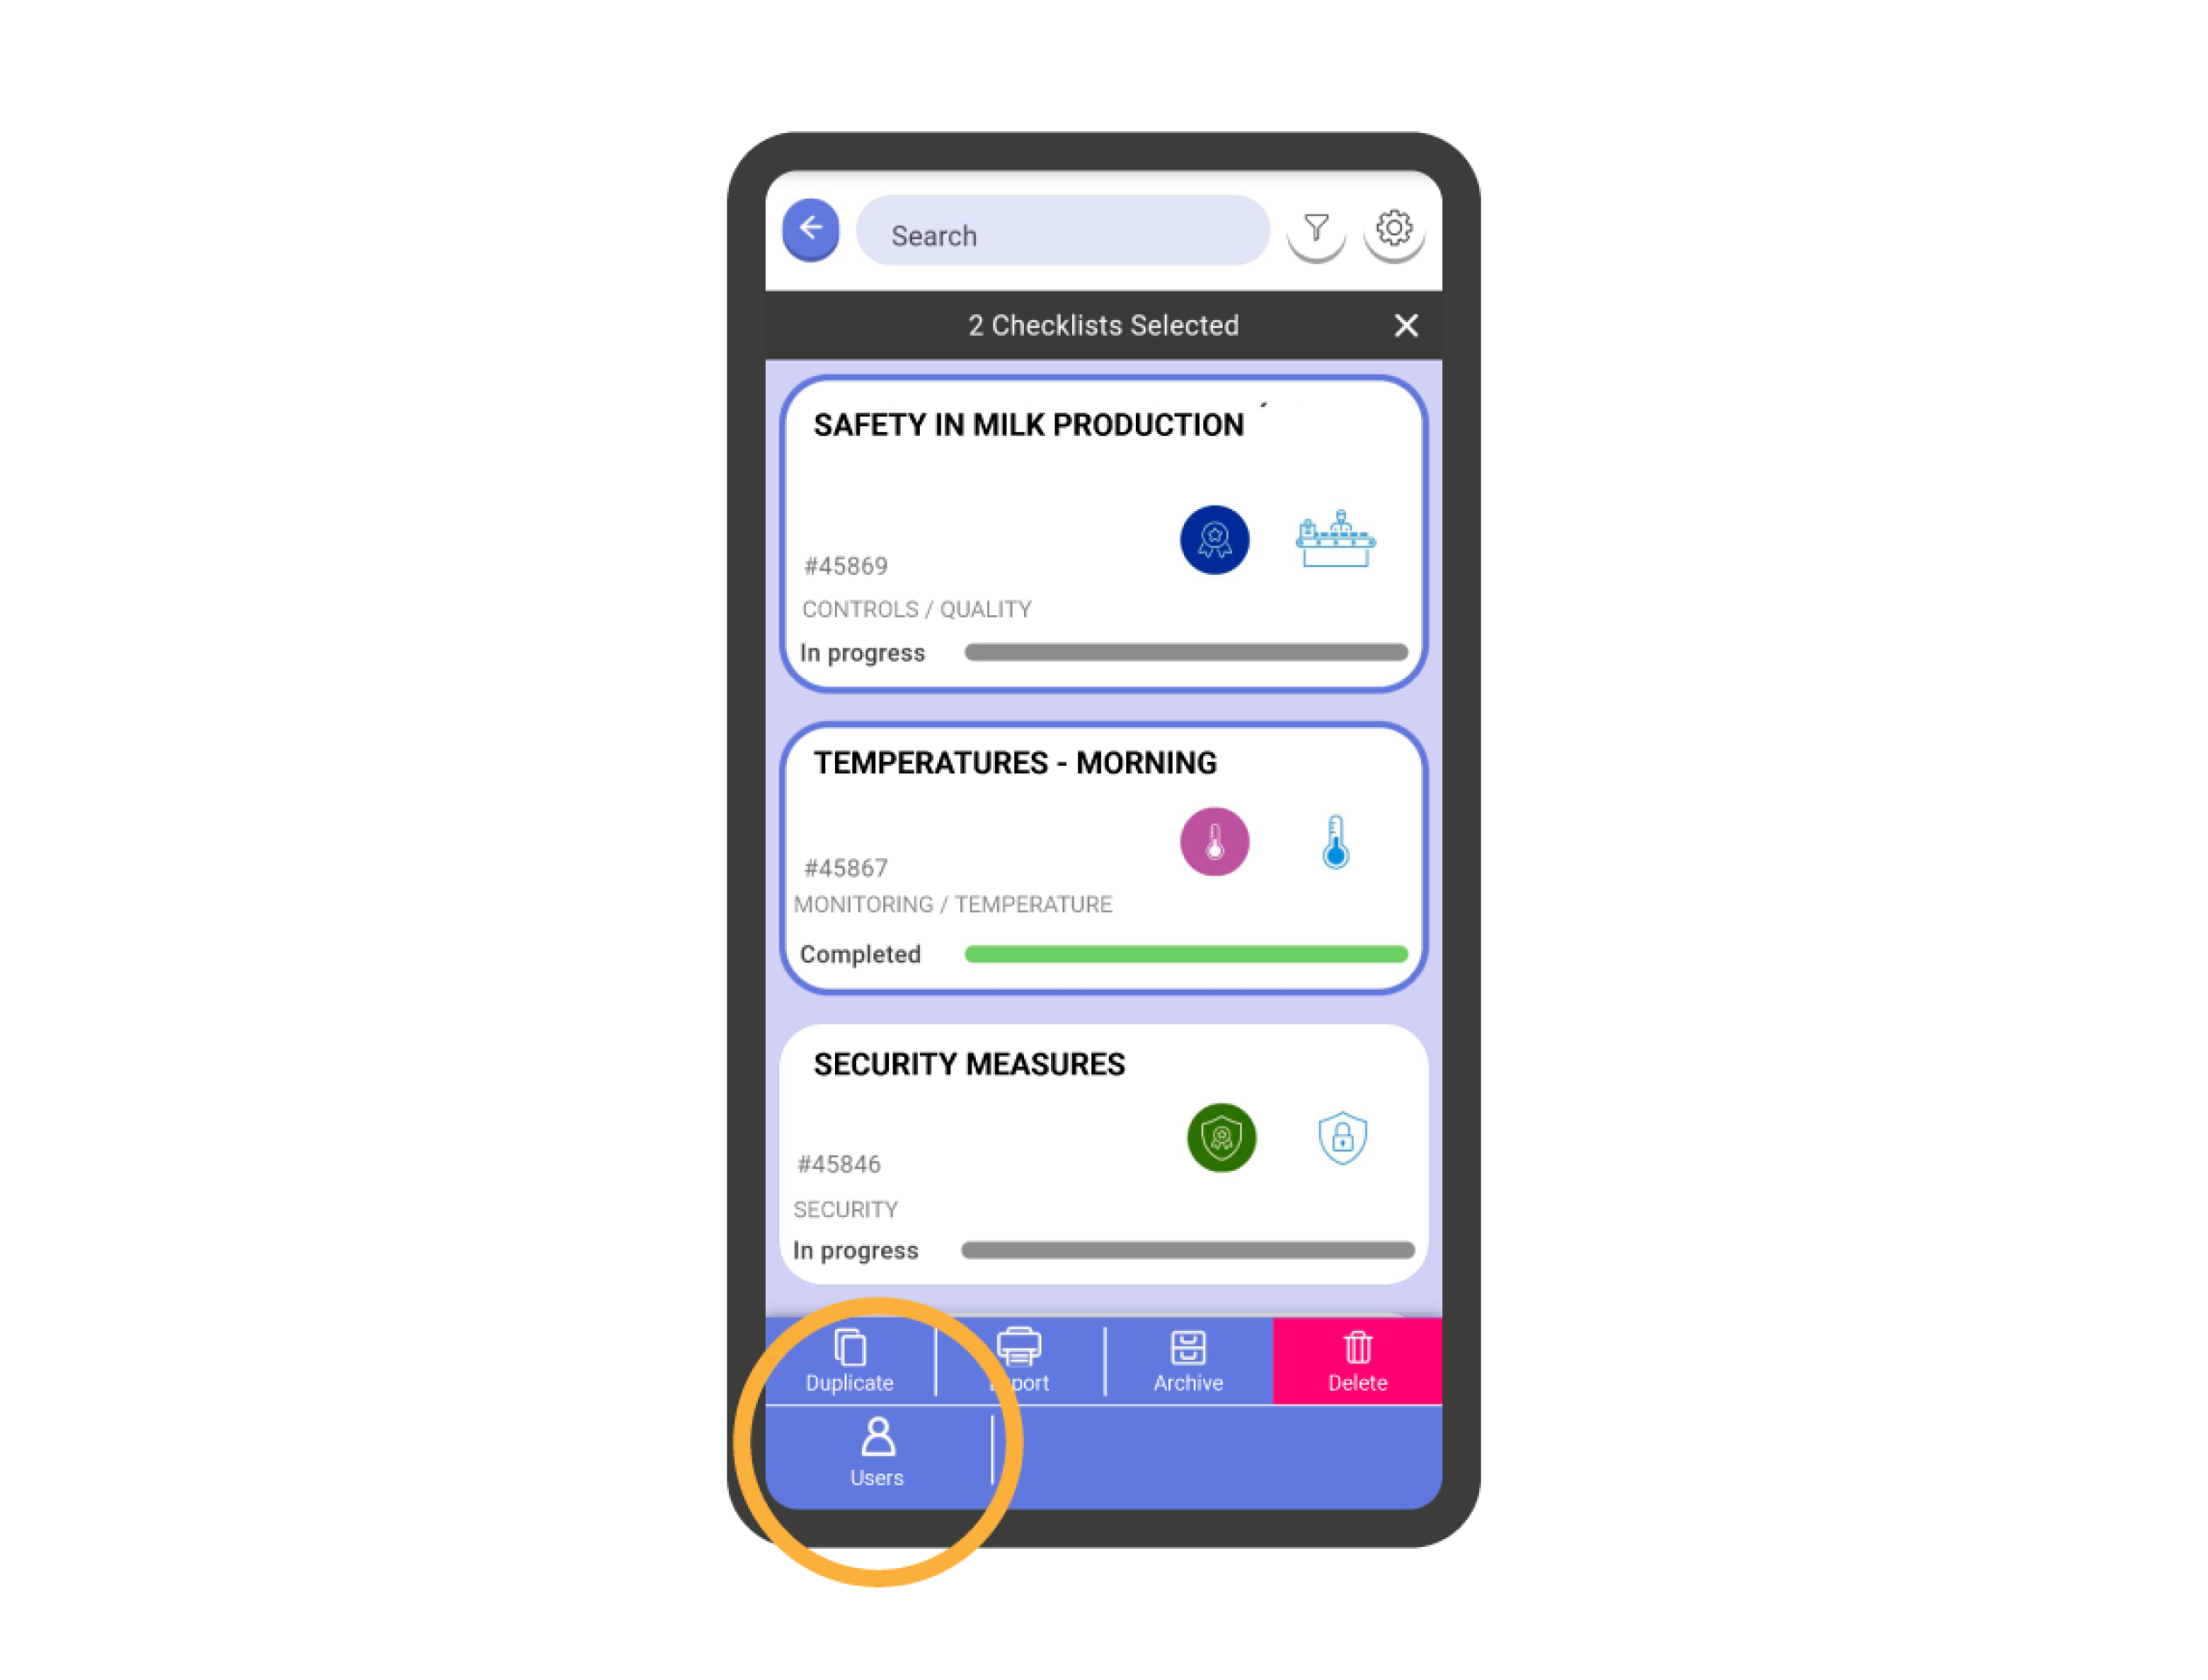
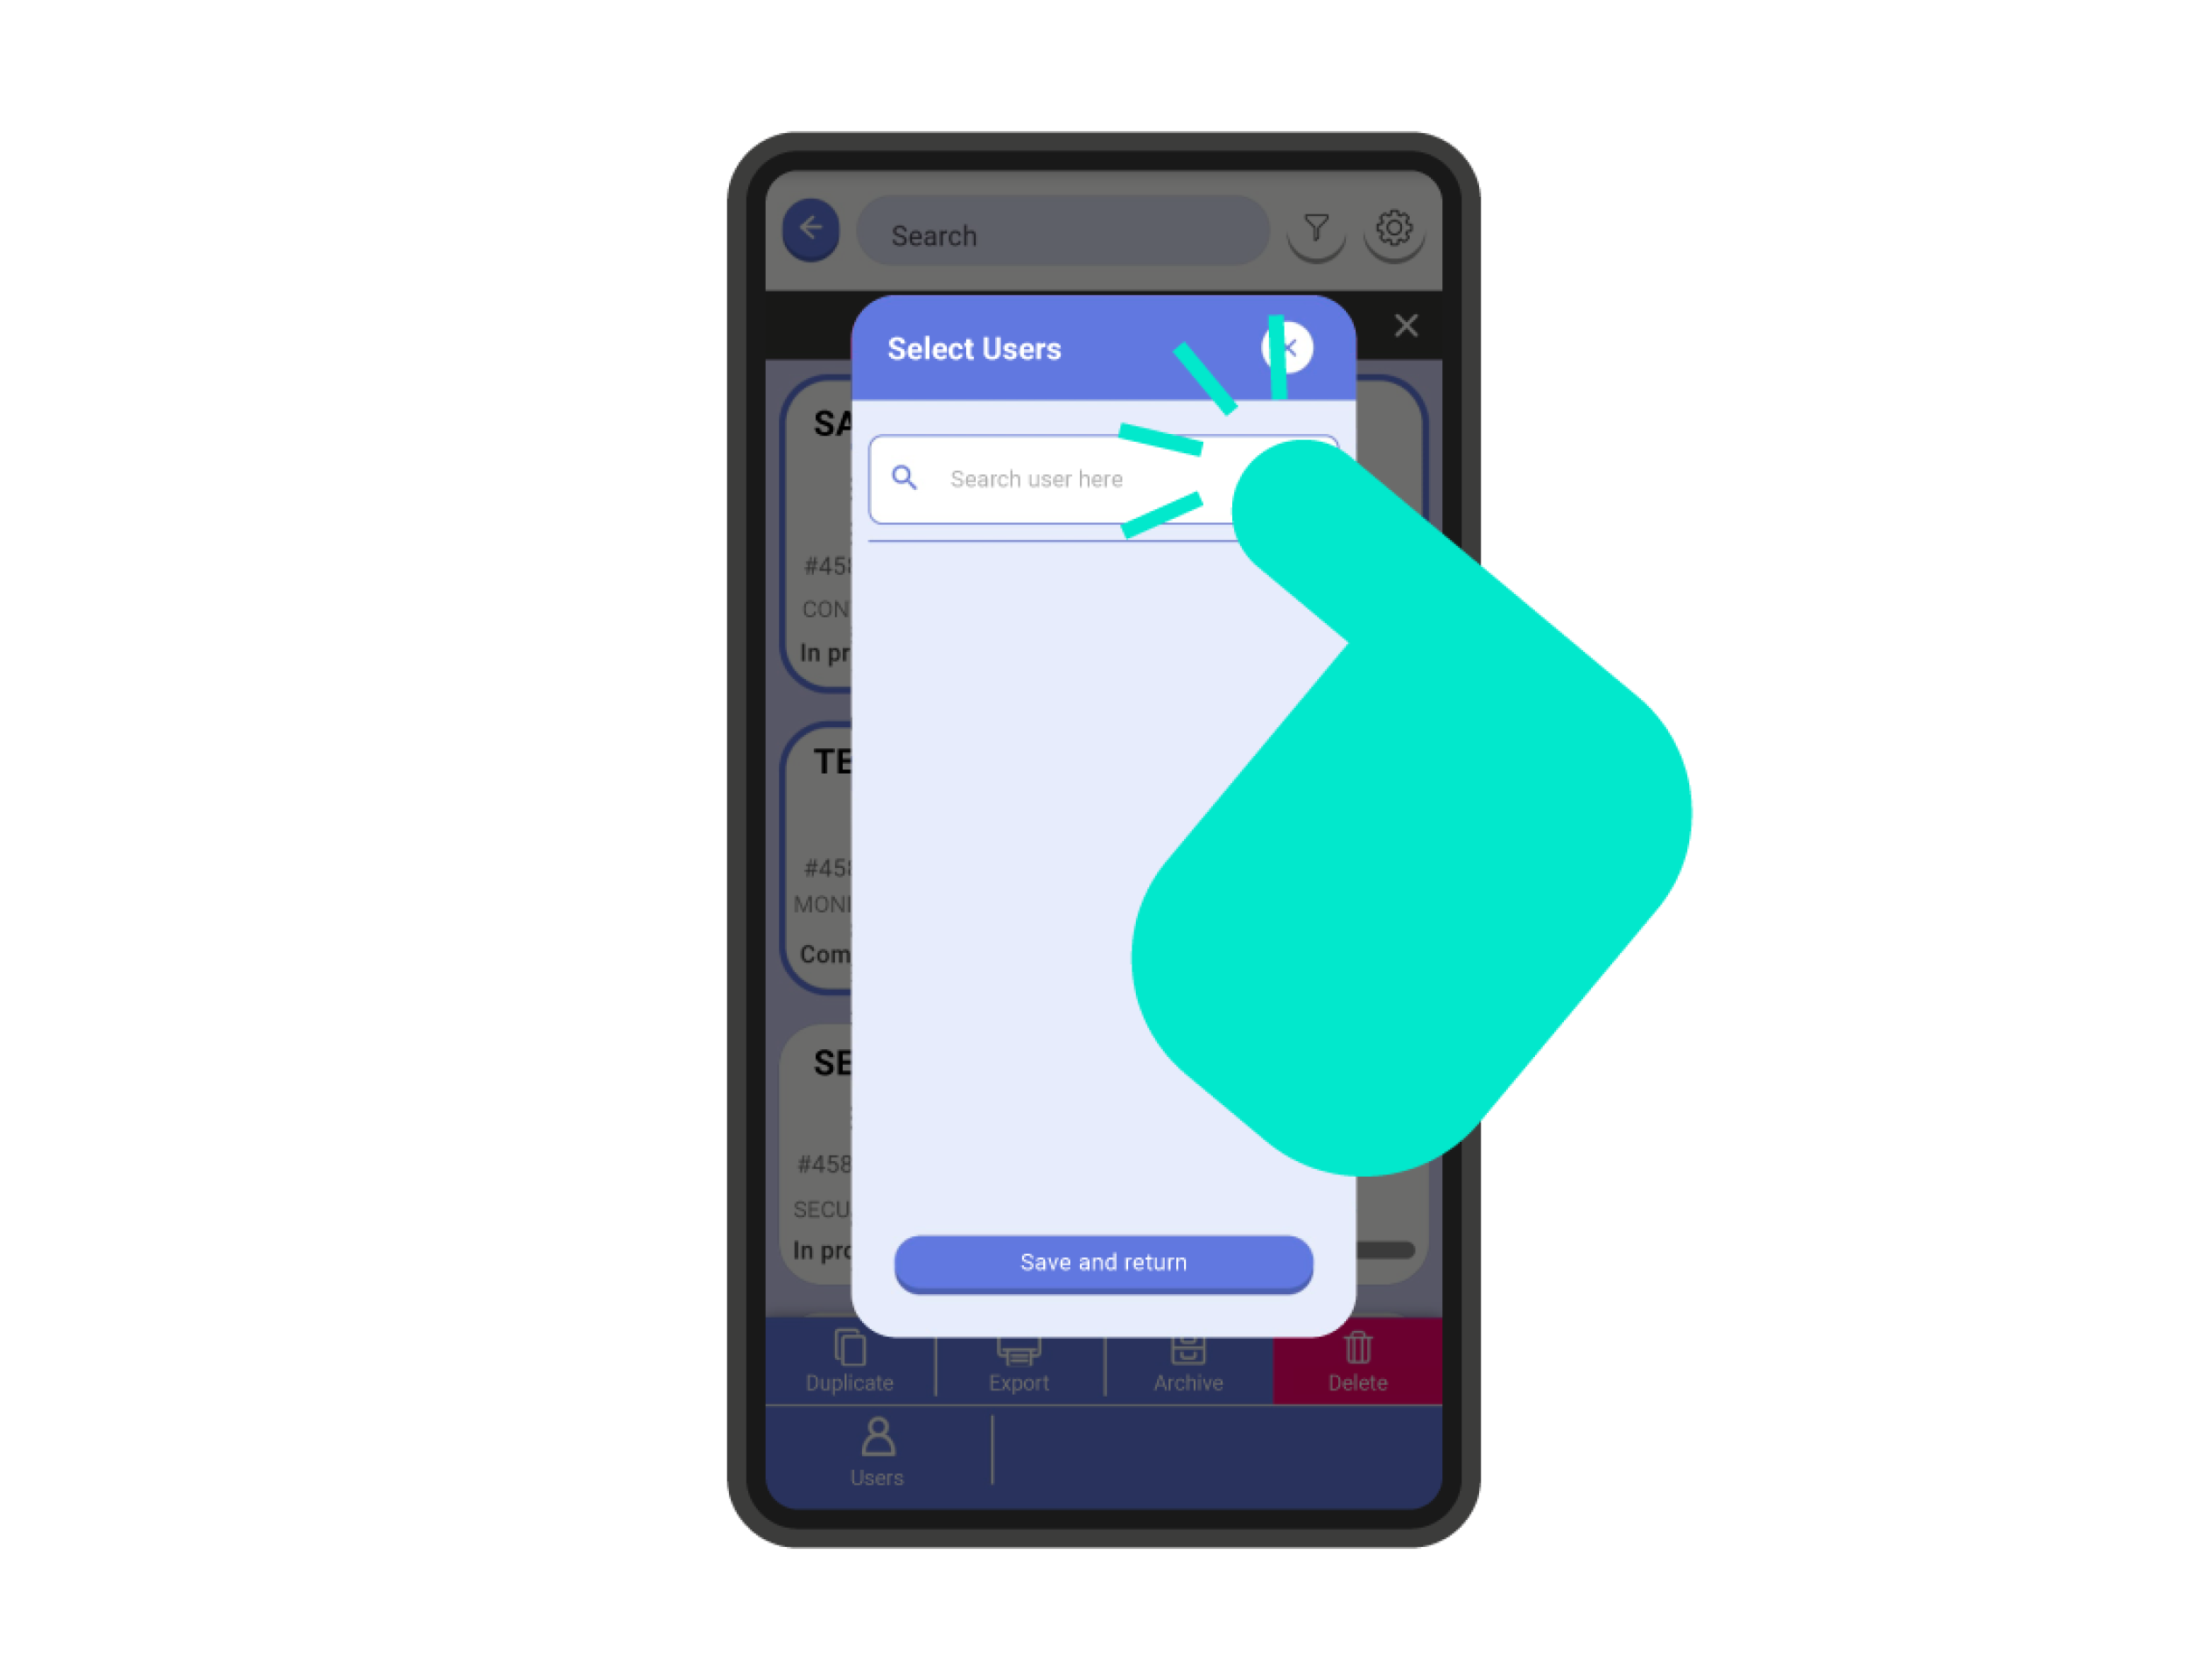
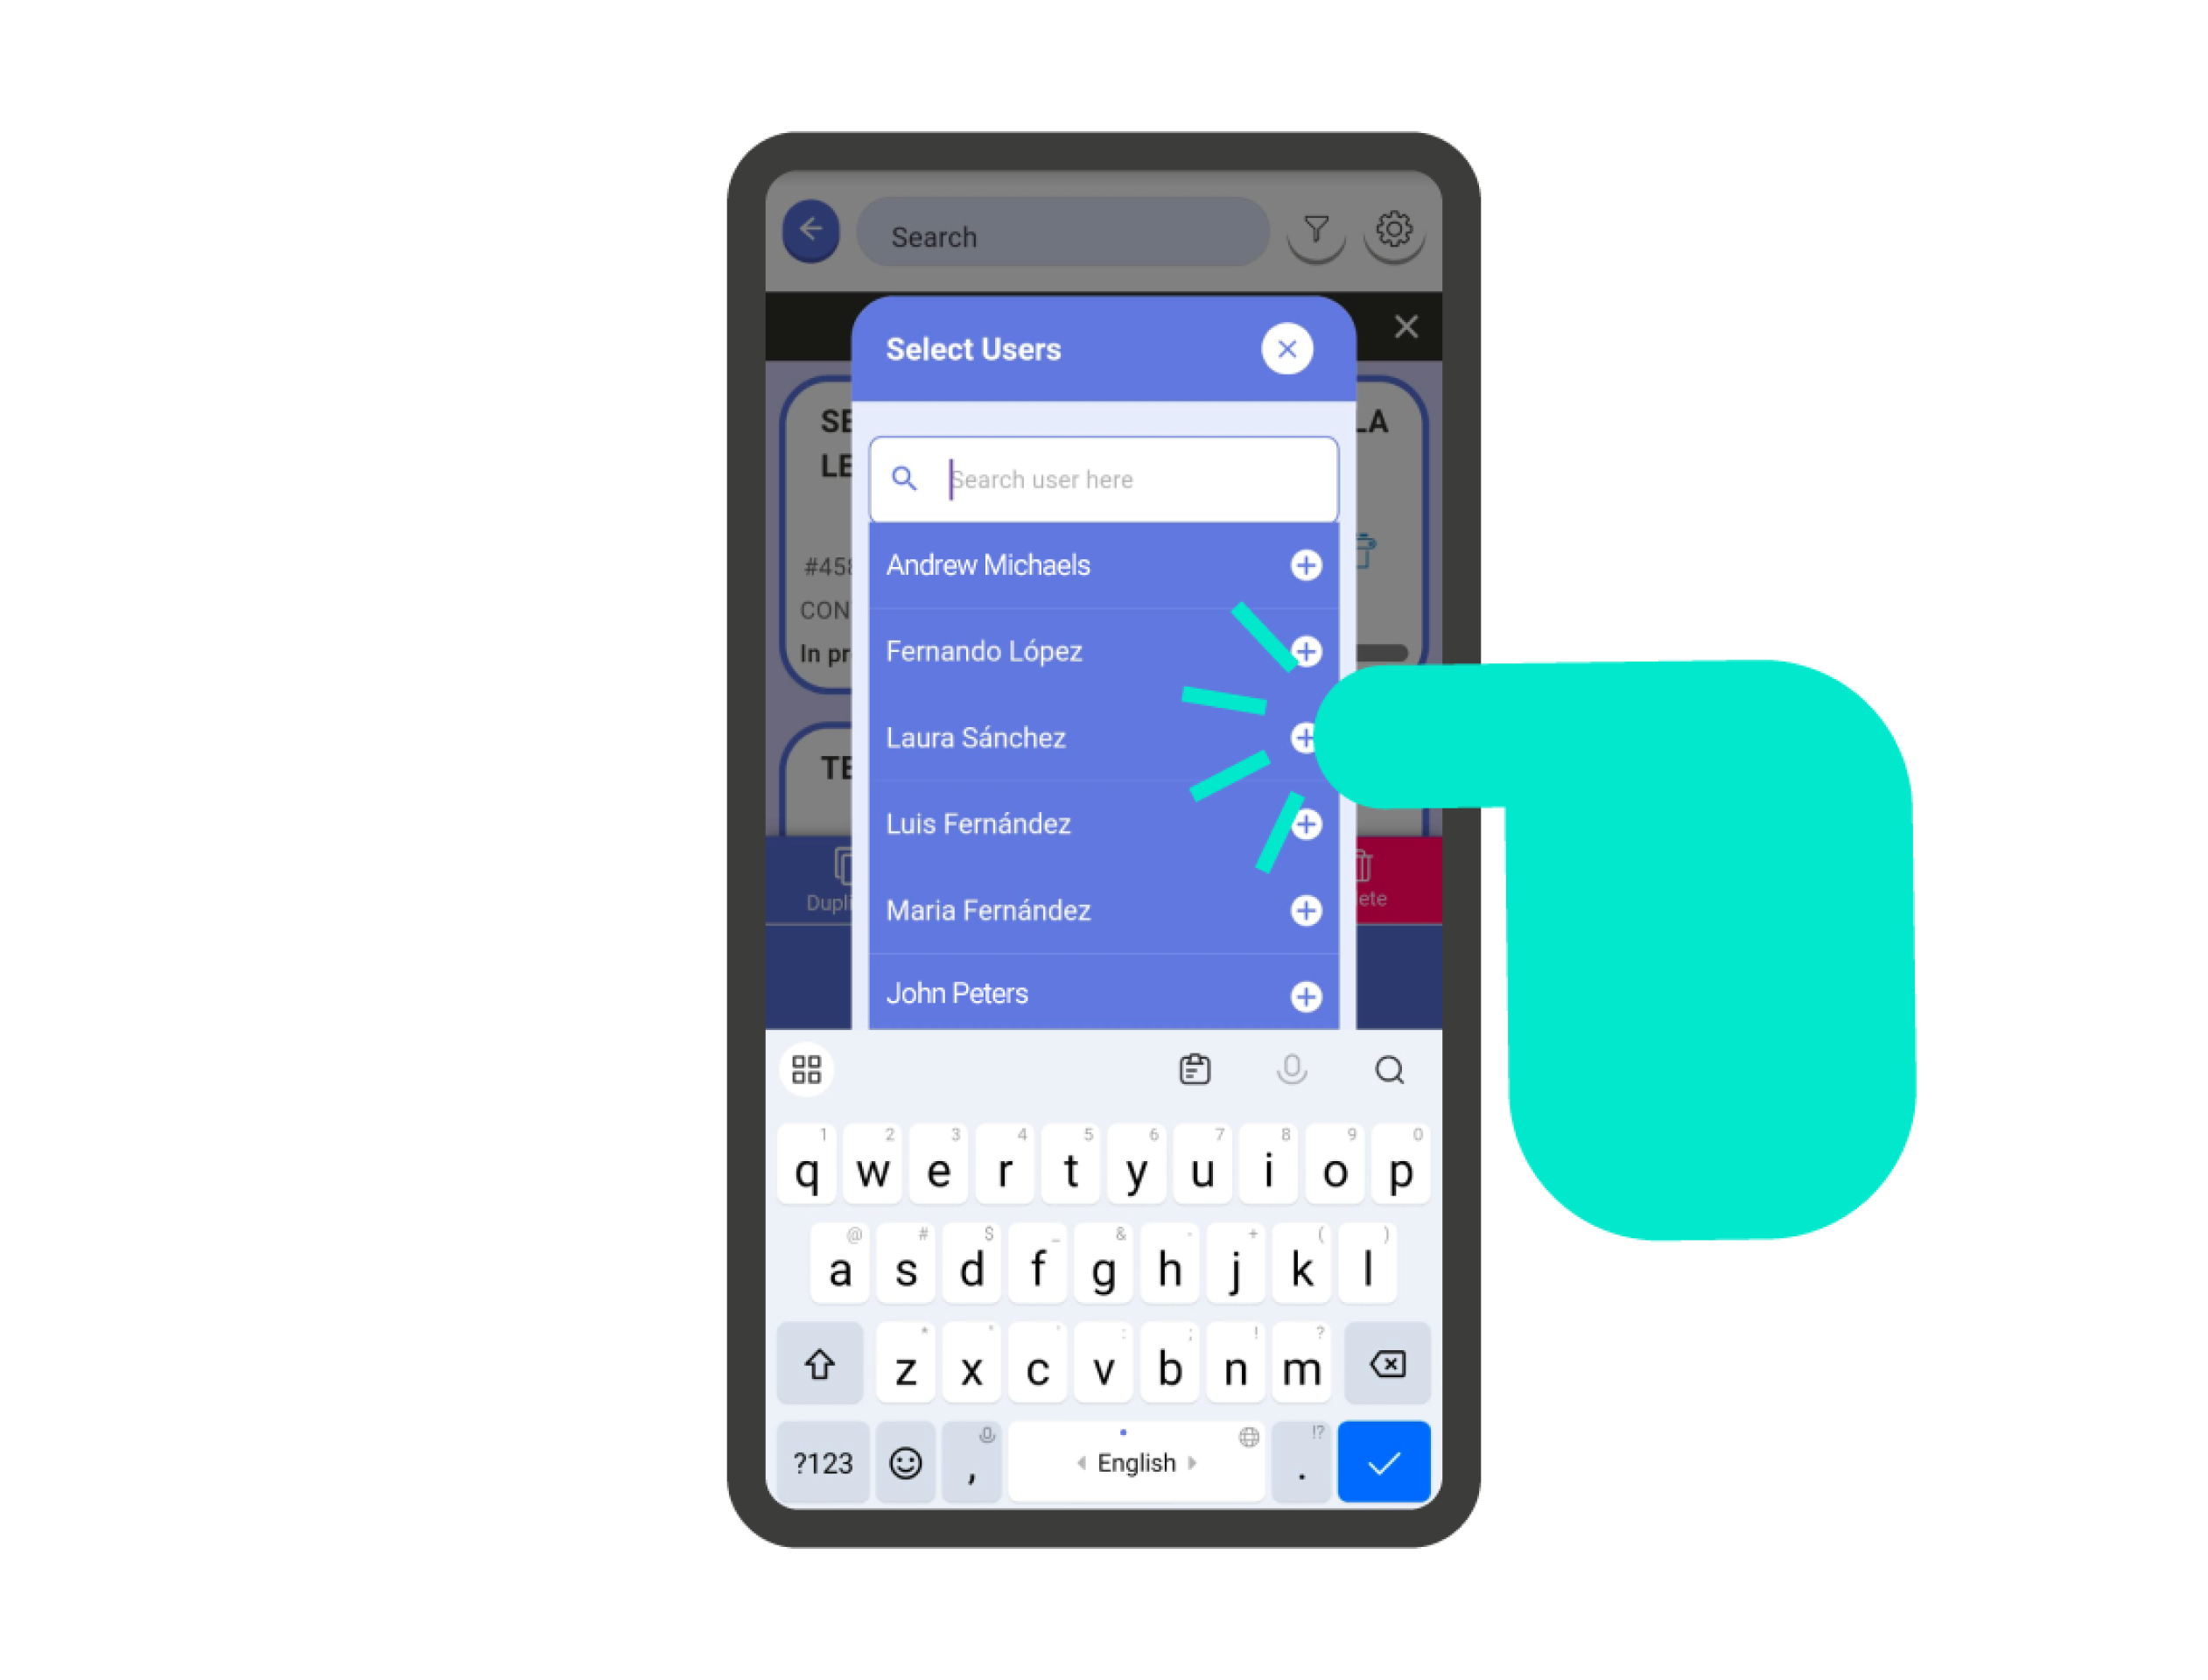
Assign Users to a Checklist #
To assign a user to a checklist, follow these steps:
- Select the checklist(s) according to the method explained in the point ‘Actions and Selection of Checklists’.
- Click on the ‘Users’ button at the bottom bar of the screen.
- Search for the user in the search field.
- Click on the username or usernames you want to assign.
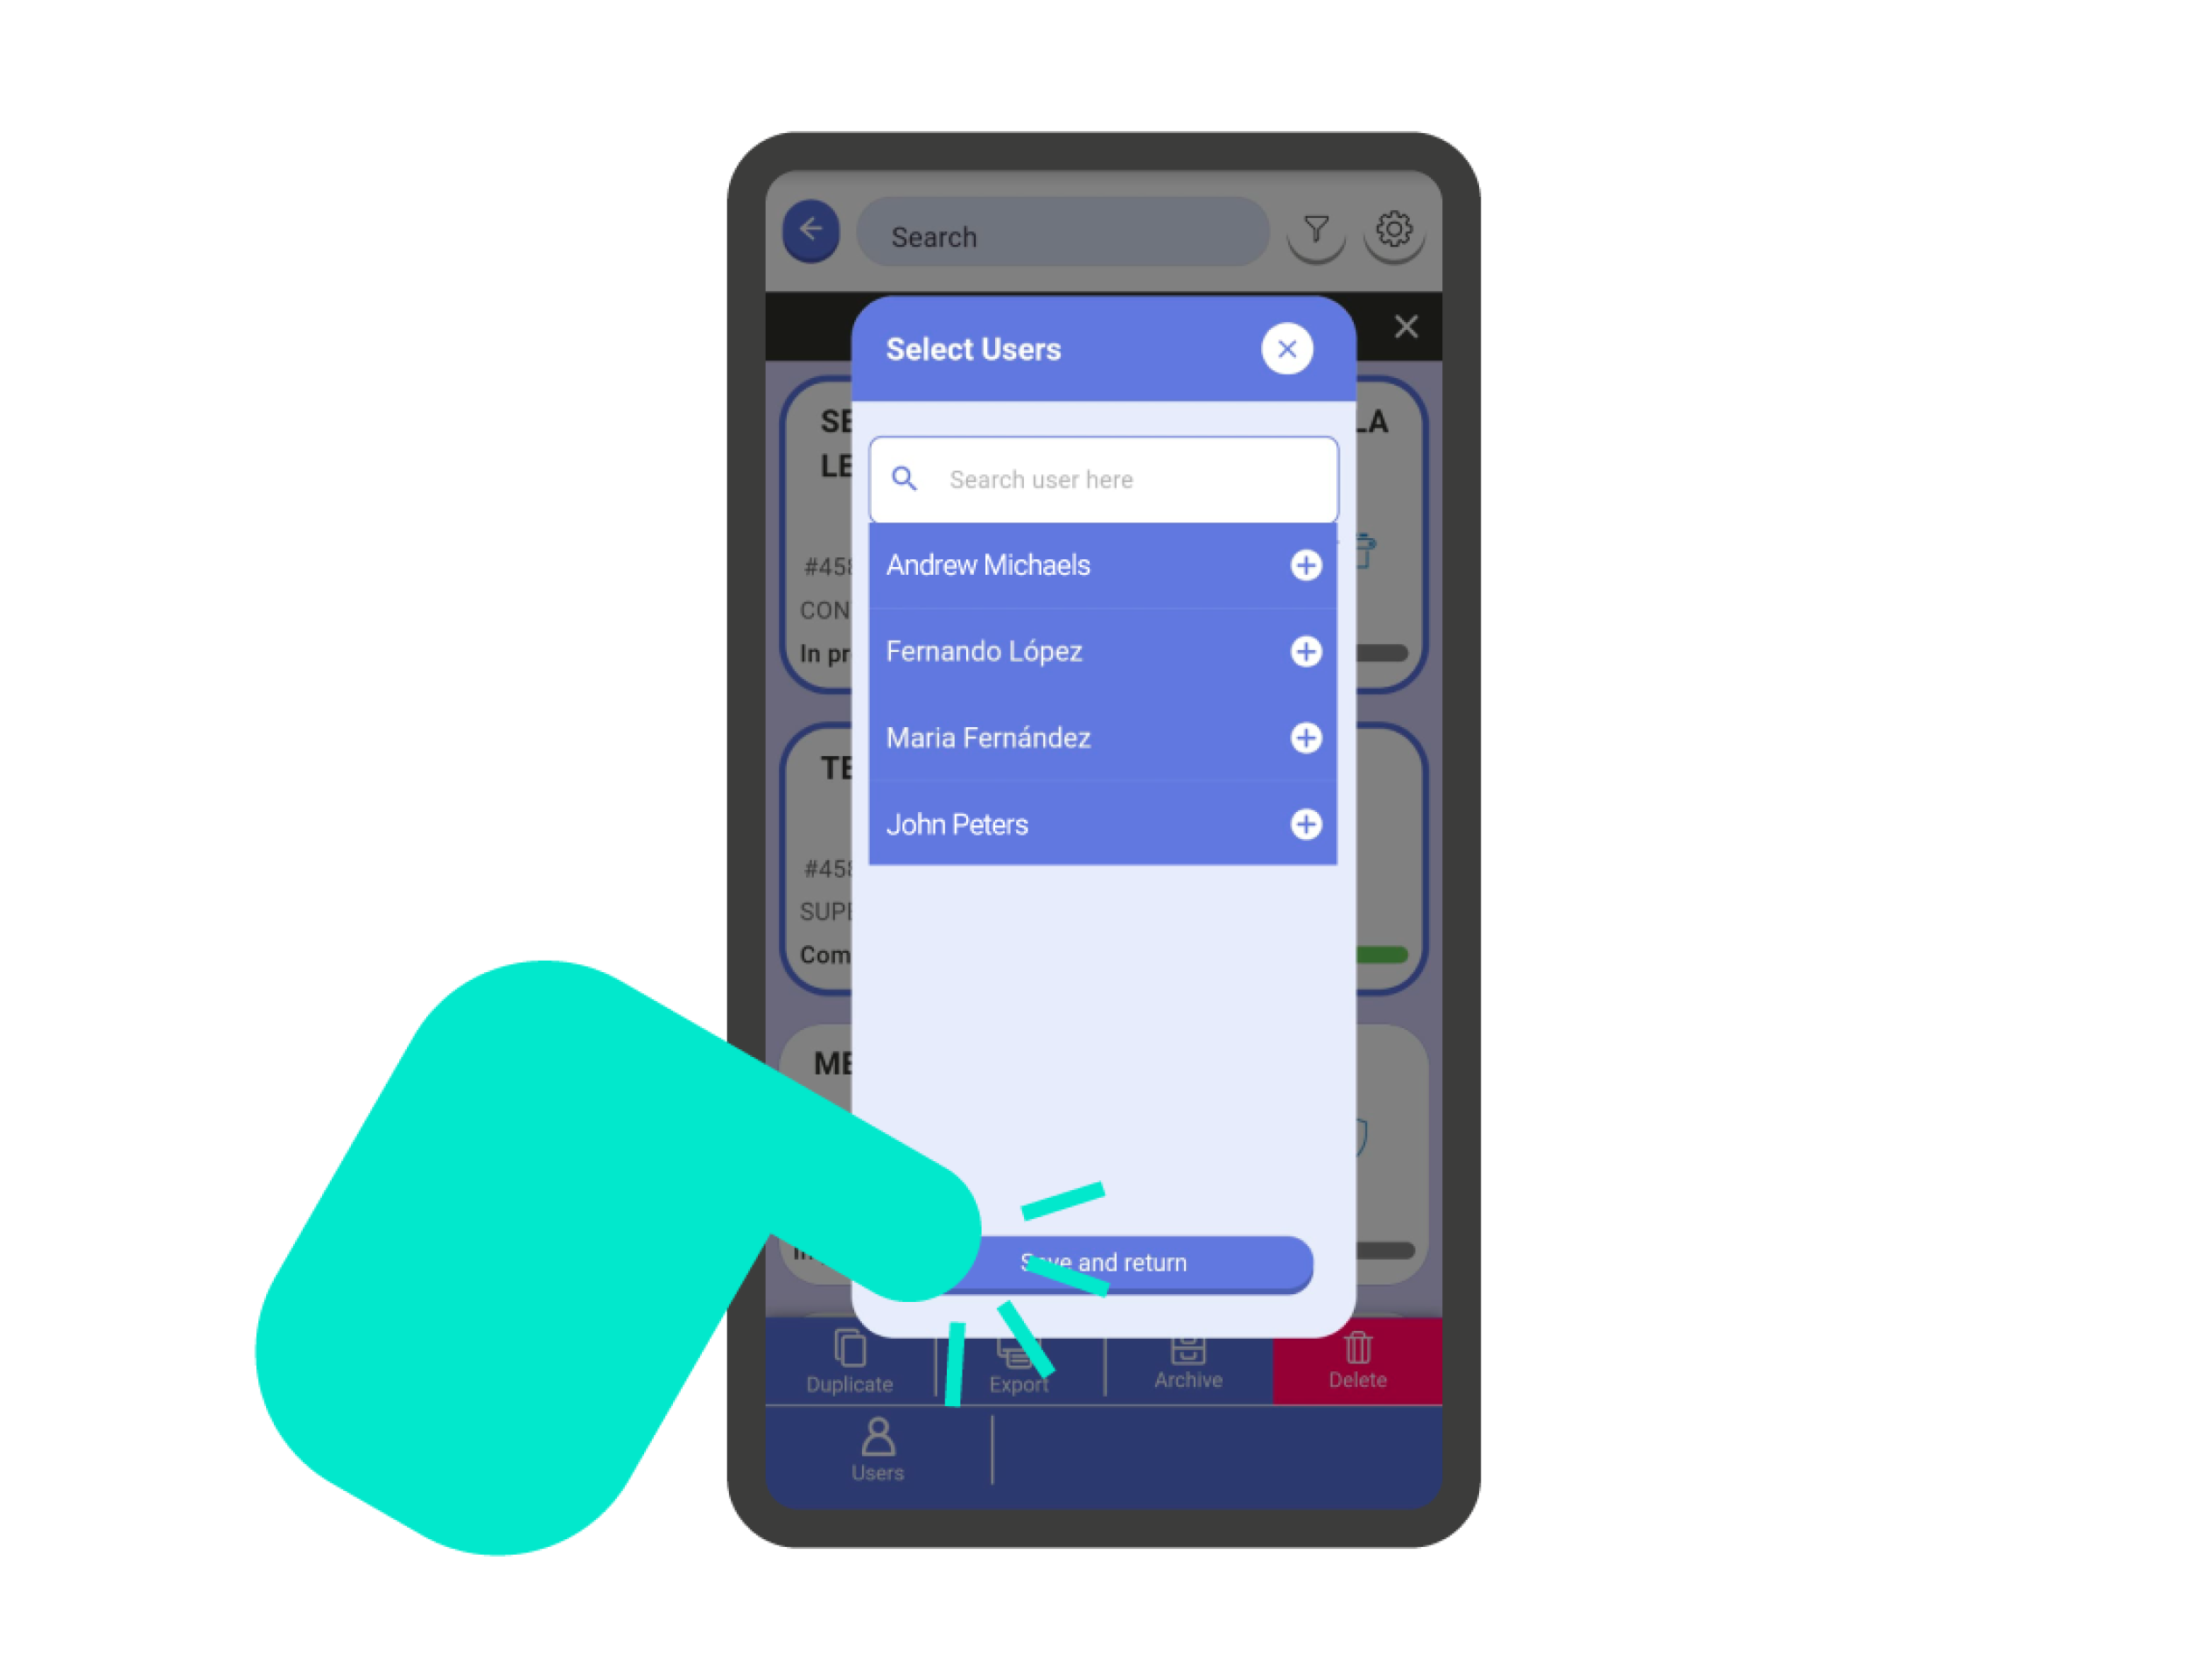
- Click on the ‘Save and Return’ button.
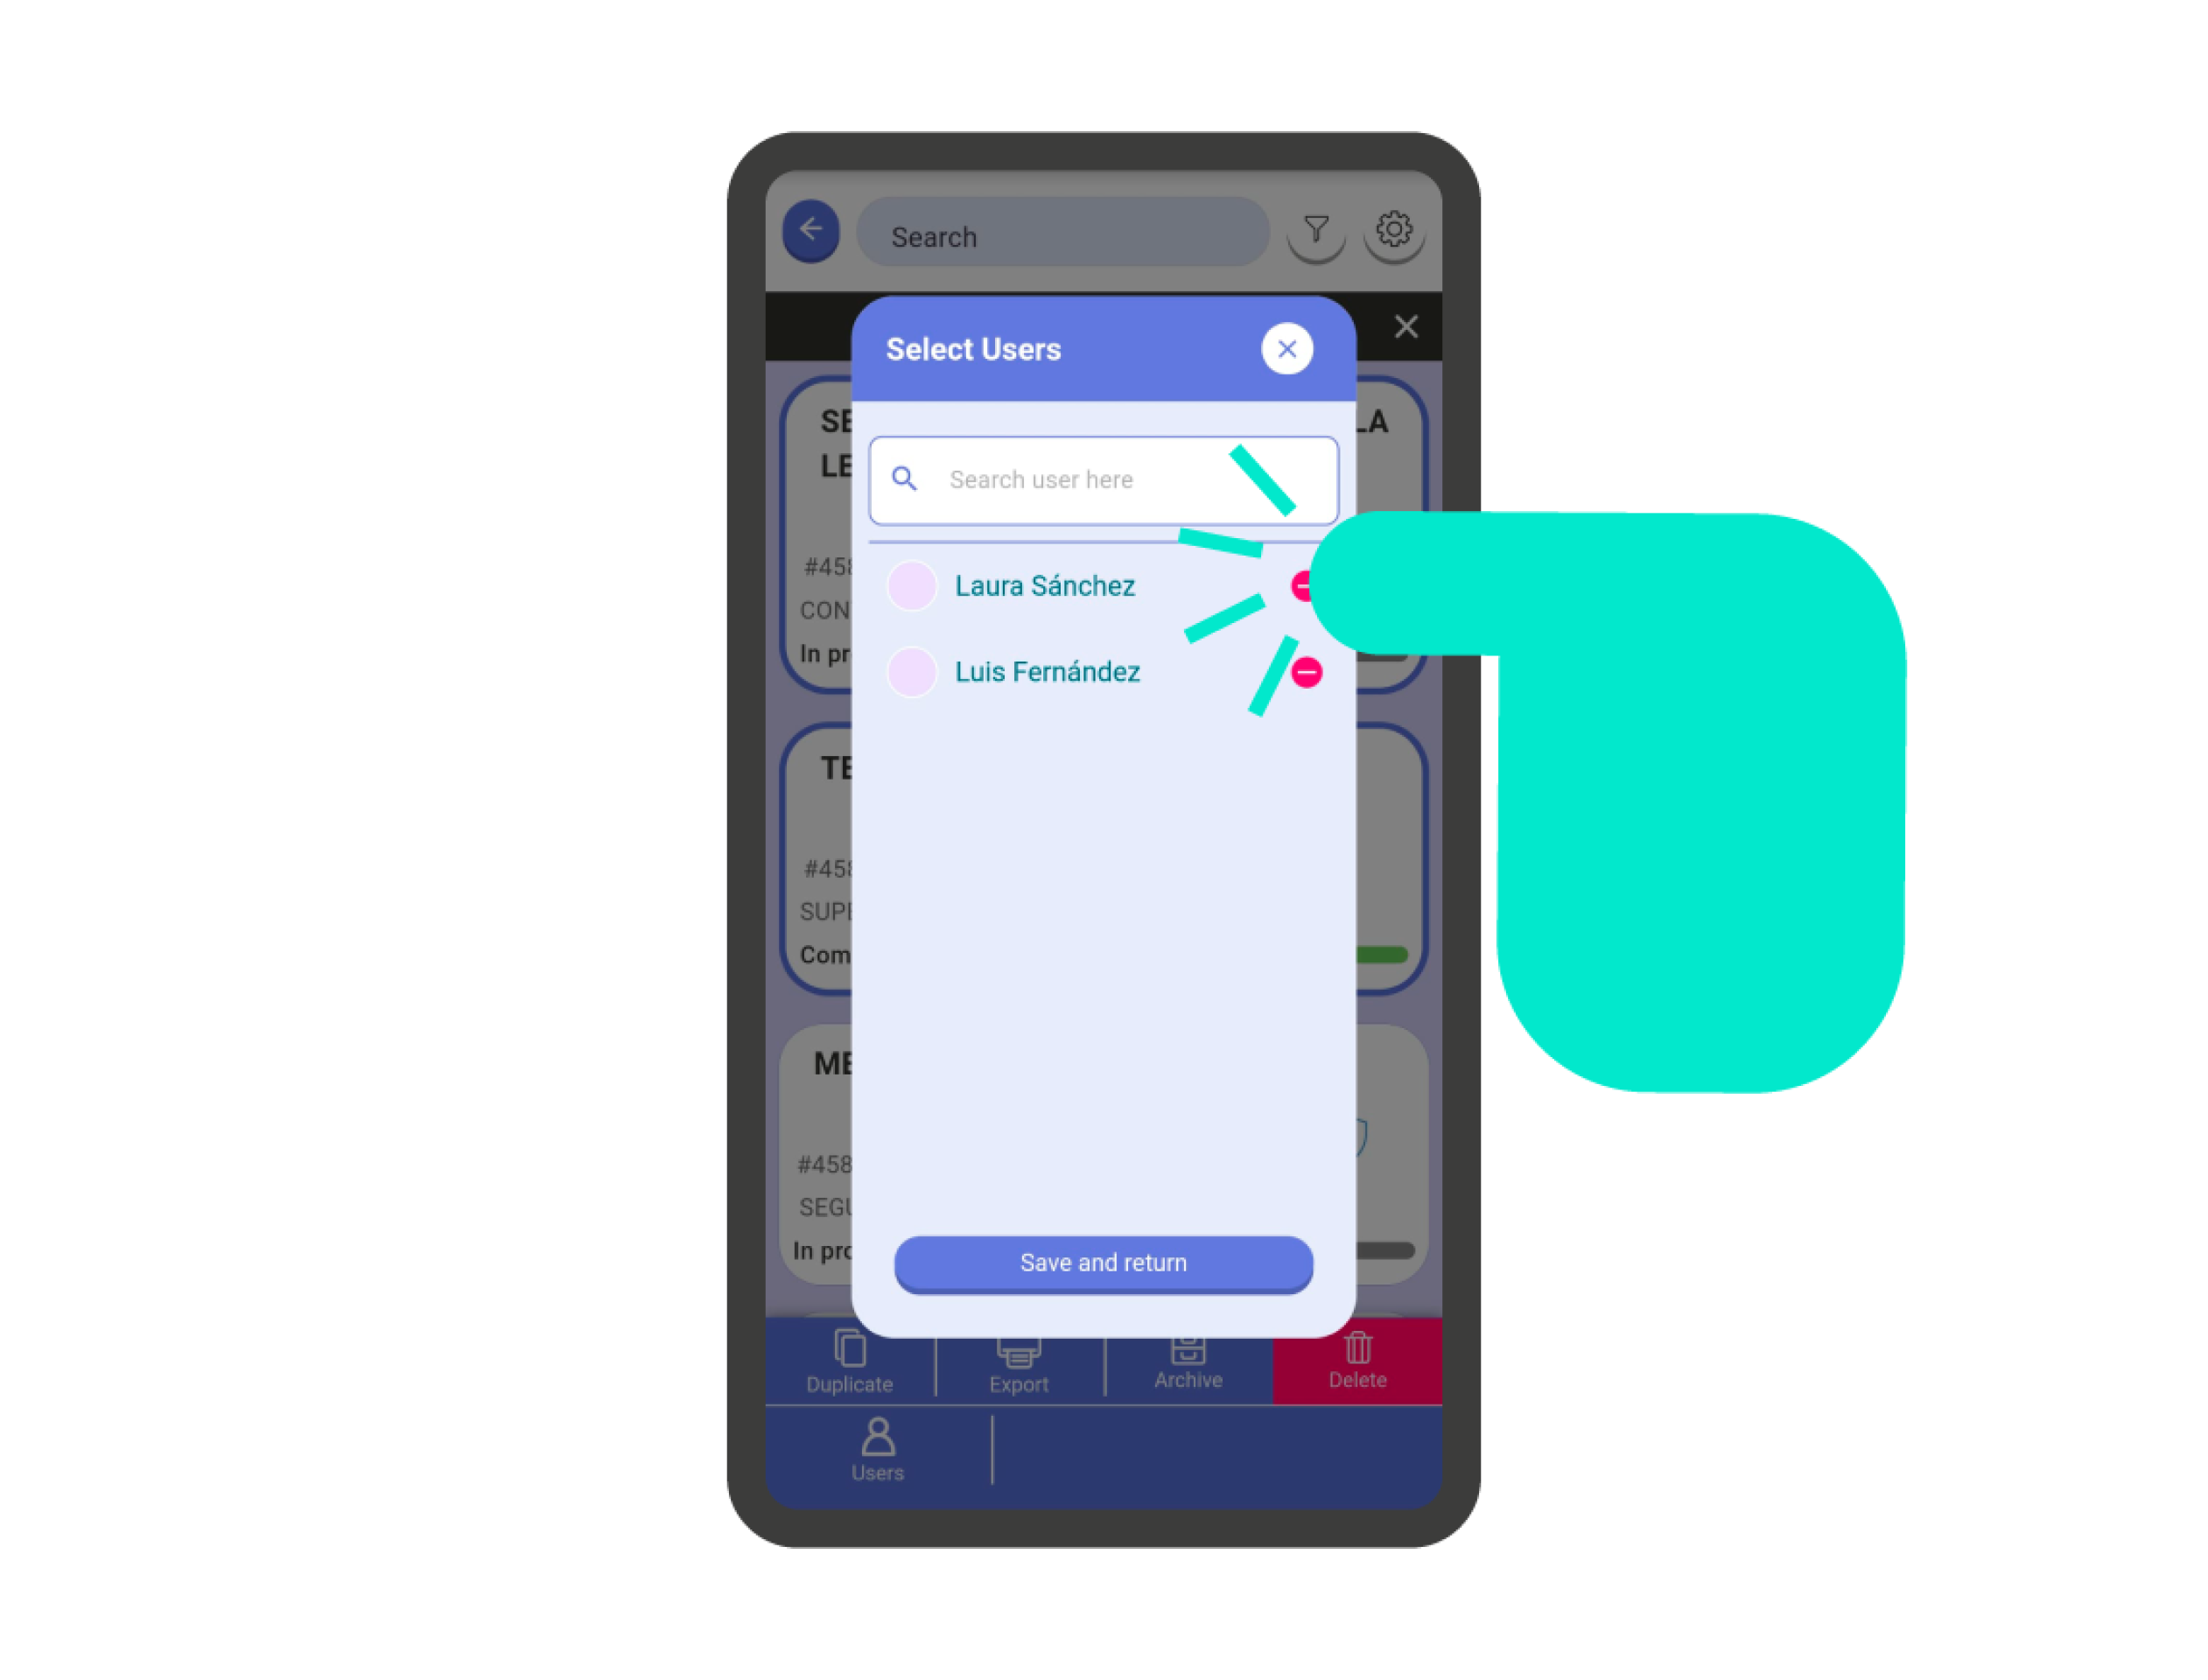
To remove a user’s assignment, you must follow this process:
- Select the checklist again and click on the ‘Users’ button again.
- Select the user or users you want to remove by clicking on the ‘remove’ icon on the right side of the name.
- Click on the ‘Save and Return’ button.
Important! This action can be performed both individually and in multiple mode.
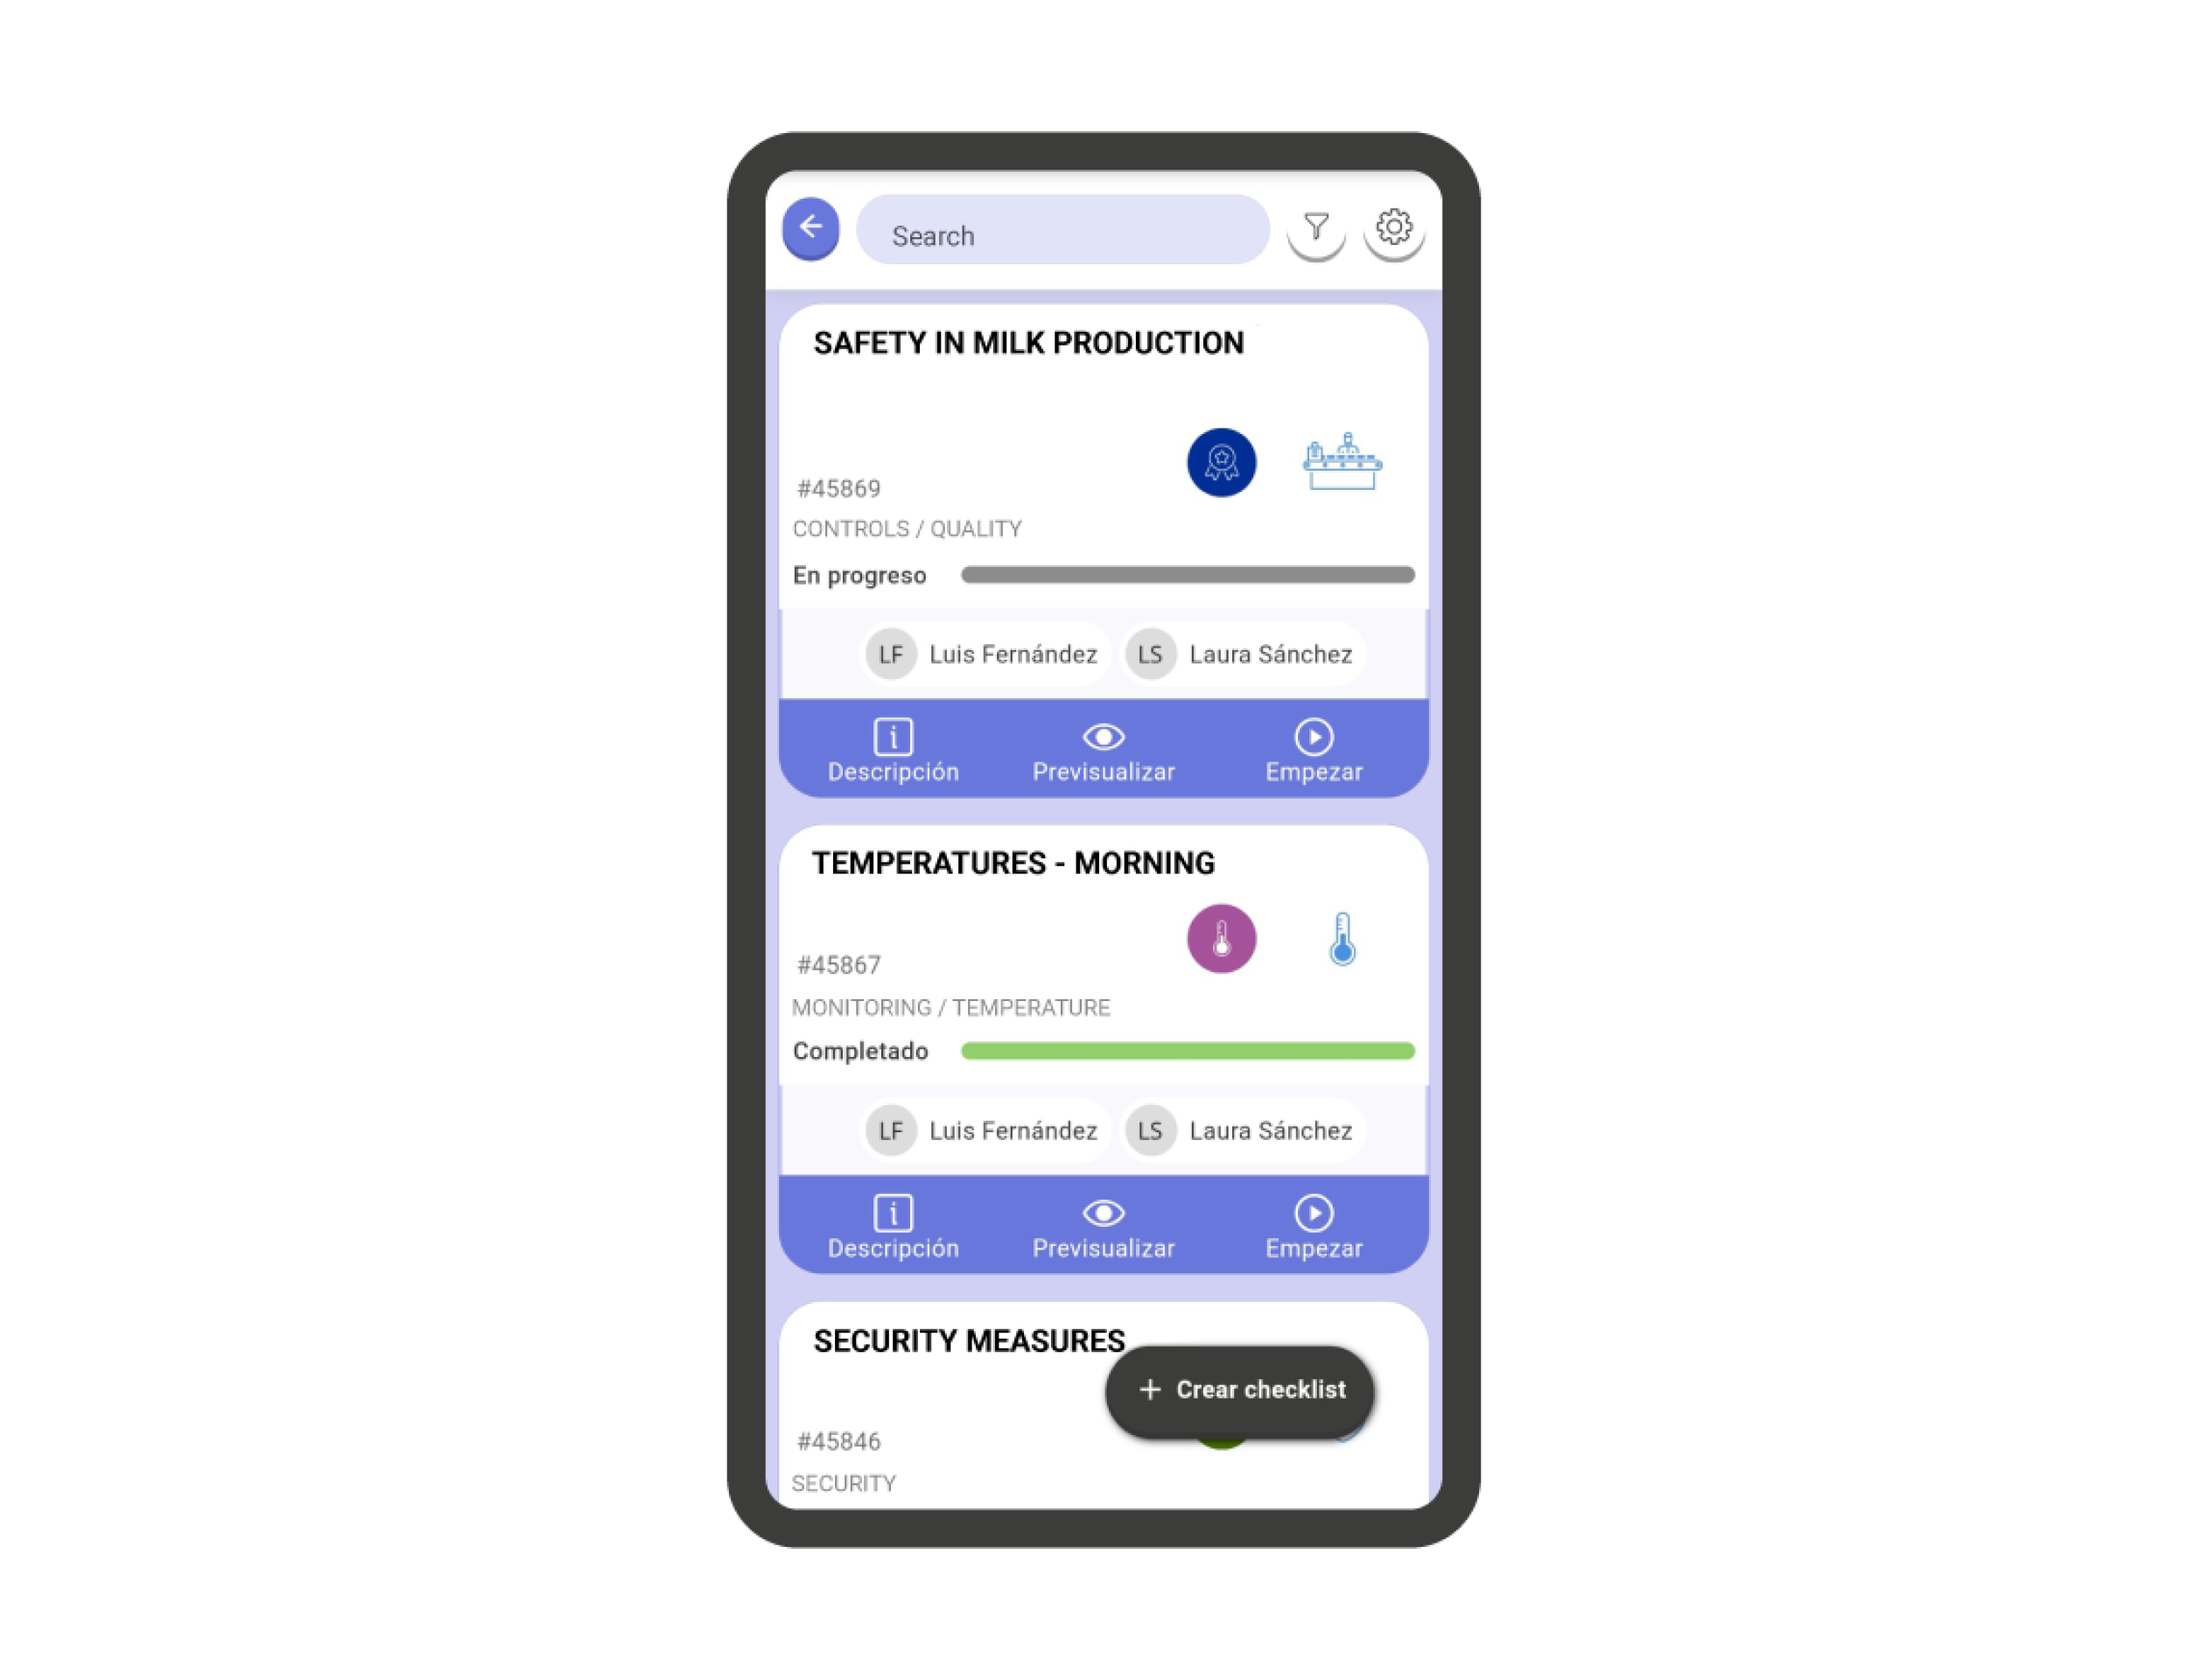
Important! If in your card view the ‘Assigned Users’ configuration option is not enabled, you will not see the users assigned to the checklist in the reduced view.
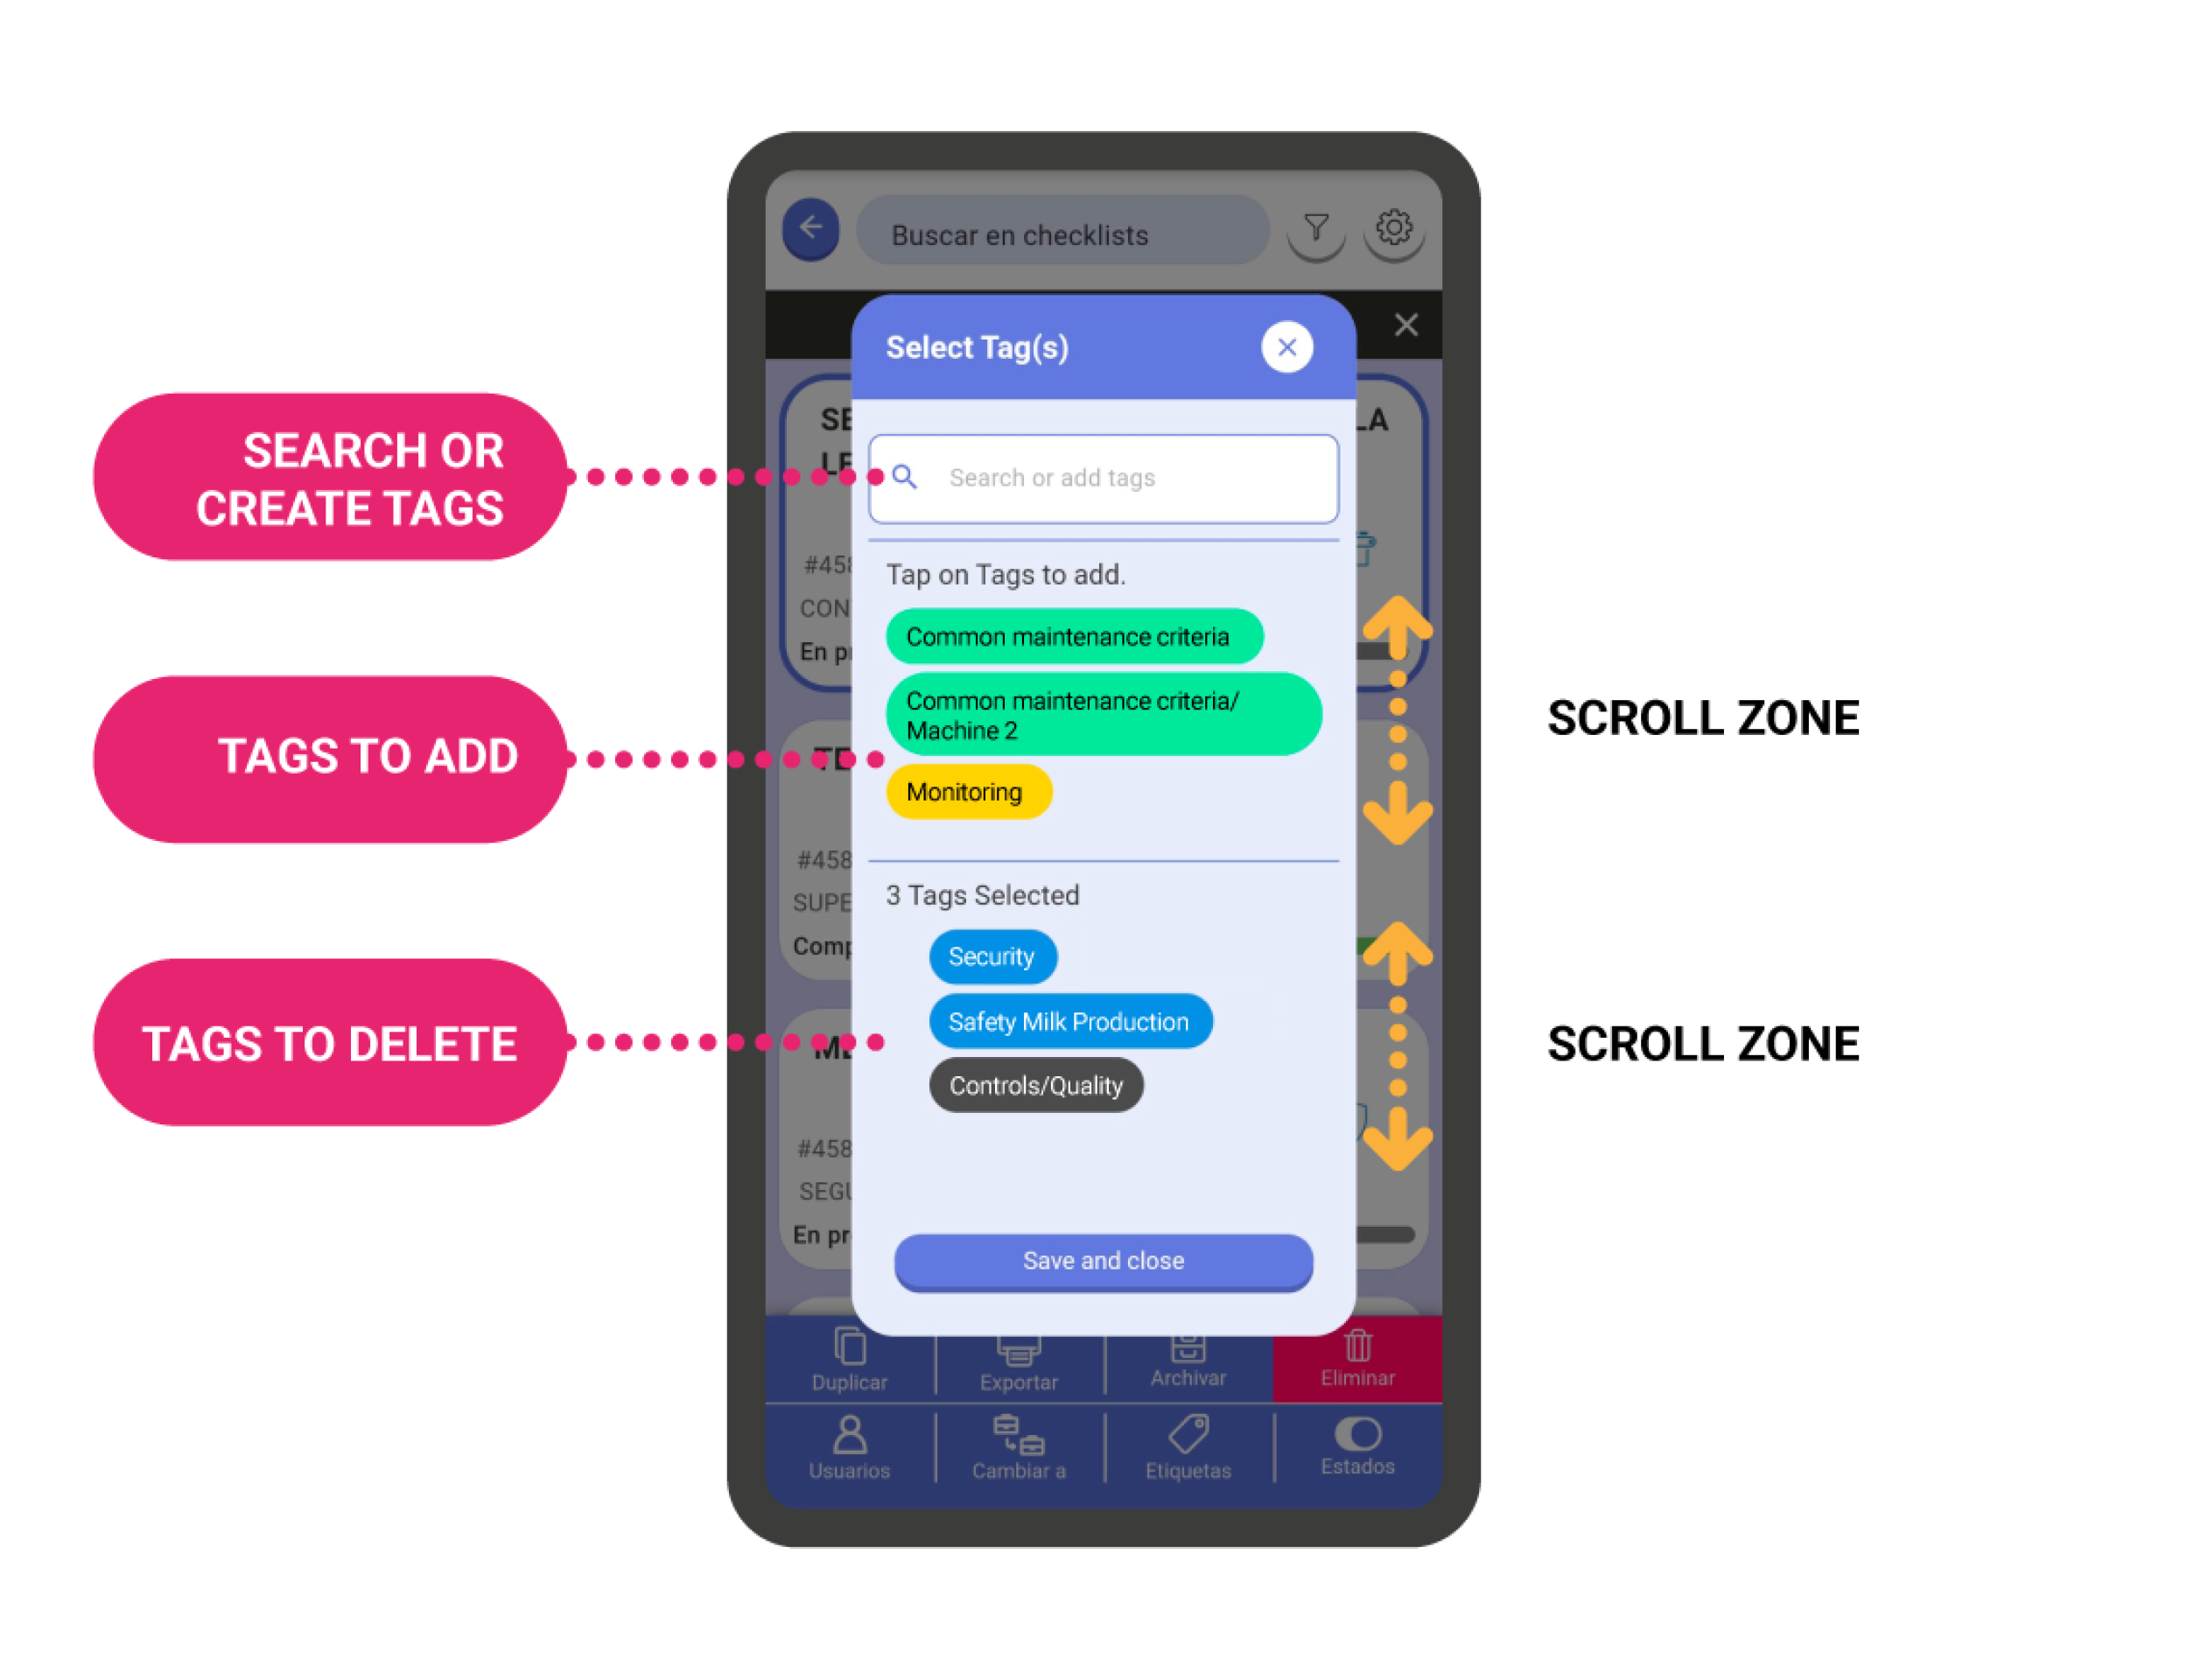
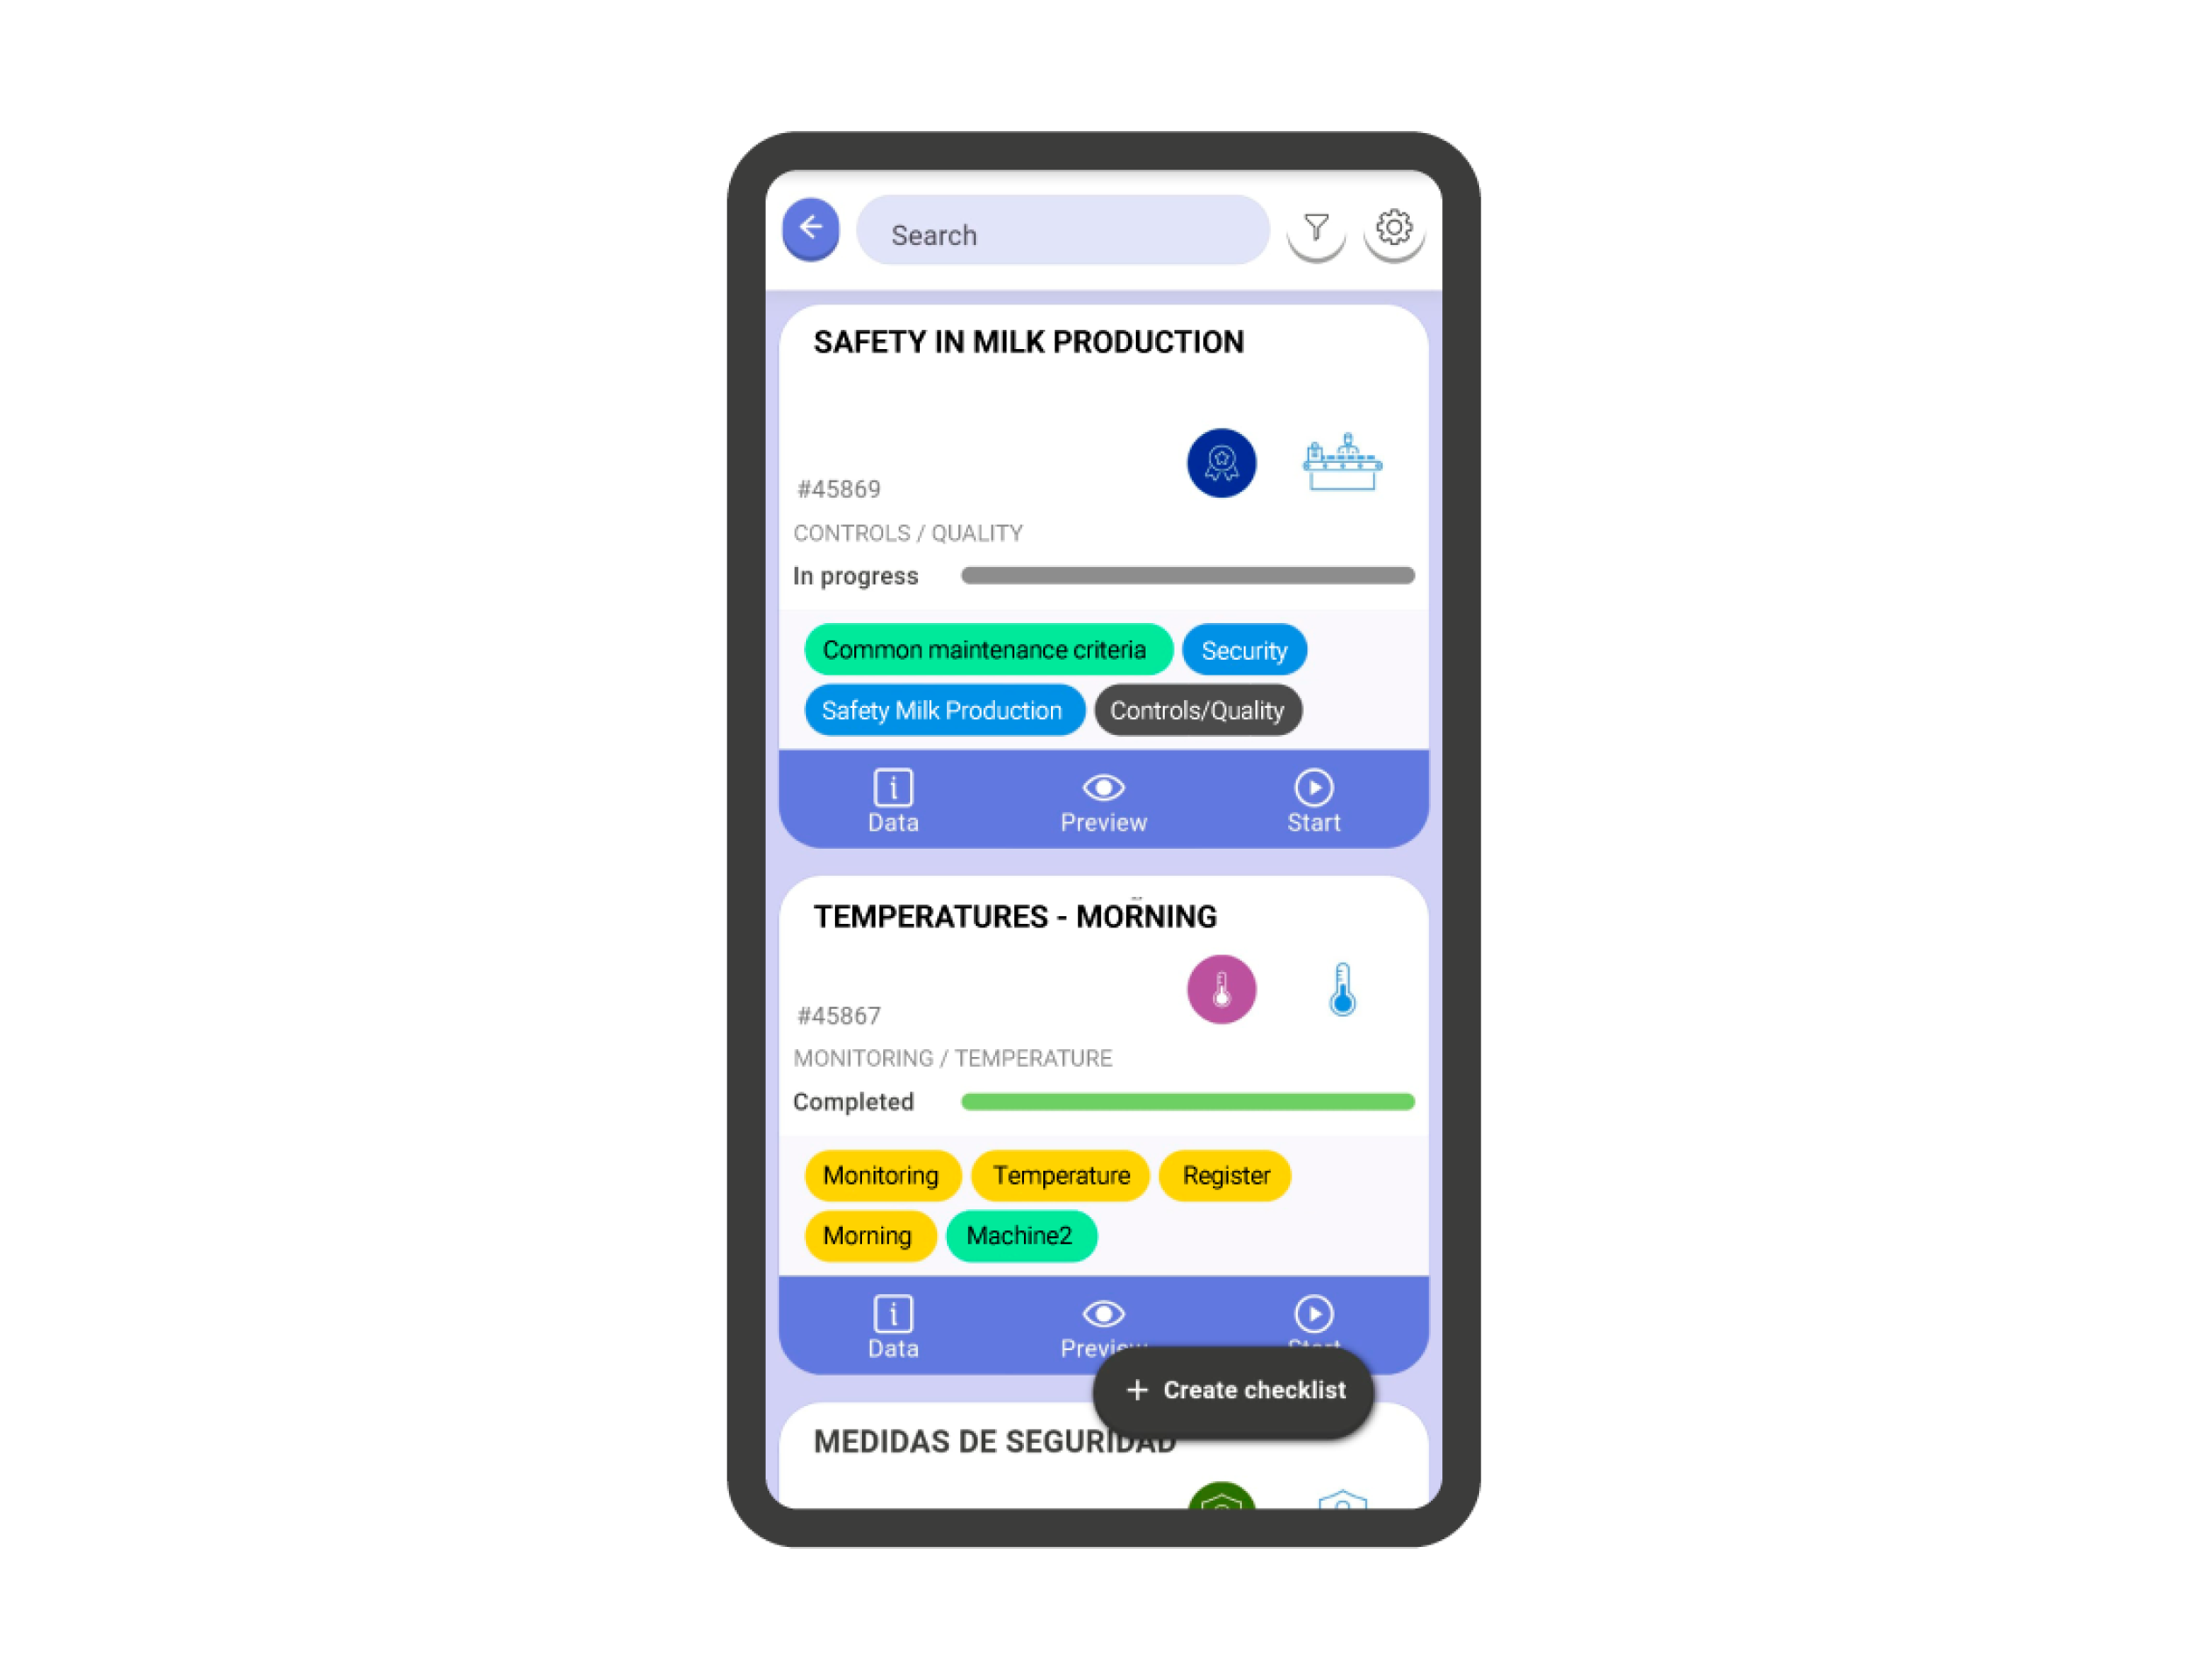
Assign Labels to a Checklist #
To assign labels to a checklist, follow these steps:
- Select the checklist according to the method explained in the section ‘Actions and selection of checklists’.
- Click on the ‘Labels’ button in the bottom bar of the screen.
- The label management screen is divided into three parts. The top part is the search box, where you can search among all available labels or create new ones. The middle part, just below the search box, includes the labels available to add to the checklist. The lower part, just above the ‘Save and Close’ button, contains the labels that are already assigned to the checklist. If this part is empty, it means that this checklist has no assigned labels.
- To add a label, you should click on the available labels, and they will automatically move to the bottom part, along with the active labels.
- To unassign a label, do the opposite: click on the label in the bottom part, and when it moves to the top part, it will be unassigned from the checklist.
Important! This action can only be performed in individual mode (one checklist at a time).
Important! If you type a label in the search field and it doesn’t exist, when you assign it to the checklist, it will be automatically created and available for future use.
Important! If the ‘Labels’ configuration option is not enabled in your card view, you won’t see the labels assigned to the checklist in the reduced view.

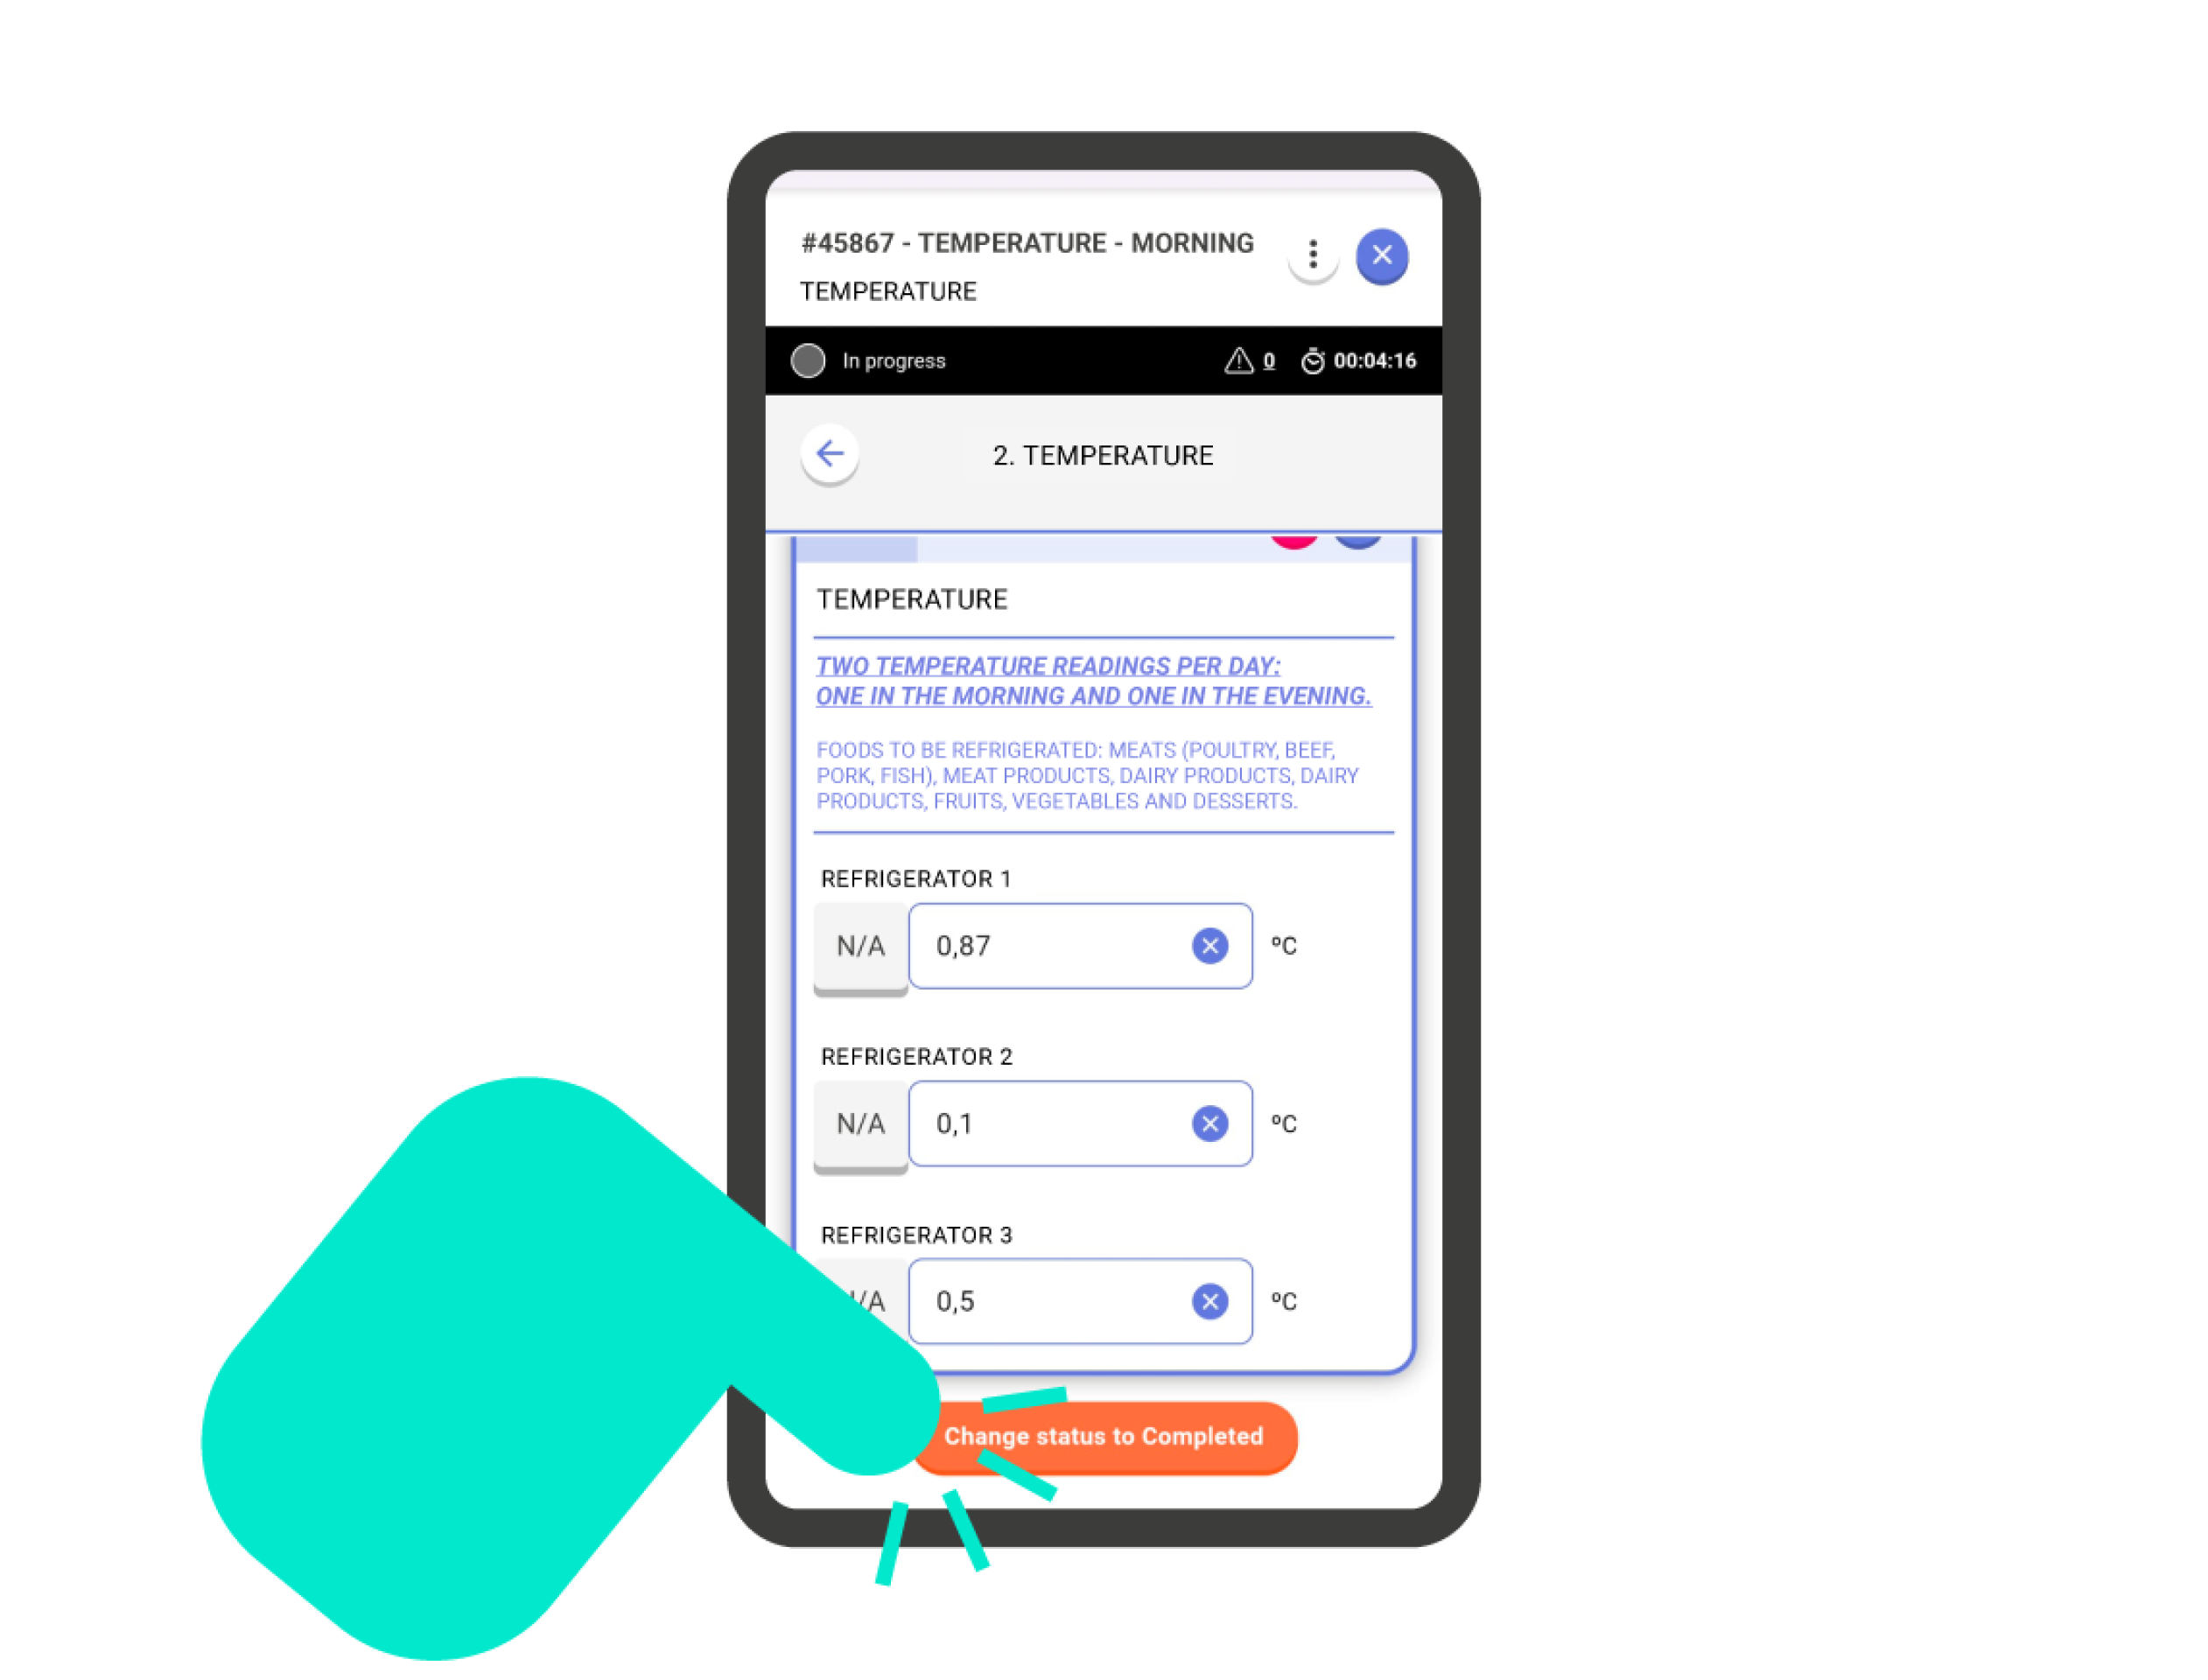
Change the Status of a Checklist #
You can change the status of a checklist from different places in IRISTRACE.
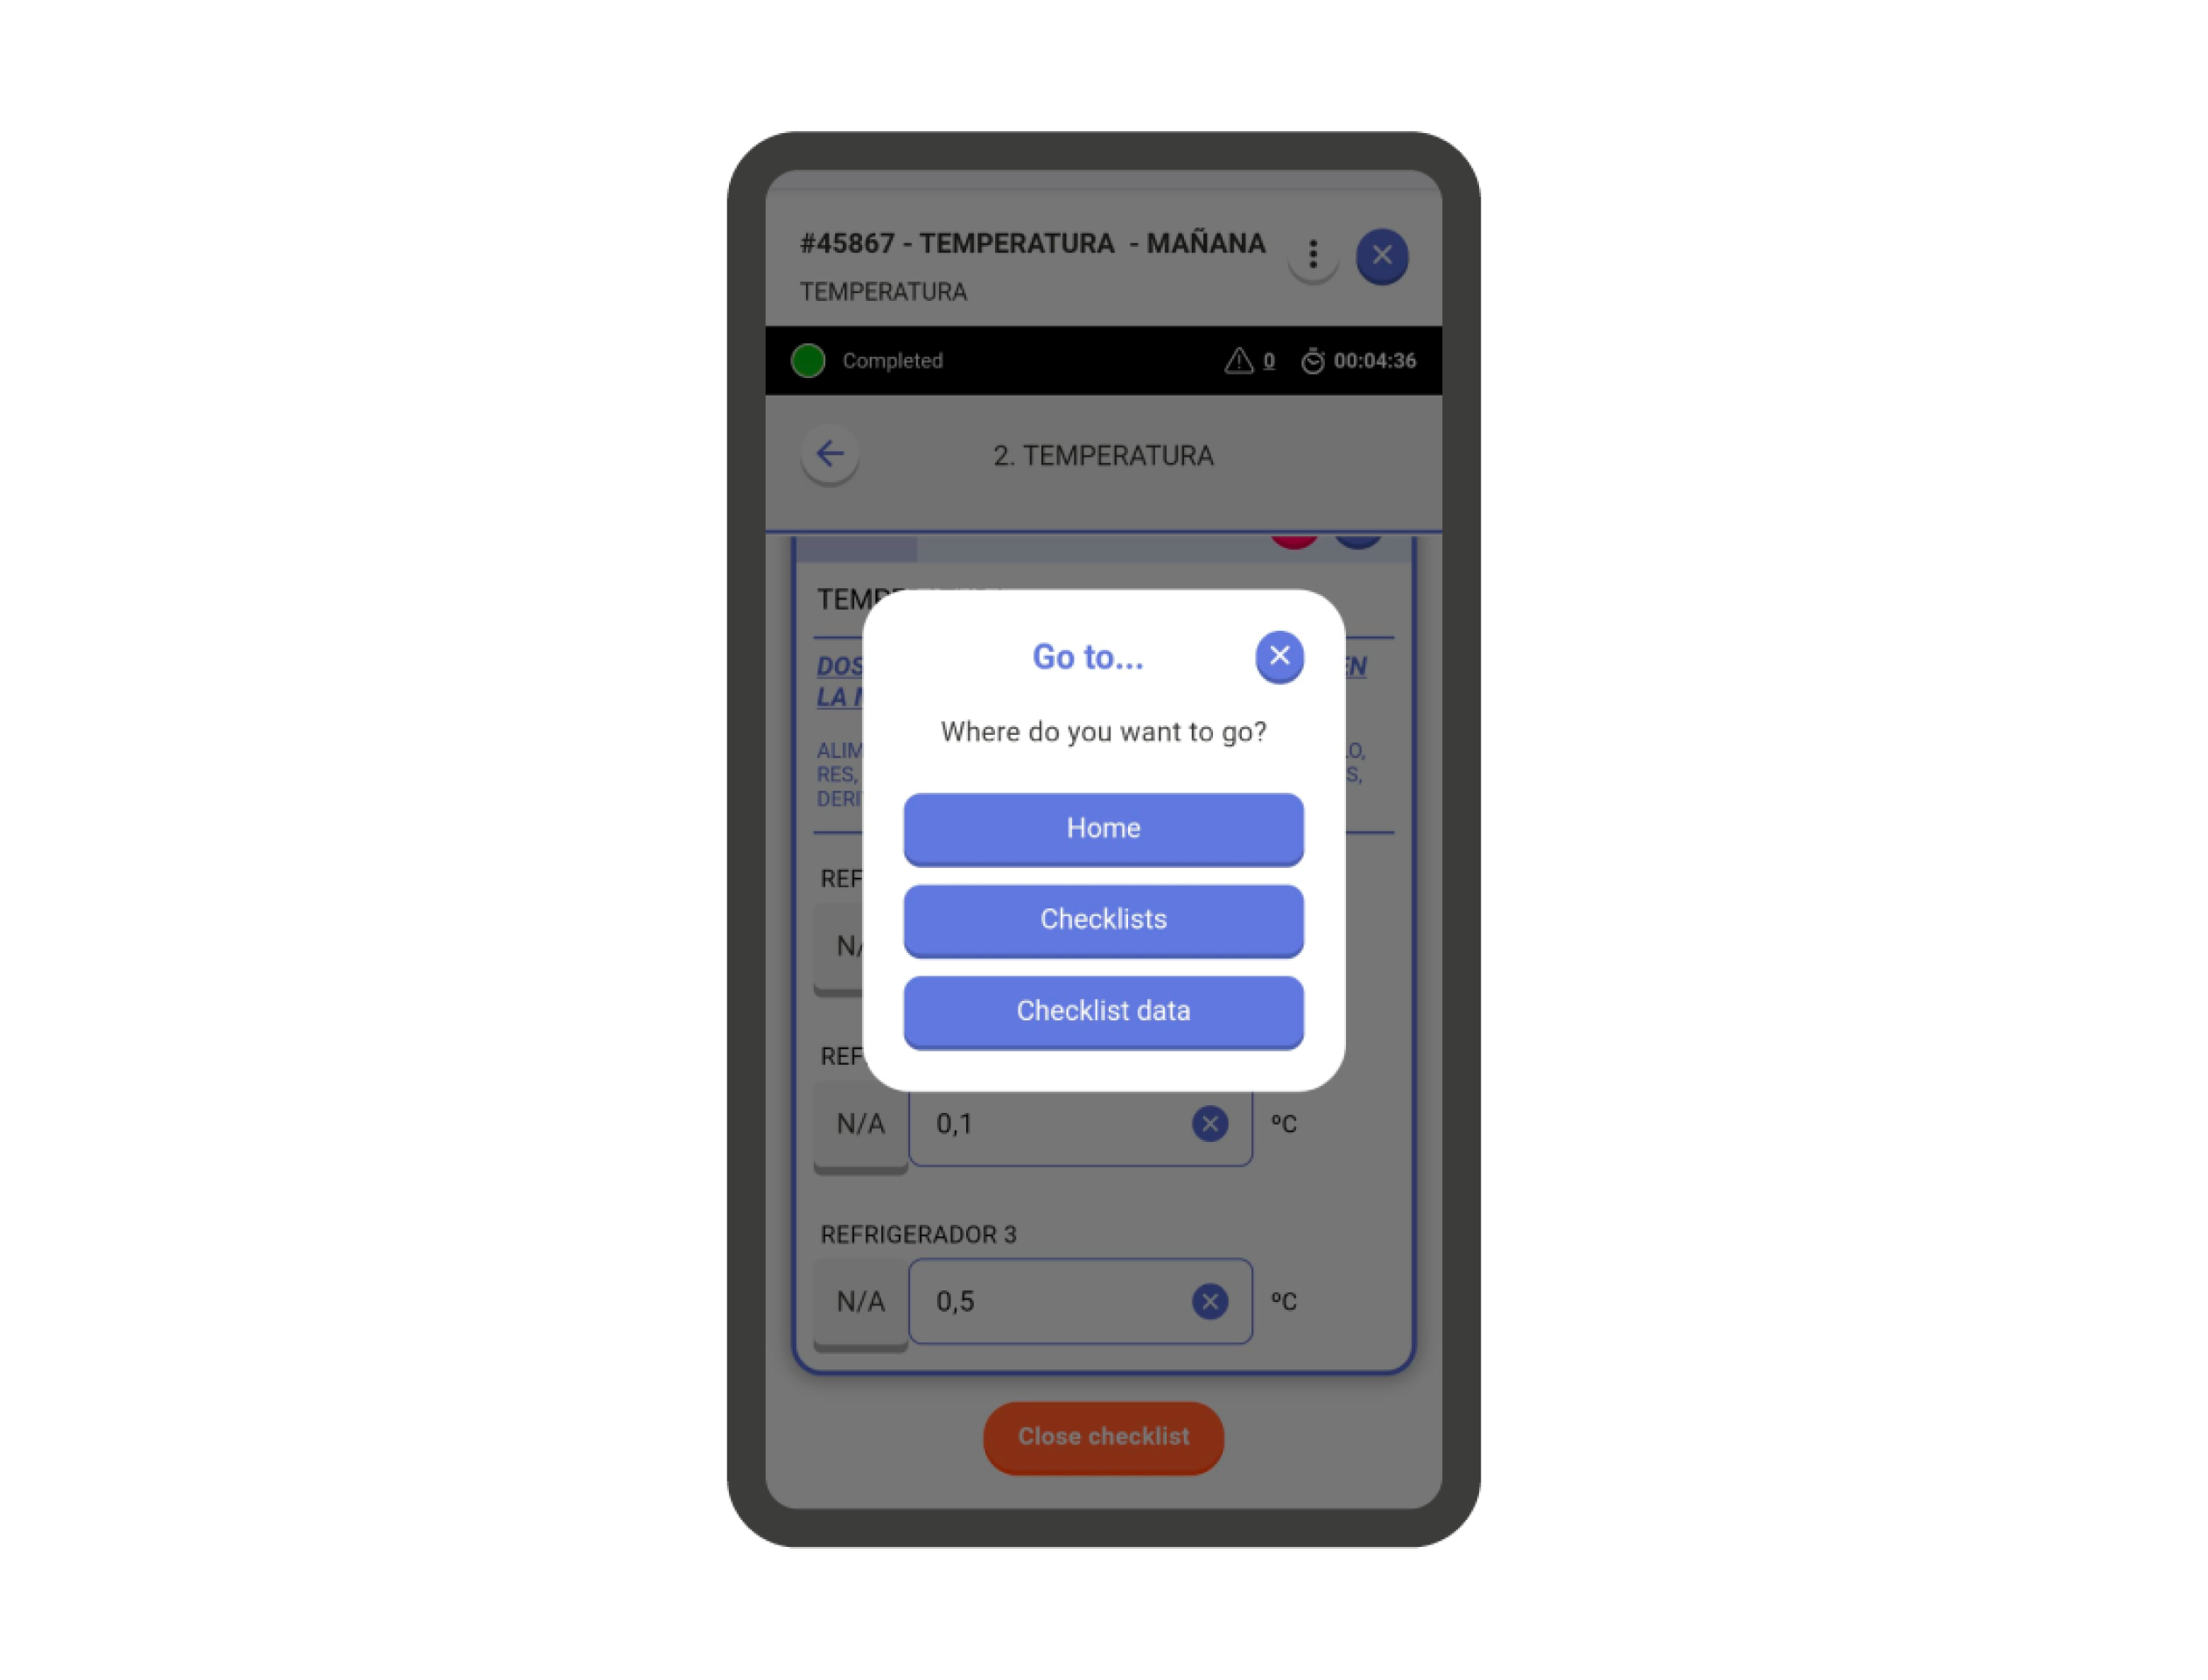
If you are completing a checklist: Upon reaching the last question, you will see a button at the bottom of the page. This button allows you to change the checklist status to the next one in the list of statuses. This action will change the checklist status and display a dialog box to go where the user decides. When you exit the checklist using the ‘Close’ button in the top right corner, you will need to decide what to do with the checklist status.
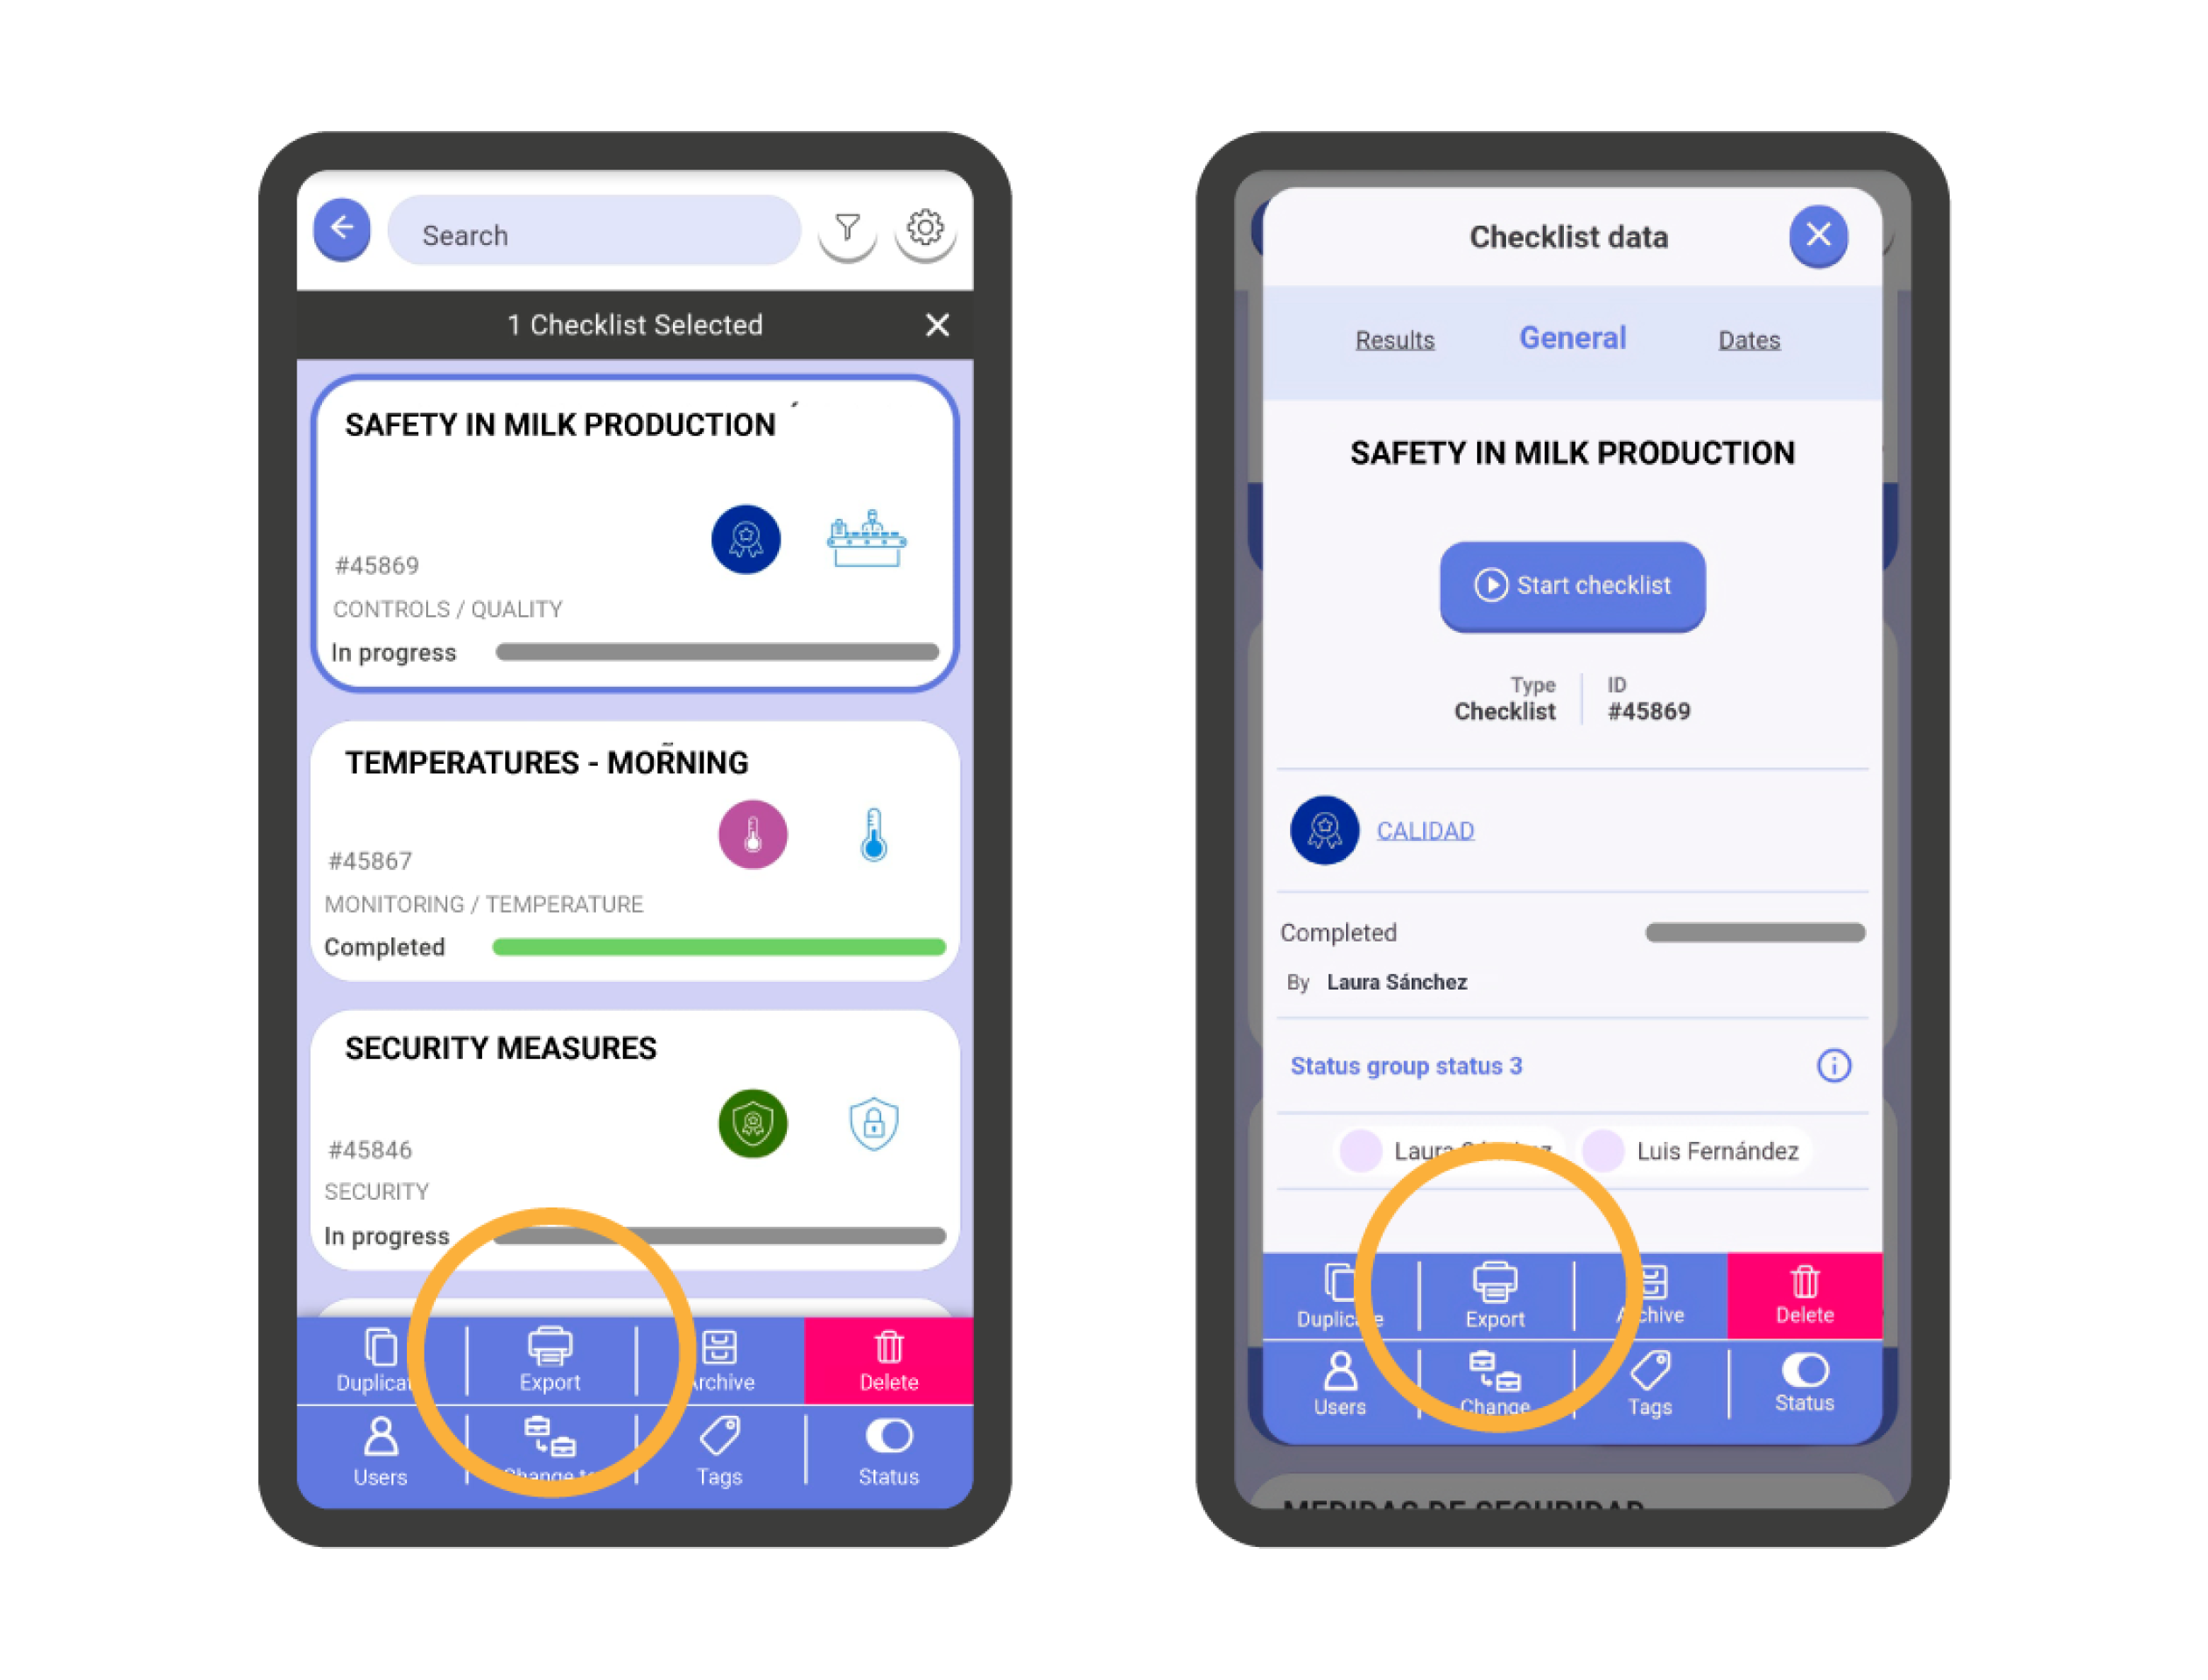
If you are in the checklist list: Changing the status is an action you can perform on a checklist. To do this, select the checklist according to the method explained in the ‘Actions and Checklist Selection’ section. In the bottom right corner, you will find the ‘Status’ button.
Important! Changing the status is an individual action, so it can only be applied to a single checklist.
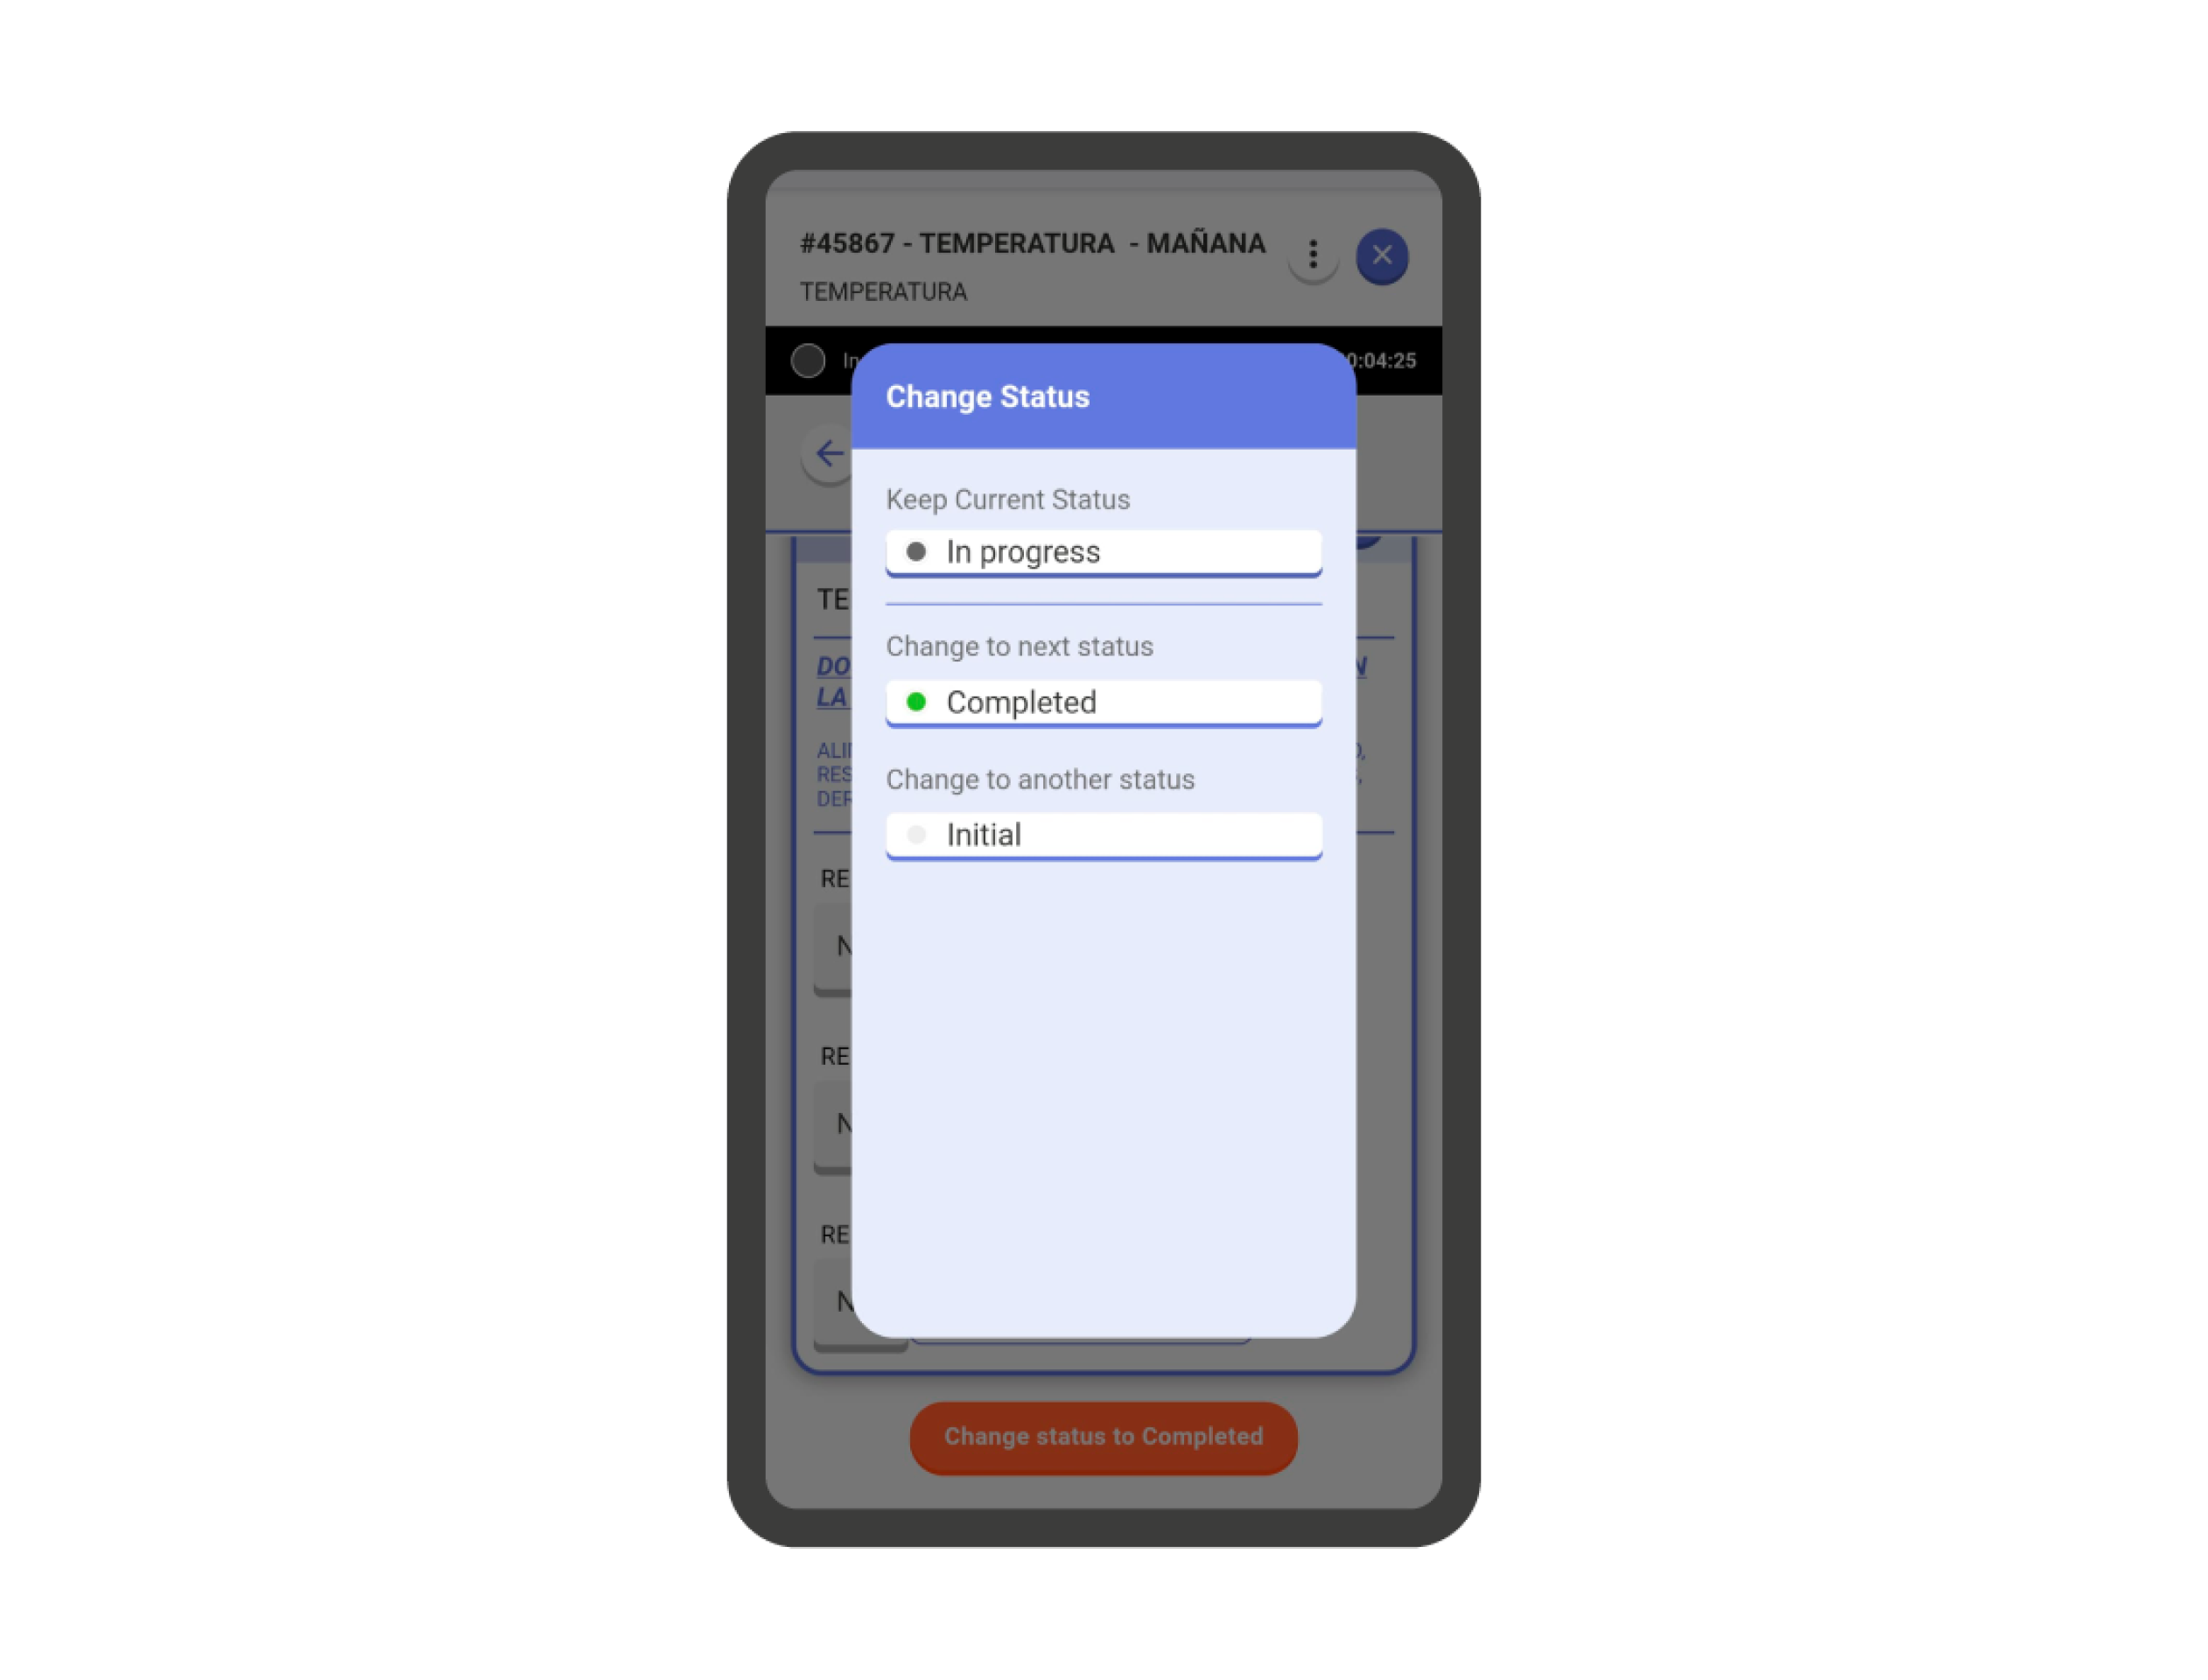
If you are within the checklist description: Within the checklist description, you will find the ‘Status’ button in the bottom right corner of the screen.
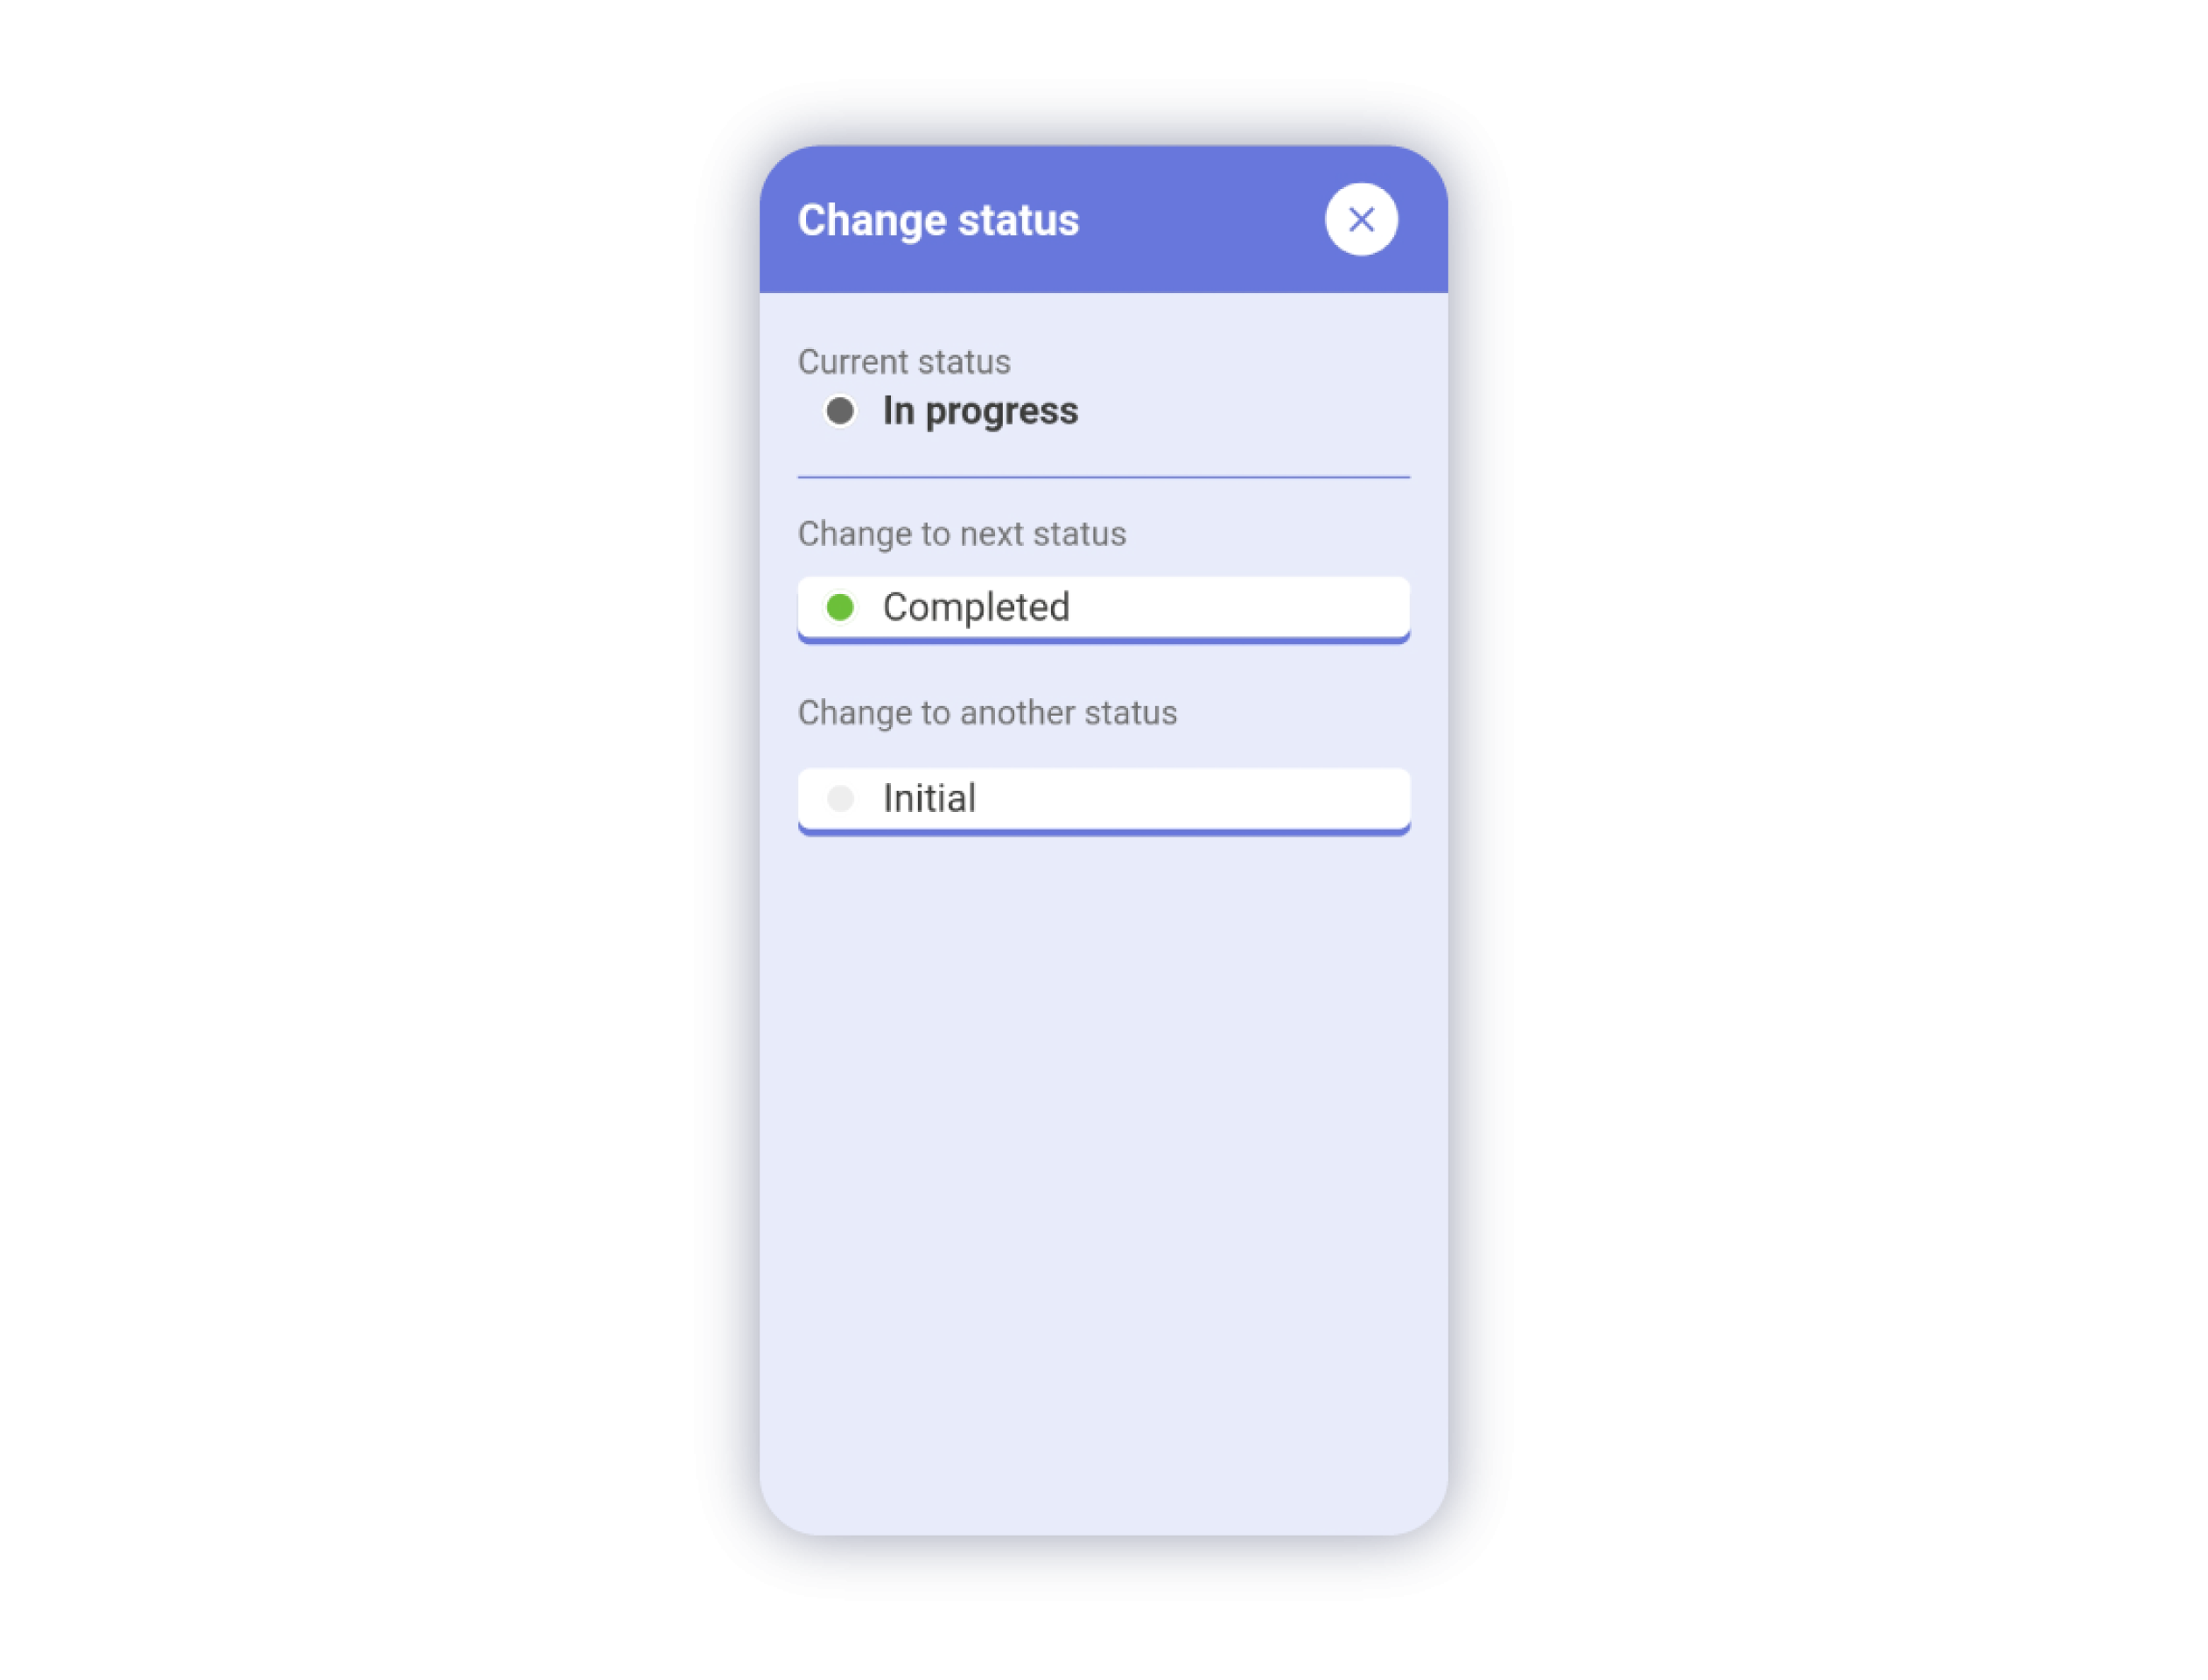
Change of Status: The change status menu will display the current status of the checklist at the top. Next, it will automatically suggest the next status in the list of statuses. Finally, you will have a complete list of all available statuses to change to. Click on the automatic option or the specific status you wish to apply to the checklist and the status will change automatically.
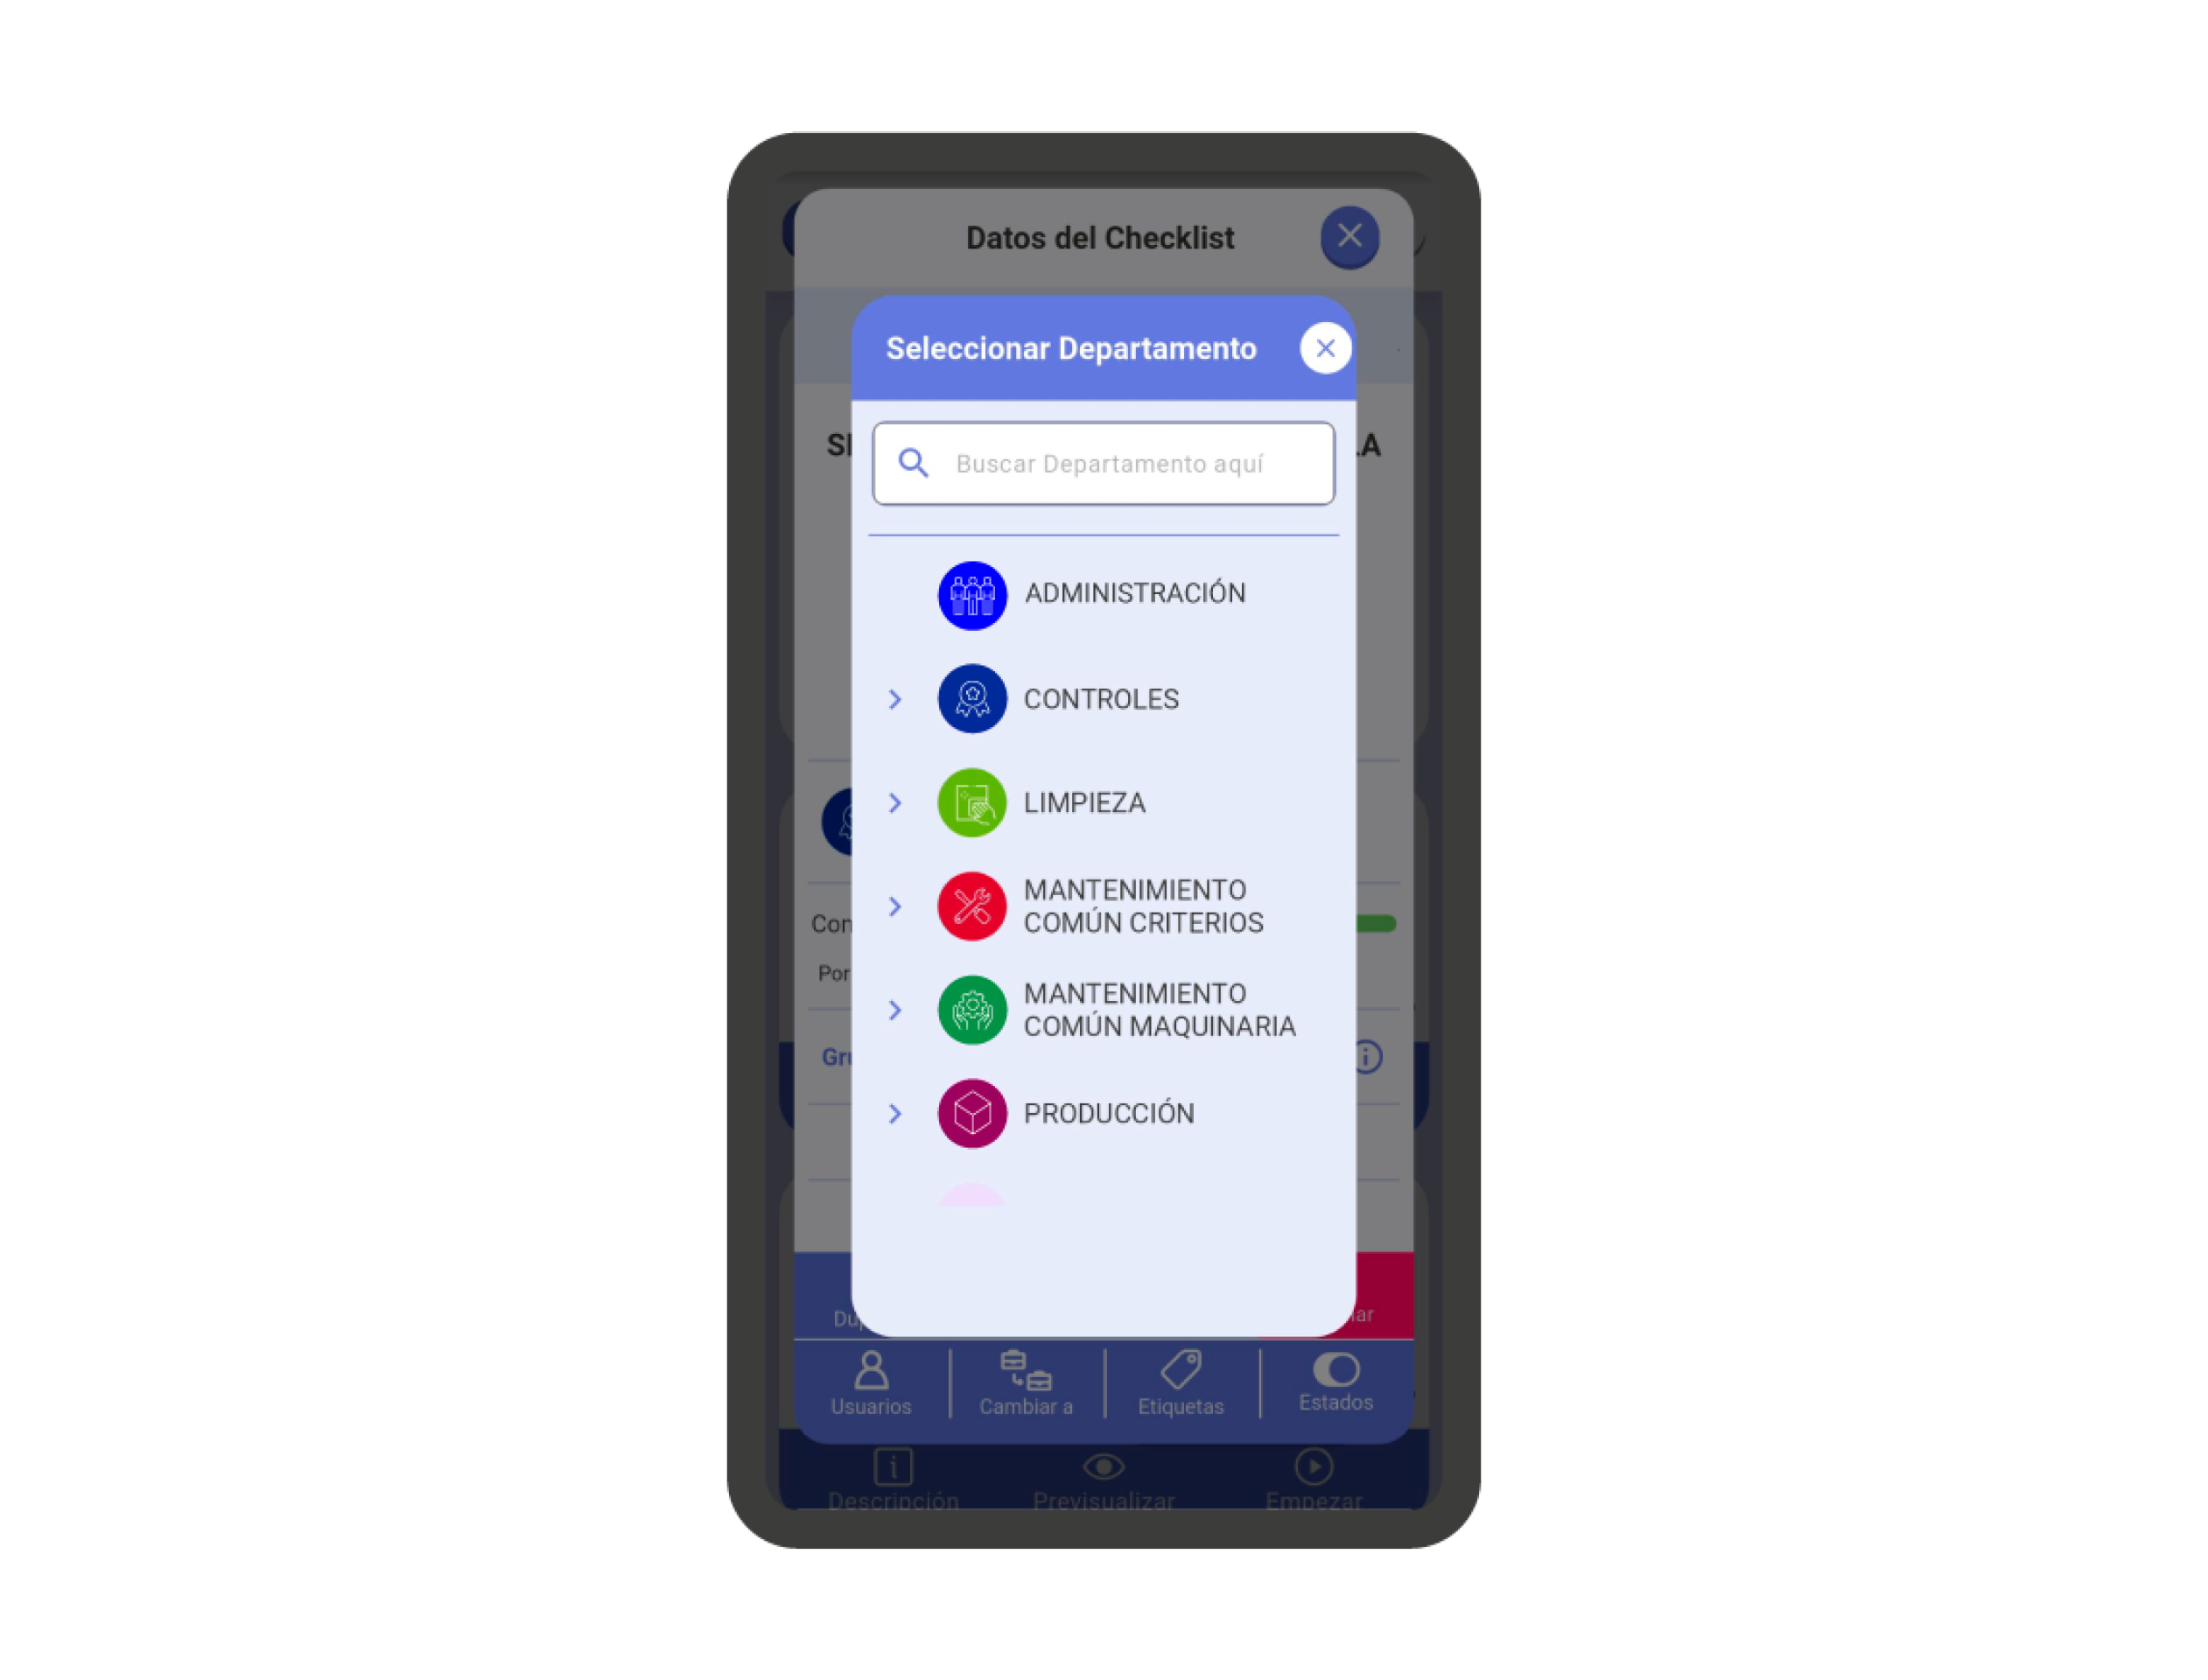
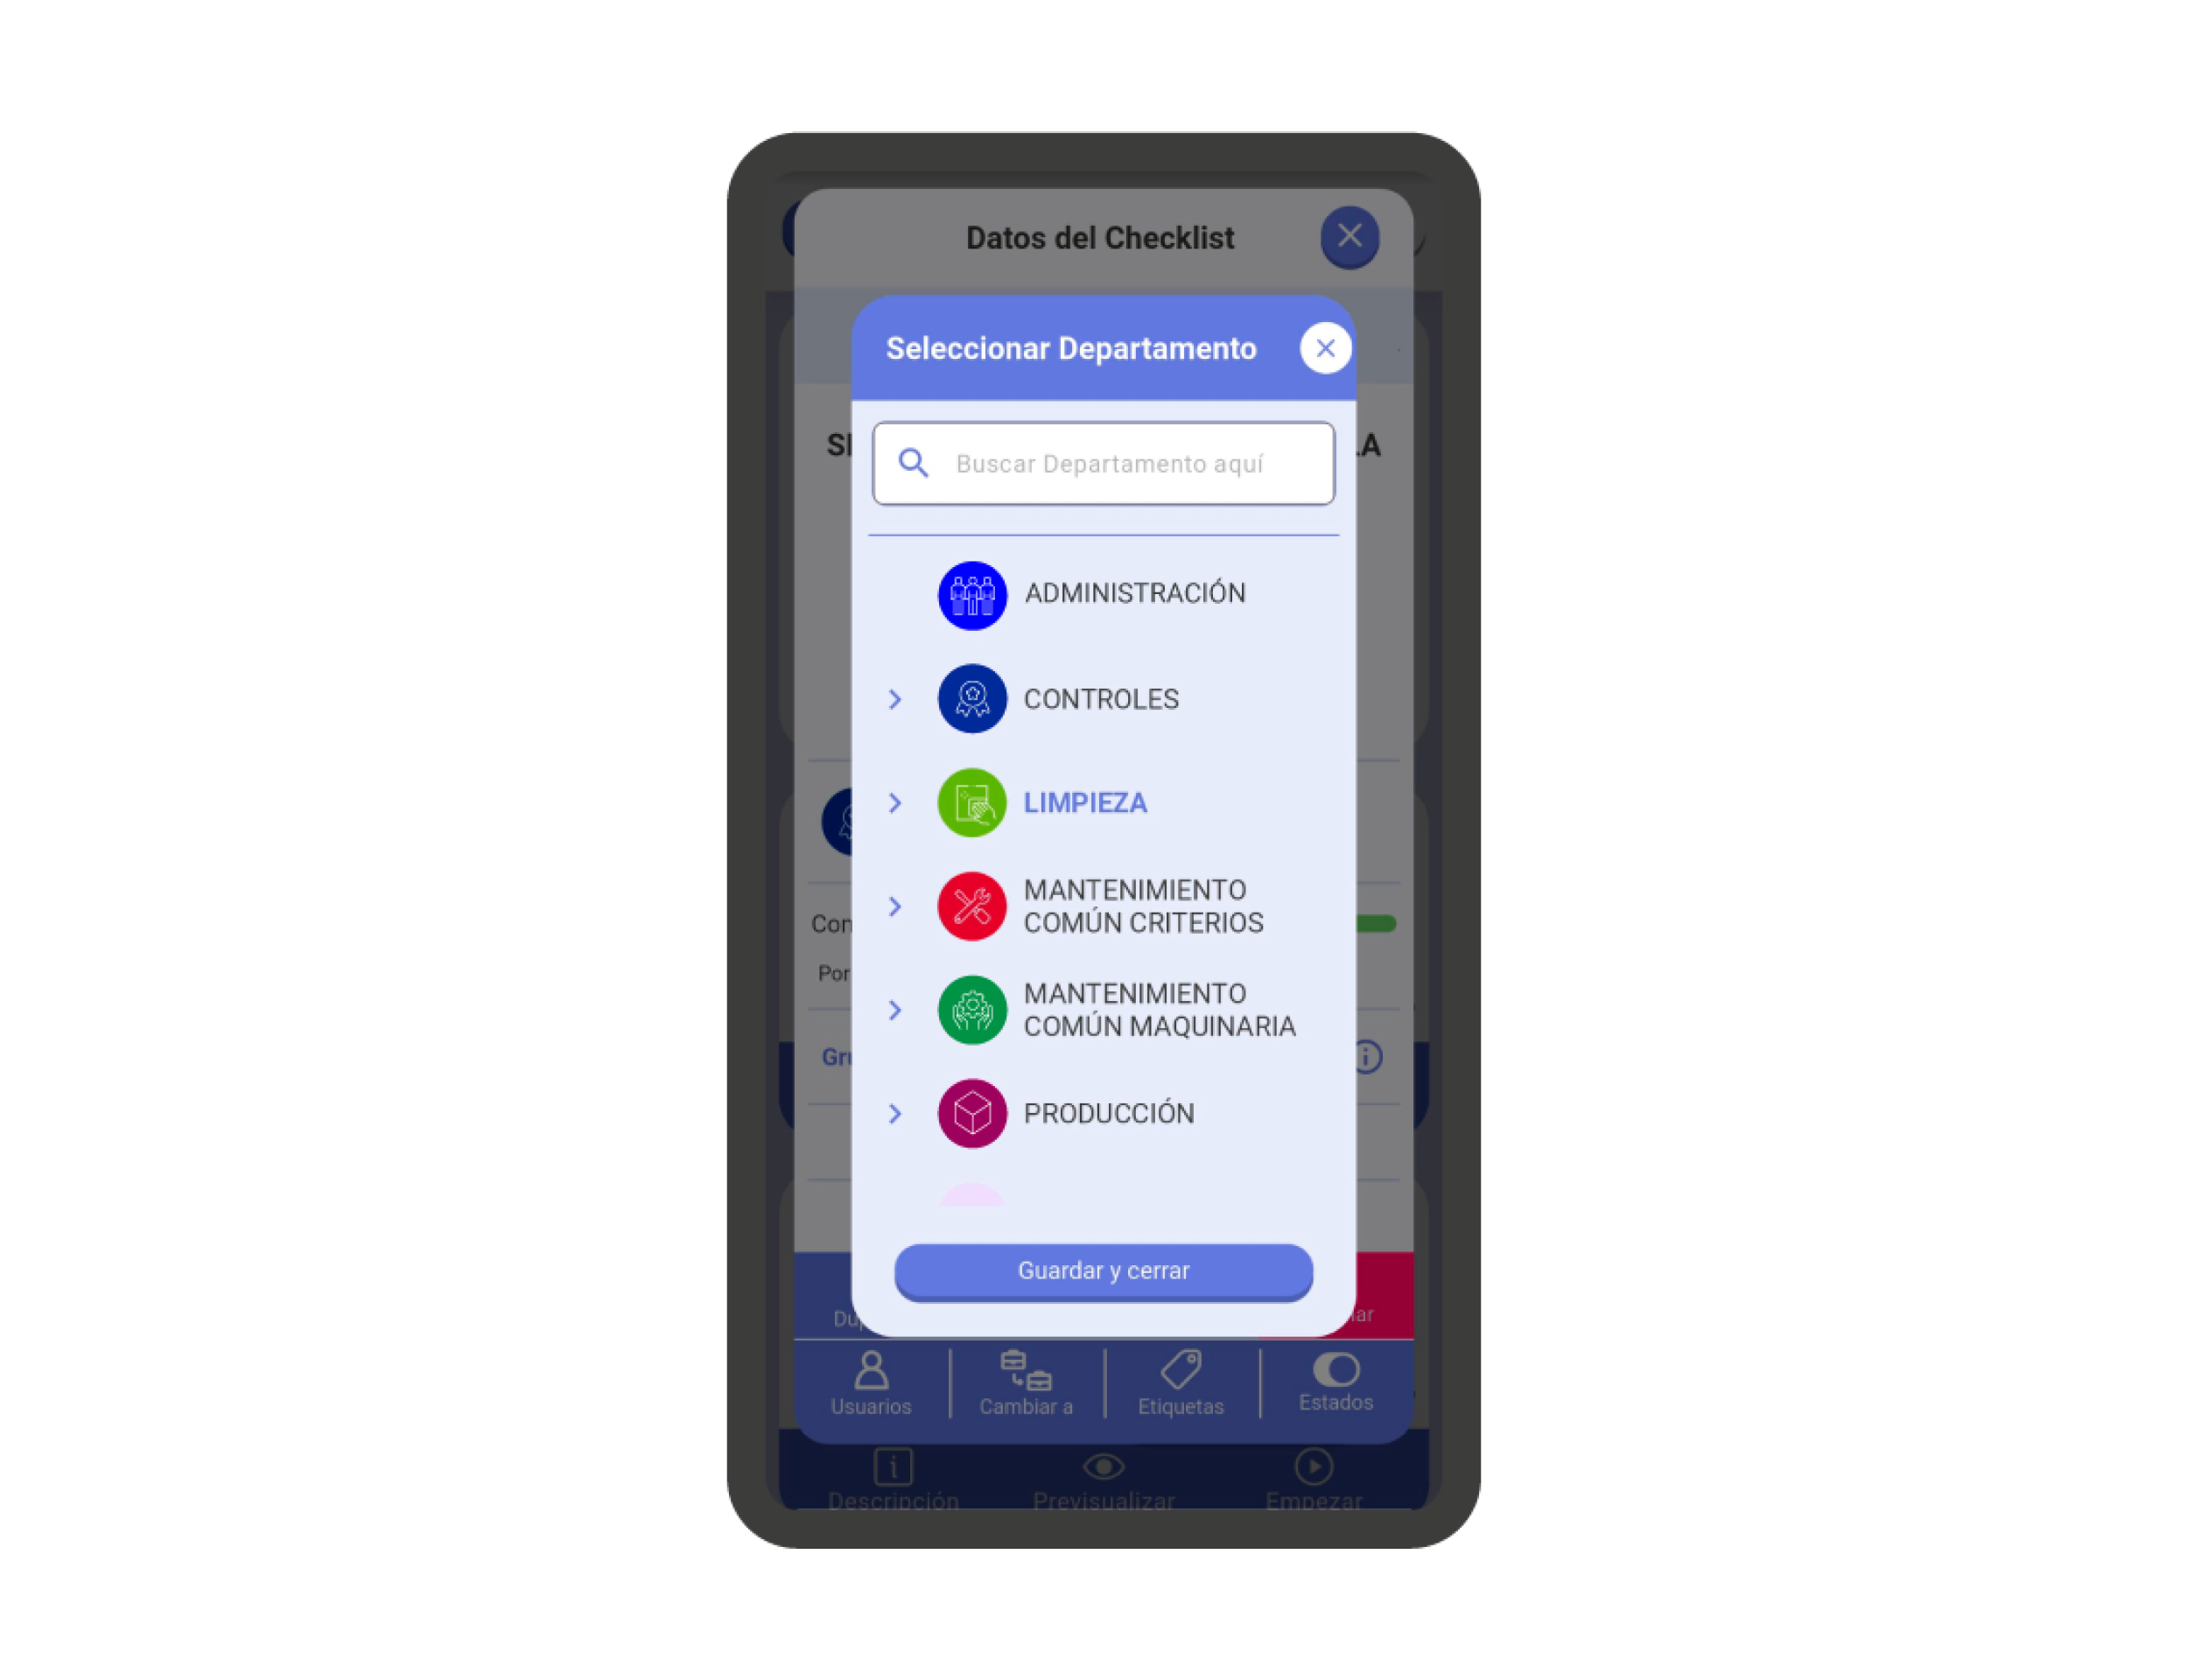
Move a Checklist to Another Department #
You might want to move a checklist to another department. To do this, access the checklist card information and click on the ‘Move to’ action in the lower action bar.
Next, choose the department where you want to save the checklist and click on ‘Save and close’. Now the checklist is within the new department.
IMPORTANT!: It may happen that the view doesn’t refresh when you go back to the checklist list. It’s advisable to refresh the list to see the changes. To do this, swipe your finger down until an arrow appears at the top of the screen. When you release your finger, the data on the screen will update.
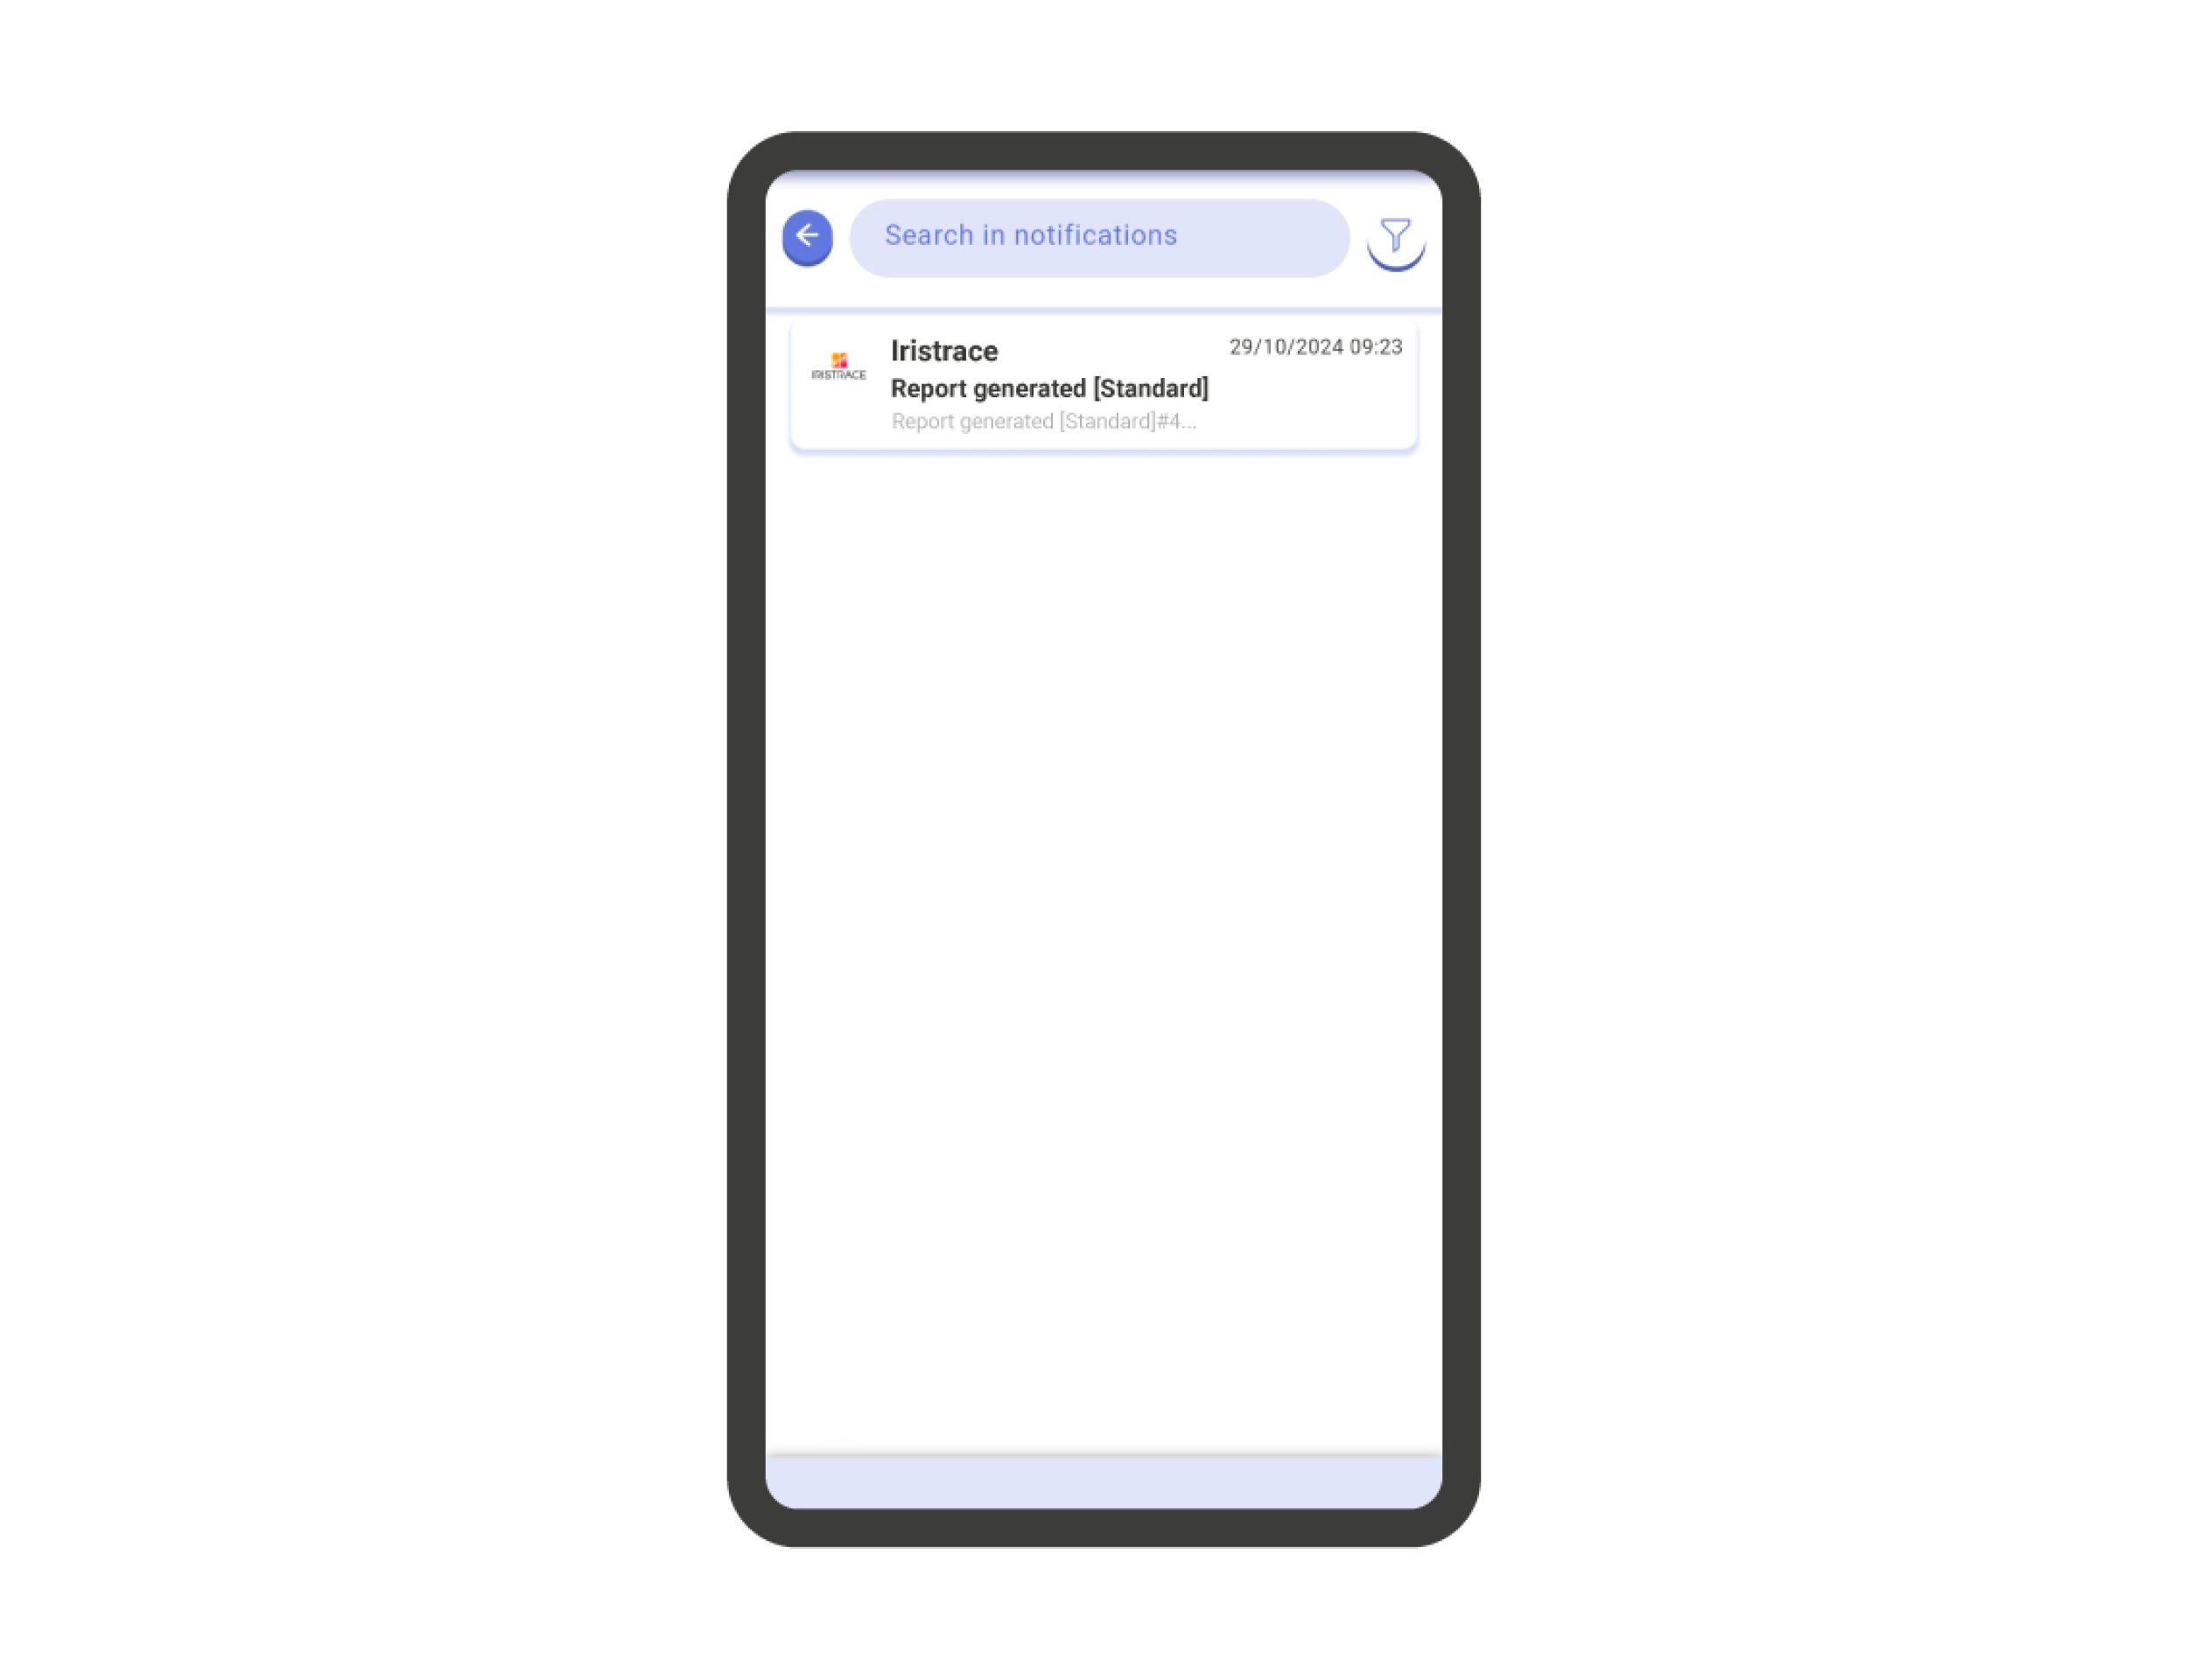
Export Reports #
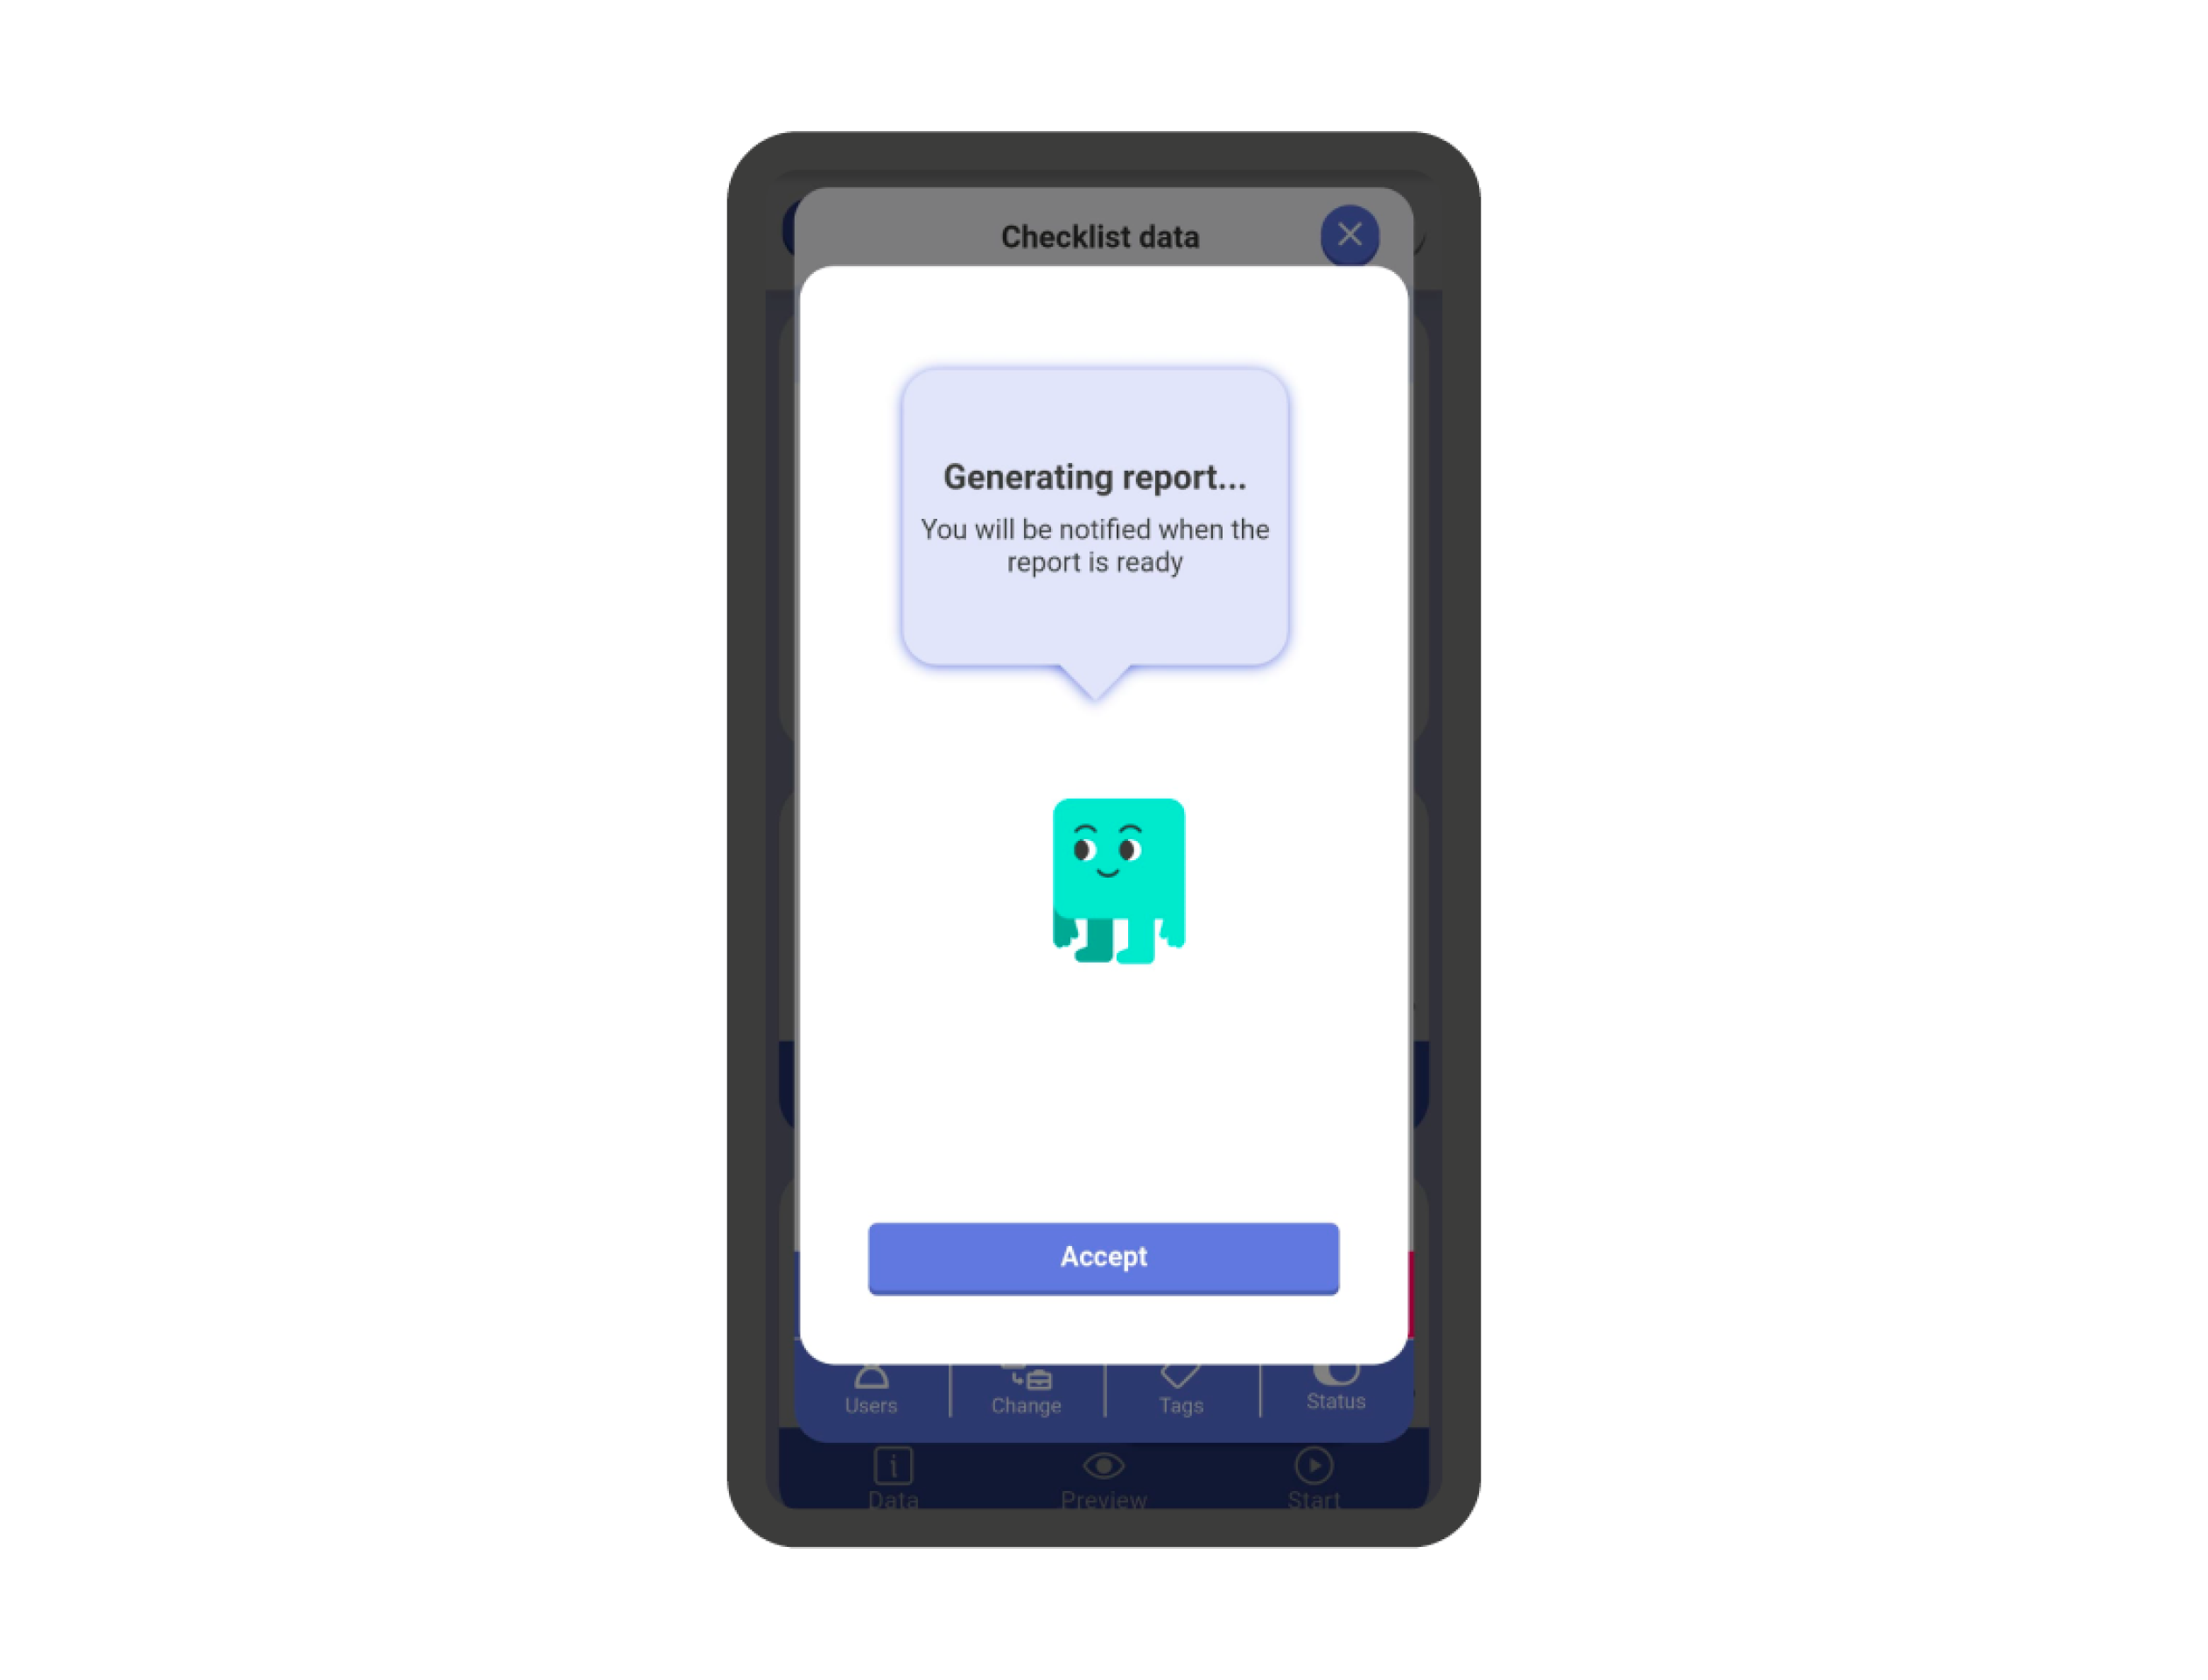
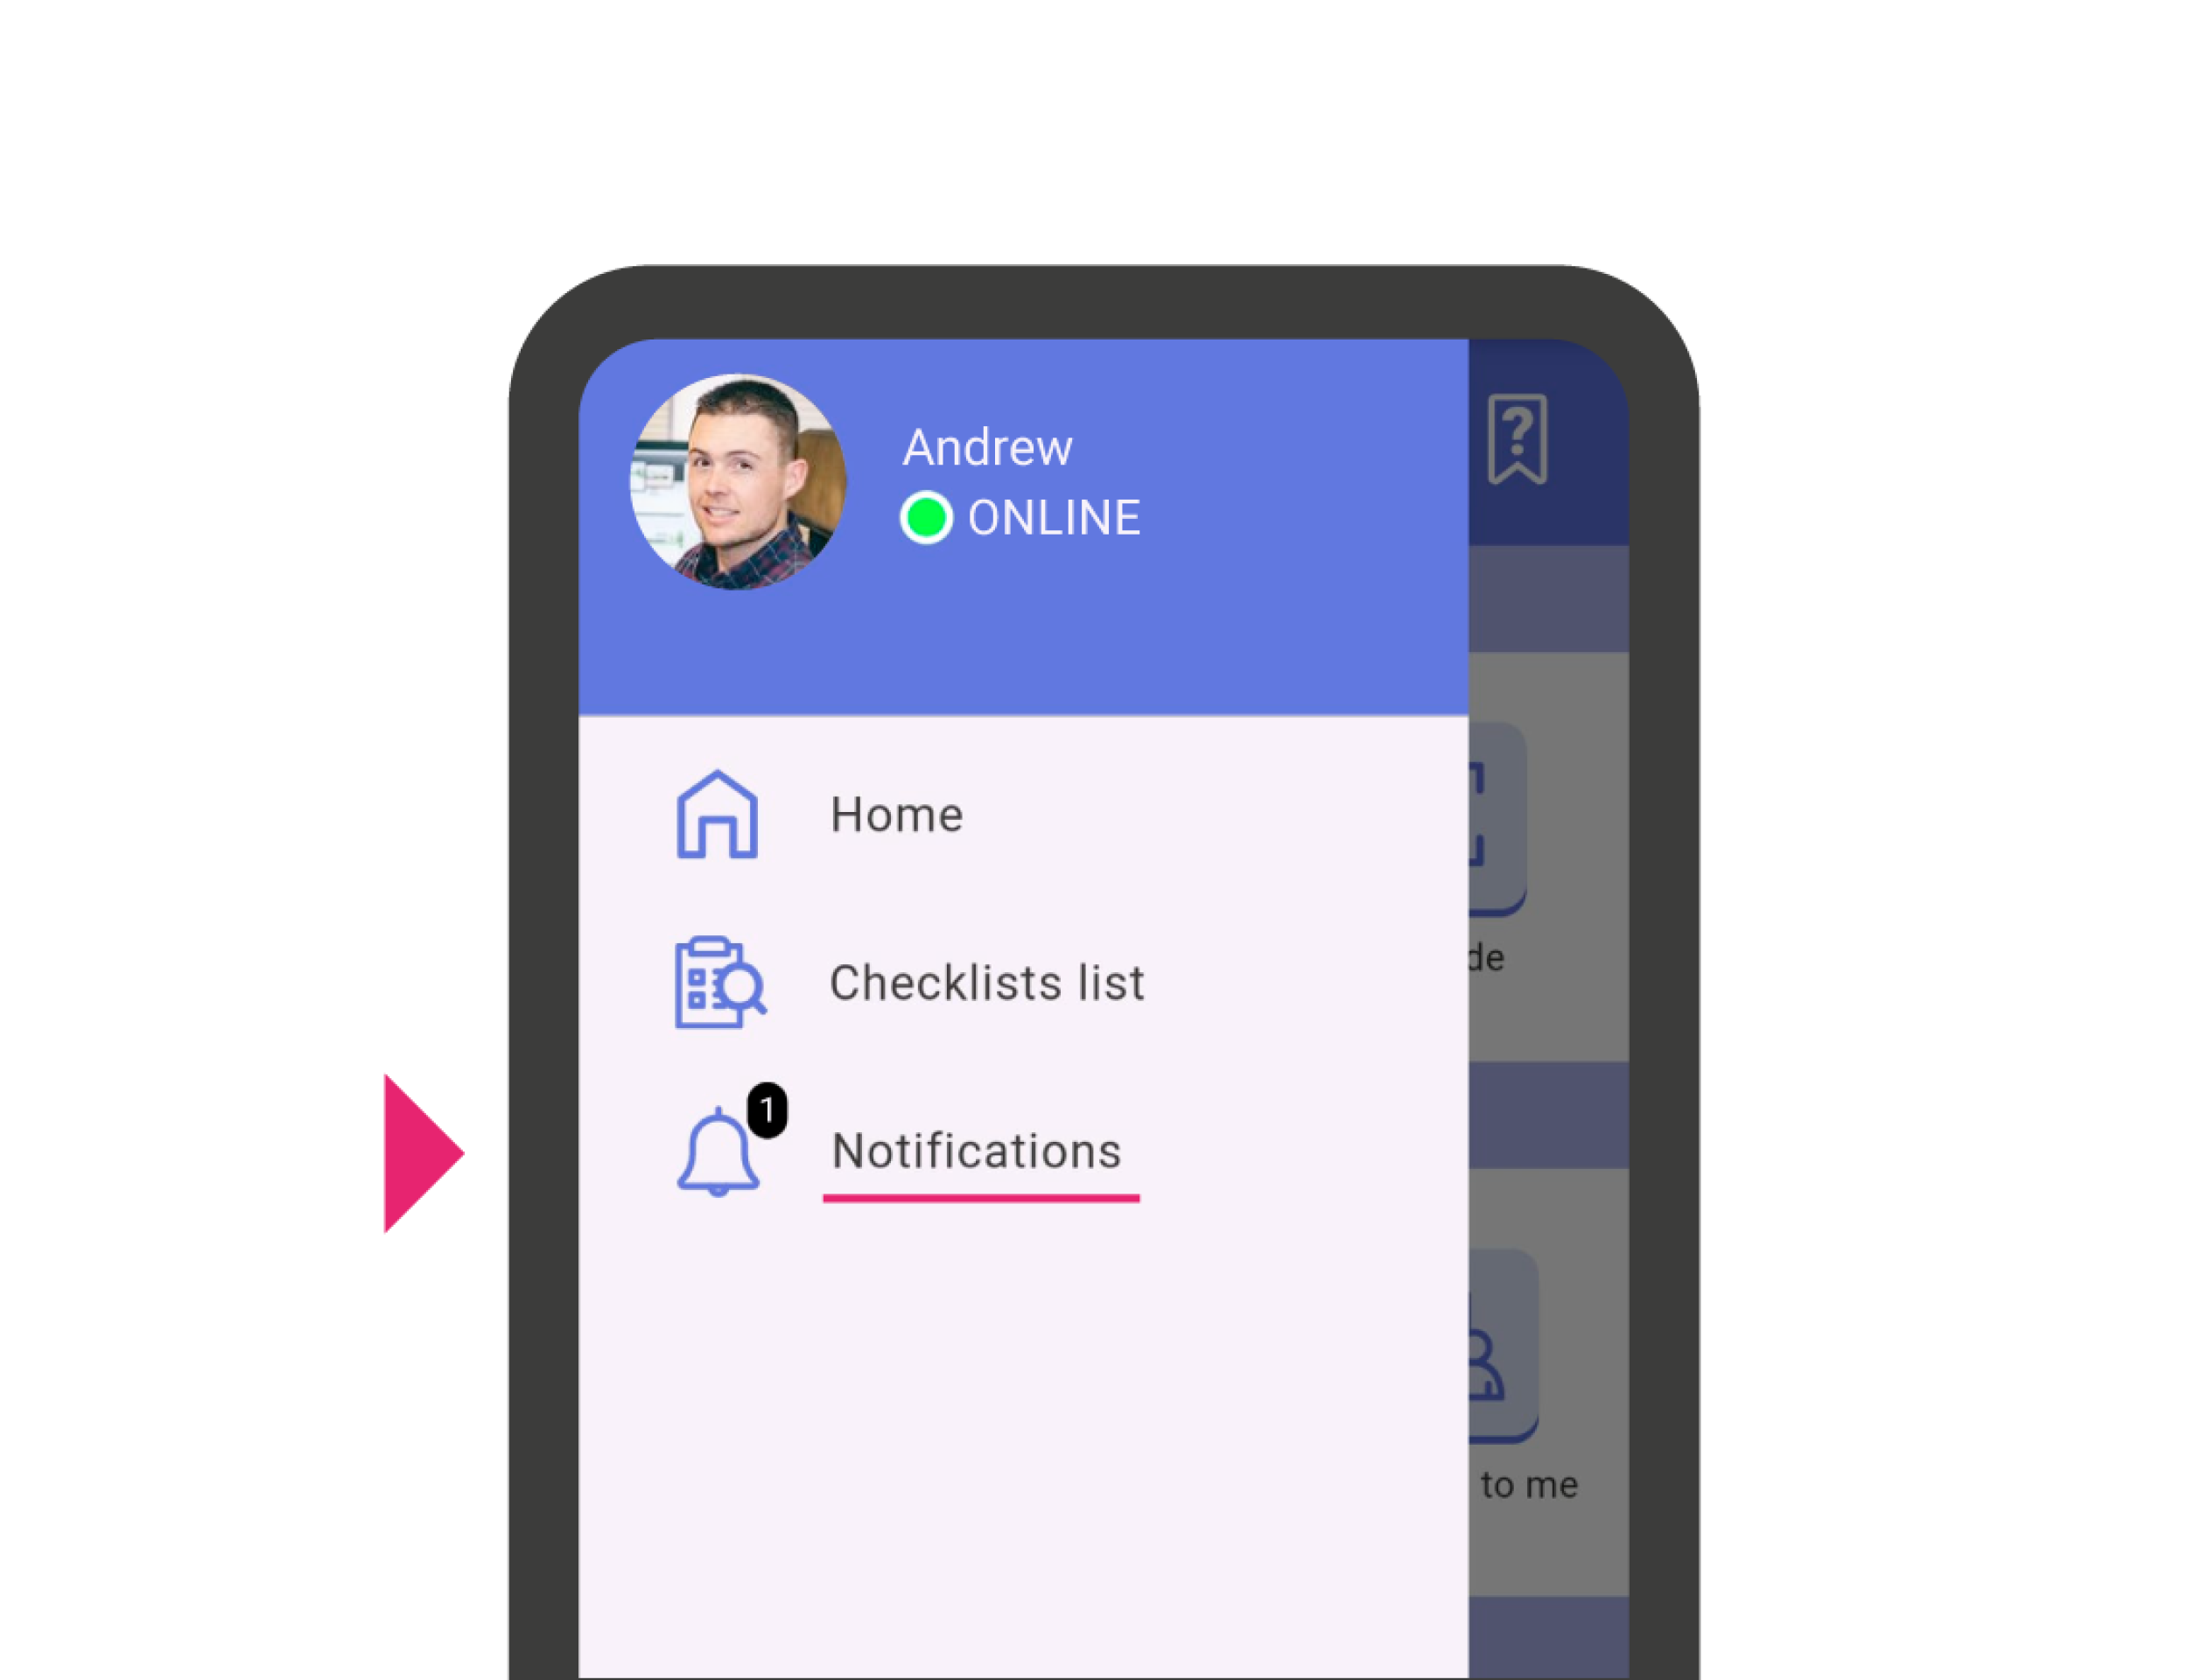
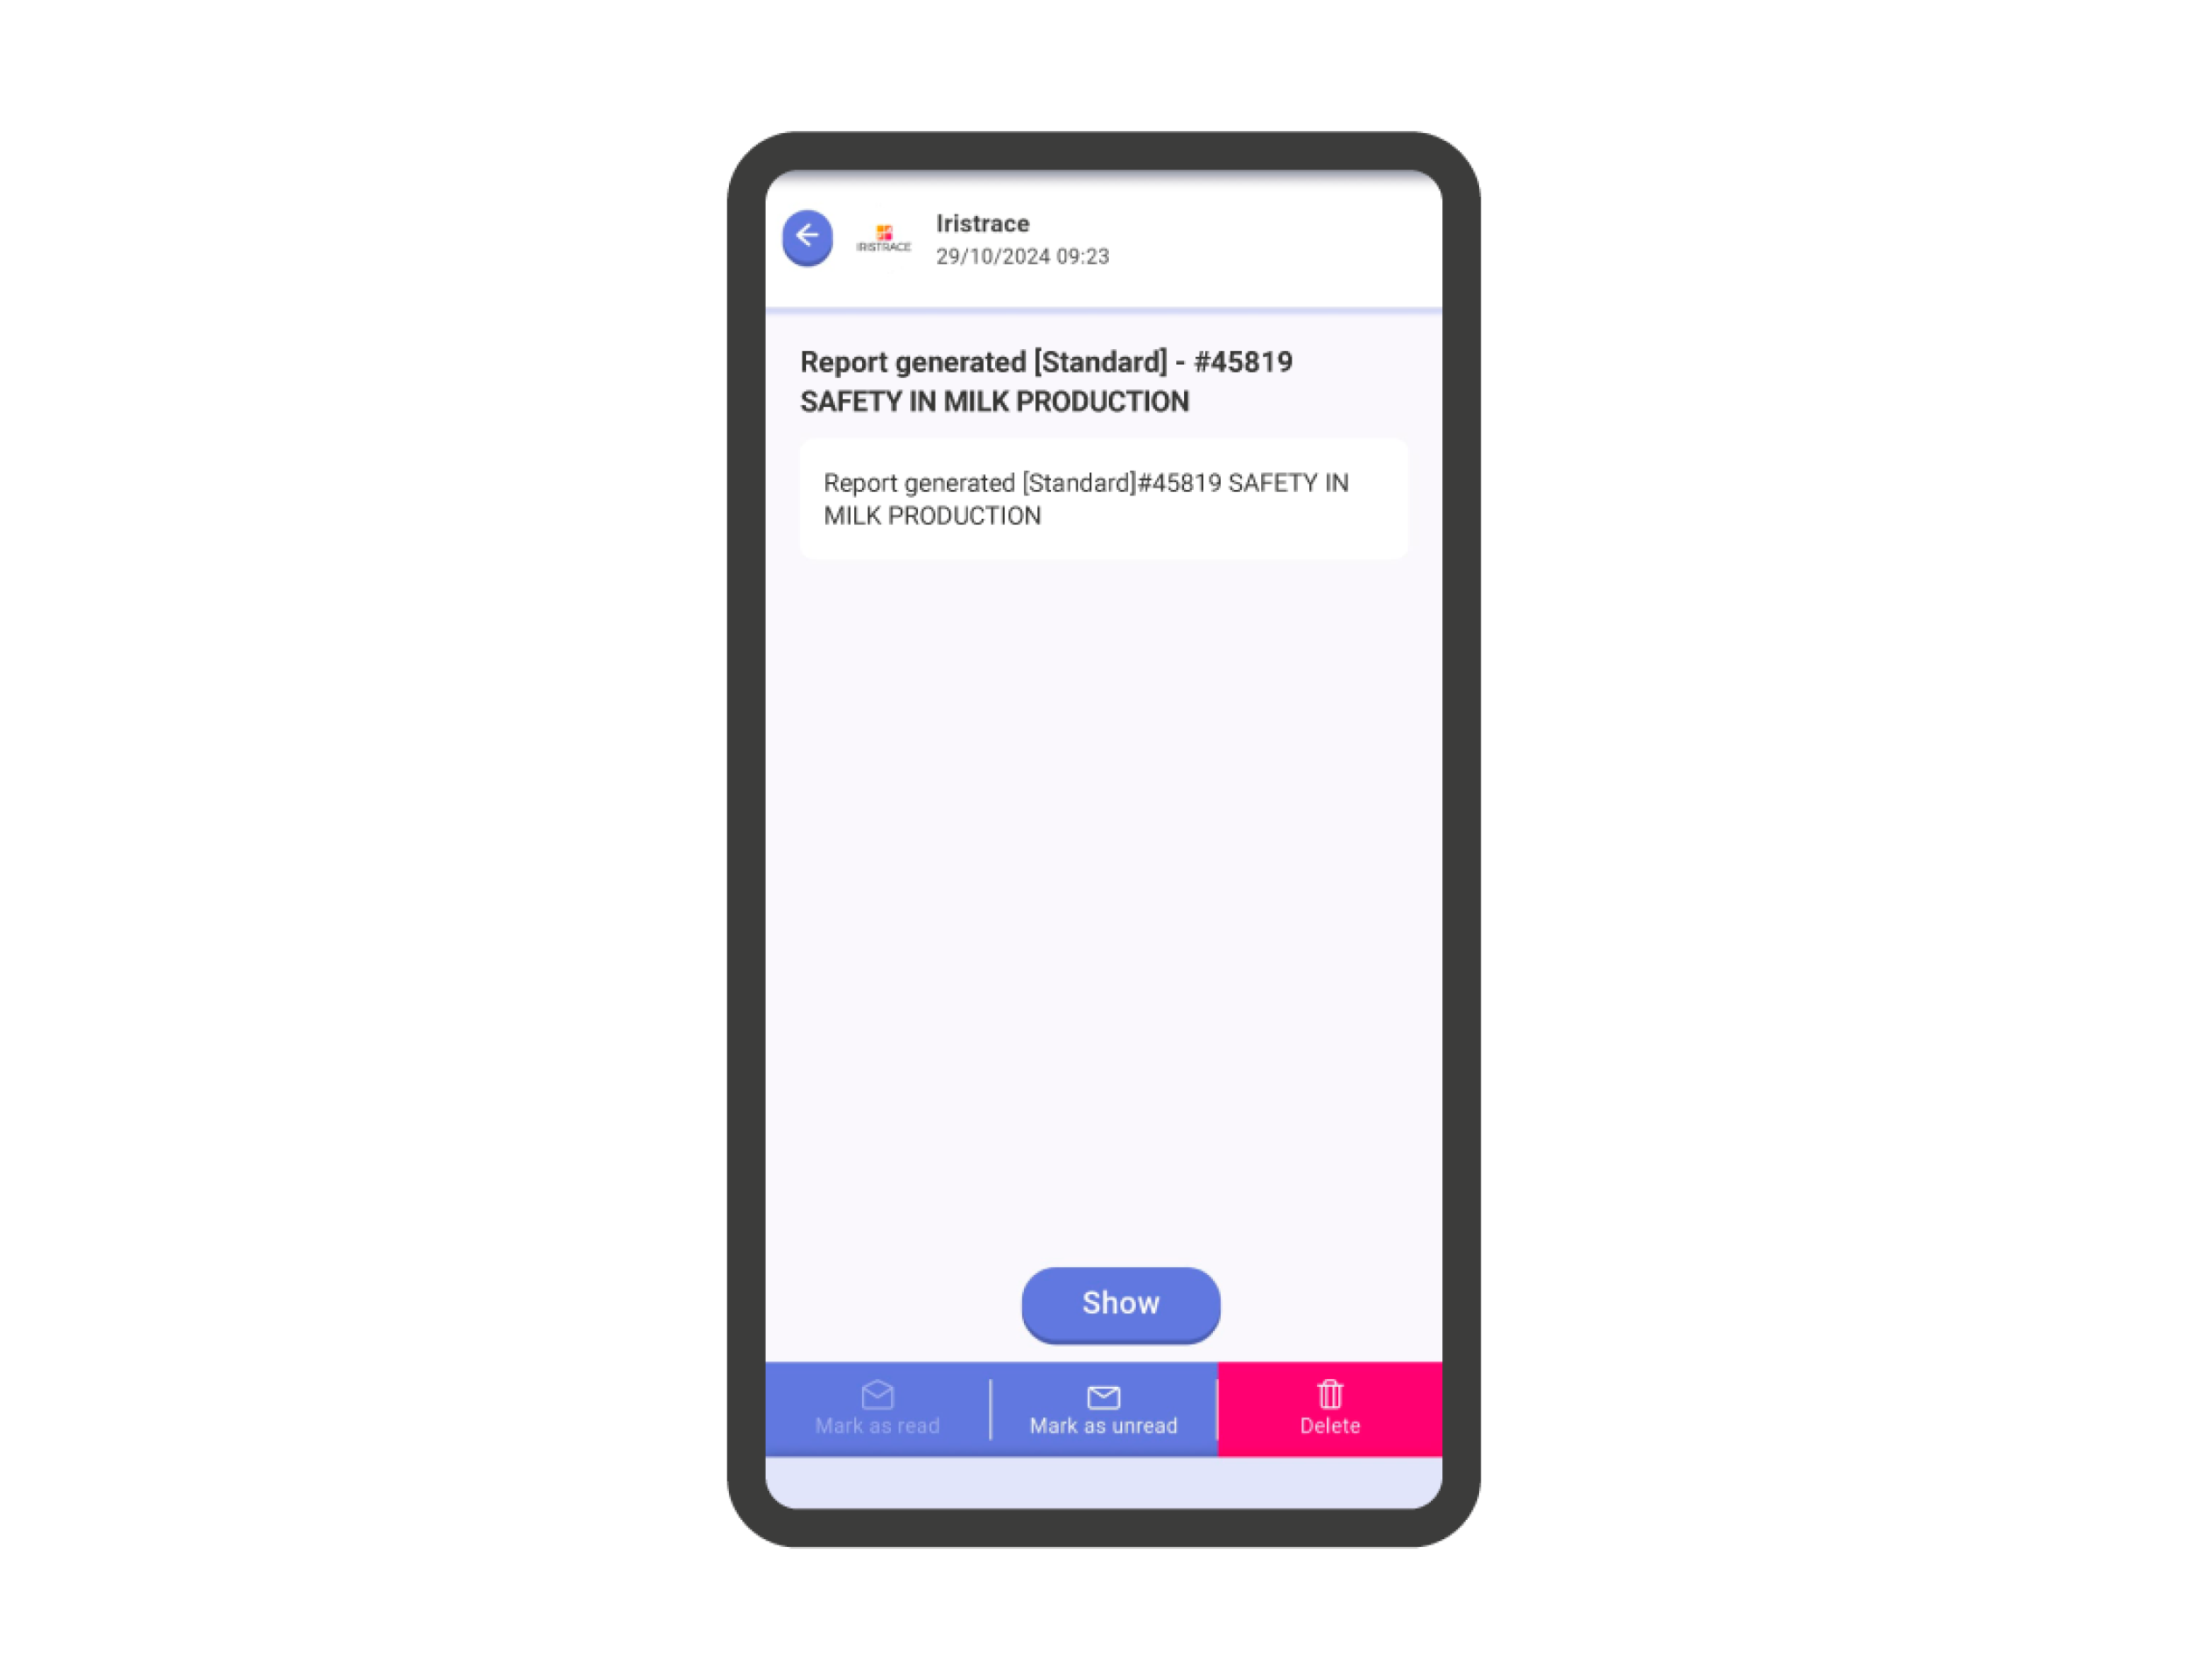
Exporting reports is a feature that is still UNDER DEVELOPMENT in the mobile version of IRISTRACE. Currently, the functionality is limited to exporting one or more checklists in a simple report PDF format. Soon the export options in WORD, EXCEL, and CSV will be enabled. To export one or more checklists, you must access the checklist list and select them by pressing and holding on the checklist cards. Then, tap on the ‘Export’ action. At this point, an informative message will appear indicating that the report is being exported and that the user will be informed through a notification. To access the exported report, go to the ‘Notifications’ section in the Home menu. If the report has been successfully exported, you will have received a notification with a link to the report.
By clicking on the link, the PDF report will download to the device and open automatically.
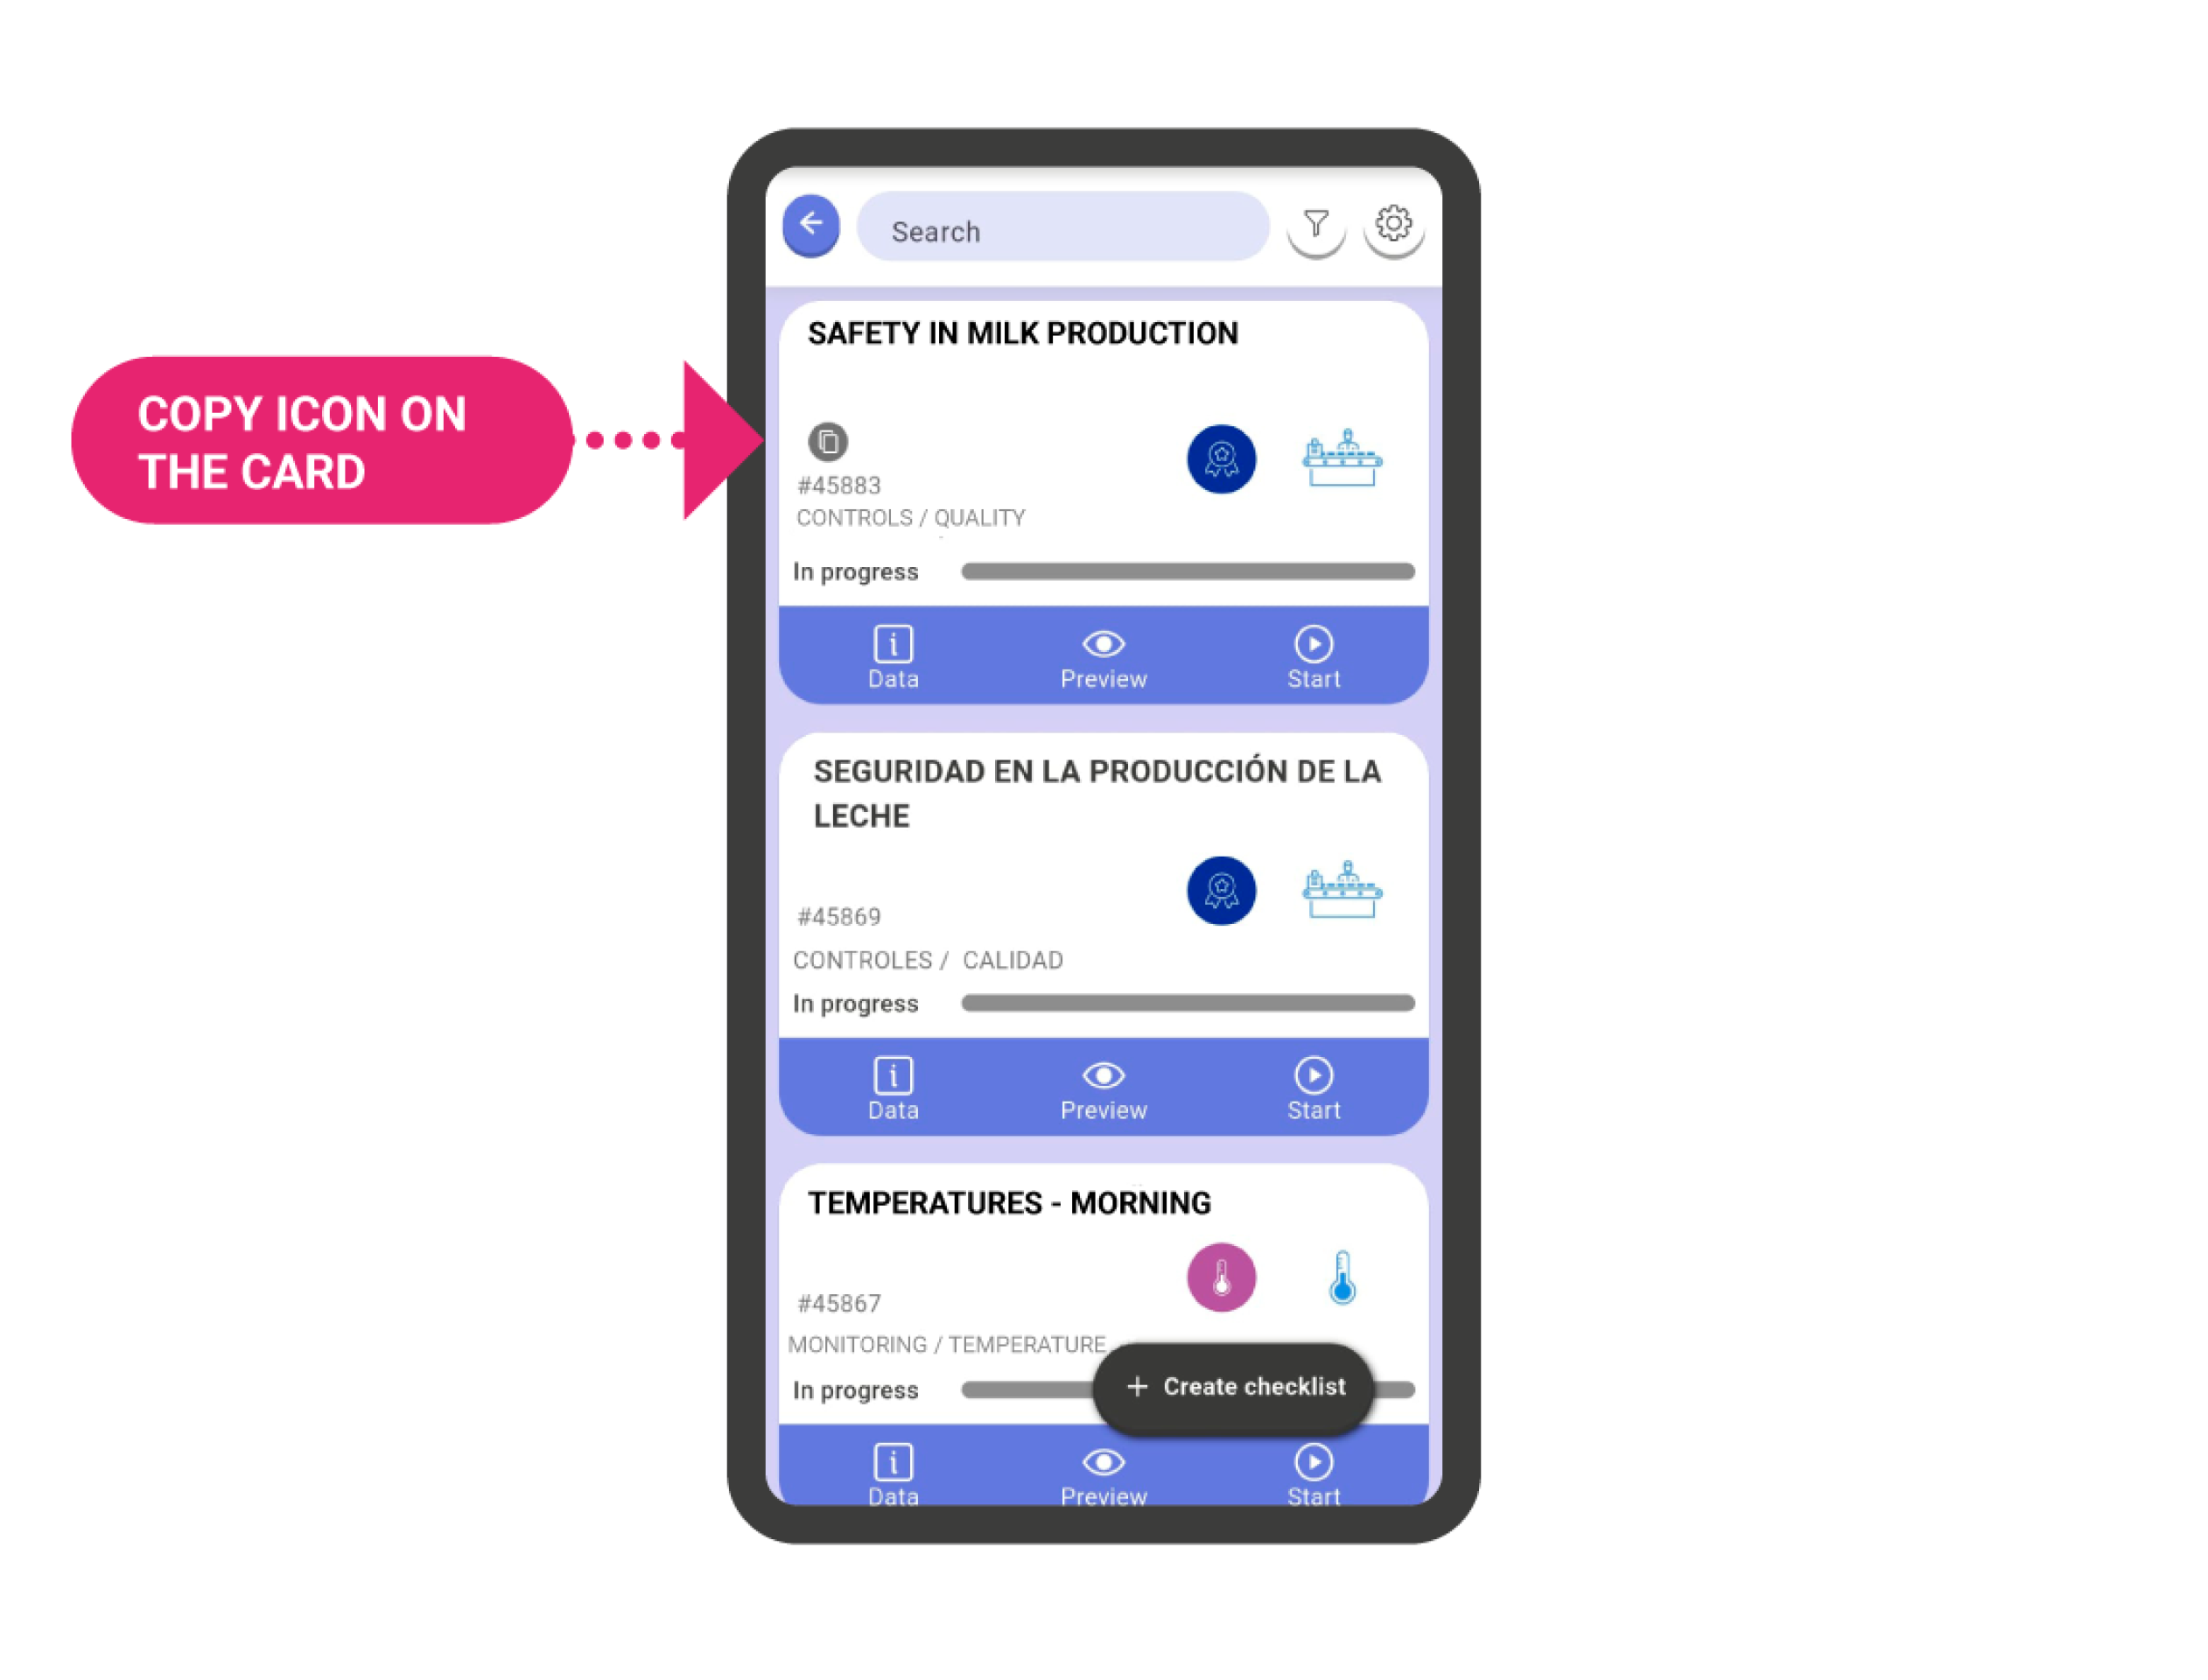
Duplicate a Checklist #
To copy one or more checklists, you must access the checklist list and select them by pressing and holding on the checklist cards. Next, tap on the ‘Duplicate’ action in the bottom action bar.
Tap on ‘Duplicate’ in the confirmation box that appears afterwards.
You will see that the selected checklists have been duplicated. To identify a copy, note that the copy has a small icon on the card indicating it. IMPORTANT! Checklist copies are created in the same department where they were originally created.

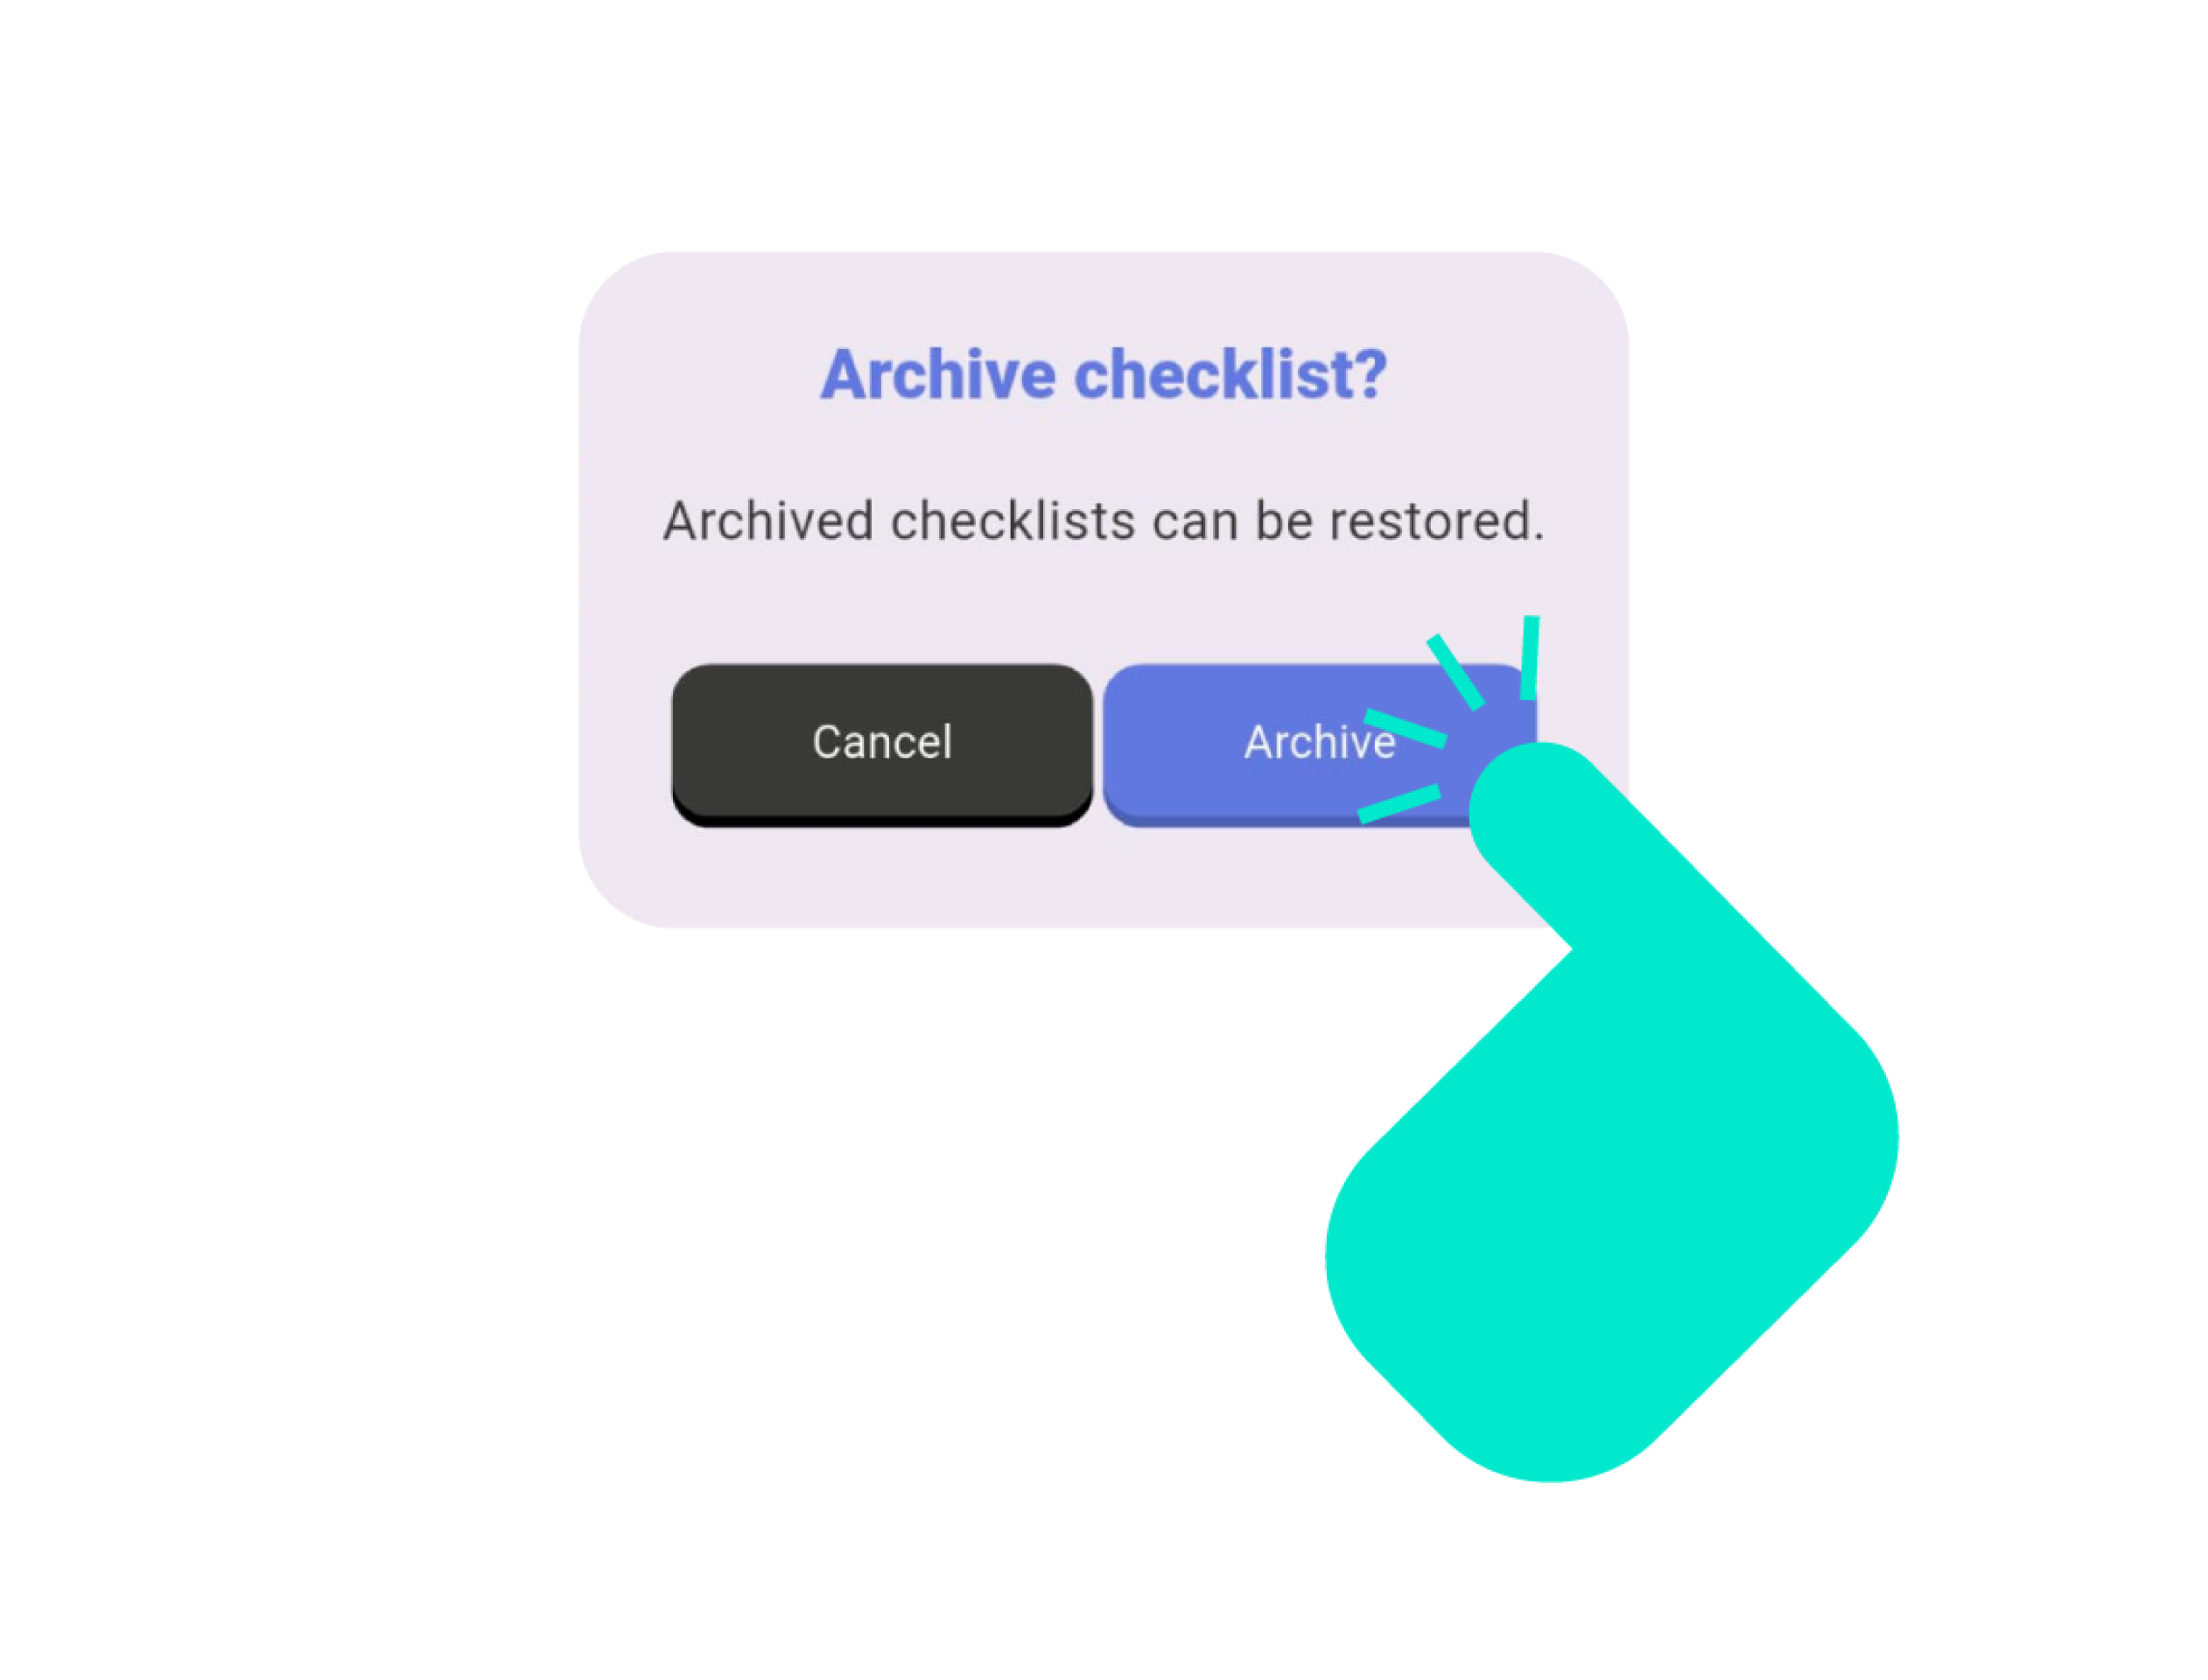
Archive or Unarchive Checklists #
An alternative to deleting checklists is archiving. Archiving involves moving these checklists to a ‘drawer’ where they are not deleted but also not considered. An archived checklist will not appear in searches (unless specified otherwise), cannot be completed, and will not influence statistics. Archiving is reversible at any time, allowing you to ‘unarchive’ any checklist to make it active again.
To archive one or more checklists, you must access the checklist list and select them by pressing and holding on the checklist cards. Then, press the ‘Archive’ action in the bottom action bar.
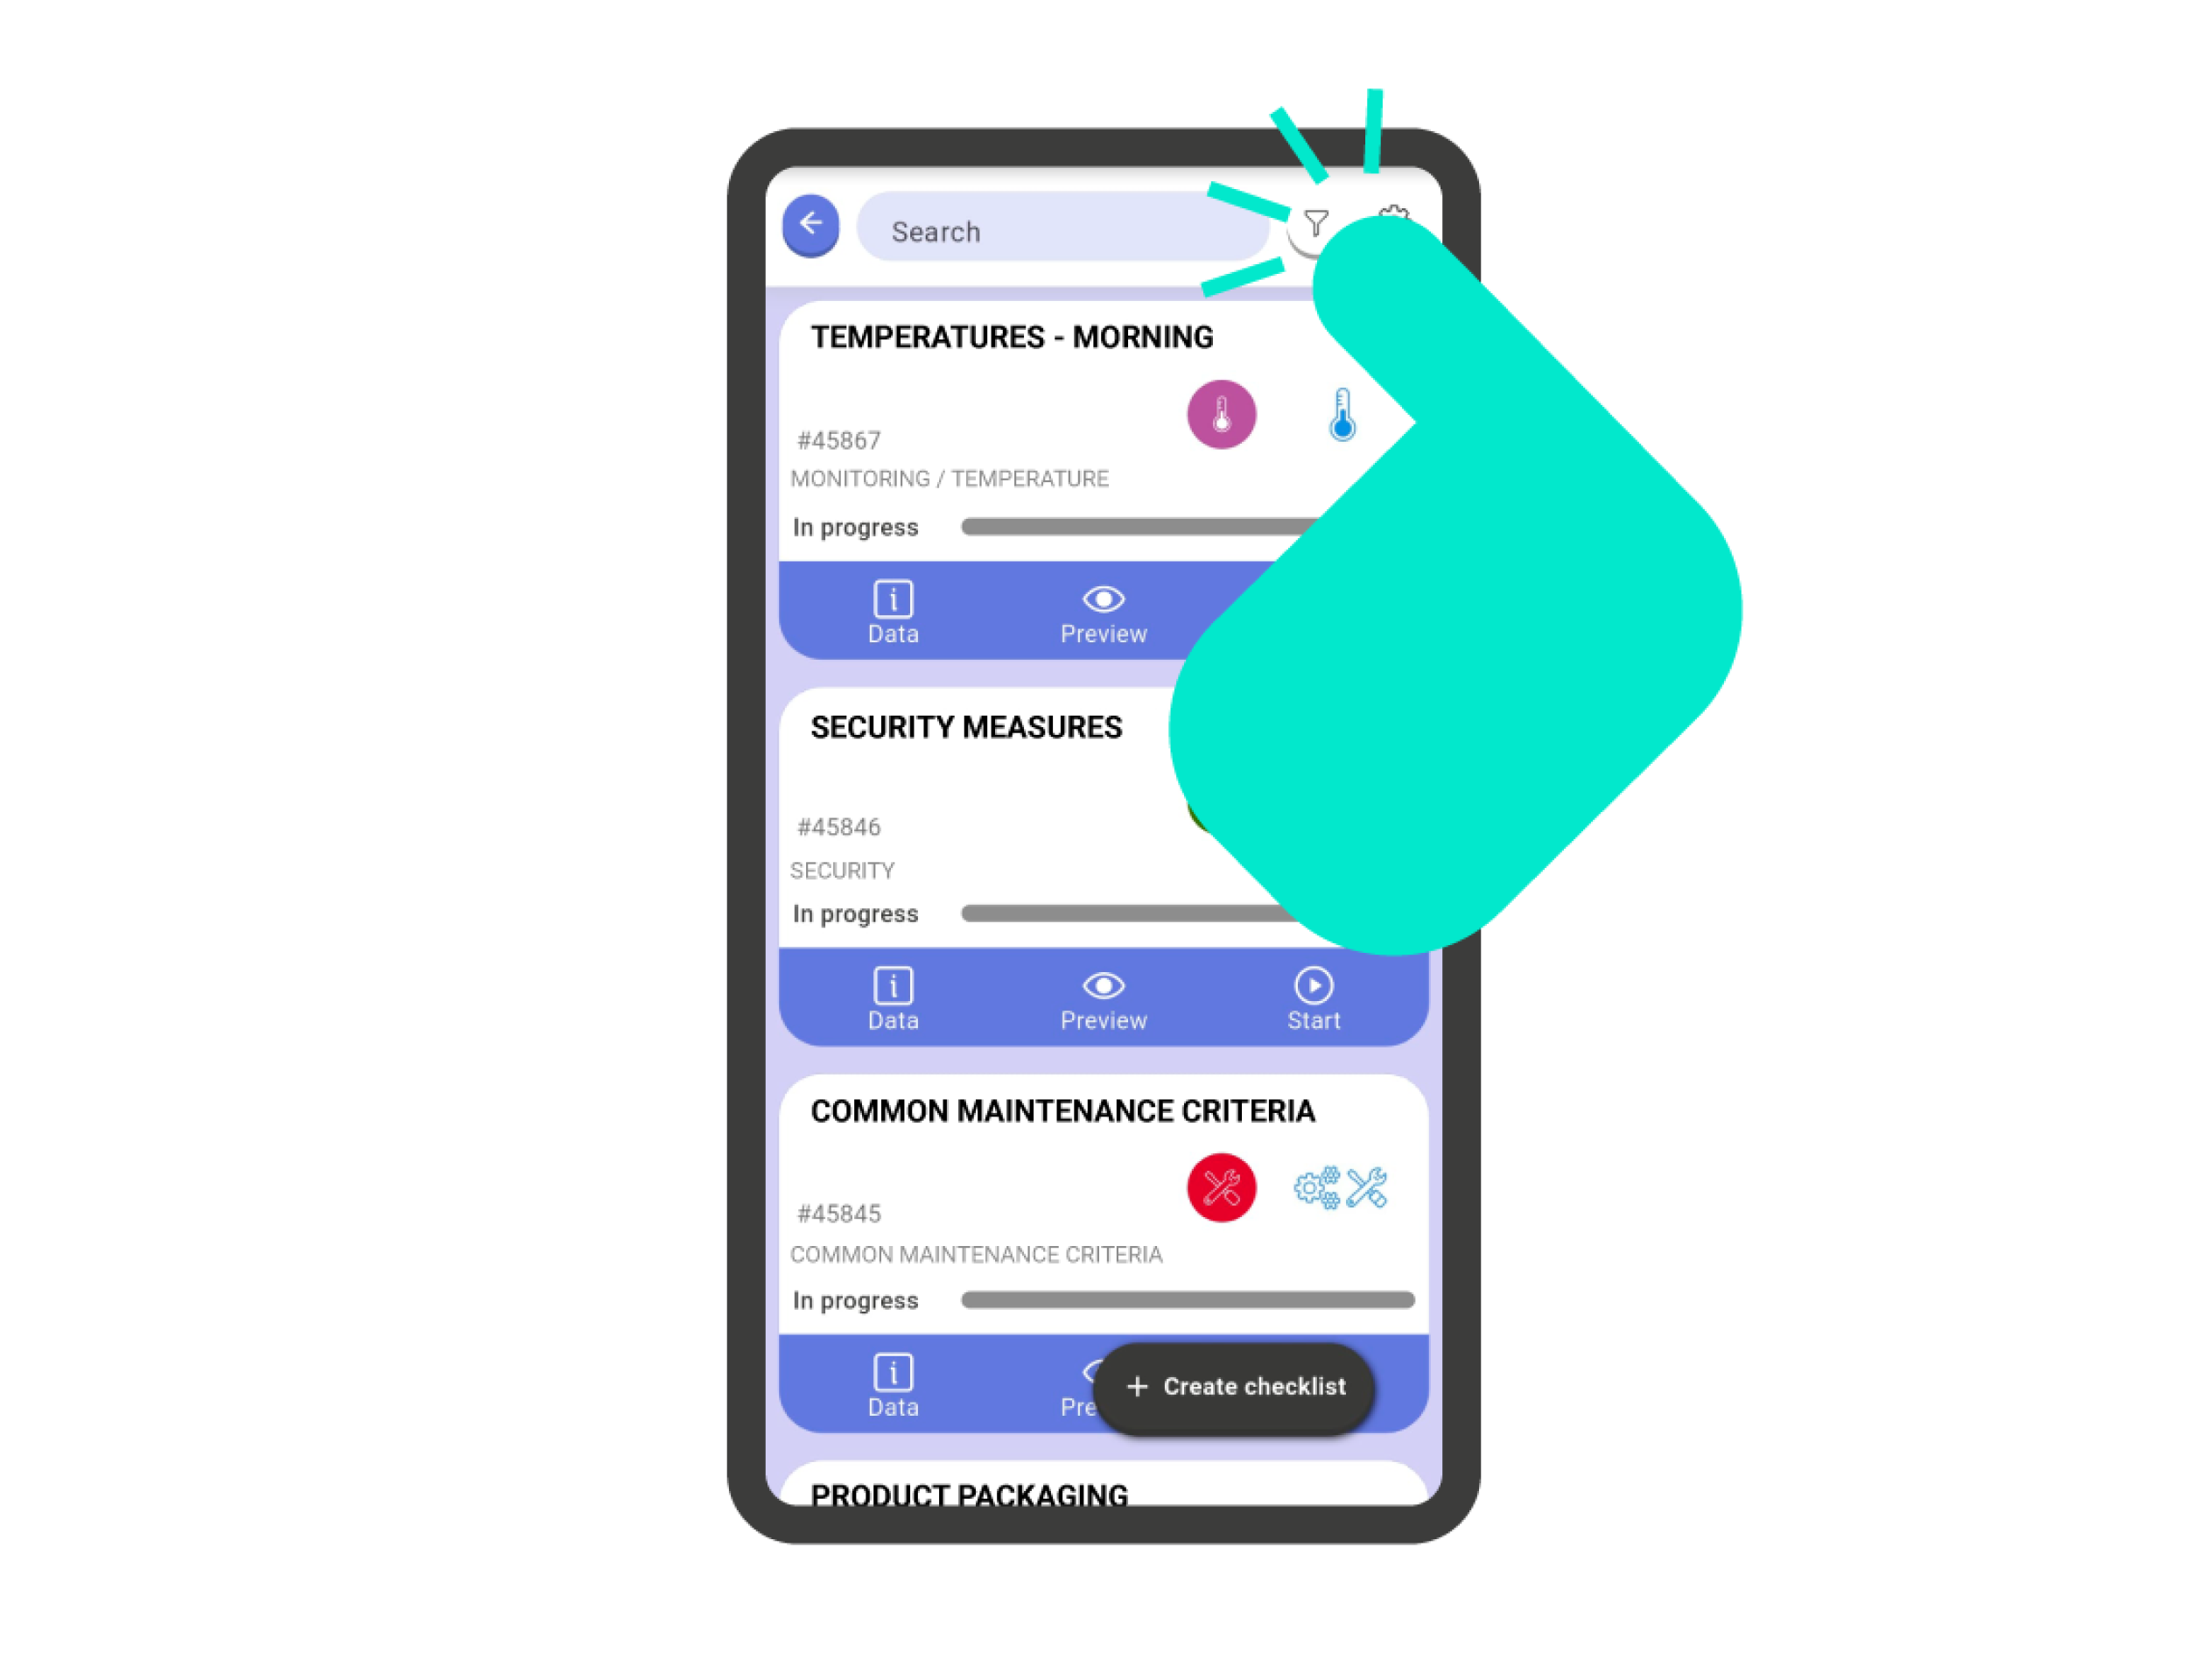
To unarchive one or more checklists, you must first filter the checklists to show only those that are archived. To do this, access the filters in the checklist list, next to the search bar in the top right corner. Click on the ‘Archived’ icon and ‘Show Results.’ Now your checklist list only shows those that are archived.
To unarchive them, you must select them by pressing and holding on the checklist cards. Then, press the ‘Unarchive’ action.
IMPORTANT! An archived checklist is not interactive. Any interaction with it requires it to be unarchived first.


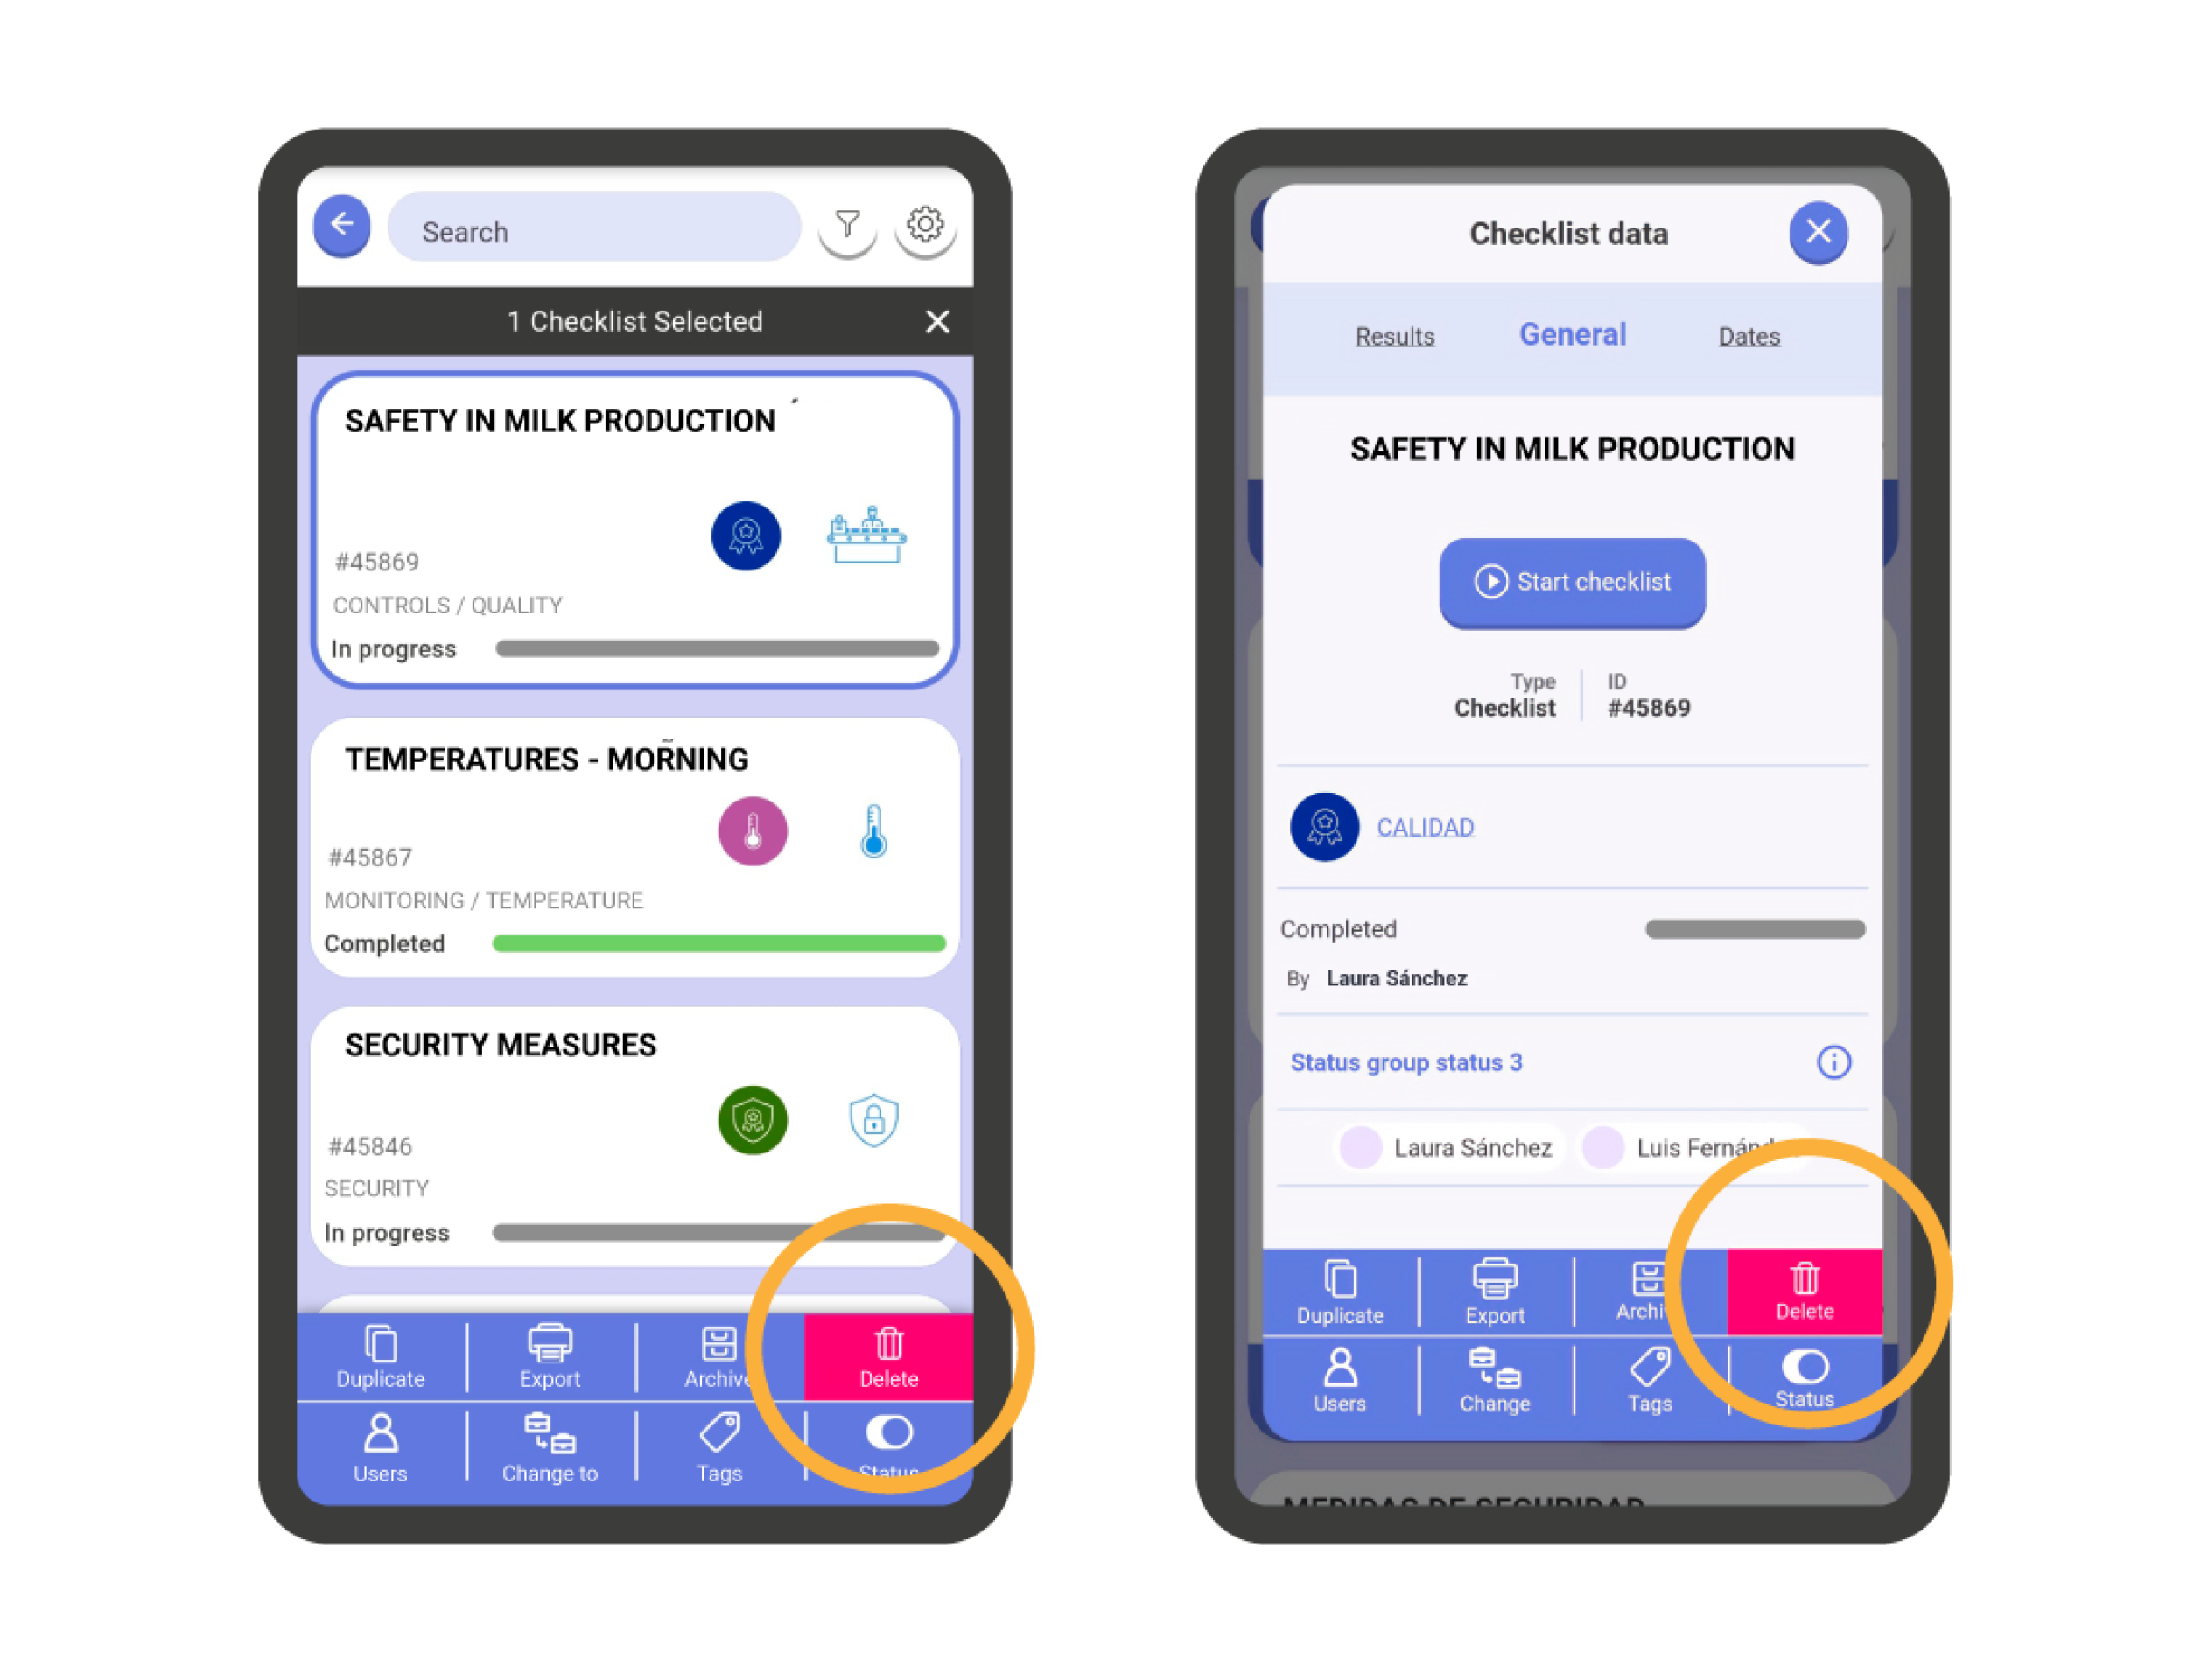
Delete checklists #
To delete one or more checklists, you must access the list of checklists and select them by pressing and holding on the checklist cards.
Then, press the ‘Delete’ action in the bottom action bar.
Press ‘Delete’ in the confirmation box that appears next.
IMPORTANT! A deleted checklist cannot be recovered in any way. Make sure before deleting a checklist as all attached data will be lost (responses, photos, comments, documents, action plans).