Skip to content
Iristrace Helpdesk
  • First steps
  • Checklists
  • Templates
  • Workflows
  • Users
  • Departments
  • Reports
  • Notifications
  • Data download
  • Dashboard
  • Recommendations for use
  • Integrations & BI
  • Glossary
  • Mobile App
    • Getting Started
    • Answering Checklist
    • Finding and managing checklists
    • Offline Mode
    • App Notifications
    • Settings

First steps

8
  • Add Additional Company Contact Fields
  • Accessing Iristrace’s web/desktop platform
  • Accessing Iristrace on mobile
  • Customizing Iristrace with your corporate image or logo
  • Customize your Iristrace environment
  • Changing the language of your account in Iristrace
  • Iristrace Menu Interface
  • Creating and answering a checklist in the web version of Iristrace

New to Iristrace

4
  • Understanding the New Iristrace Interface and Template Versioning
  • New Features in the Template Question Editor
  • Answering Tables in the Web-App
  • New Account Settings in Iristrace

Checklists

16
  • How to View Checklists in the Kanban View
  • Creating and answering a checklist in the web version of Iristrace
  • How to answer a checklist from the Iristrace mobile app
  • How to create and answer a checklist from the web version of Iristrace
  • What additional options are available to the user when answering a checklist?
  • How to answer a checklist without connectivity (offline mode)
  • How to browse checklists in web version
  • How to filter the list of checklists in the web version
  • How to create an action plan in a checklist
  • How to set up a dynamic title per checklist
  • How to mass import checklists into Iristrace
  • How to manage incidents recorded in Iristrace
  • How to download an Excel file of incidents
  • Create and download checklist reports
  • How to assign a checklist to a user
  • How to change the department of a checklists

Templates

17
  • How to configure the visibility of a category of questions in a checklist based on its status
  • Archive Templates
  • How to create templates in Iristrace
  • What types of questions can be configured
  • What additional options can be configured in questions Excerpt
  • How to create default responses and reuse response structures
  • How to configure default responses
  • How to create statuses and status groups
  • How to create templates for action plans
  • How to examine the metadata in your templates
  • What are the additional functionalities of the templates?
  • How to customize a template
  • How to set basic scoring in templates
  • How to set up conditional questions
  • How to set up an advanced scorecard
  • How to Create a Random Question Template
  • How to set score thresholds for multiple choice questions

Workflows

2
  • How to create a Workflow to send notifications by email
  • How to create a Workflow to create checklists

Users

5
  • Checklist Access Control: Restrict Checklist Visibility by User and Template
  • “View Users” Permission
  • How to create a user
  • Managing Custom Permissions
  • How to mass customize user permissions

Departments

5
  • How to create a department
  • What are departments in Iristrace
  • How to create subdivisions
  • How to assign users to departments
  • How to customize the title “Departments”.

Reports

2
  • Exporting a report in Word format
  • How to customize PDF reports

Notifications

4
  • Creating a Notification Based on an Automatic Event
  • How to Generate a Notification According to a Time Periodicity
  • How to set up an automatic instant message (notifications)
  • How to download the requested reports

Data download

1
  • How to download an Excel file of incidents

Dashboard

1
  • How to create a dashboard

Recommendations for use

4
  • How to solve the most common web application stability issues
  • How to solve the most common problems with Iristrace access
  • How to resolve text mismatches in the calendar

Integrations & BI

11
  • Intermediate Database Iristrace
  • Data model
  • Connecting MariaDB with Microsoft Power BI
  • Conectar MariaDB con JDBC
  • ODBC data source
  • Connecting MariaDB with Google Looker Studio
  • Direct connection to MySQL Workbench
  • Connecting MariaDB to SAP Datasphere
  • Connection between MariaDB and Tableau
  • Connecting from Azure Synapse via local connection
mobile

Mobile App

23
  • Notifications
    • Notifications
  • Getting Started
    • Iristrace in a nutshell
    • Introduction to Iristrace basics
    • How to create a checklist
  • Answering checklists
    • Introduction
    • Question types
    • Question contents
    • Tables
    • Checklist options
  • Finding and managing checklists
    • List view of checklists
    • Checklist Actions
    • Basic checklist filters
    • Checklist preview and data
  • Offline
    • Using Mobile Offline Mode
  • Settings
    • Profile and account
    • App preferences
View Categories
  • Inicio
  • Iristrace Help Desk
  • Mobile App
  • Answering checklists
  • Question contents

Question contents

Add comments, photos, and files #

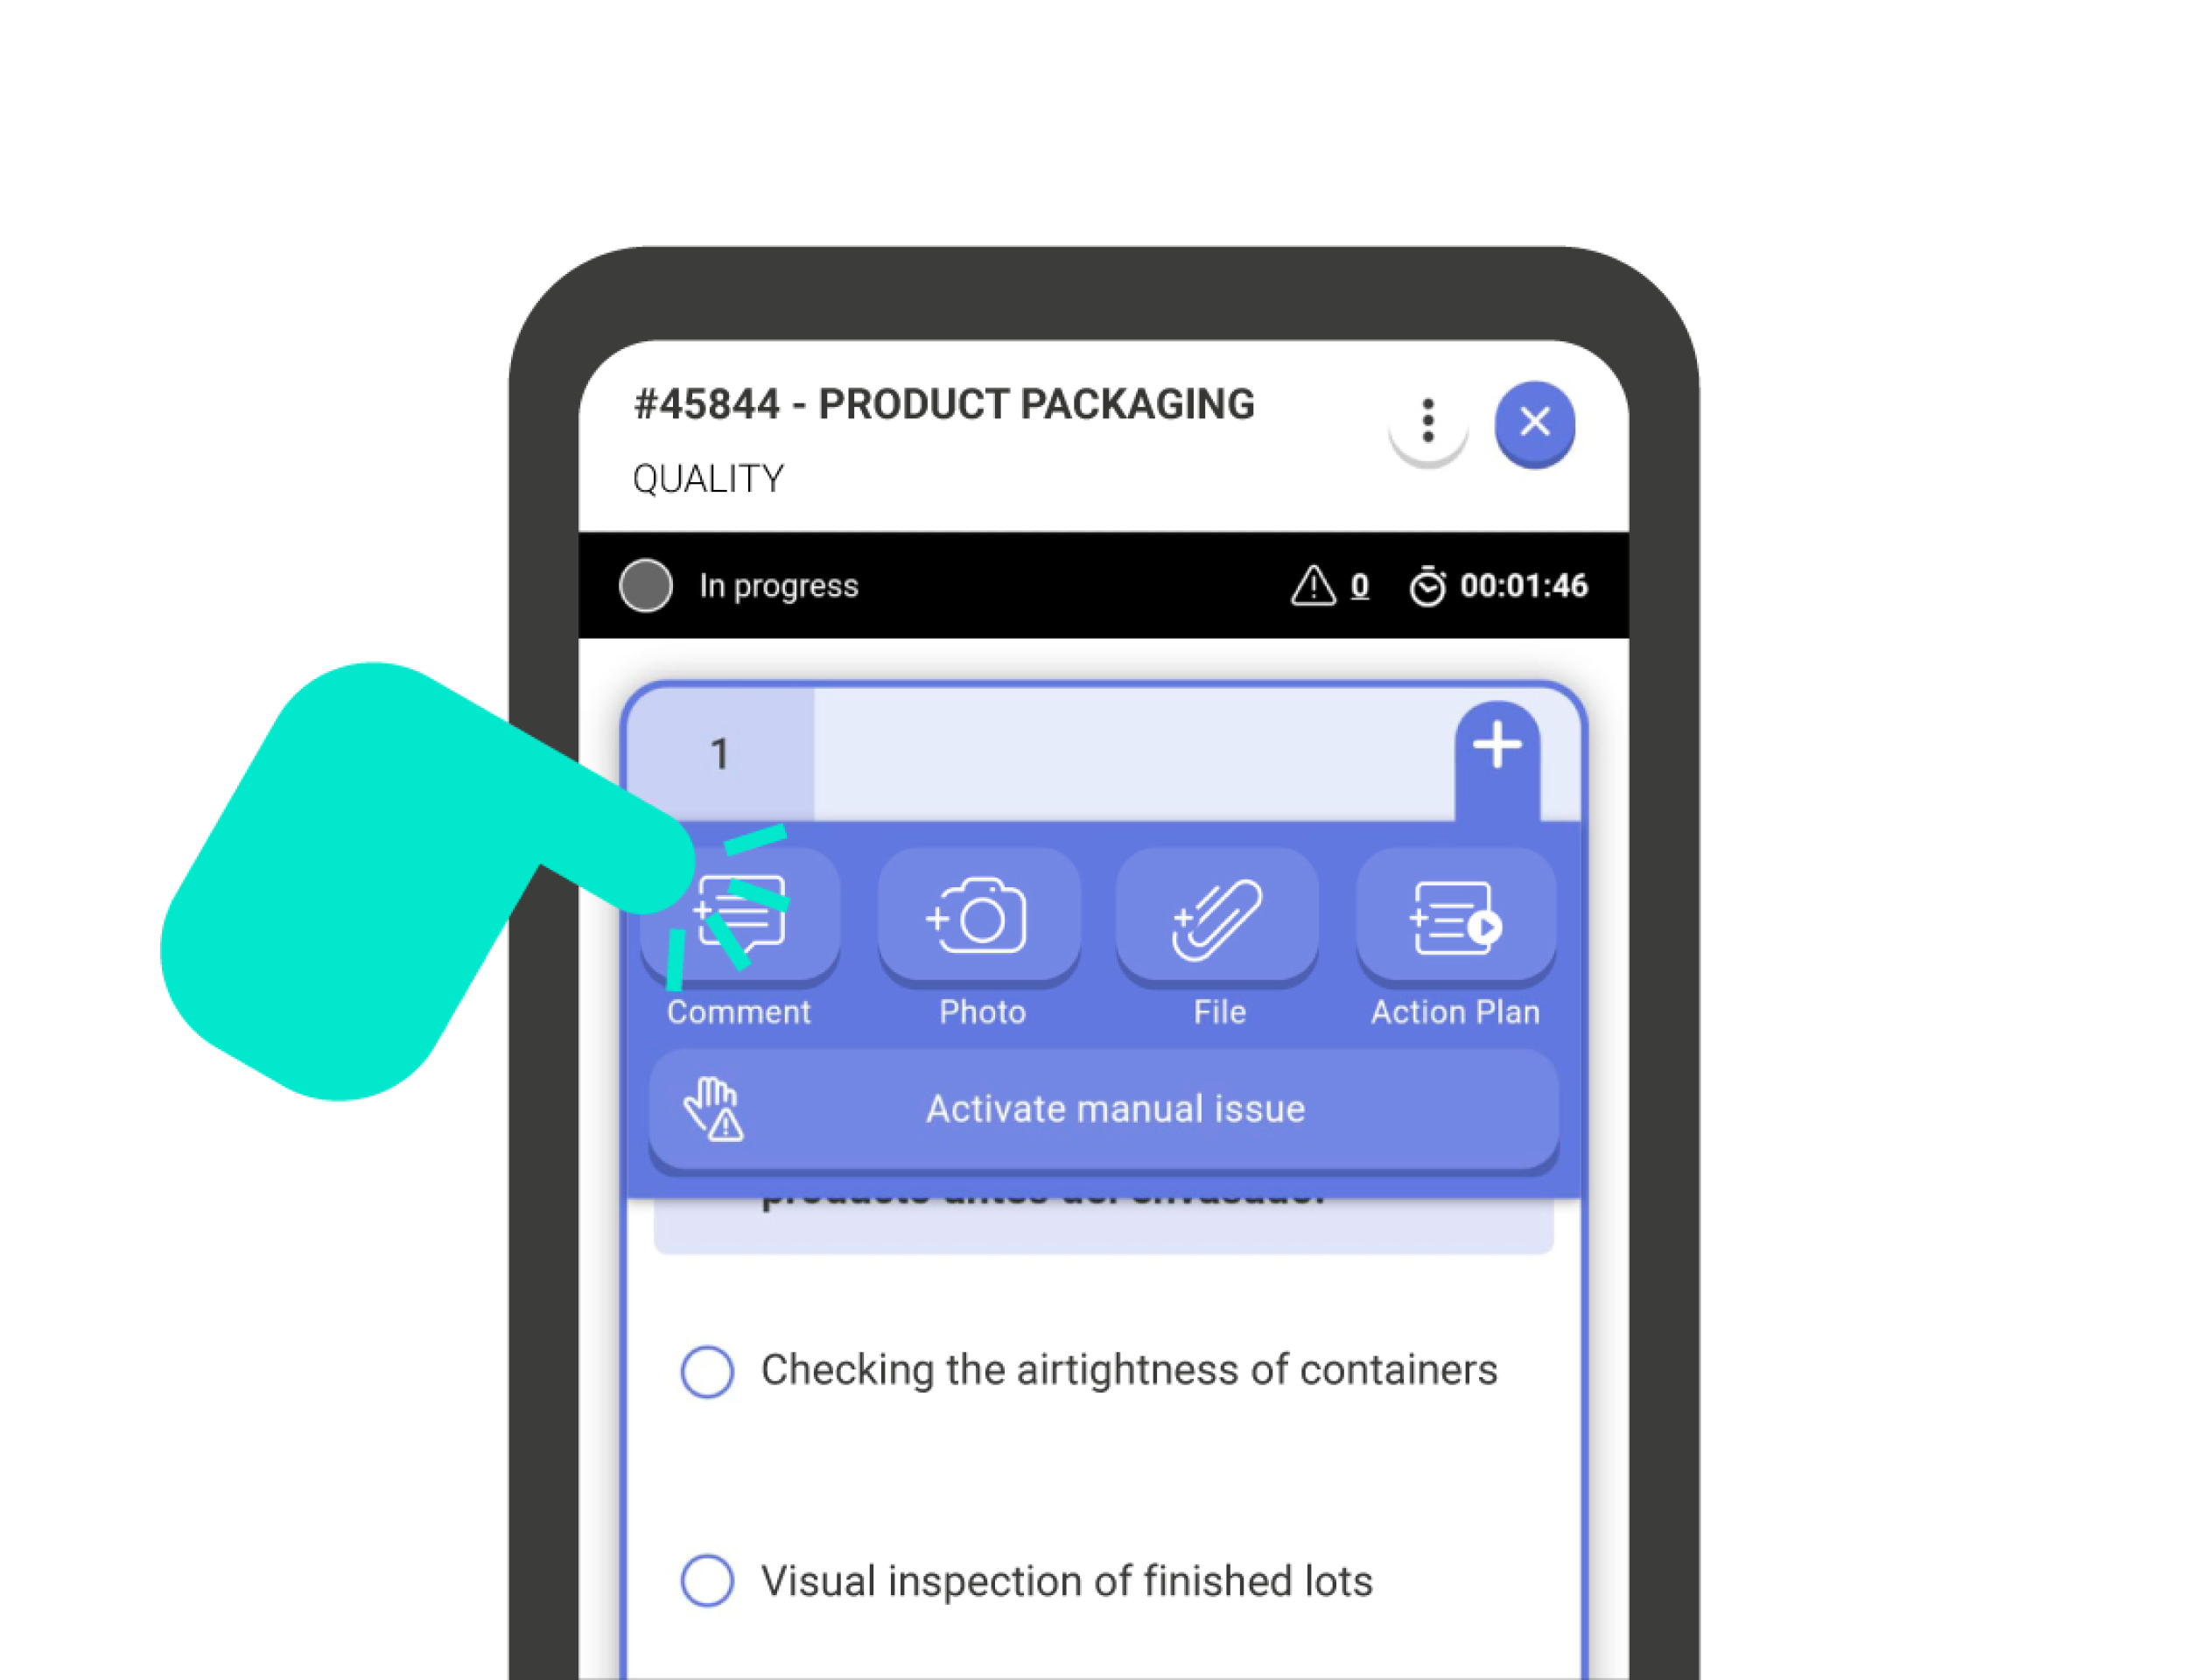
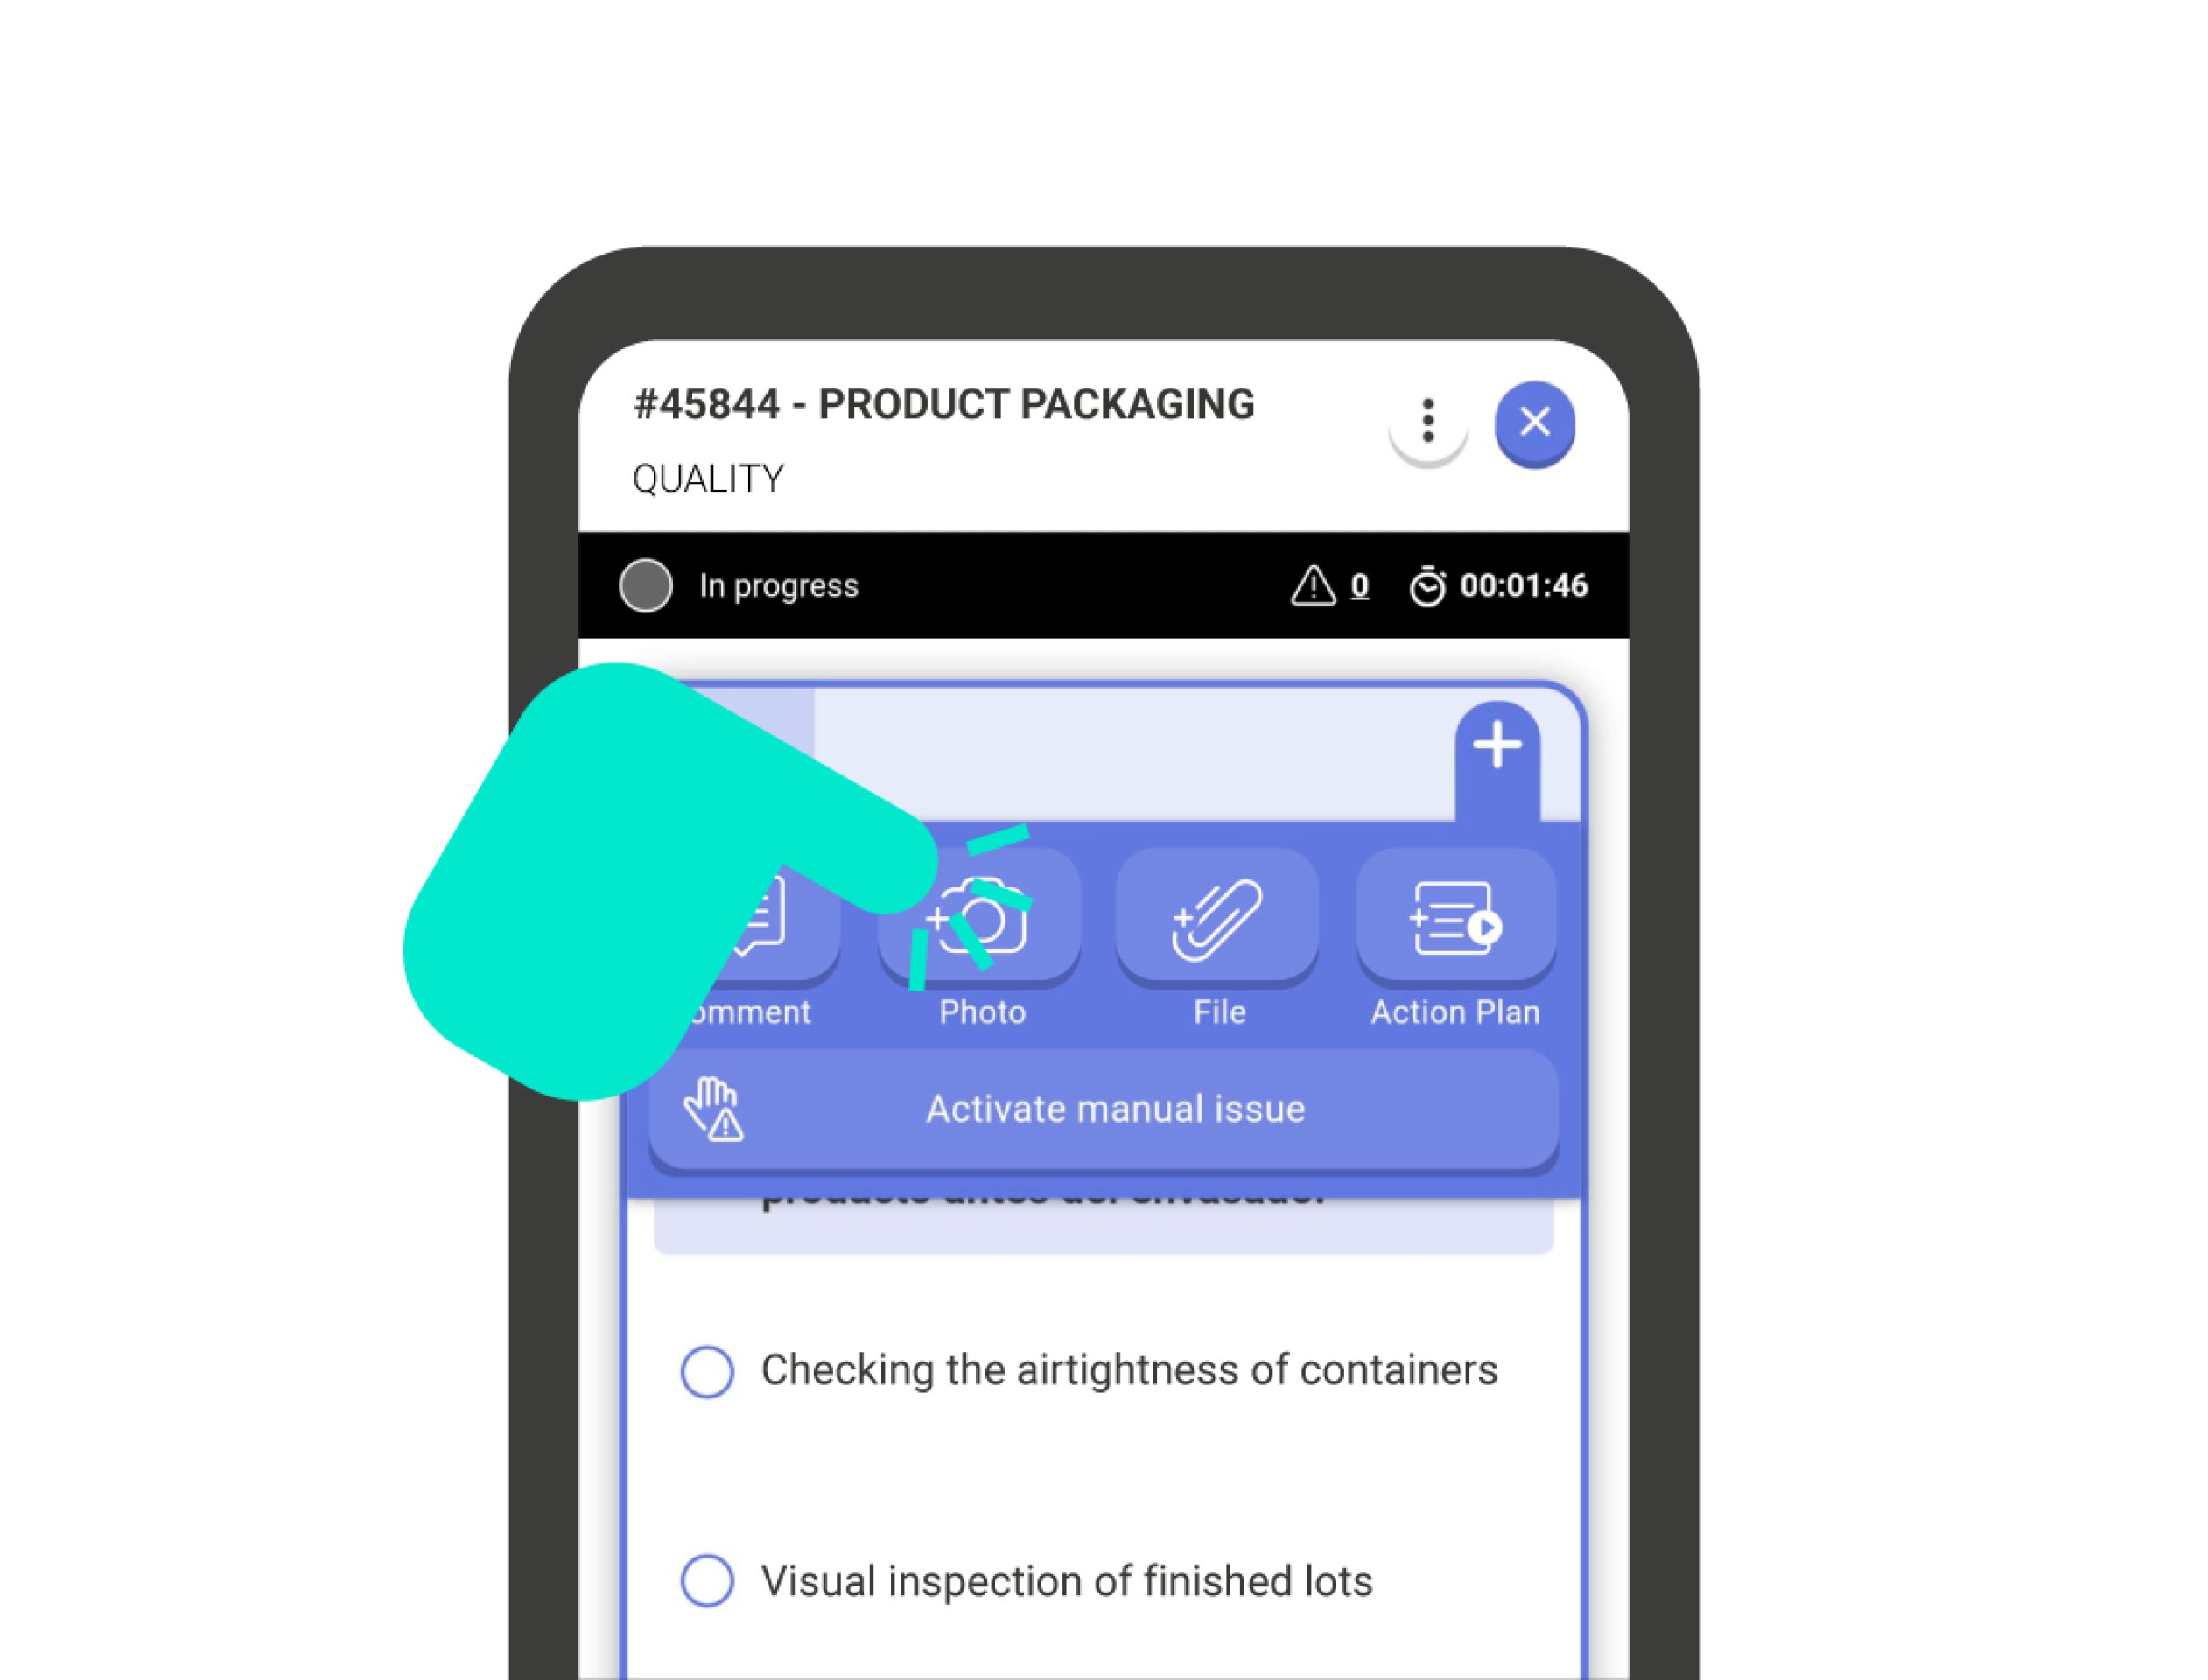
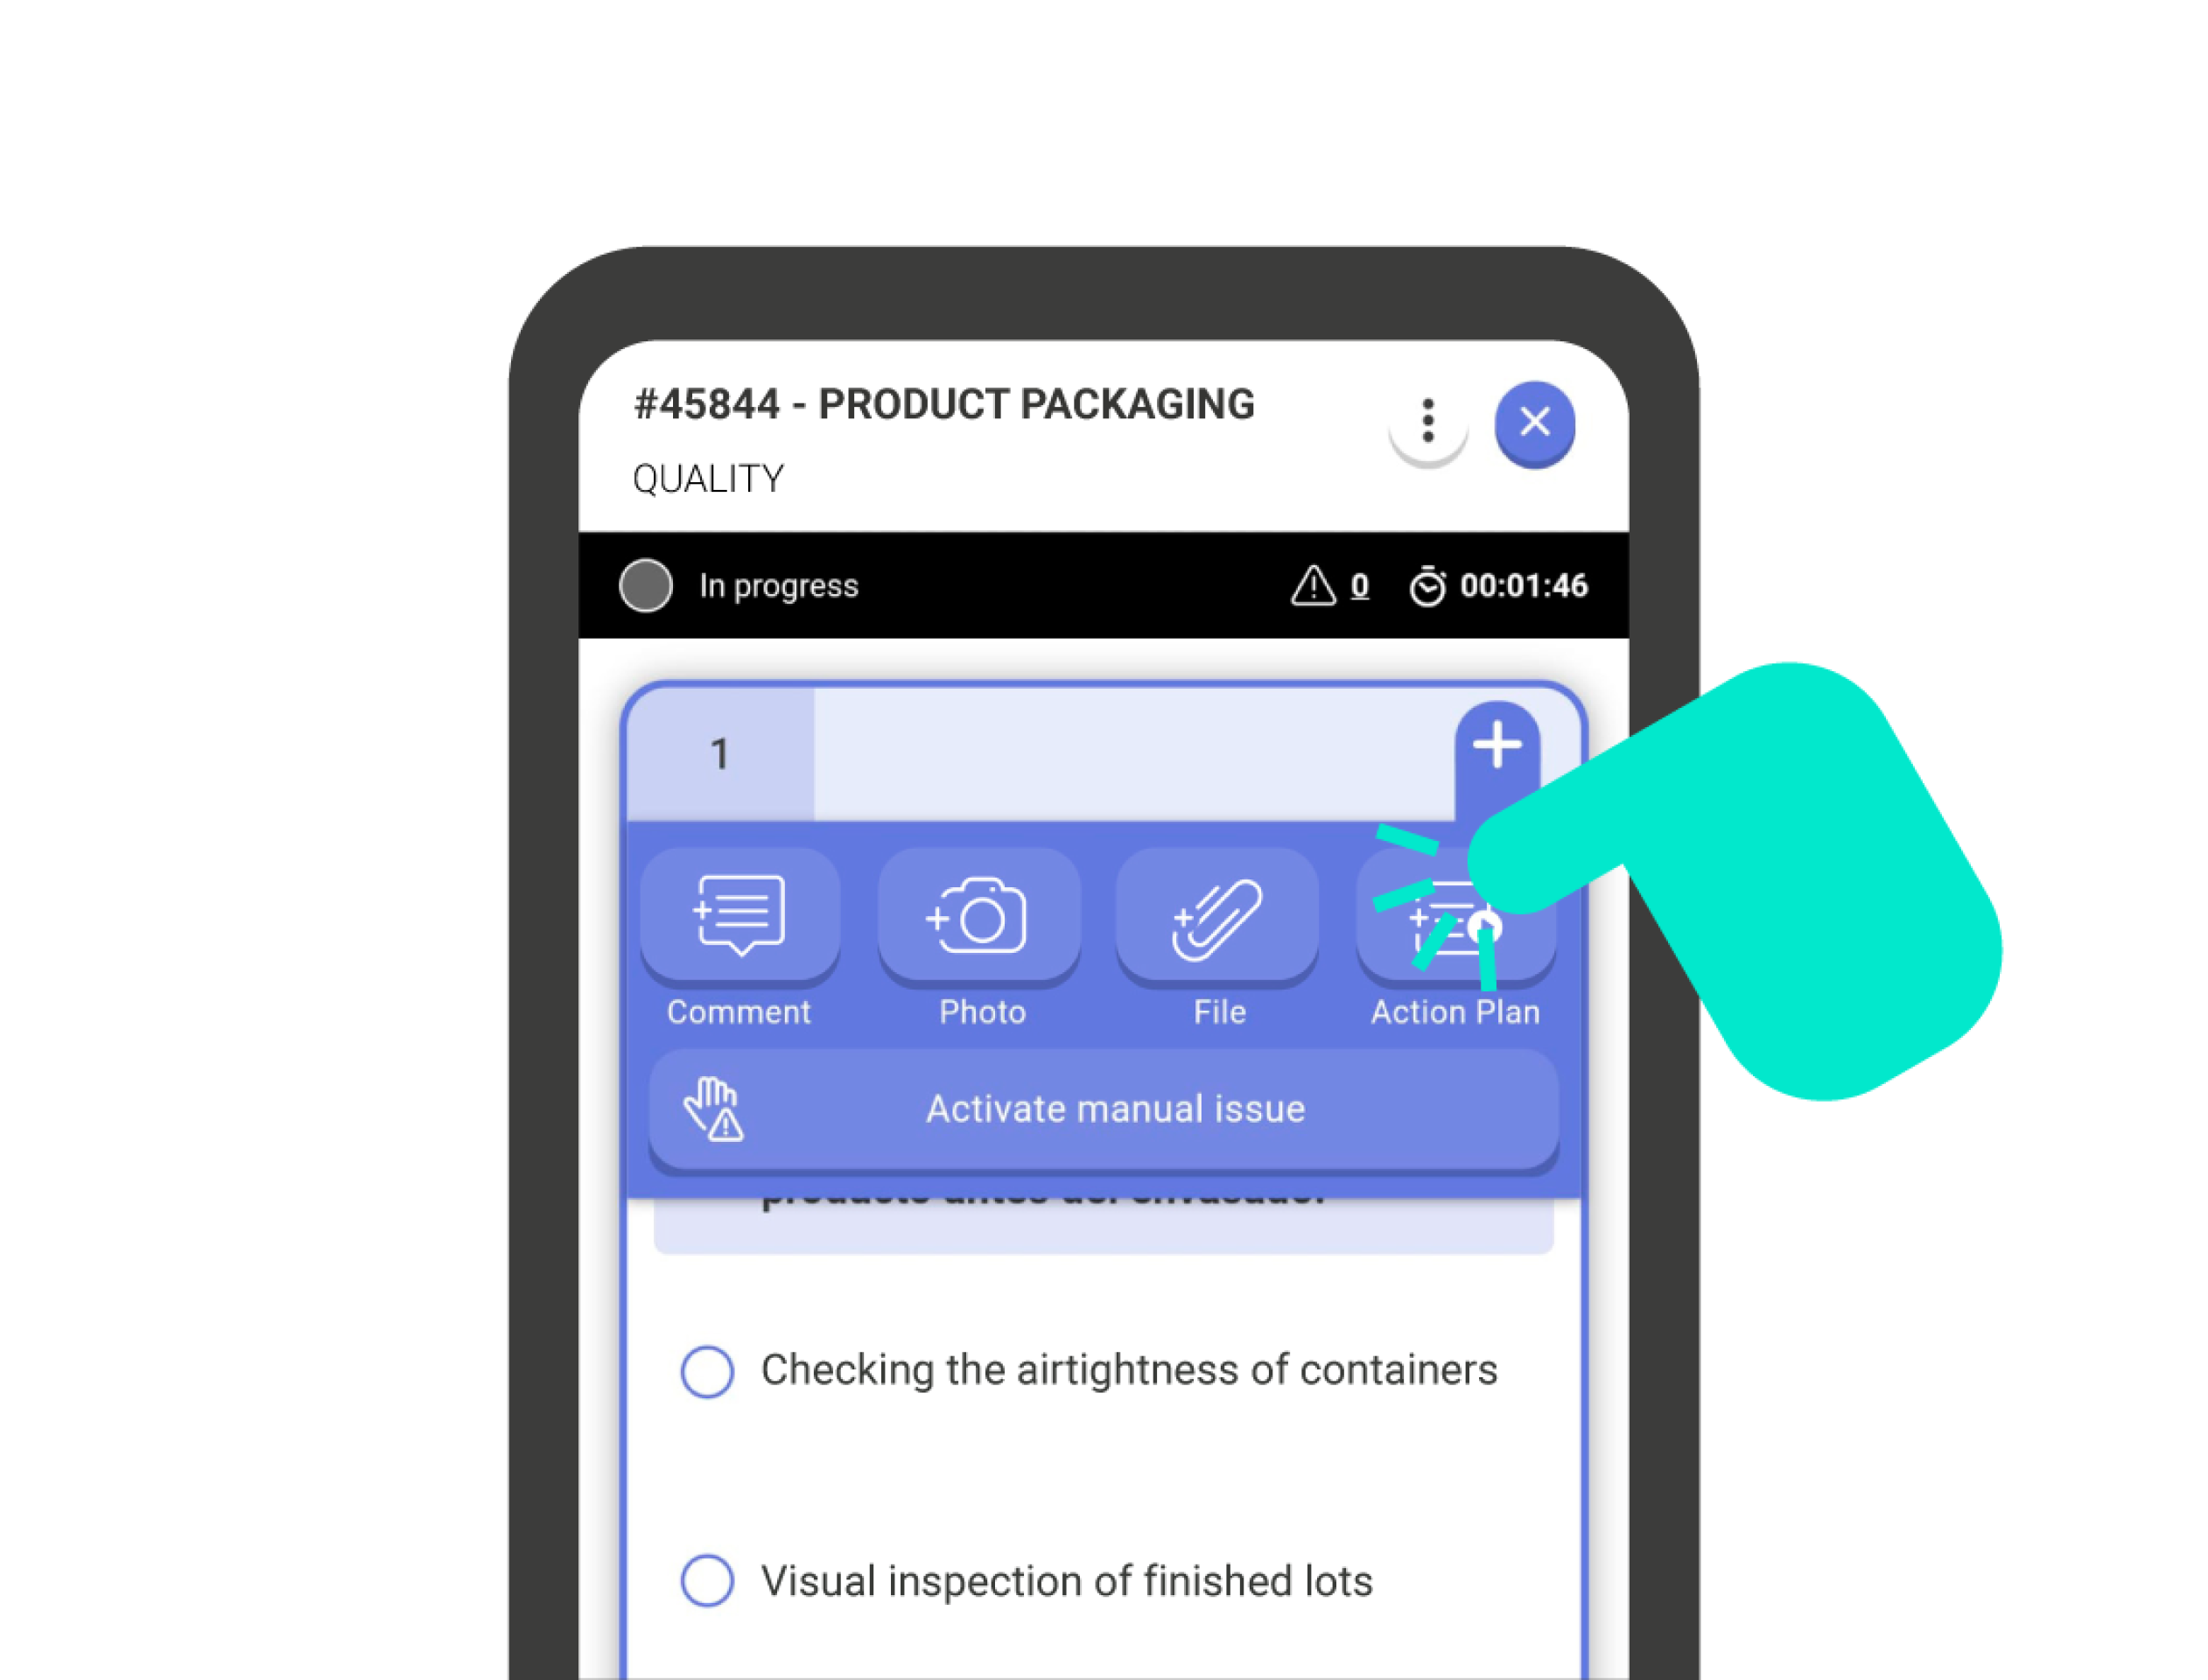
In IRISTRACE questions, you can add attachments. The method to attach anything to the question is quite simple. Press the button with the ‘+’ symbol on the top right corner of the question card you want to attach to, and a submenu with several options will appear:

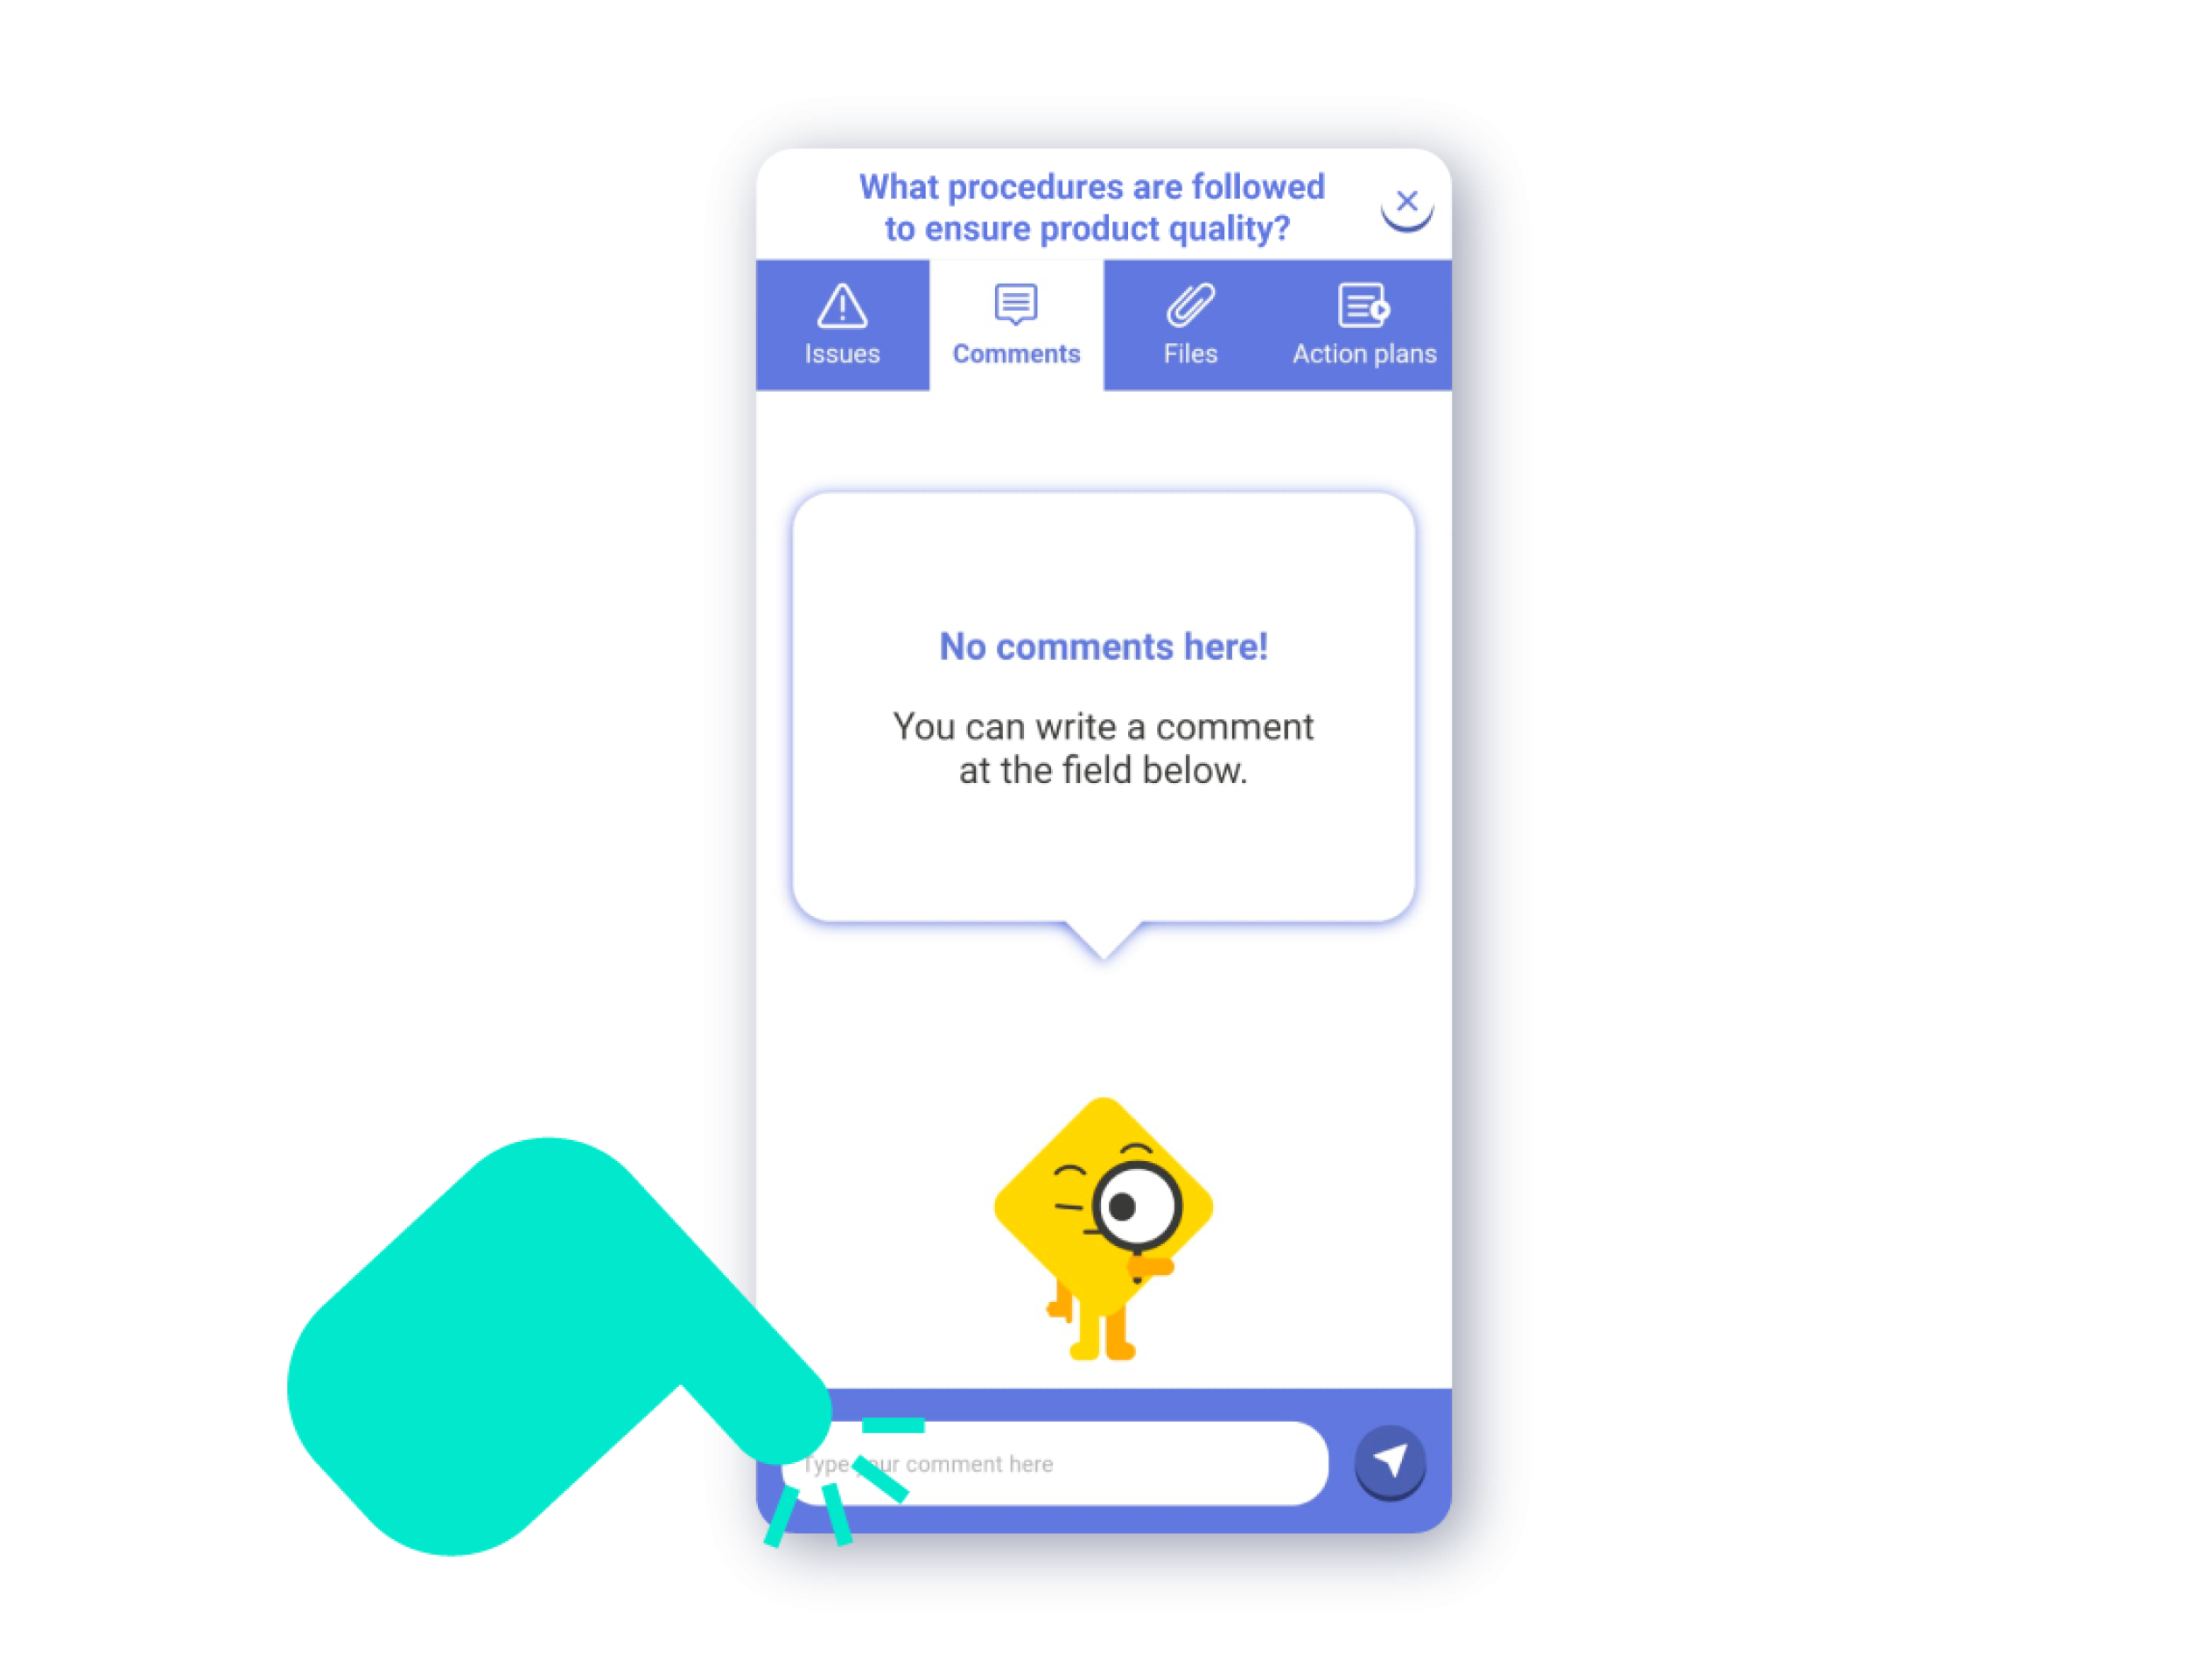
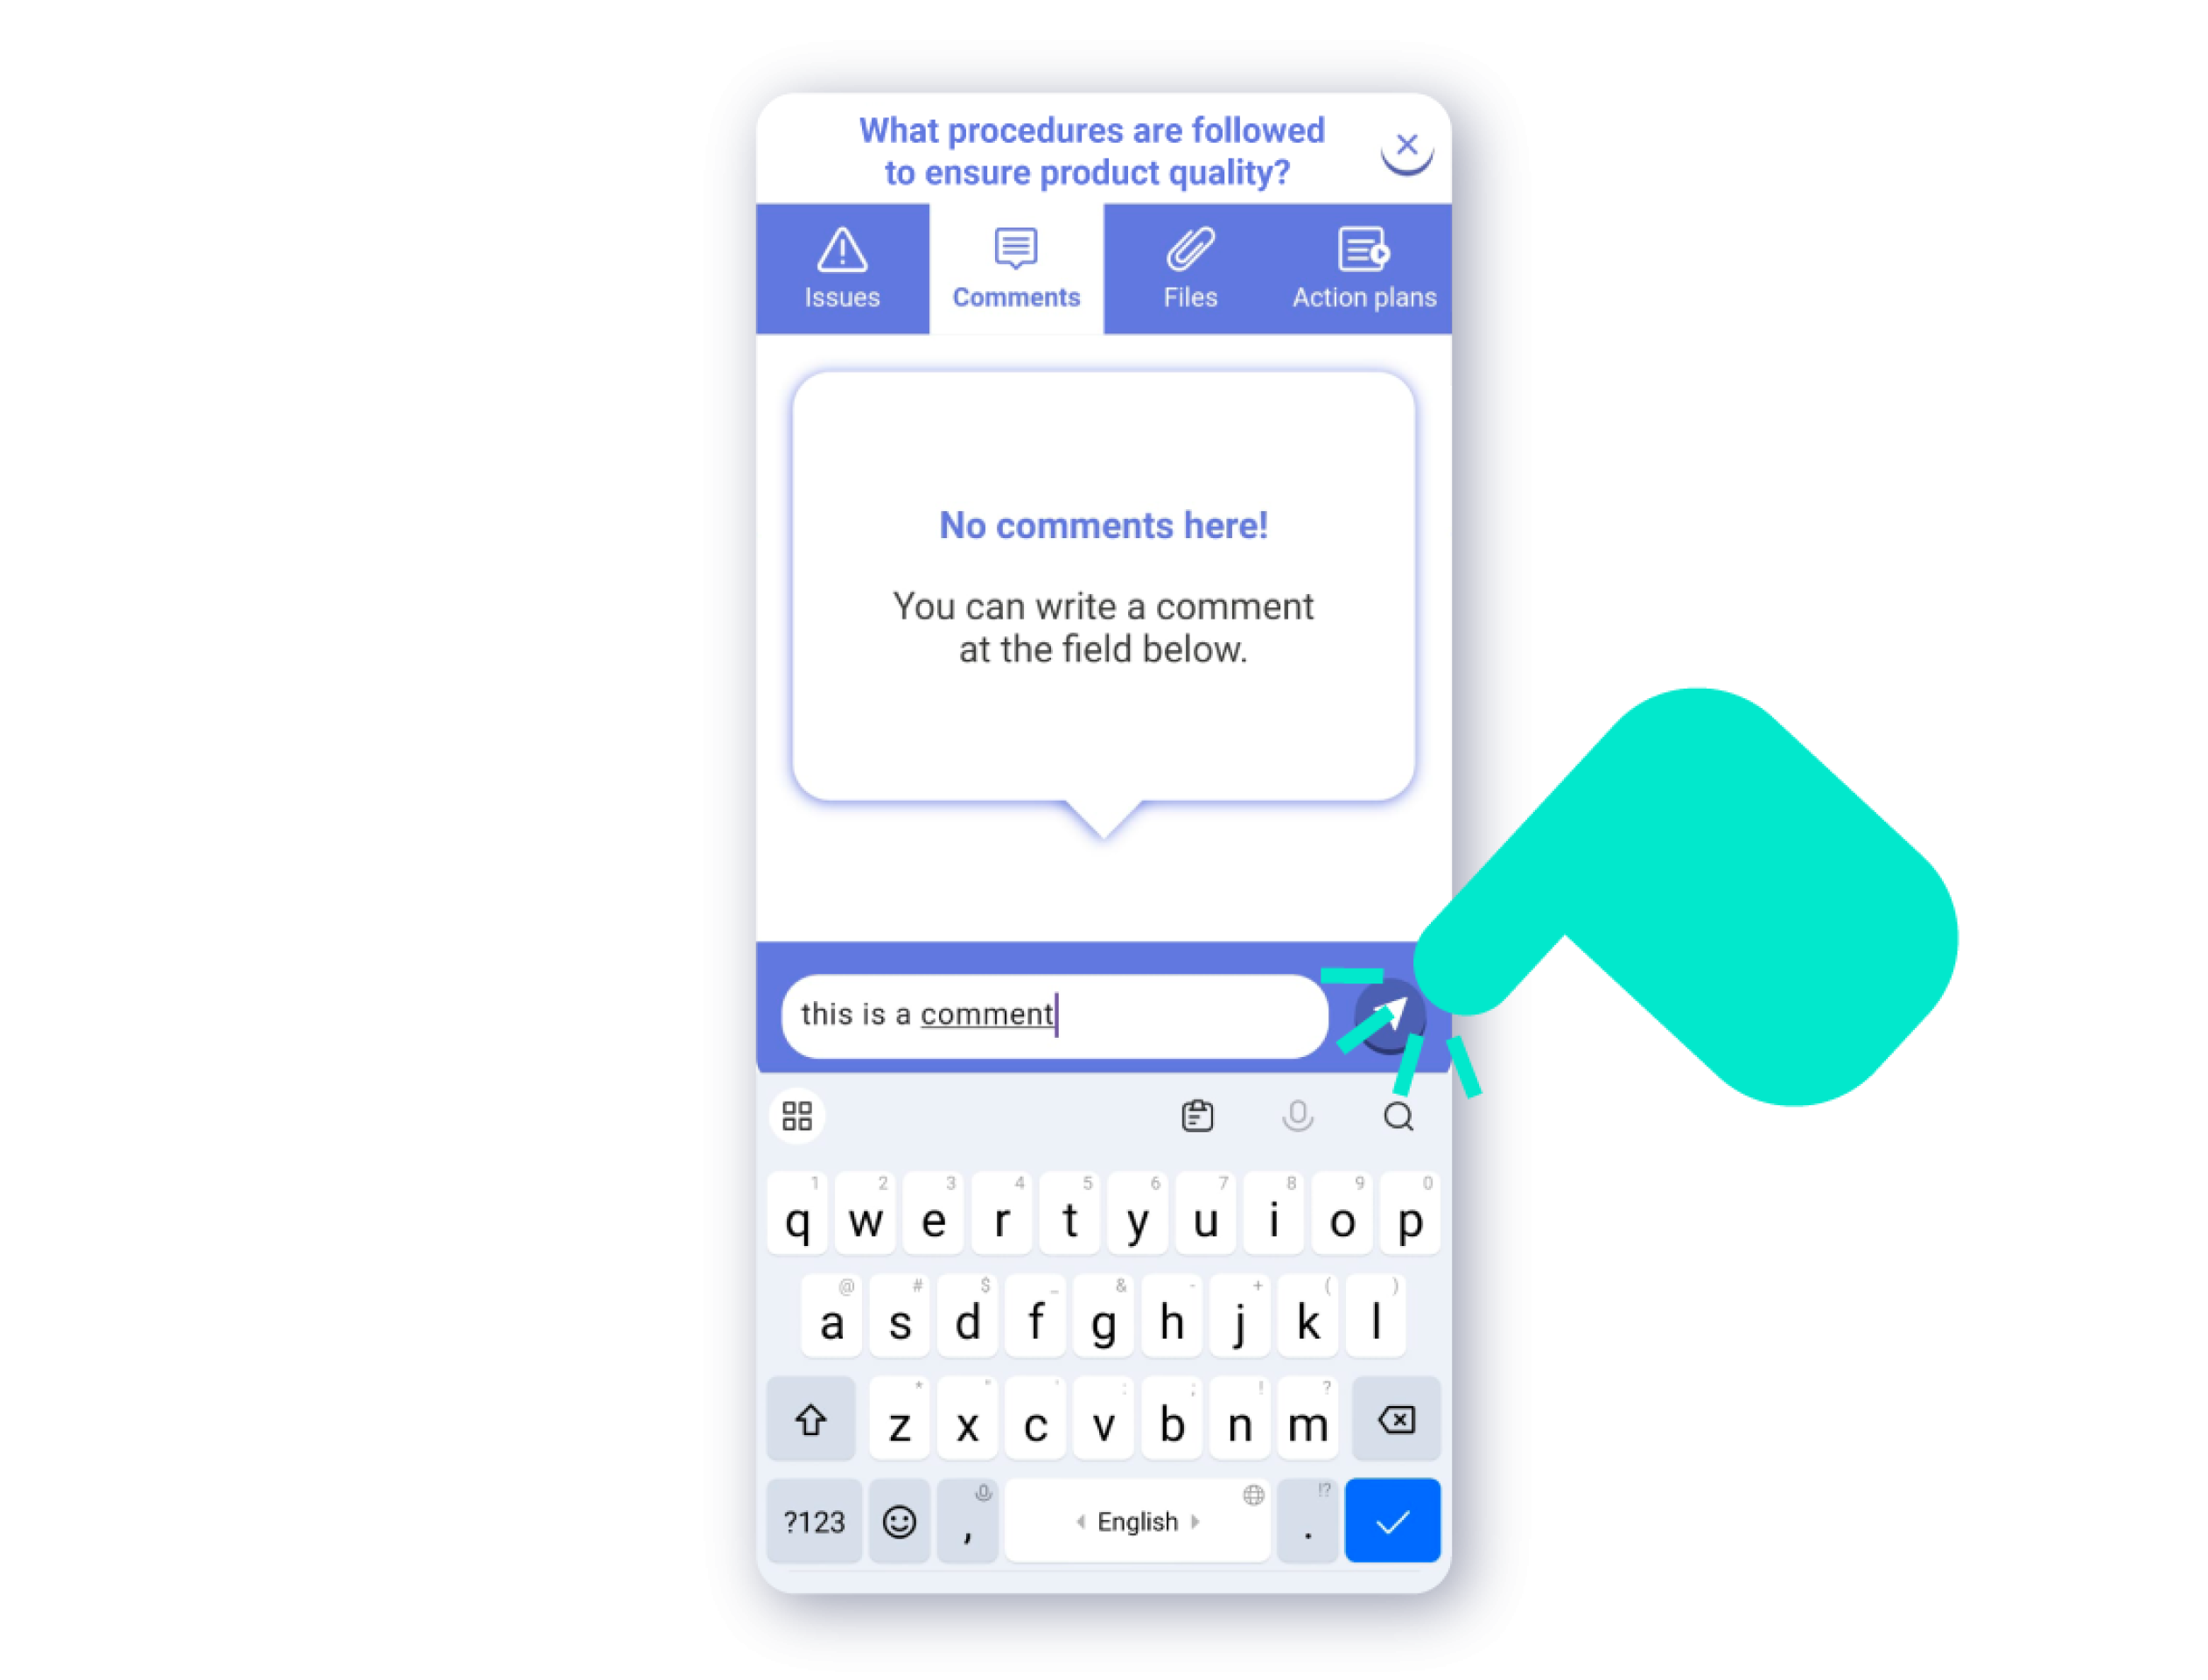
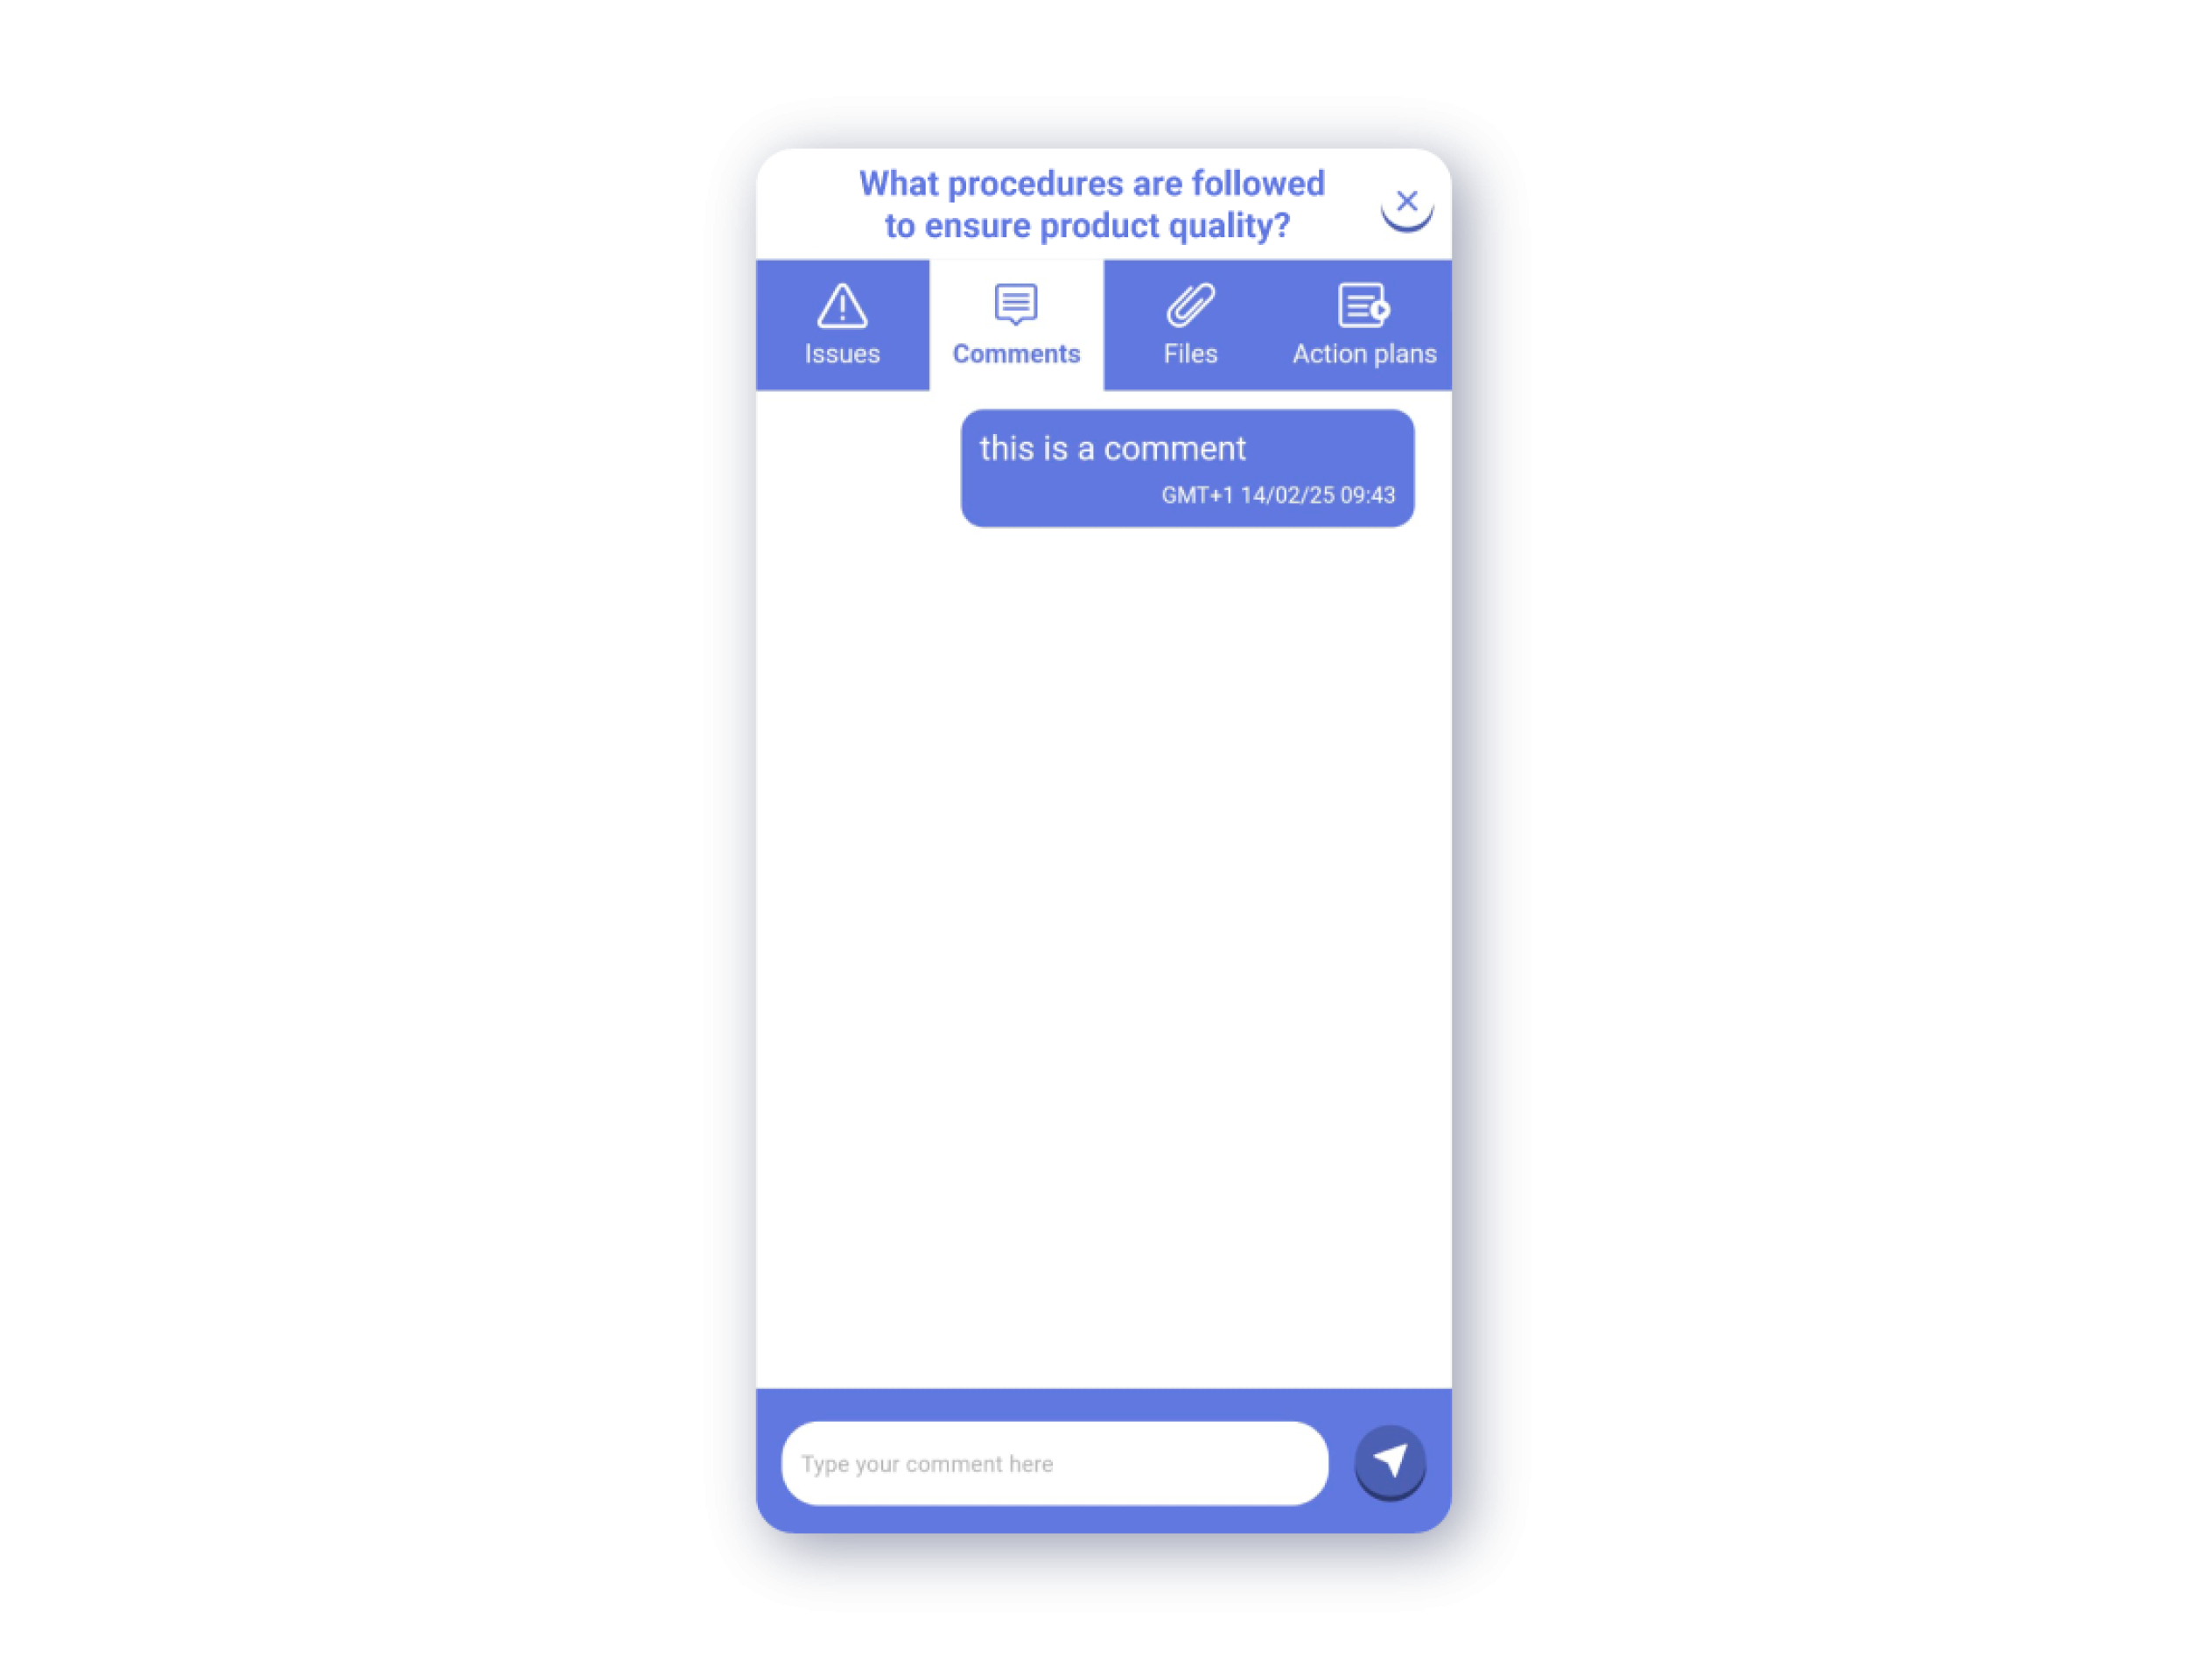
Add Comment: By tapping the ‘Comment’ icon, an internal chat for the question will open, where you can register the comment. To write the comment, tap on the comment bar at the bottom of the screen. Once you have written the comment, press the send button right next to the comment bar.

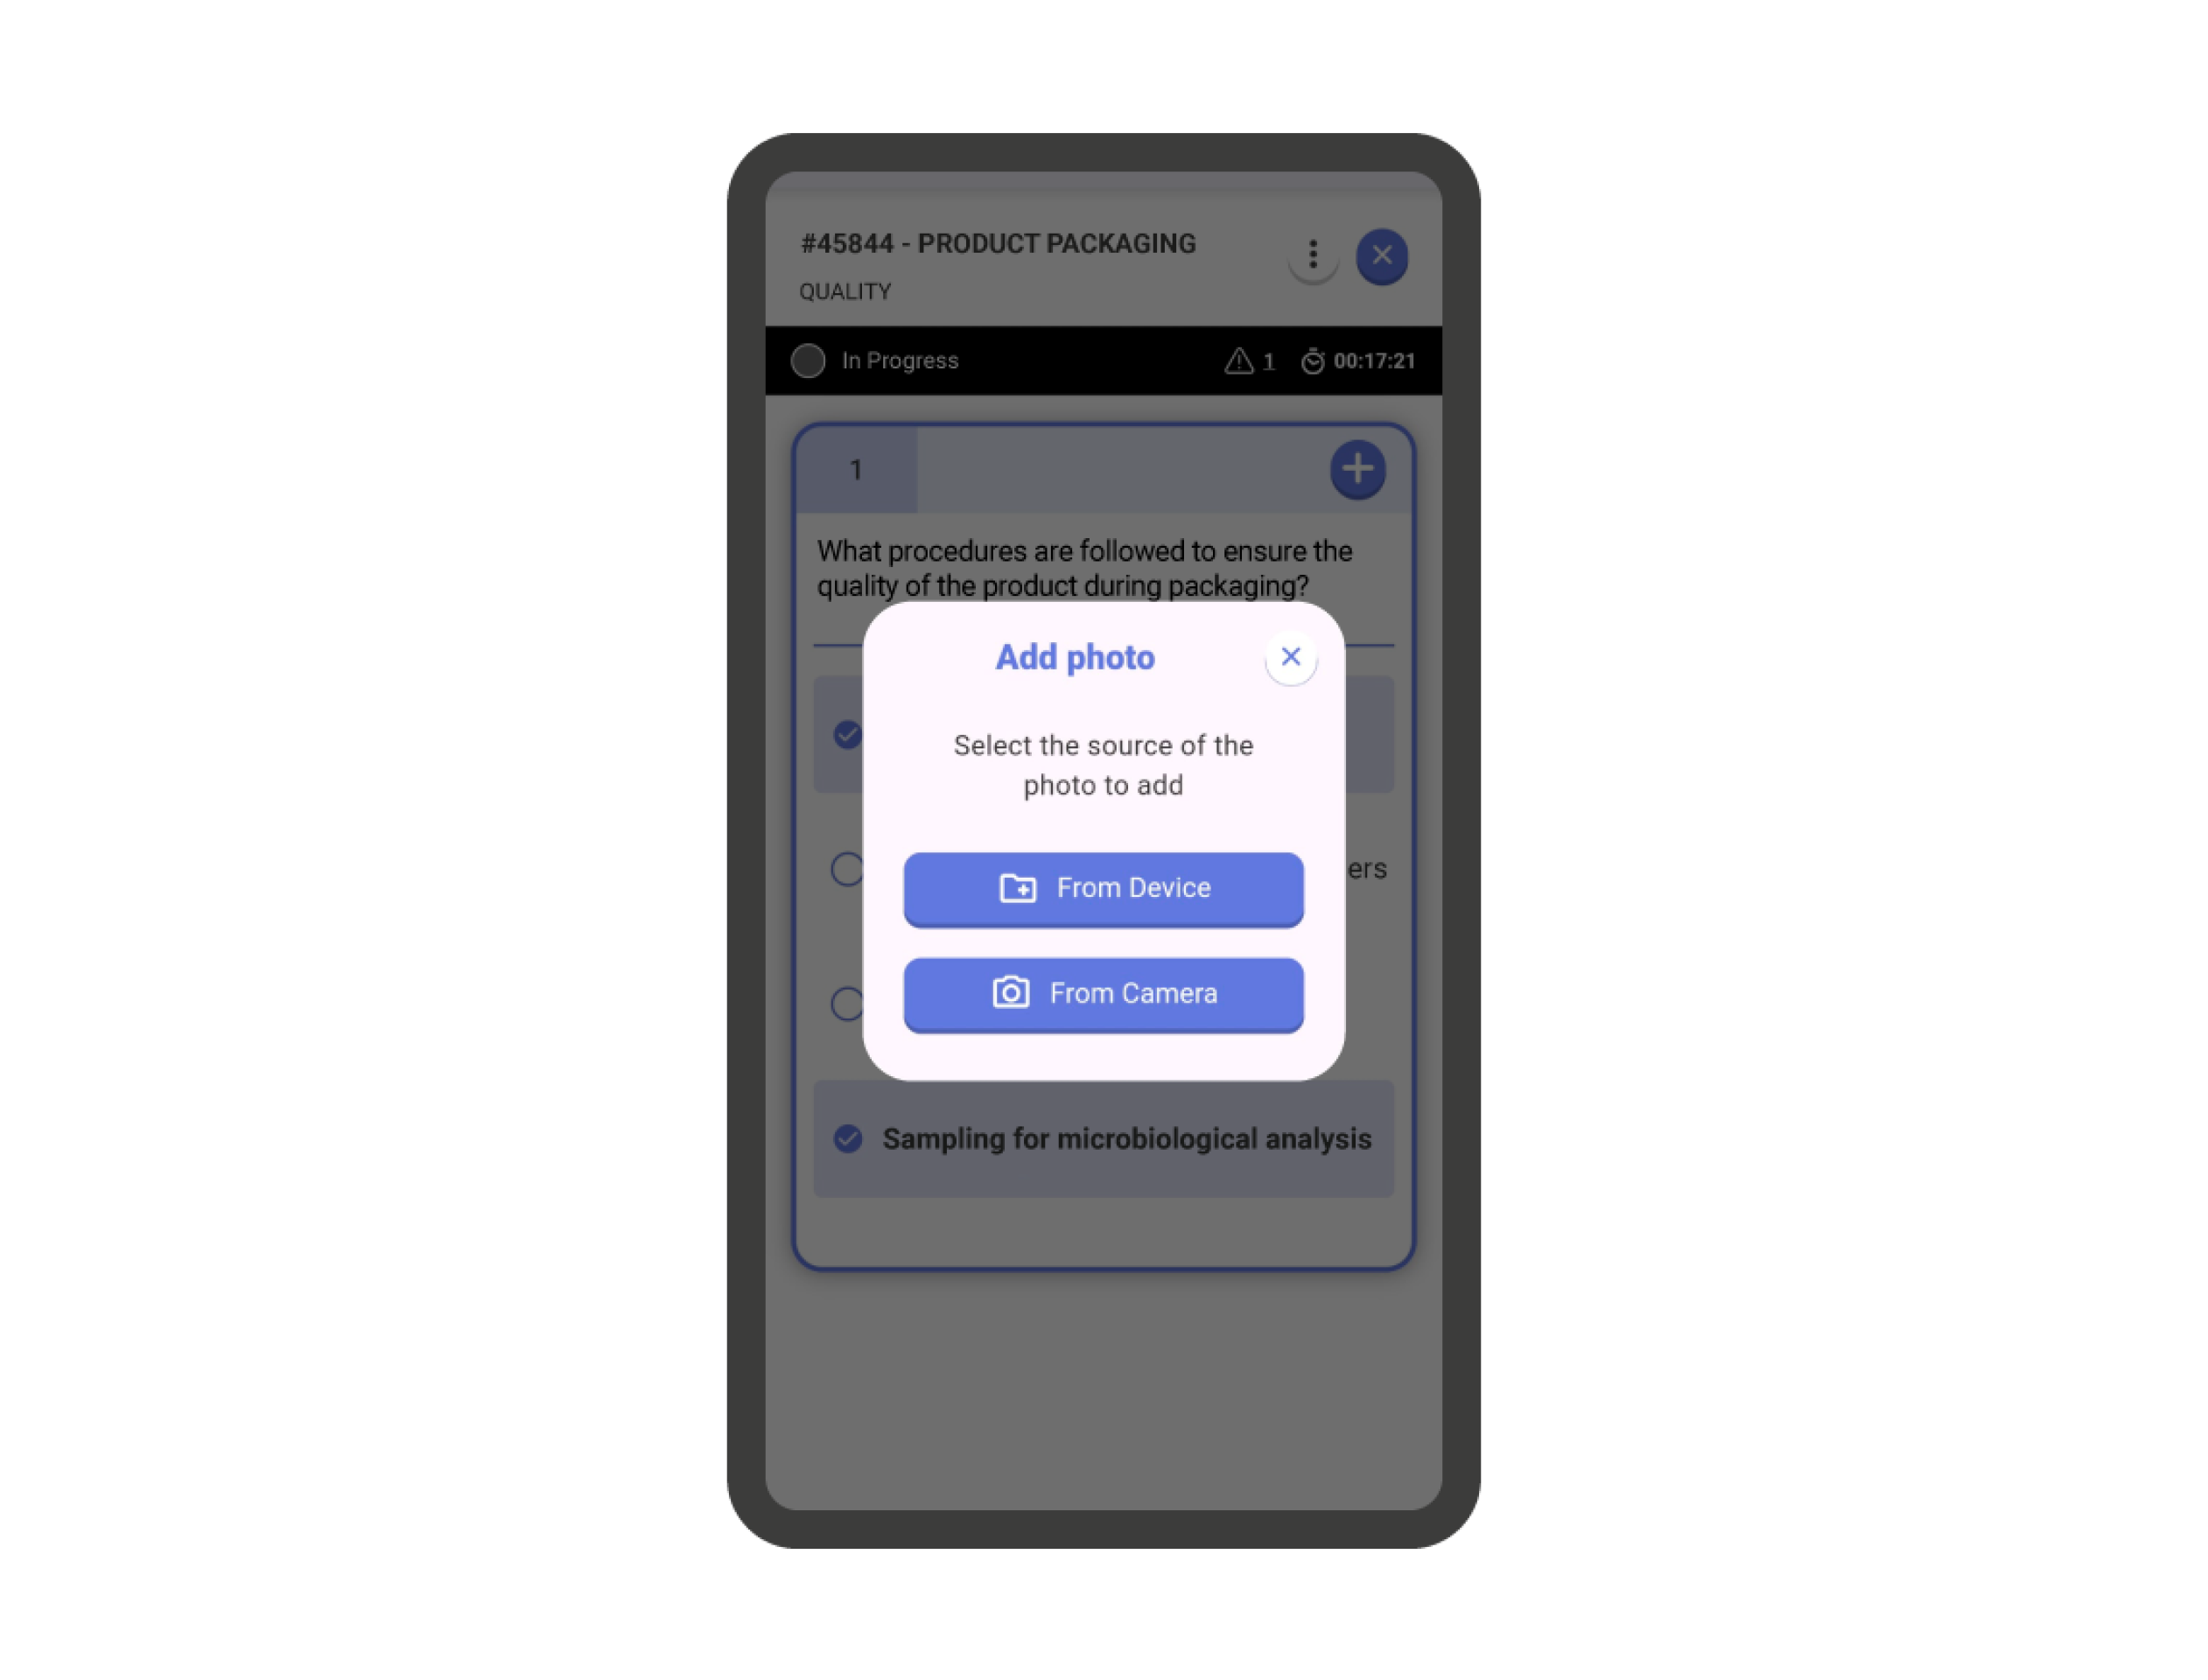
Add Photos: By tapping the ‘Photo’ icon, a menu will appear where you can choose the method to attach the image: From the device’s camera or from a folder on it. Once the image is taken (or uploaded), a screen will appear where you can:

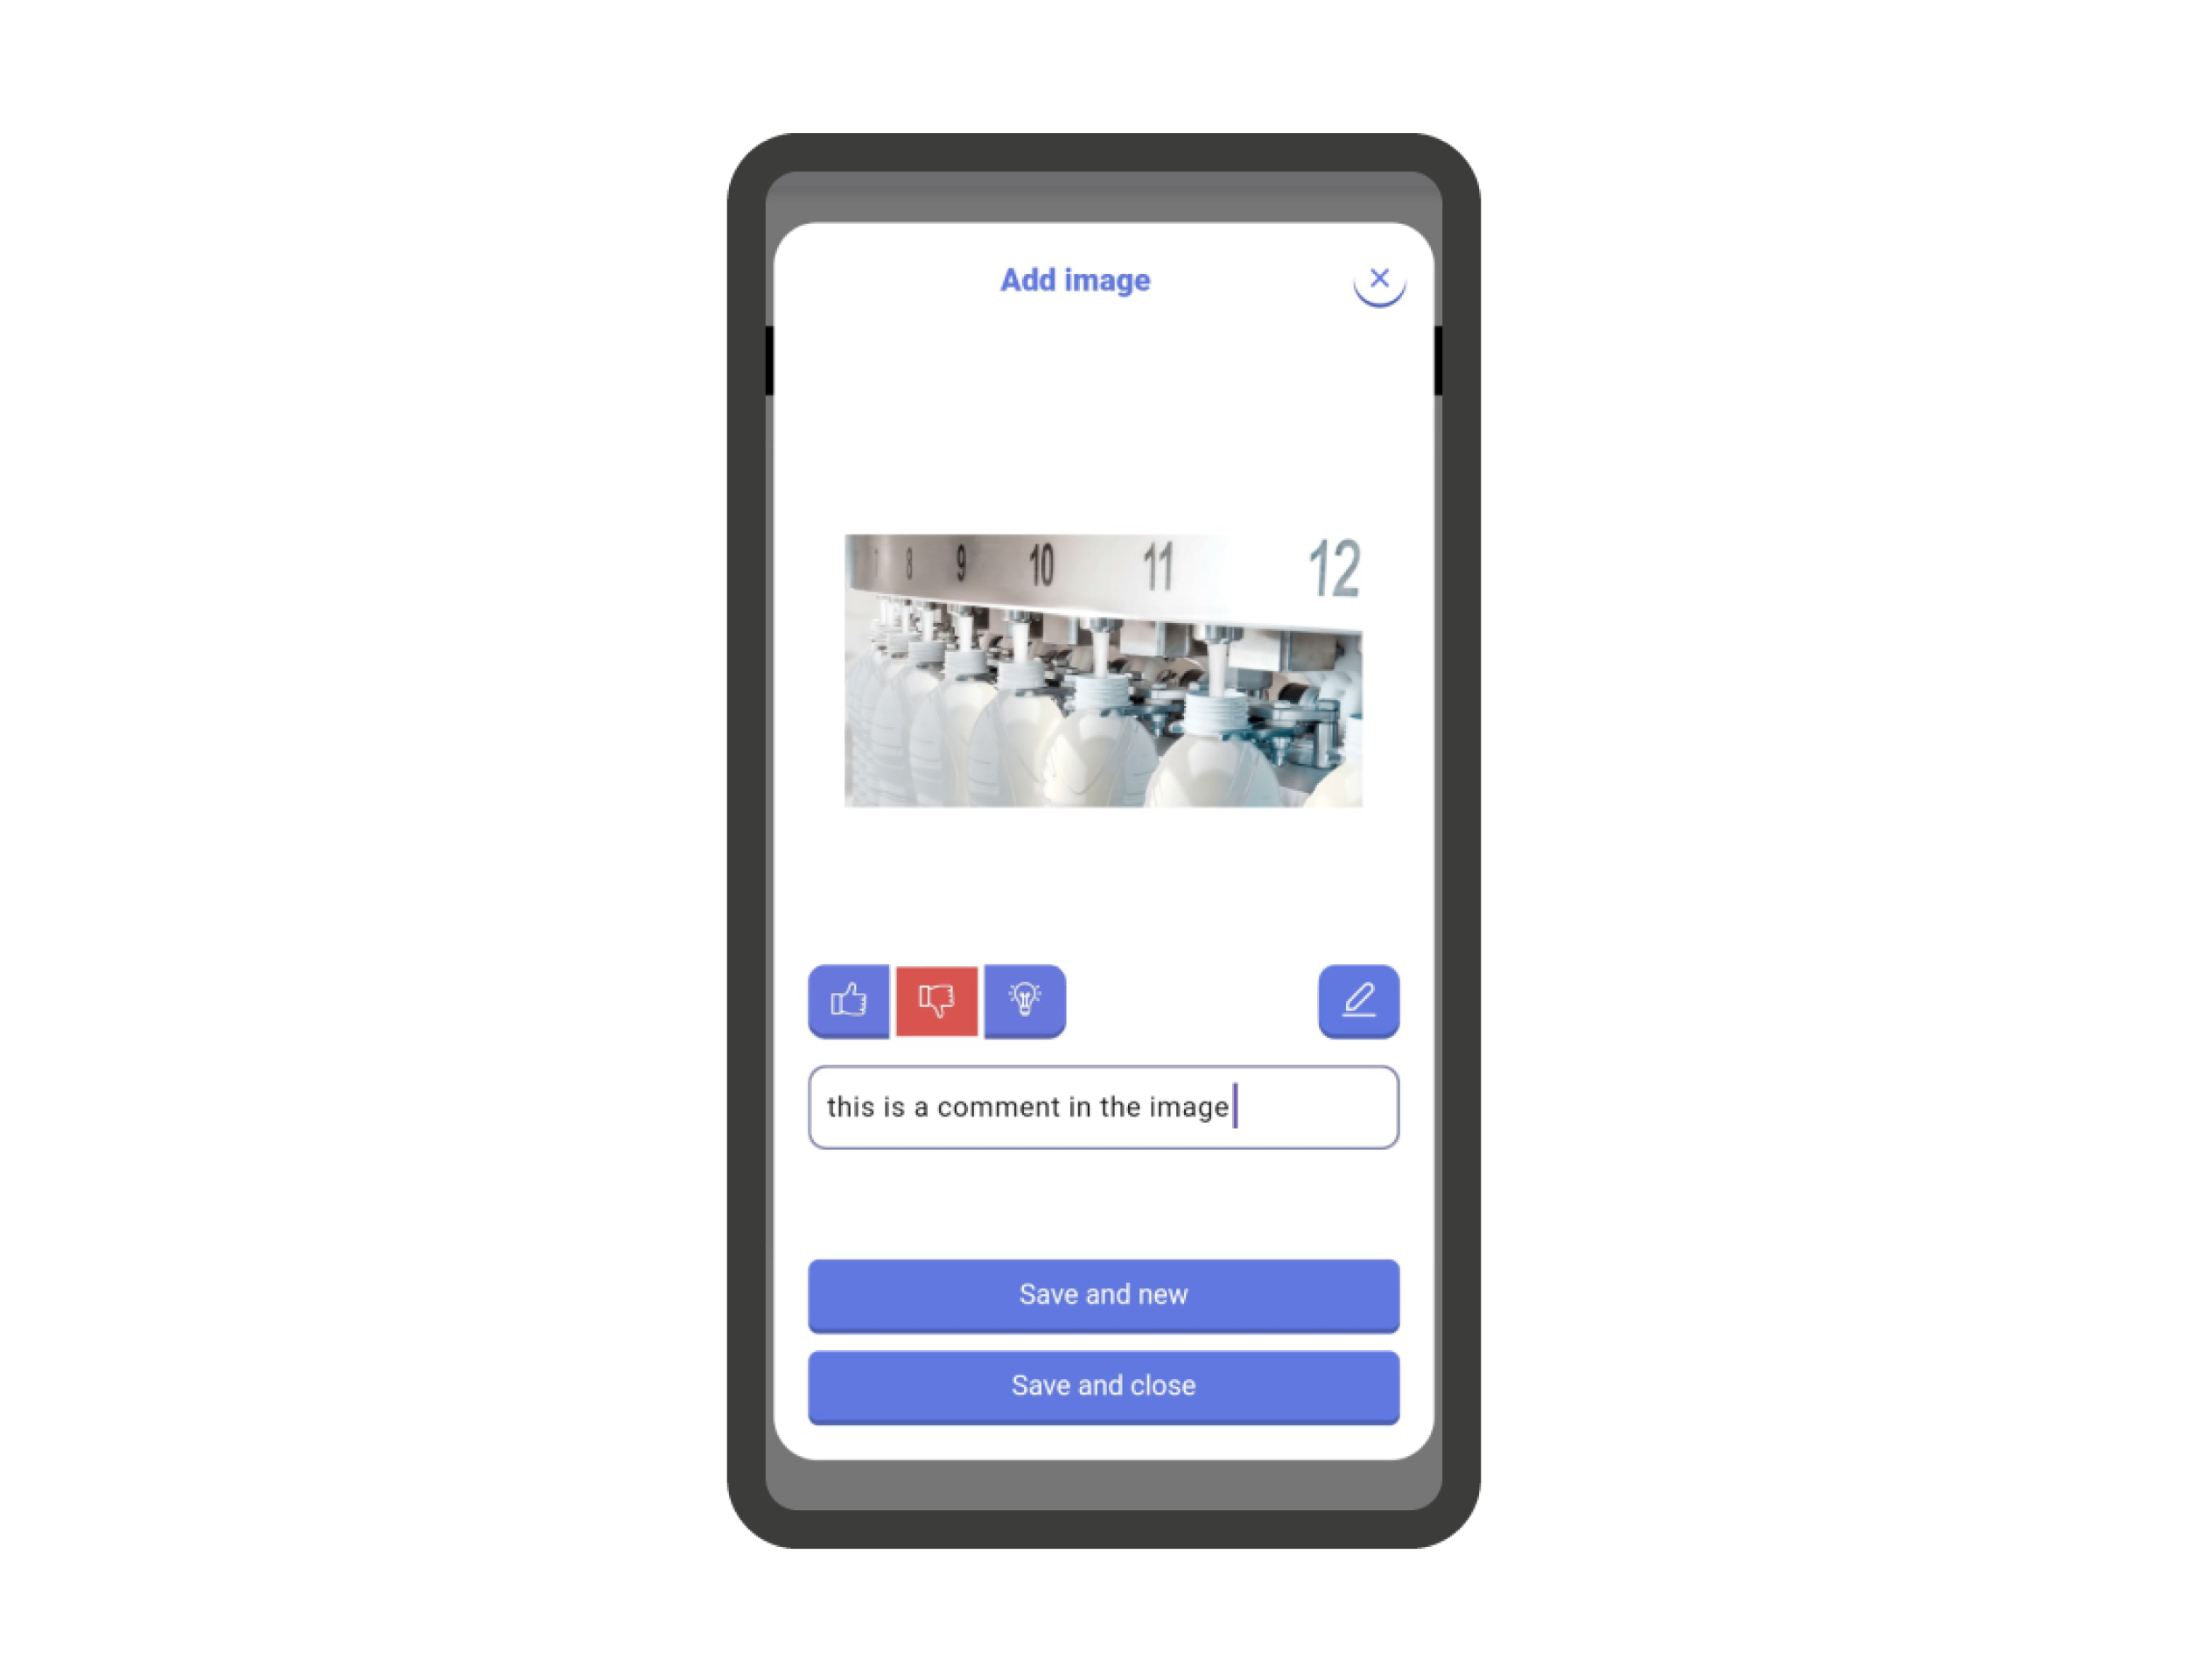
  • Add a comment to the image: Add a comment to the image by typing it in the designated space.
  • Edit the image: By tapping the pencil button on the right side of the screen, you’ll open the image editor, where you can draw, rotate, crop, write, etc.
  • Rate the image: In this set of three icons, you can select a rating for the image:
    • The thumbs up (green) means ‘good’, ‘positive’, ‘correct’.
    • The thumbs down (red) means ‘bad’, ‘negative’, ‘incorrect’.
    • The lightbulb (blue) indicates that the photo refers to an idea or suggestion.
  • Save and New: Save the image and offers the possibility to take or upload a new image.
  • Save and Close: Save the image and go back to the question within the checklist.

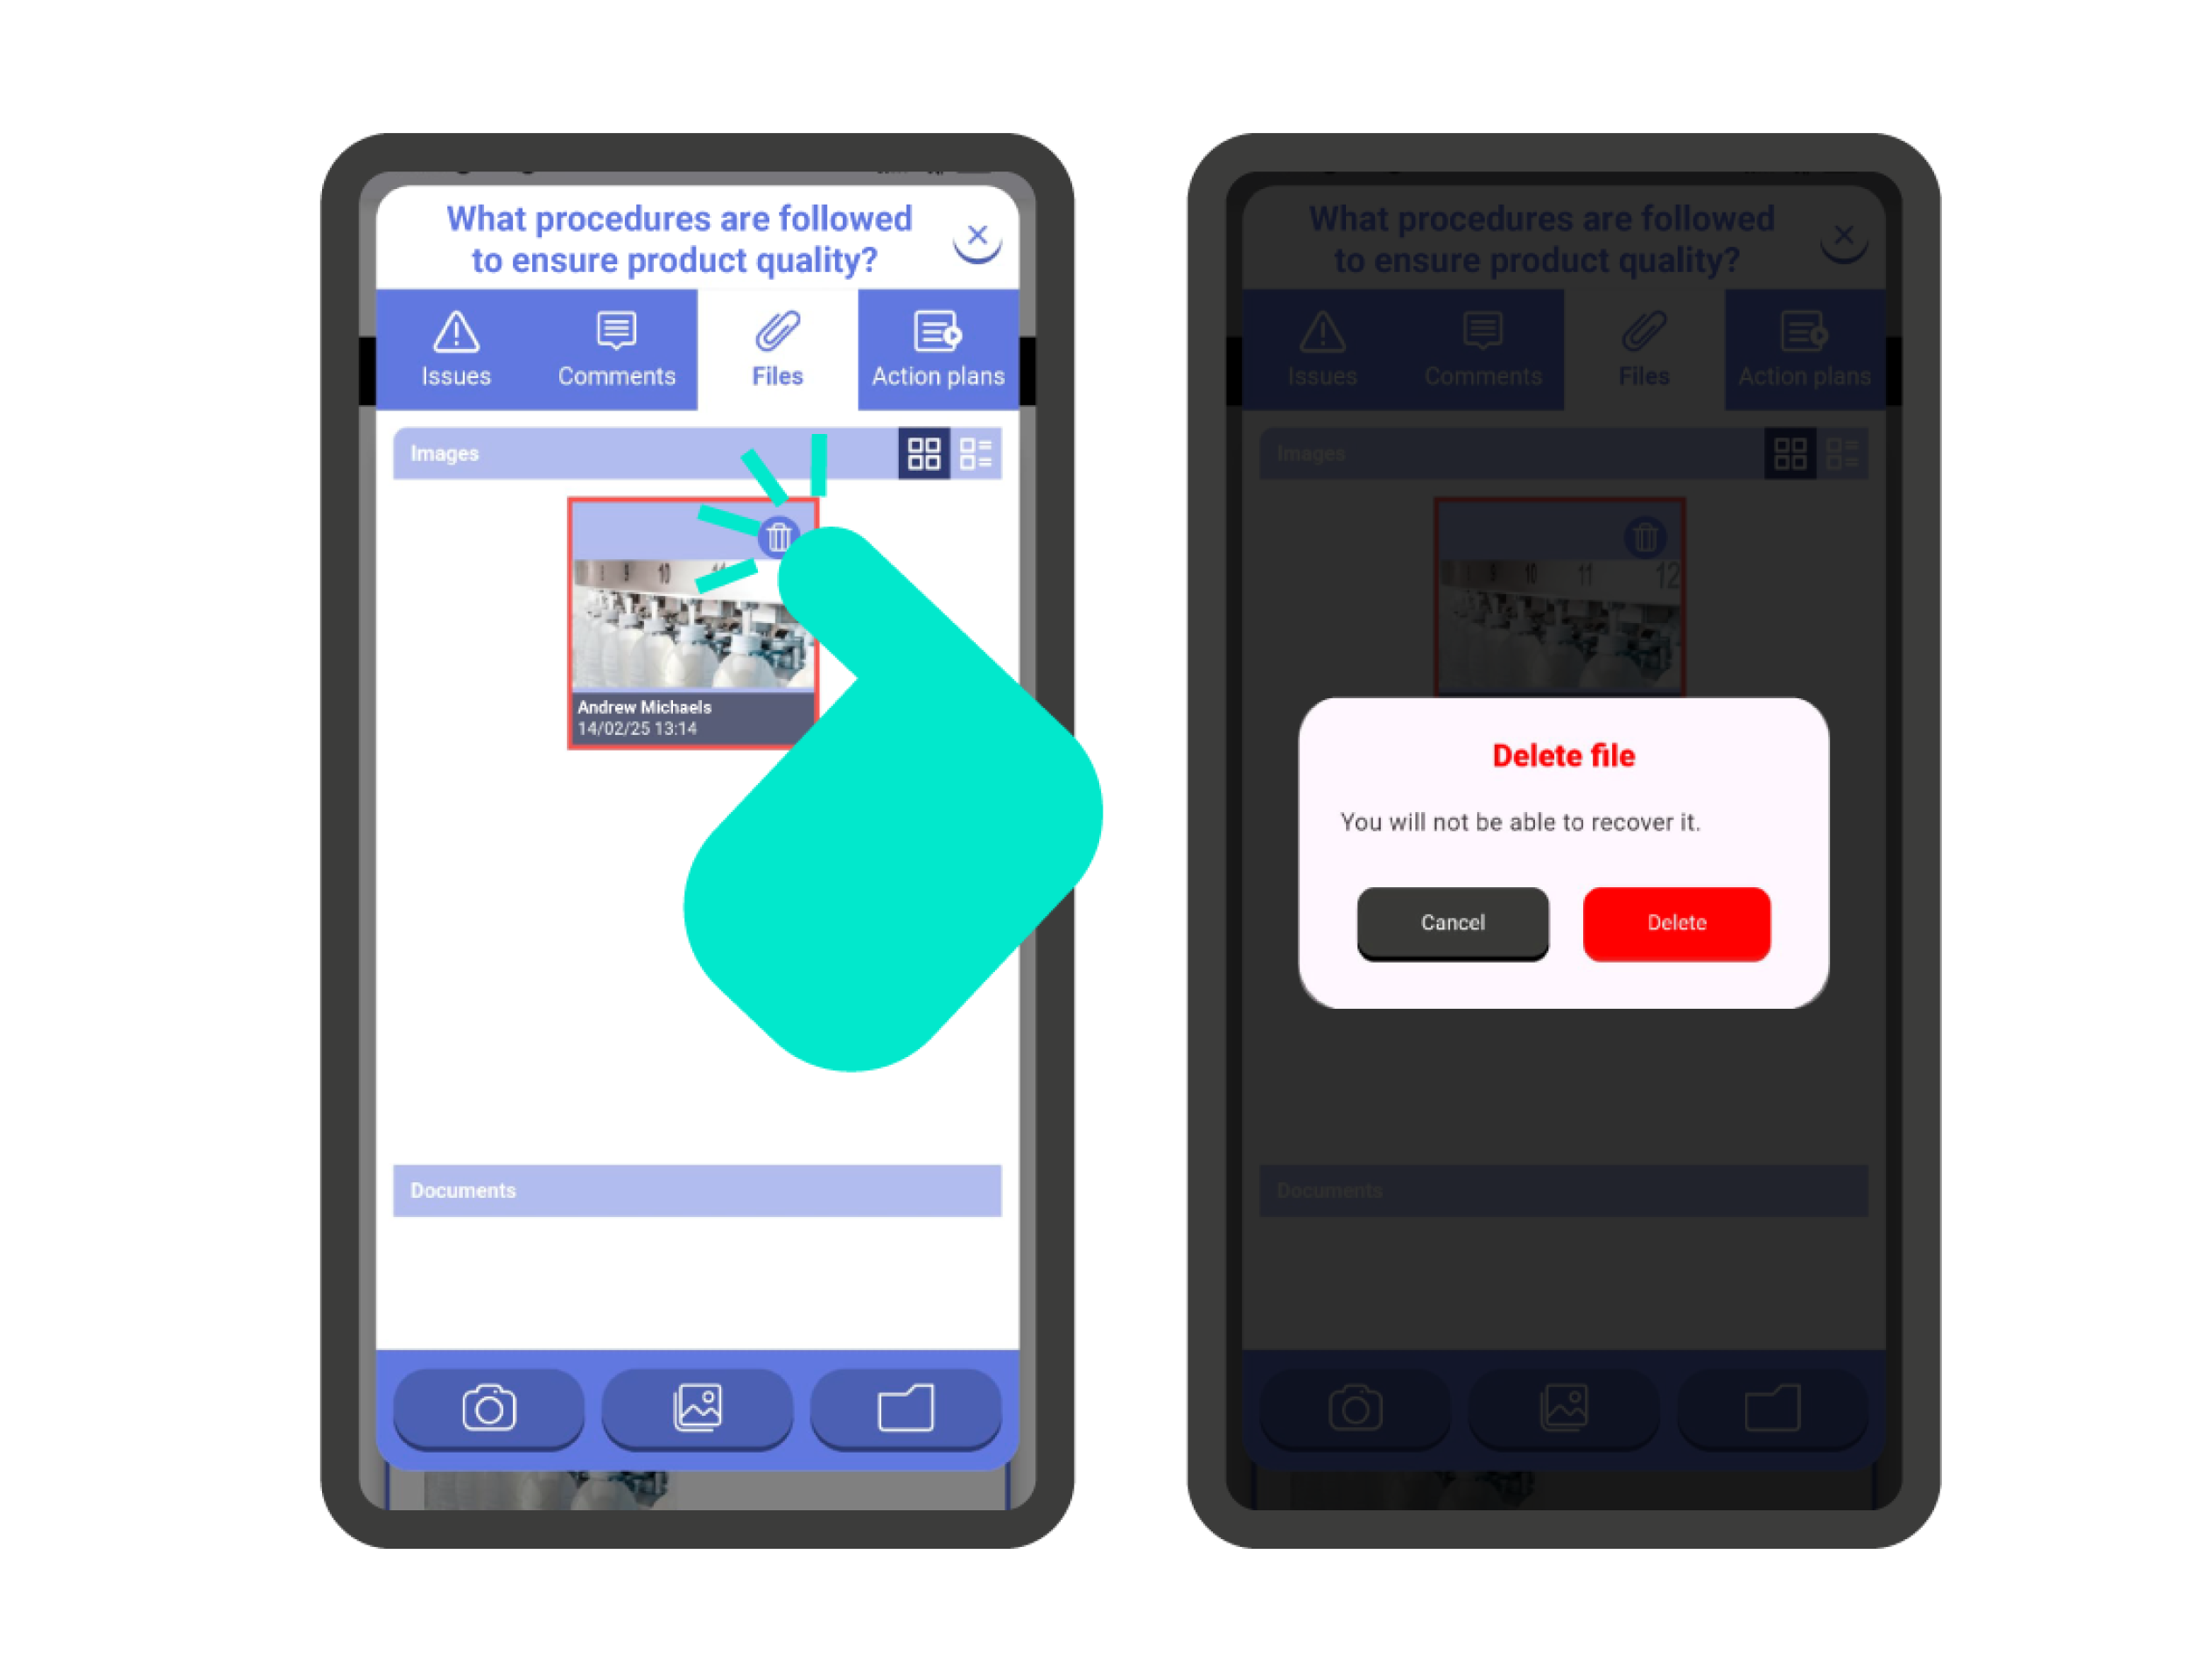
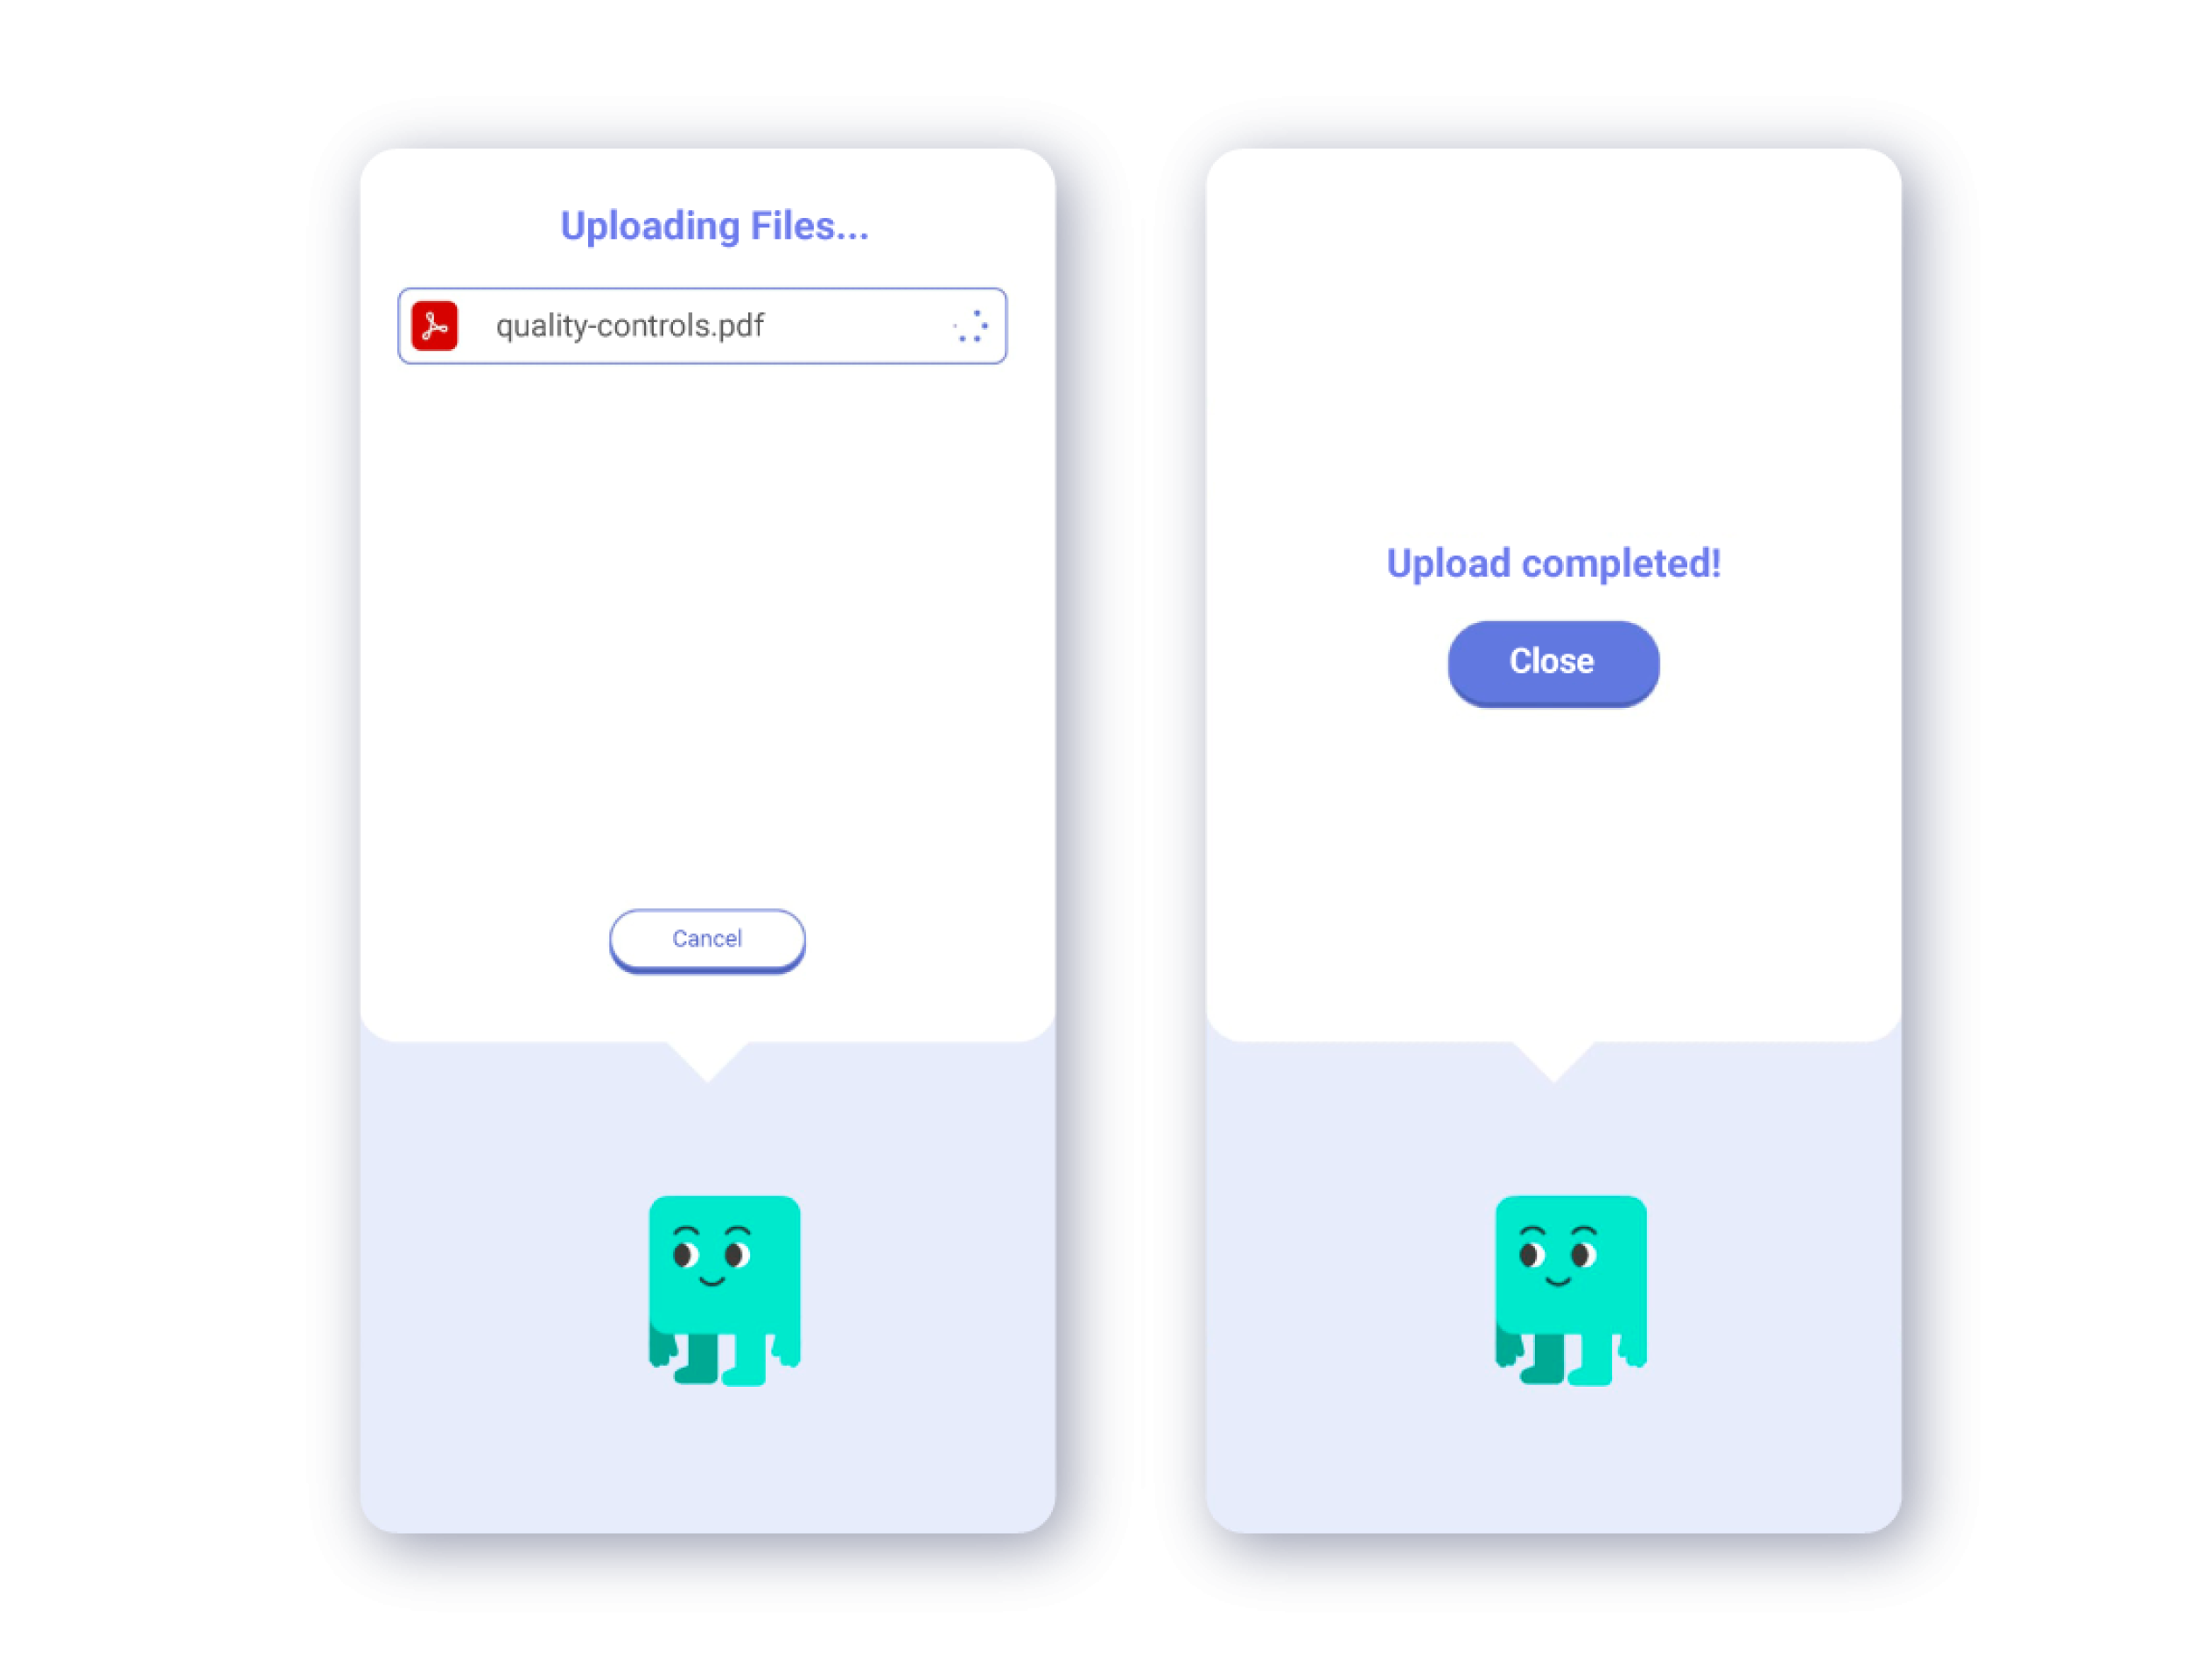
Add File: By tapping the ‘File’ icon, you can select a file from your device. The available formats are: CSV, PDF, XLS, DOC, JPG, PNG.

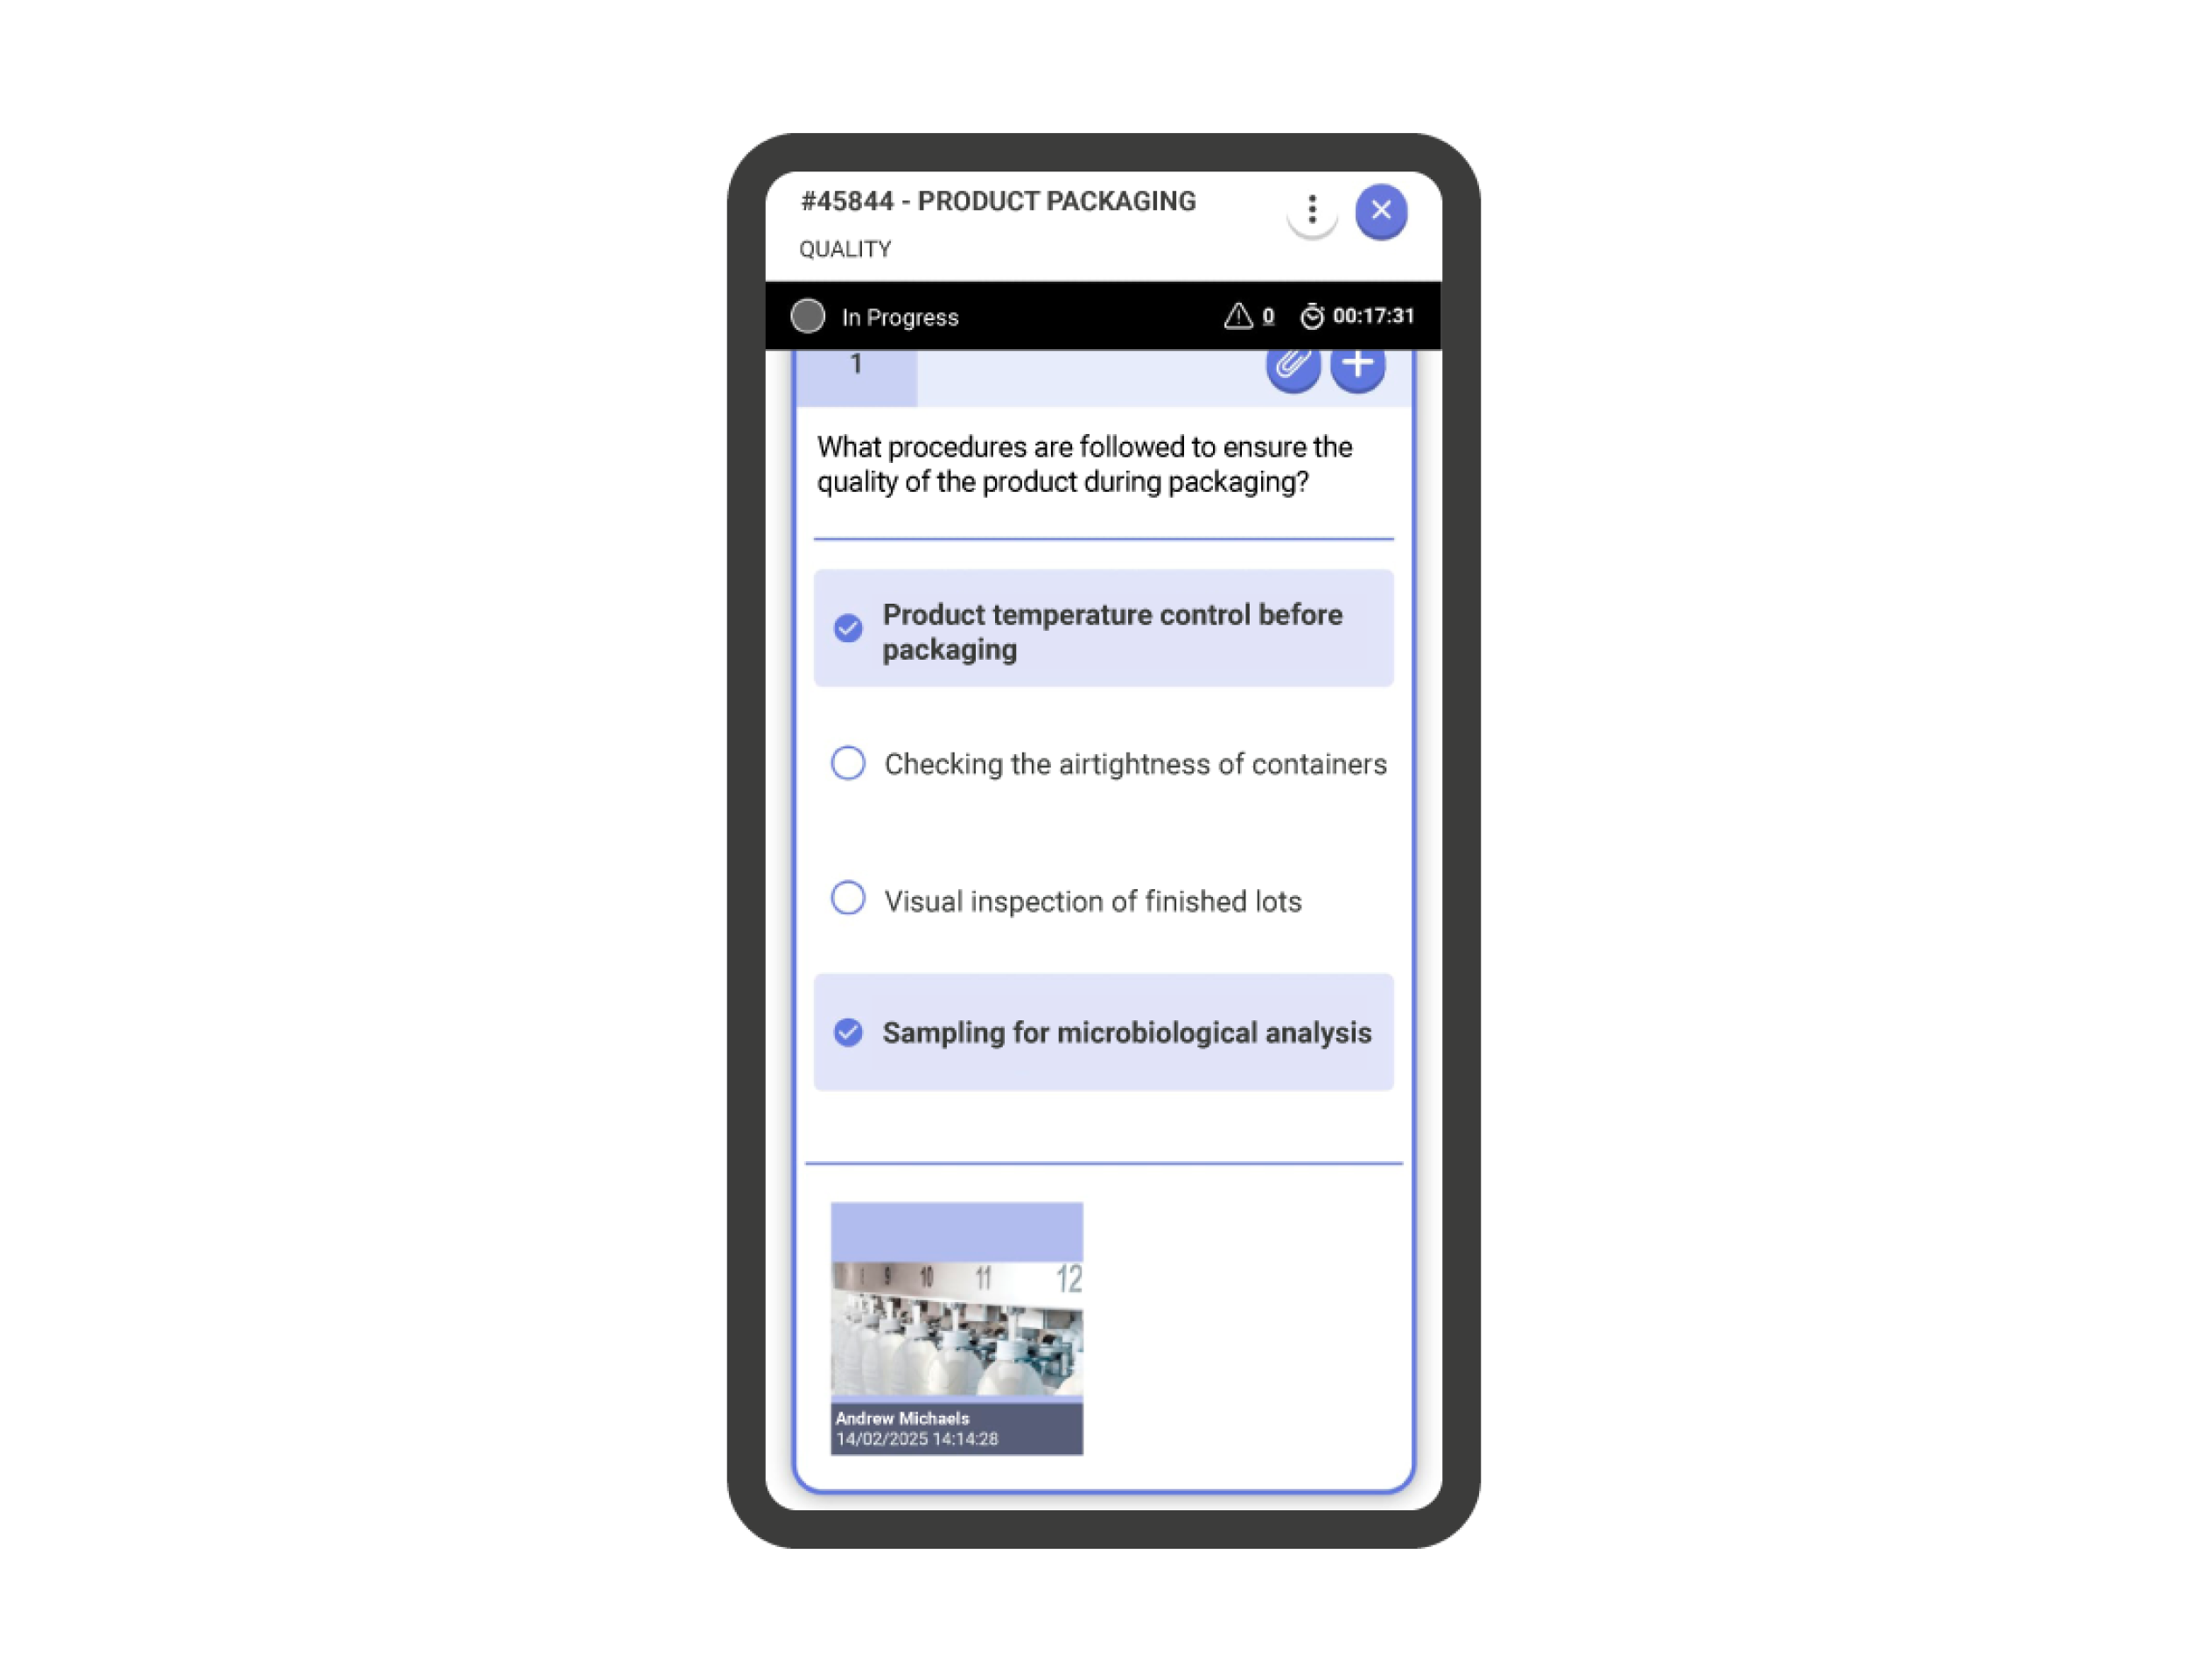
Important!: When there is any comment, image, or file attached to the question, buttons will appear at the top of the card. By tapping any of them, you will be able to view the attachments to the question.

Add Action Plans #

An action plan is usually a reactive measure defined to correct or prevent an incident, error, breakdown… and can be added to questions in IRISTRACE.

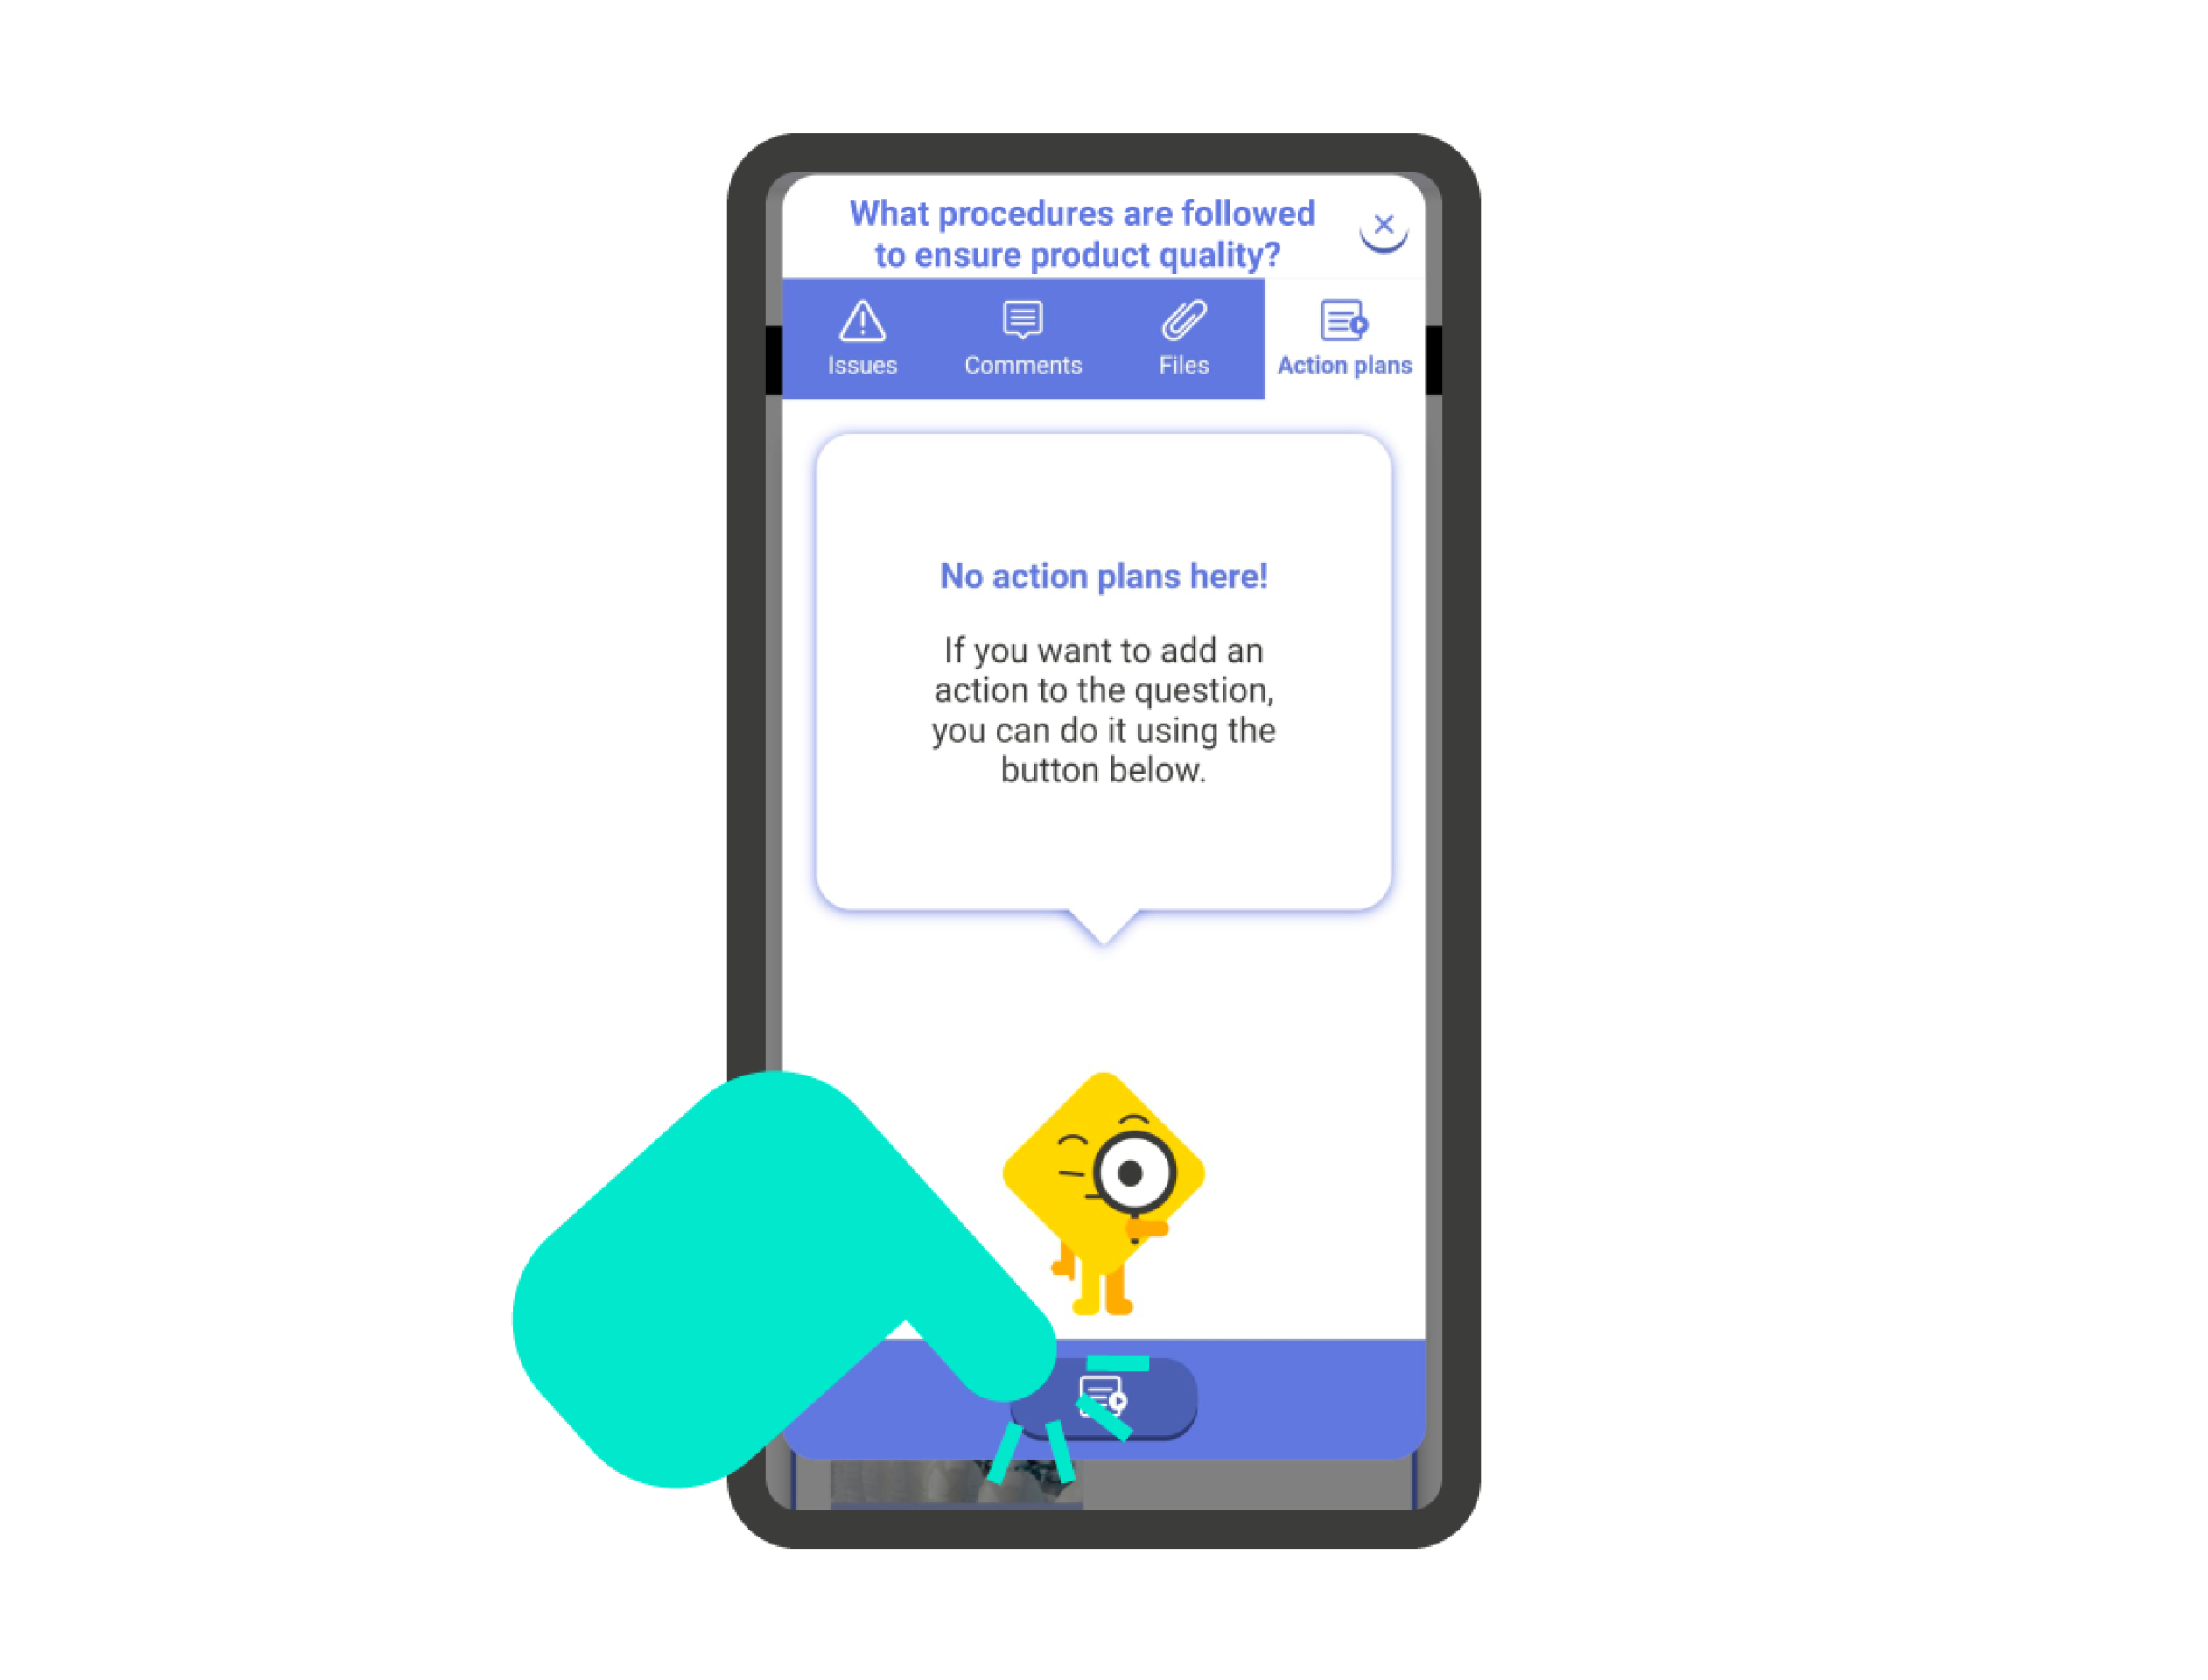
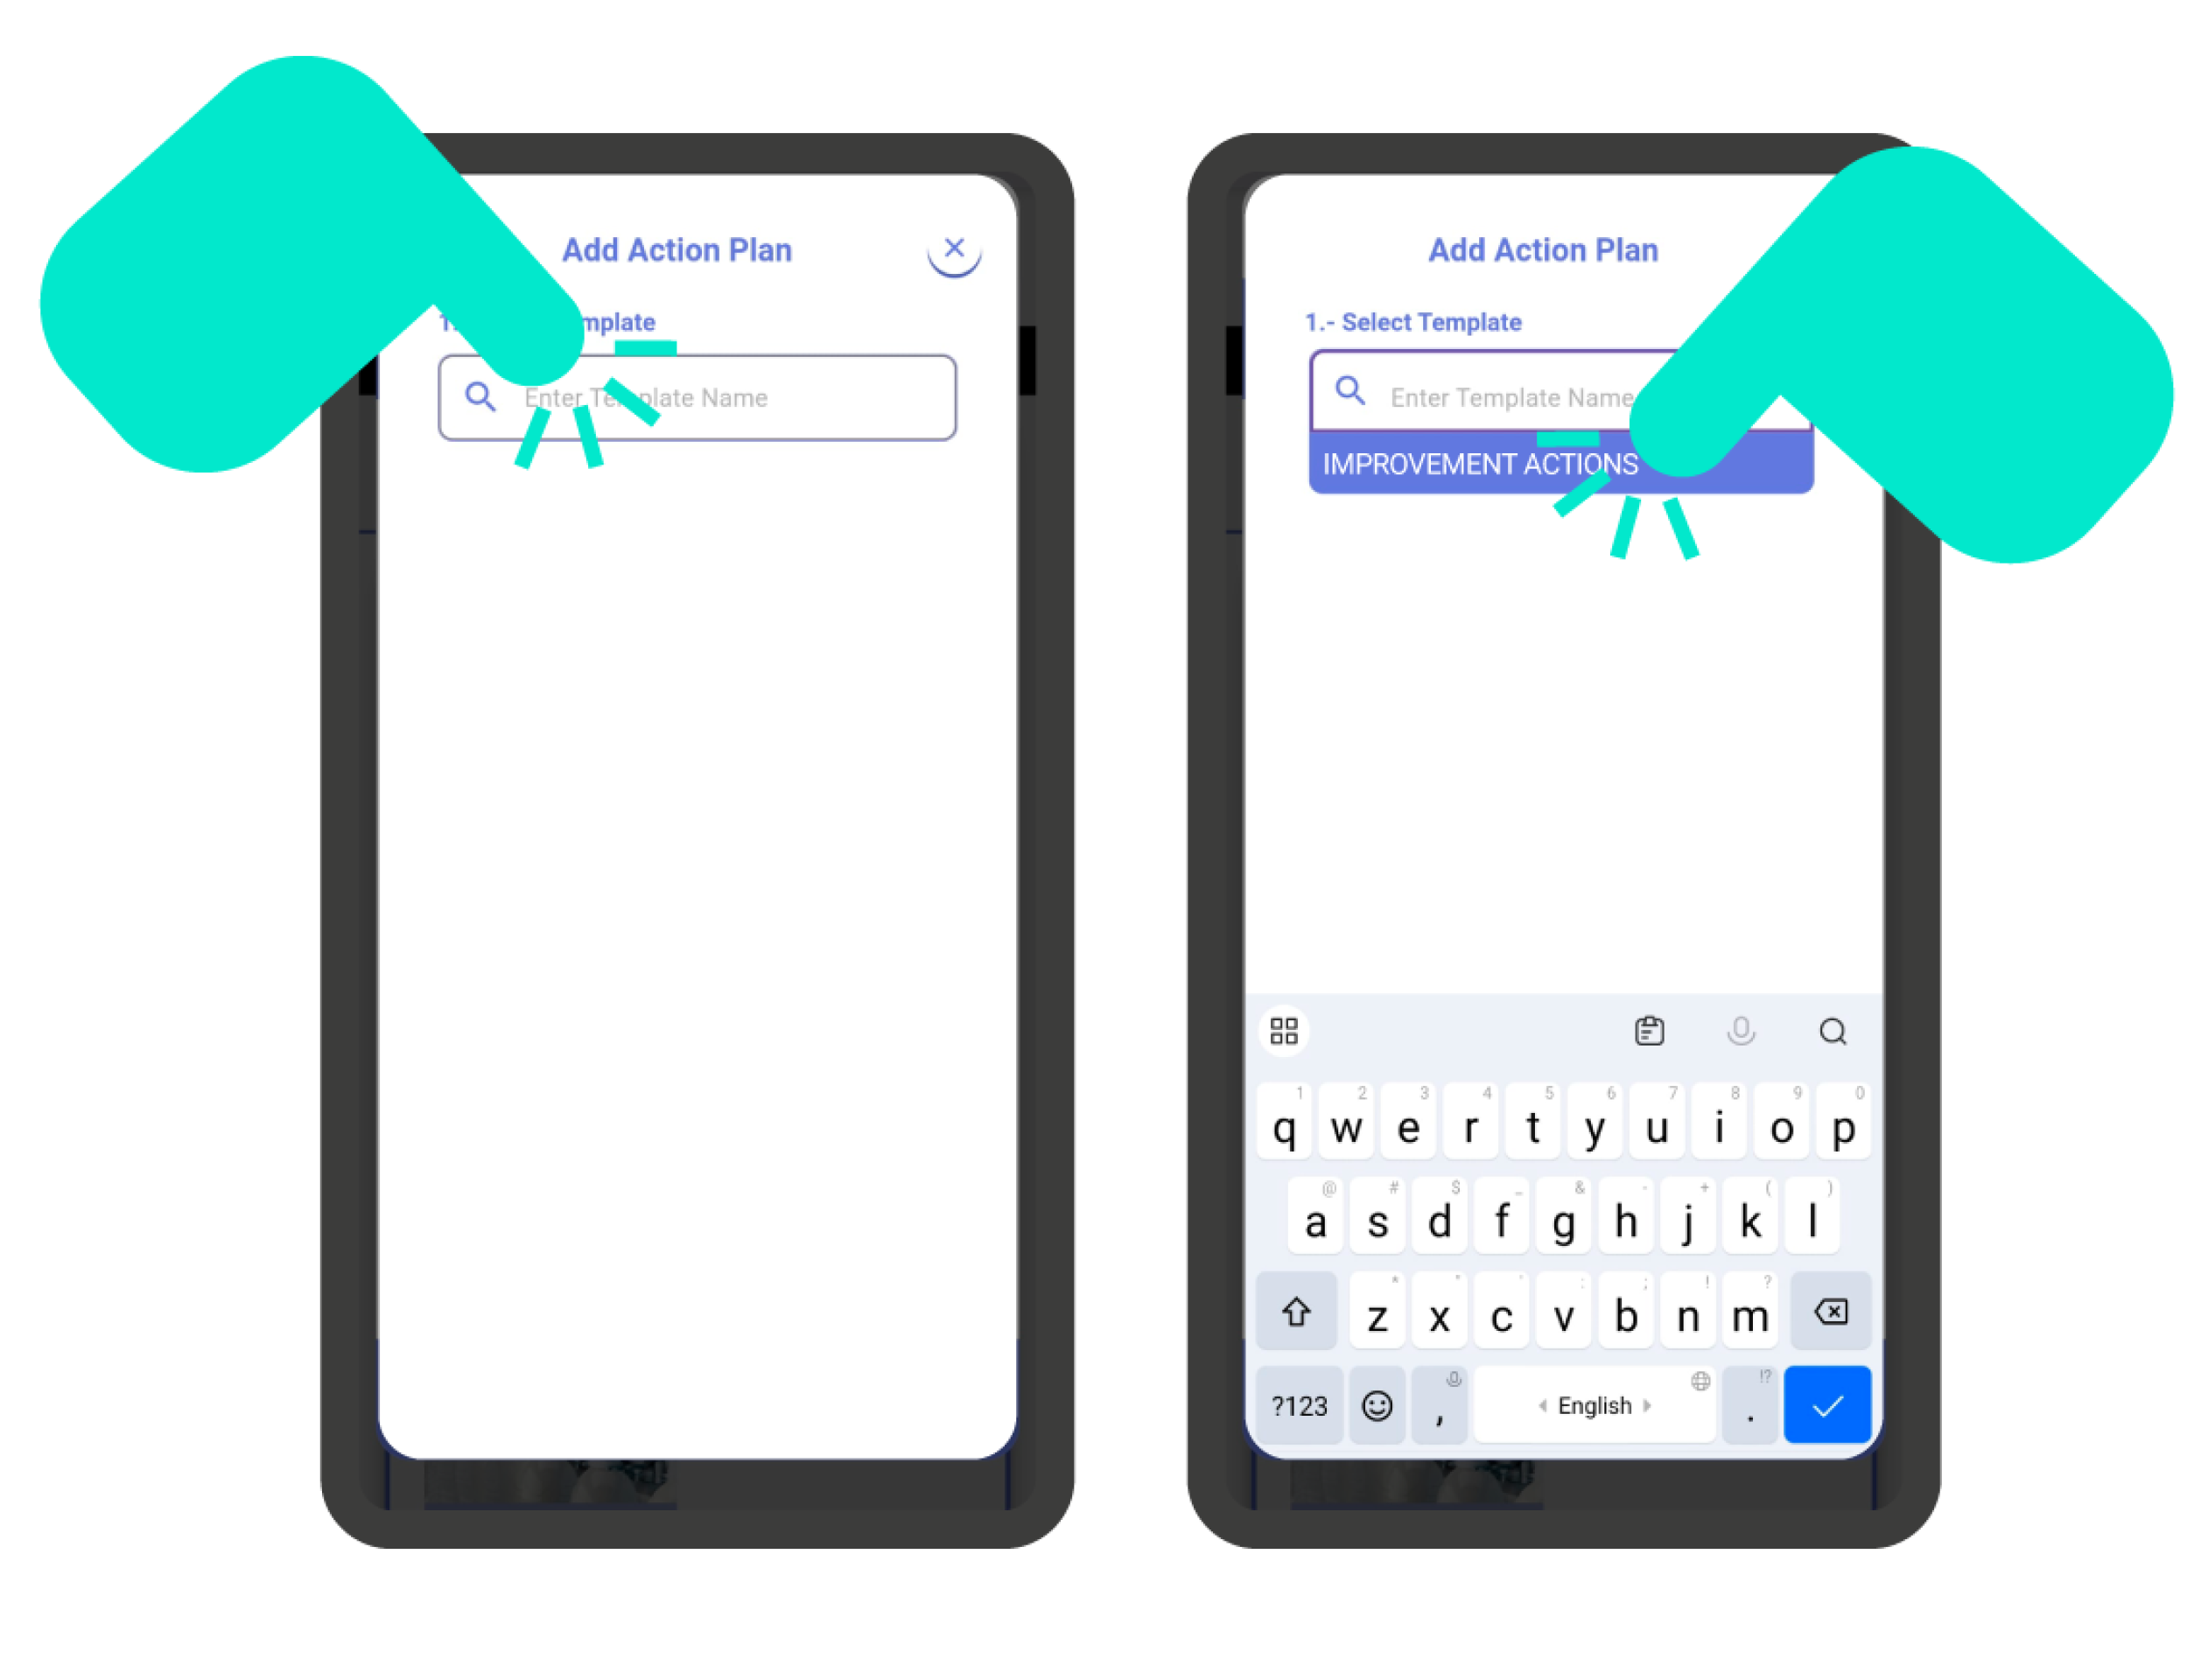
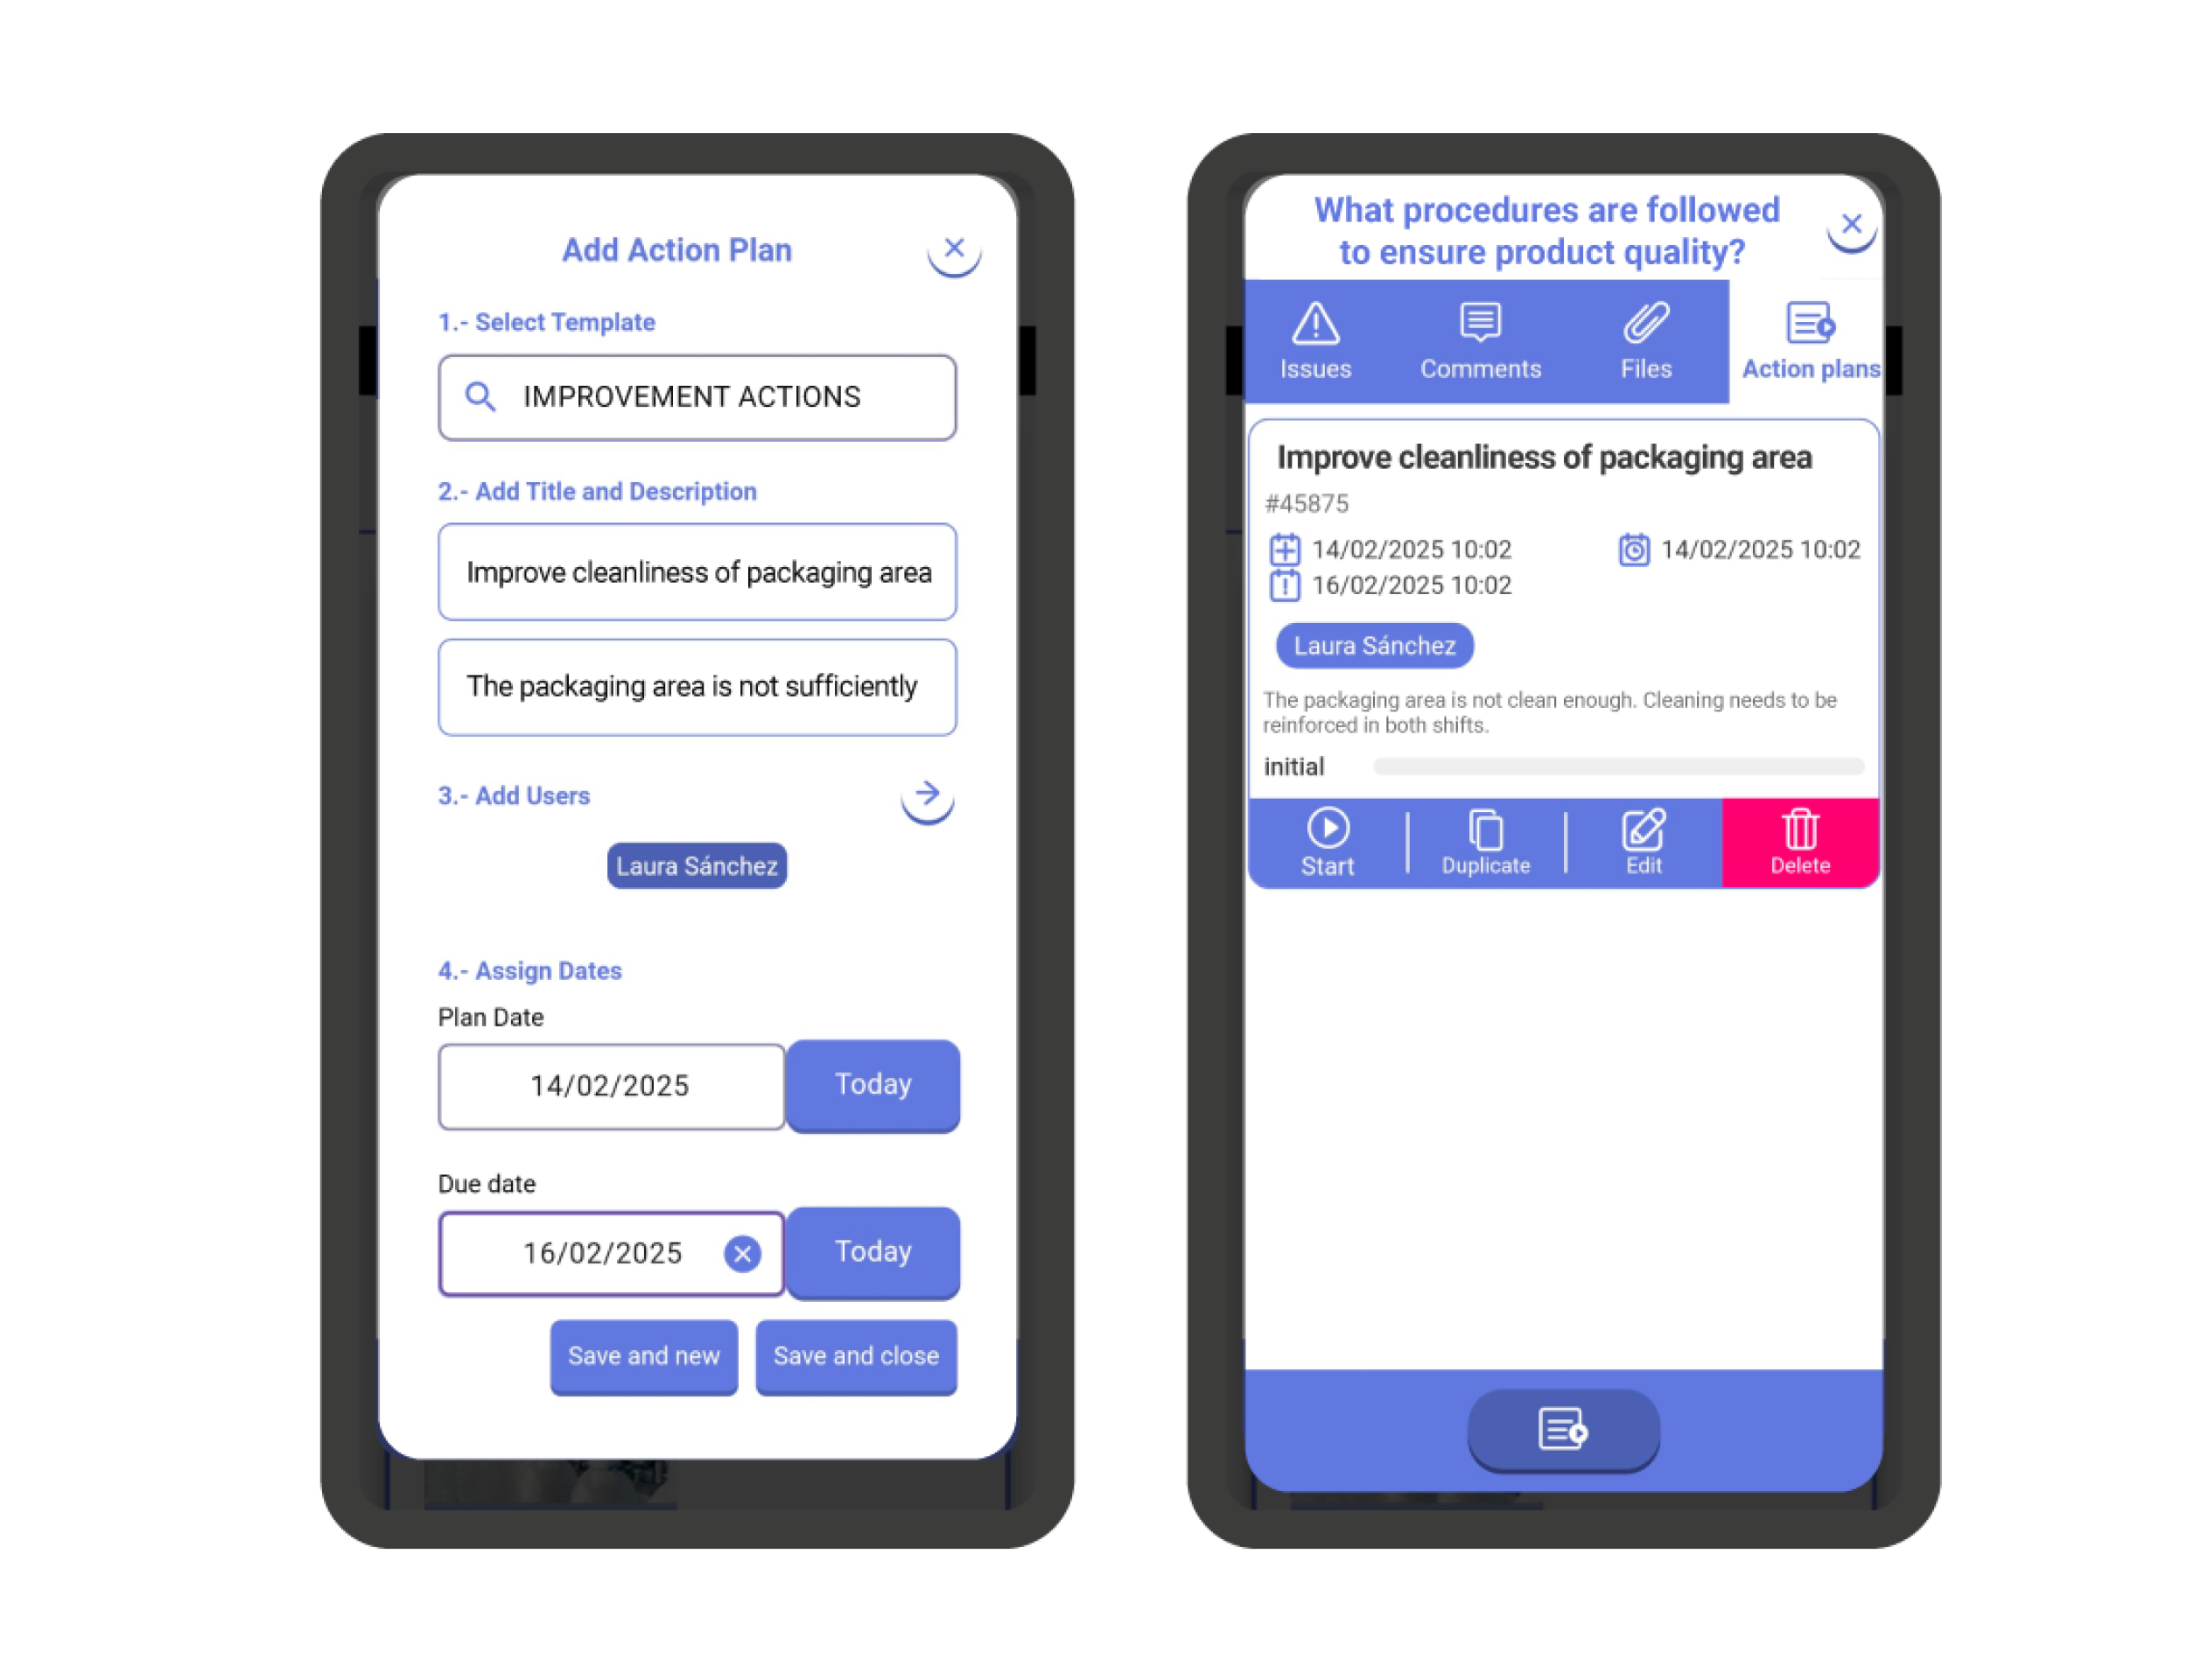
To add an action plan to a question, click the ‘+’ button at the top right of the question’s card. Then, select the ‘Action Plan’ option from the menu. This will open the ‘Action Plans’ section for the question.

To add a new action plan, click the button at the bottom of the screen.

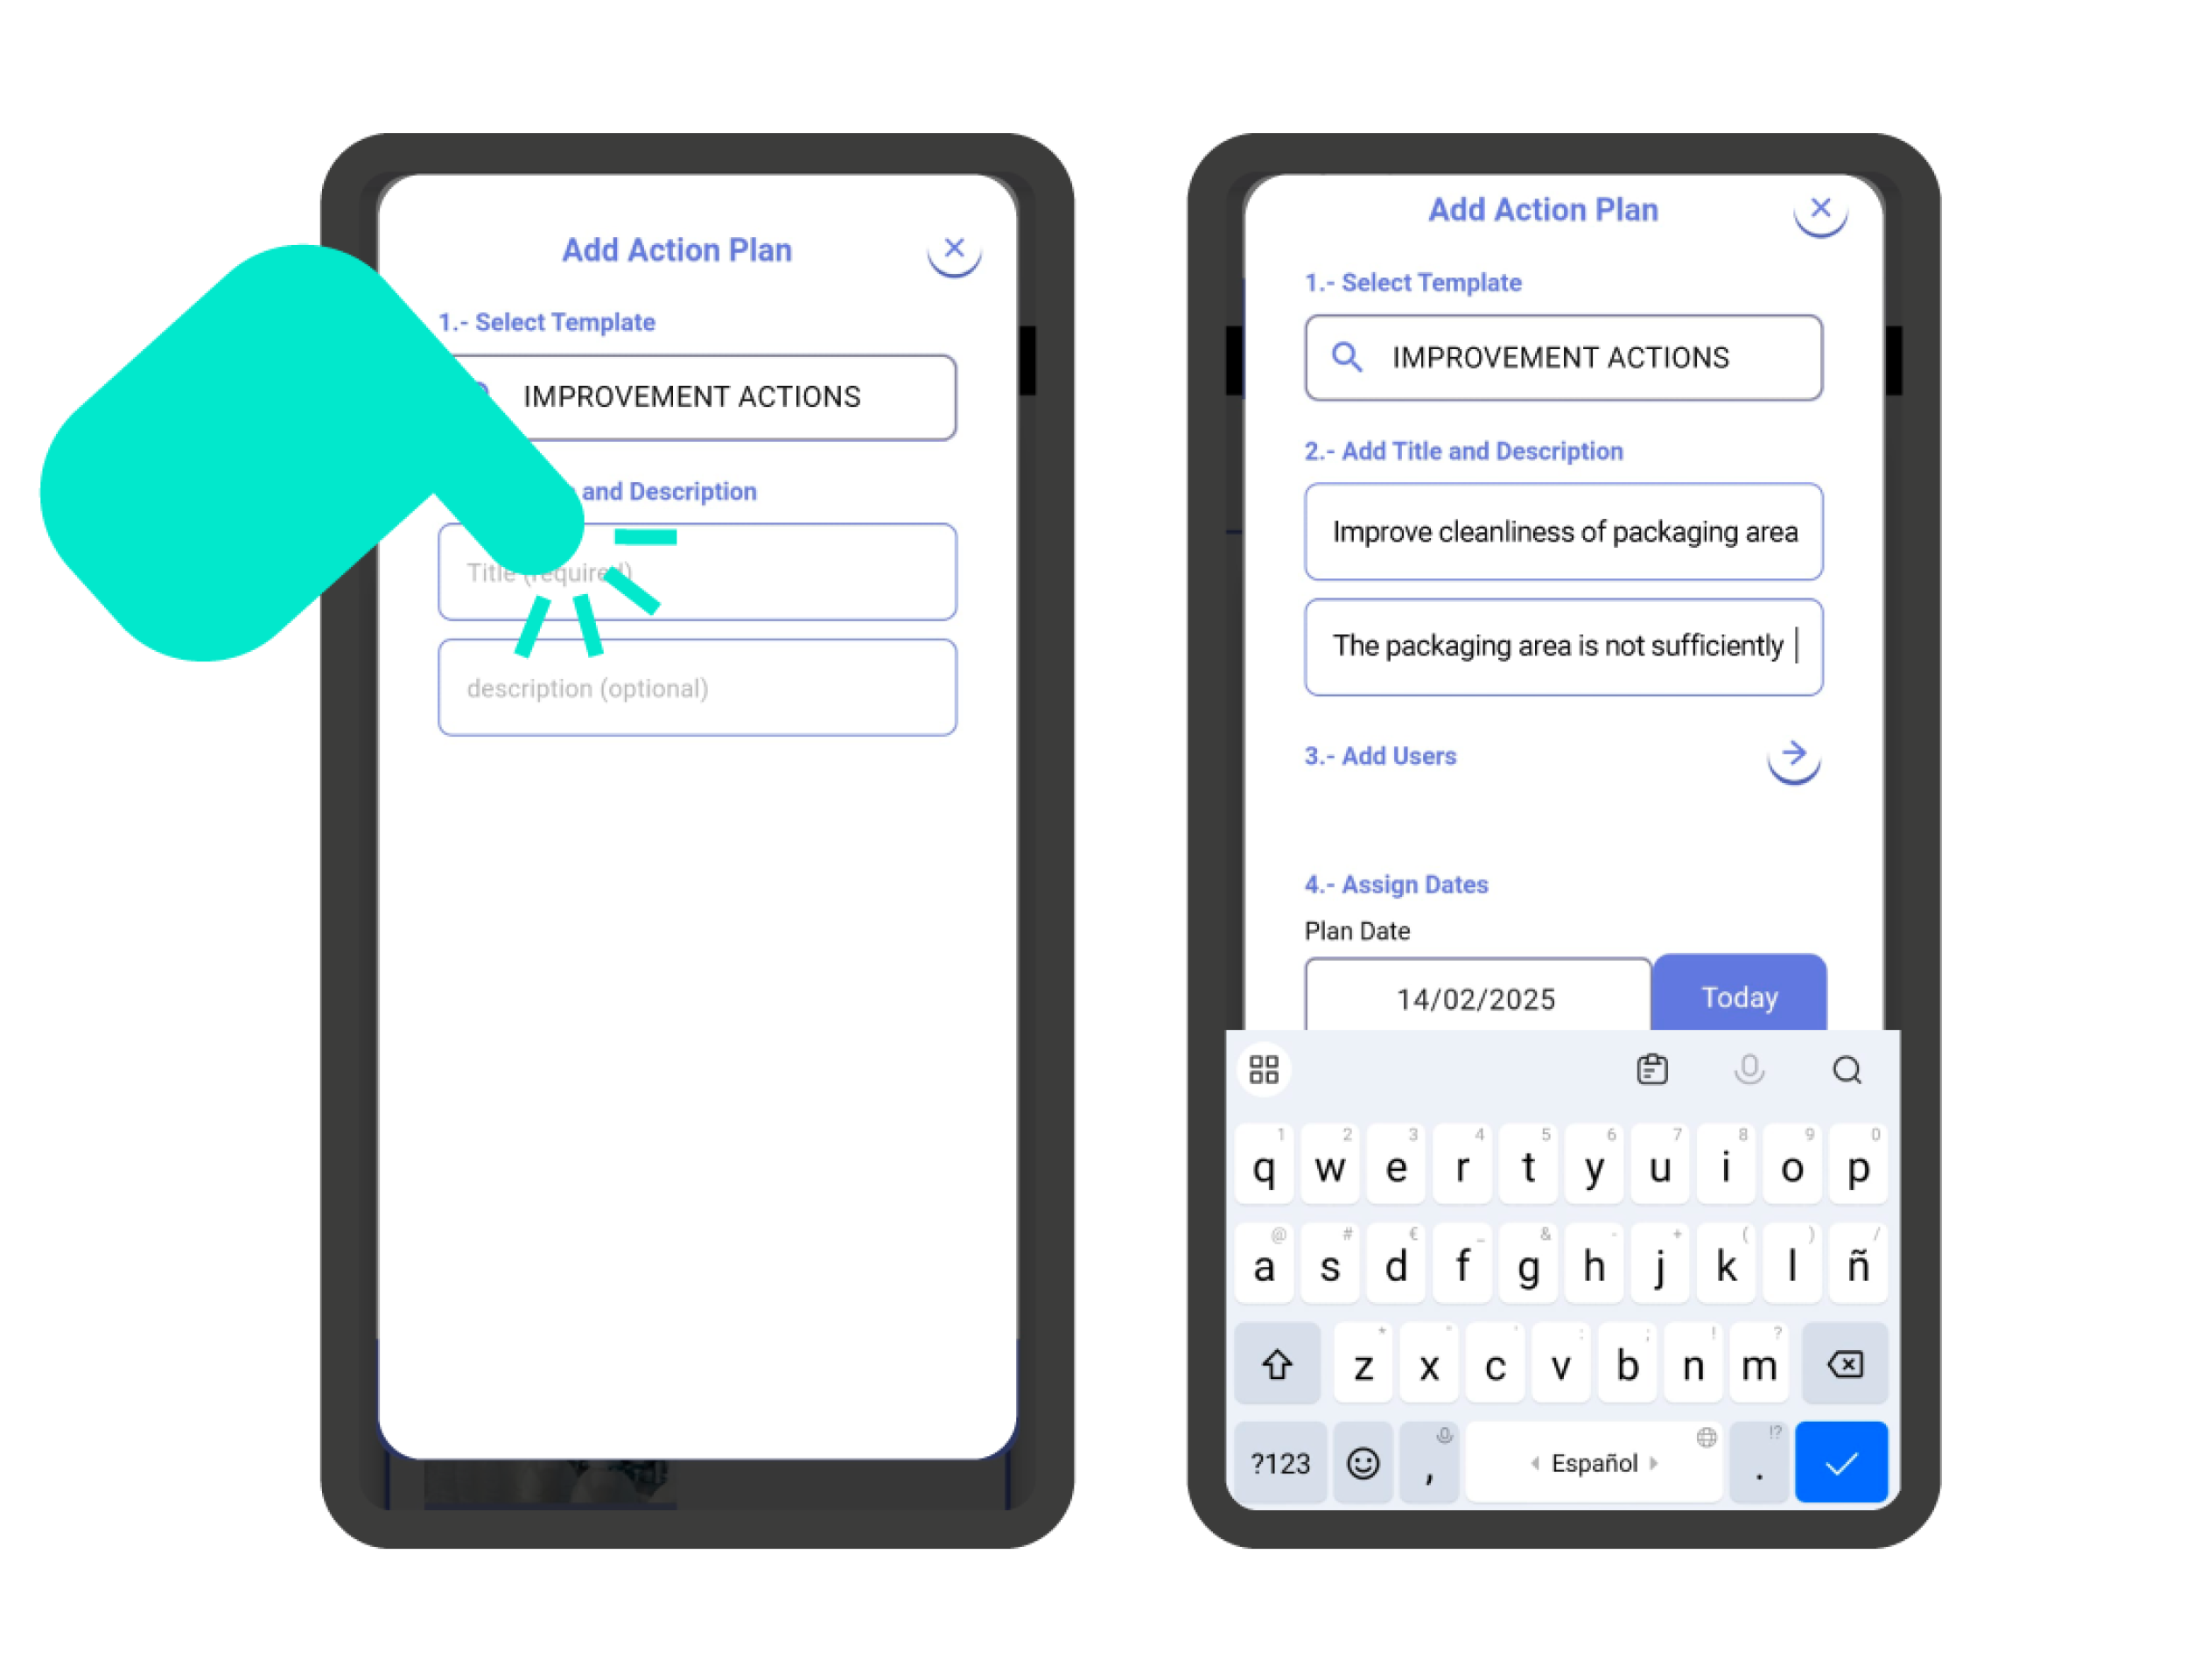
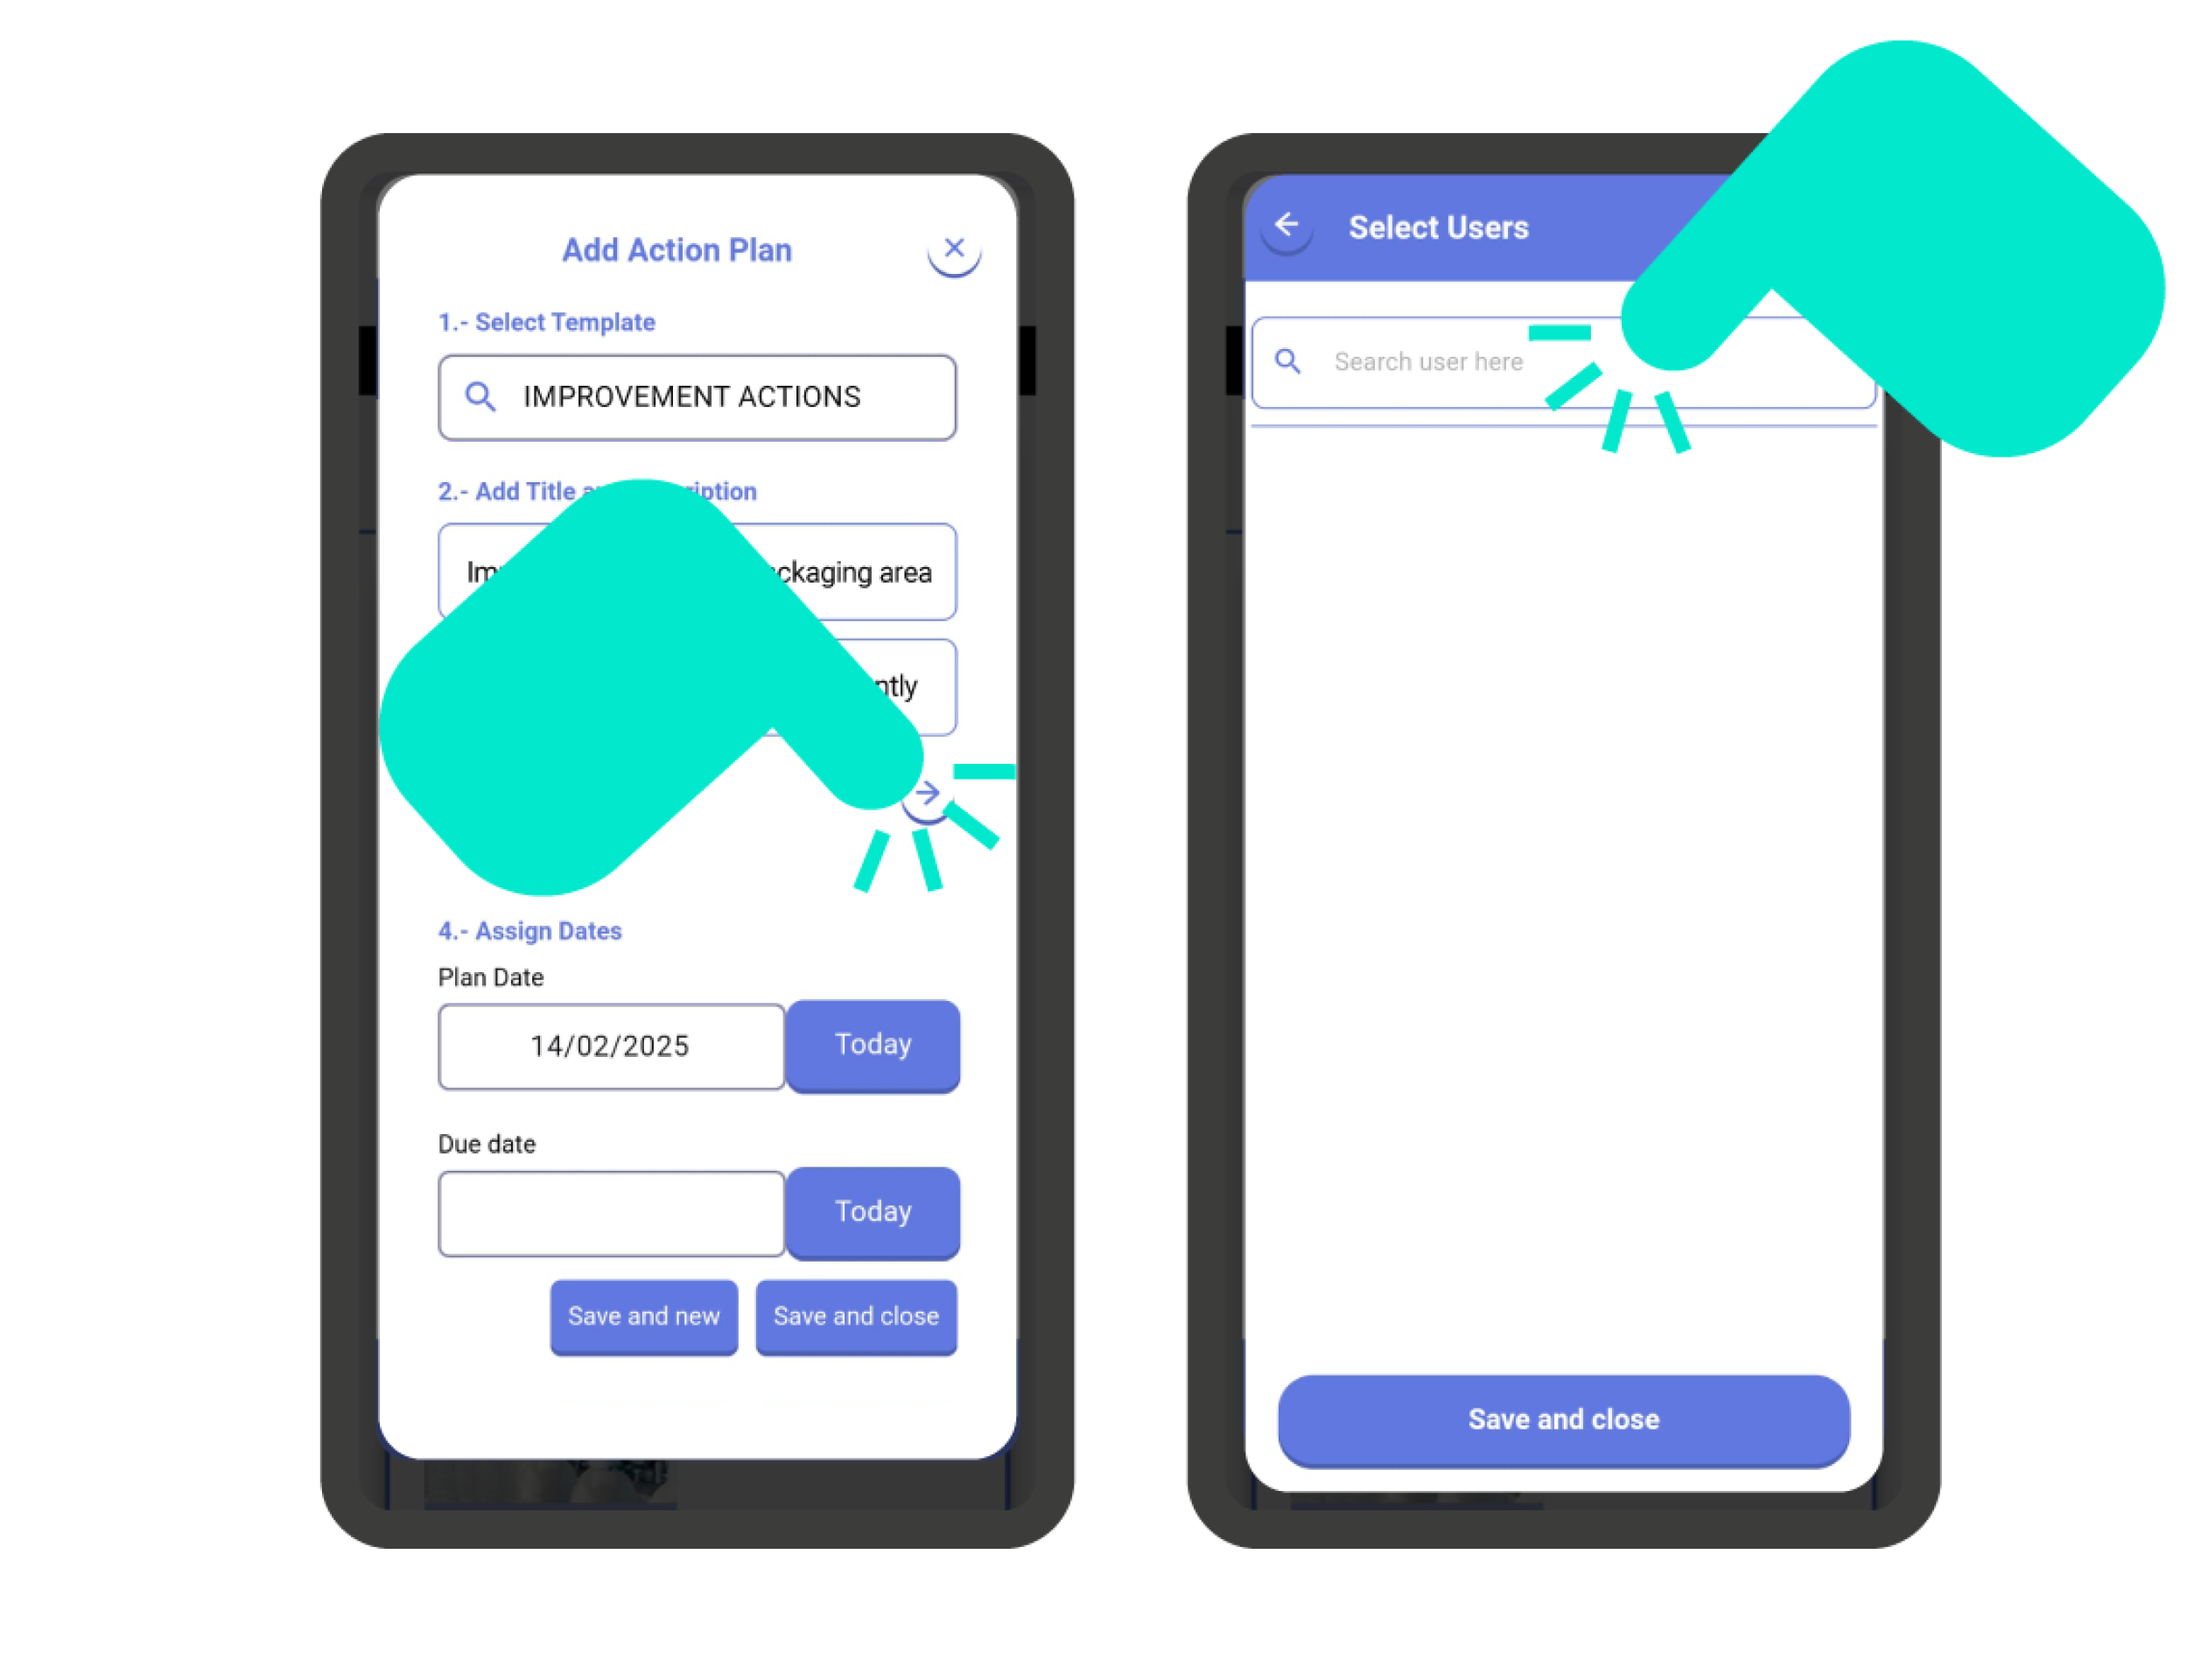
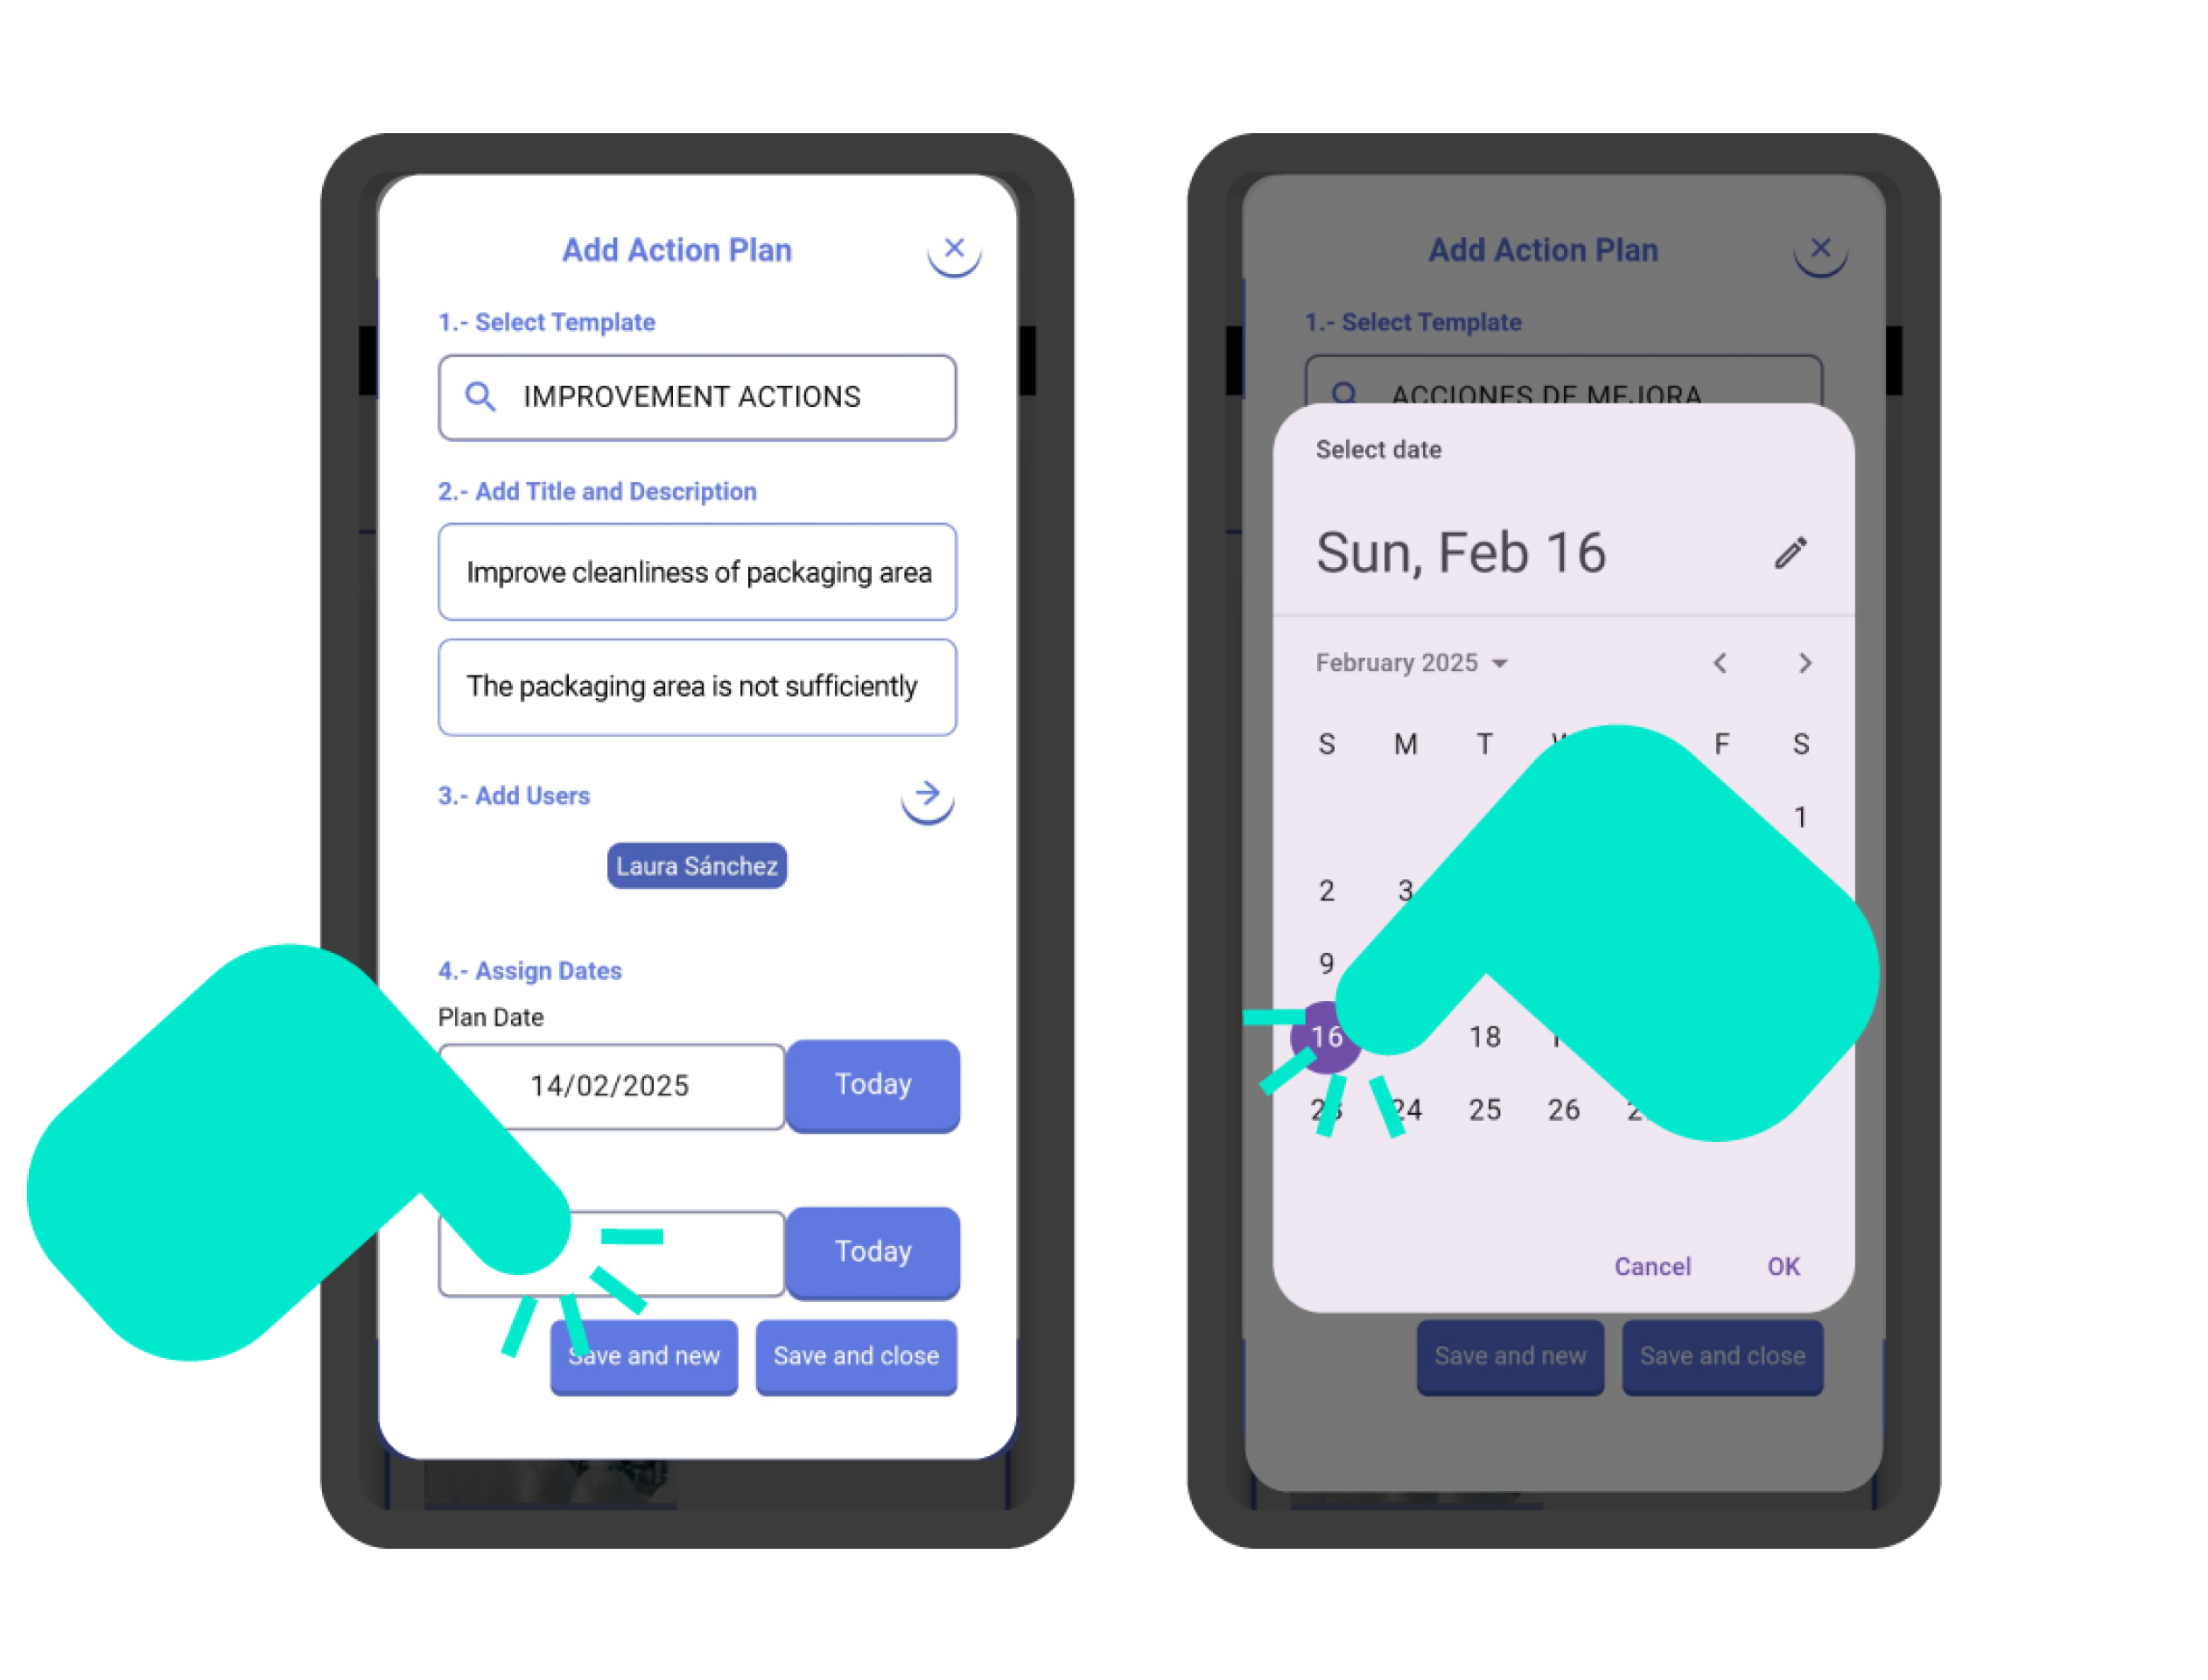
Defining an action plan is very straightforward. The first thing you need to do is select an action plan template. Then, add a name and description (instructions to follow, objectives to achieve, problem to solve…) to the action plan. Finally, optionally, assign one or more users and define the planning and expiration date.

You can ‘save and start a new action plan’ or ‘save and close’ using the buttons at the bottom of the screen.

Important!: The action plan operates like a checklist within a checklist and although they are linked, they work independently. You can access this checklist from the question (by clicking the ‘action plan’ icon that will appear at the top of the card, or from the ‘Results’ tab in the ‘Description’ screen of the checklist.
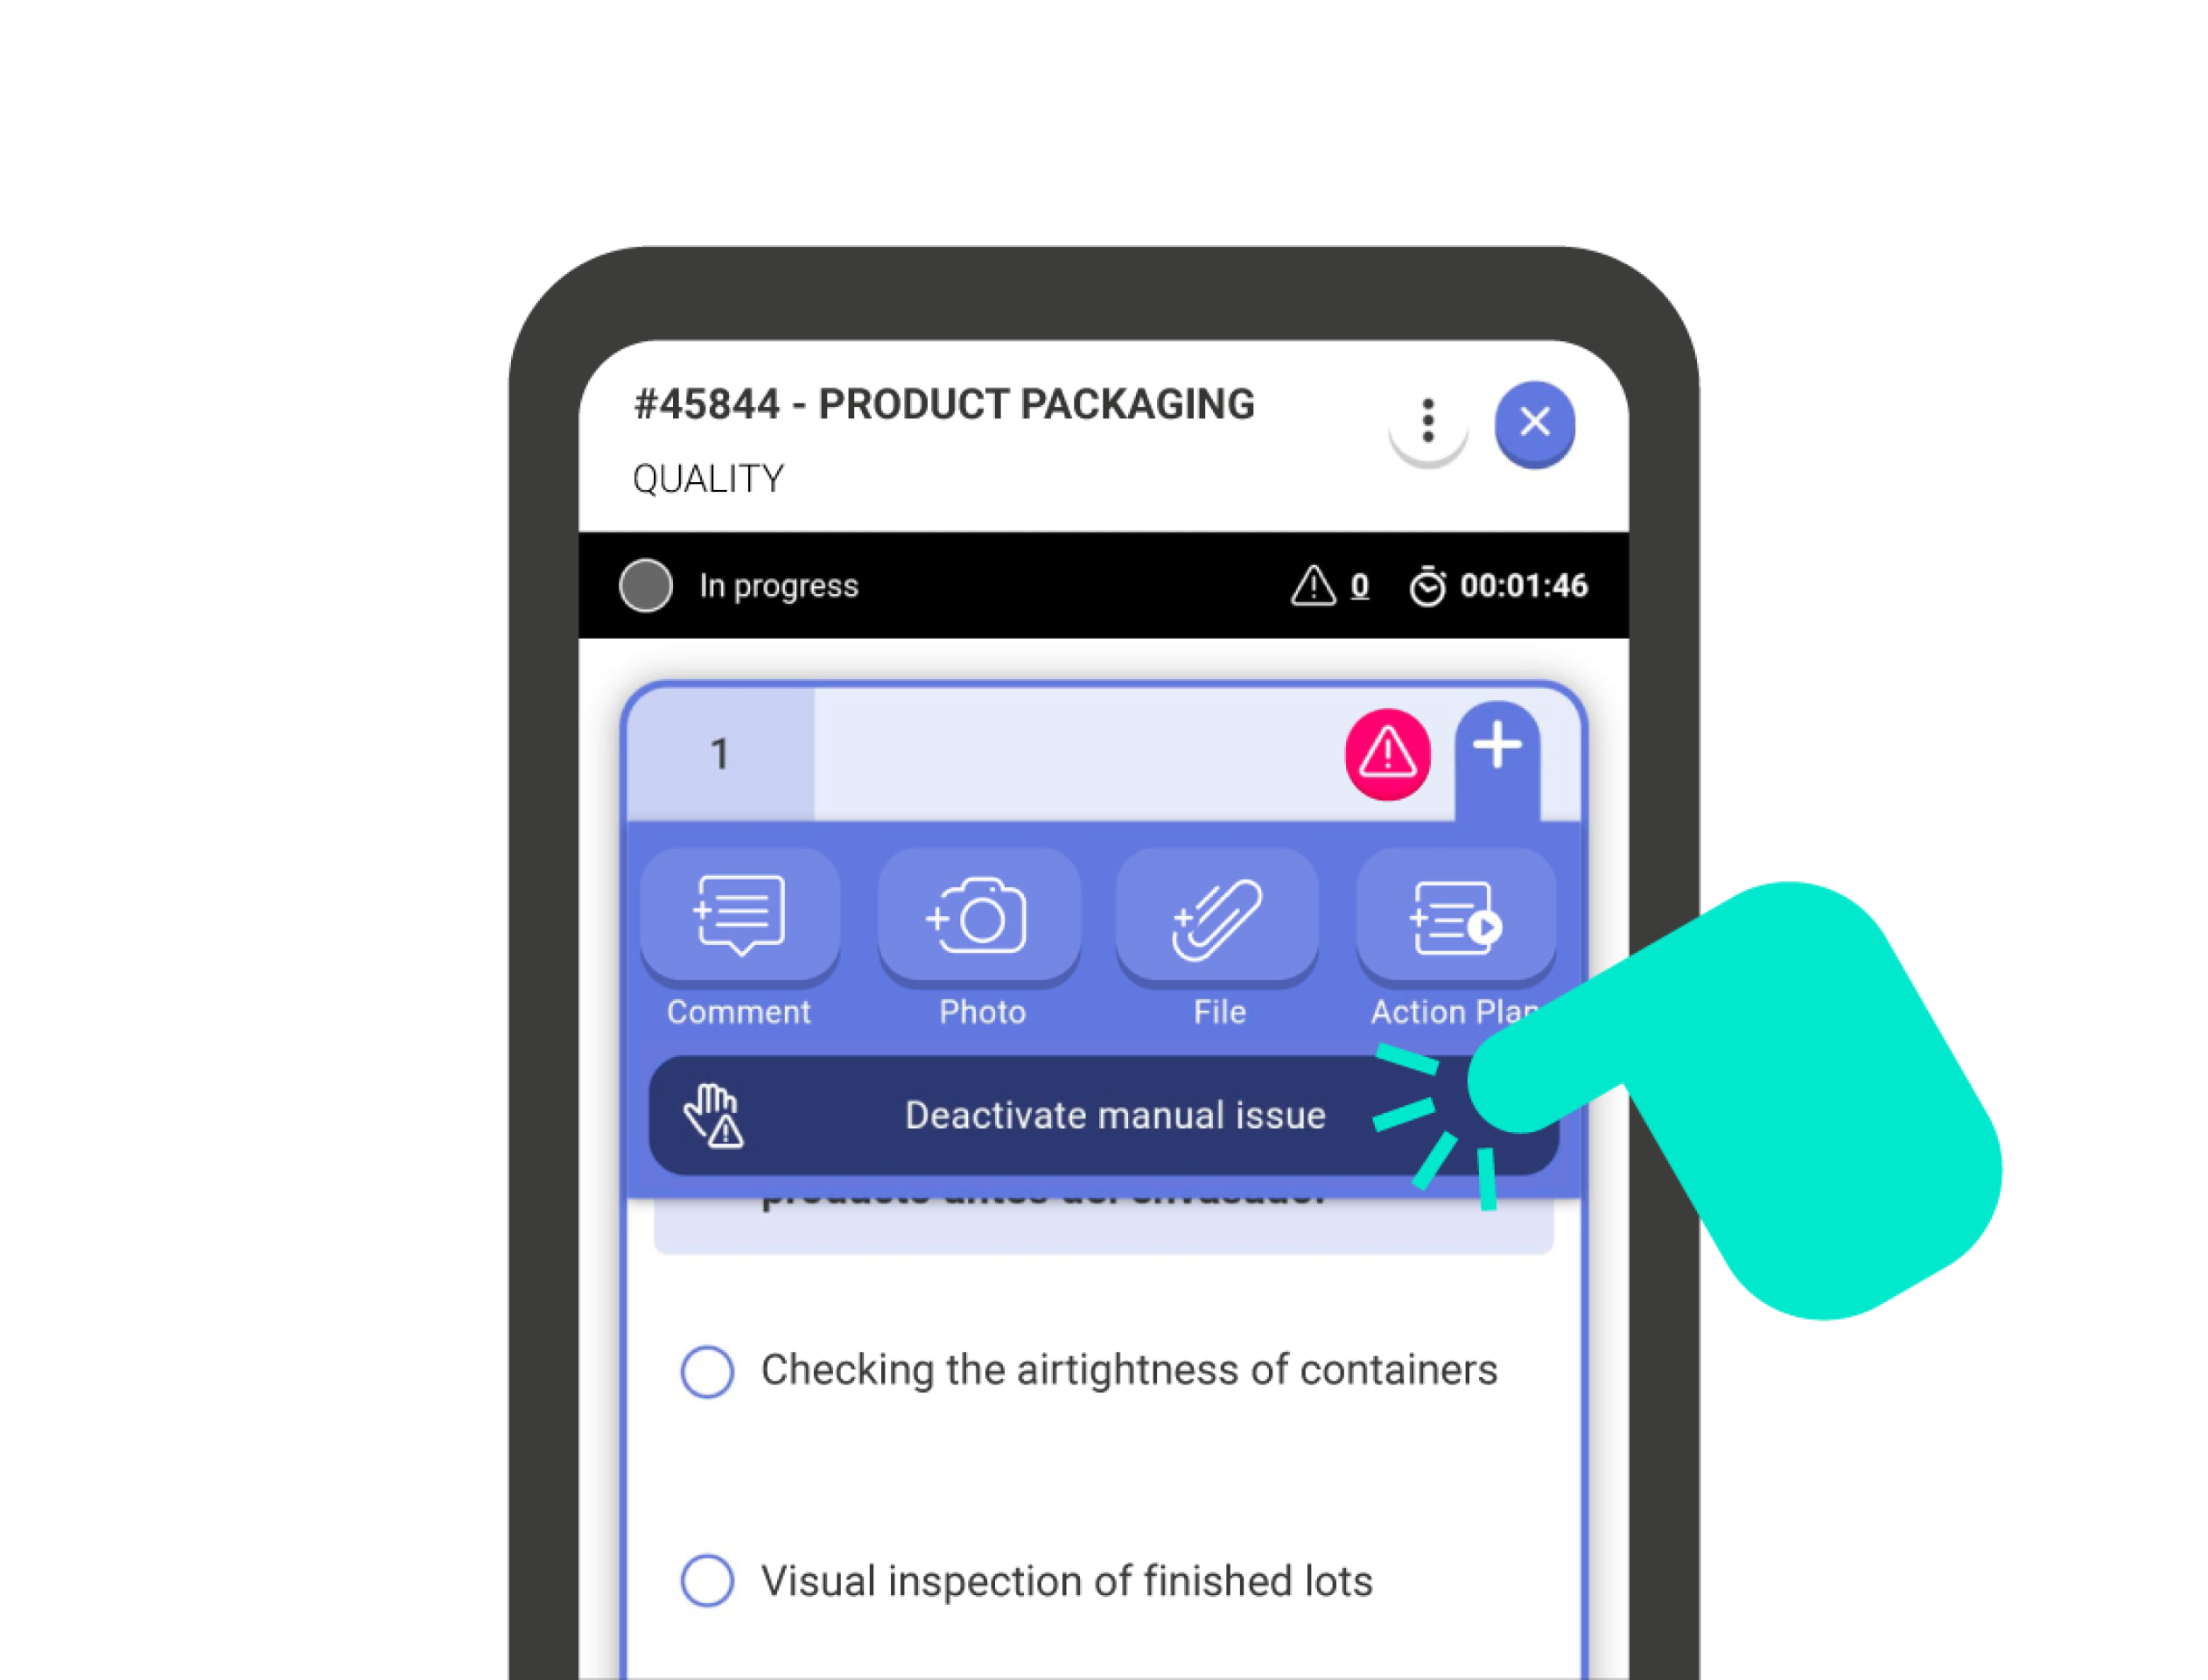
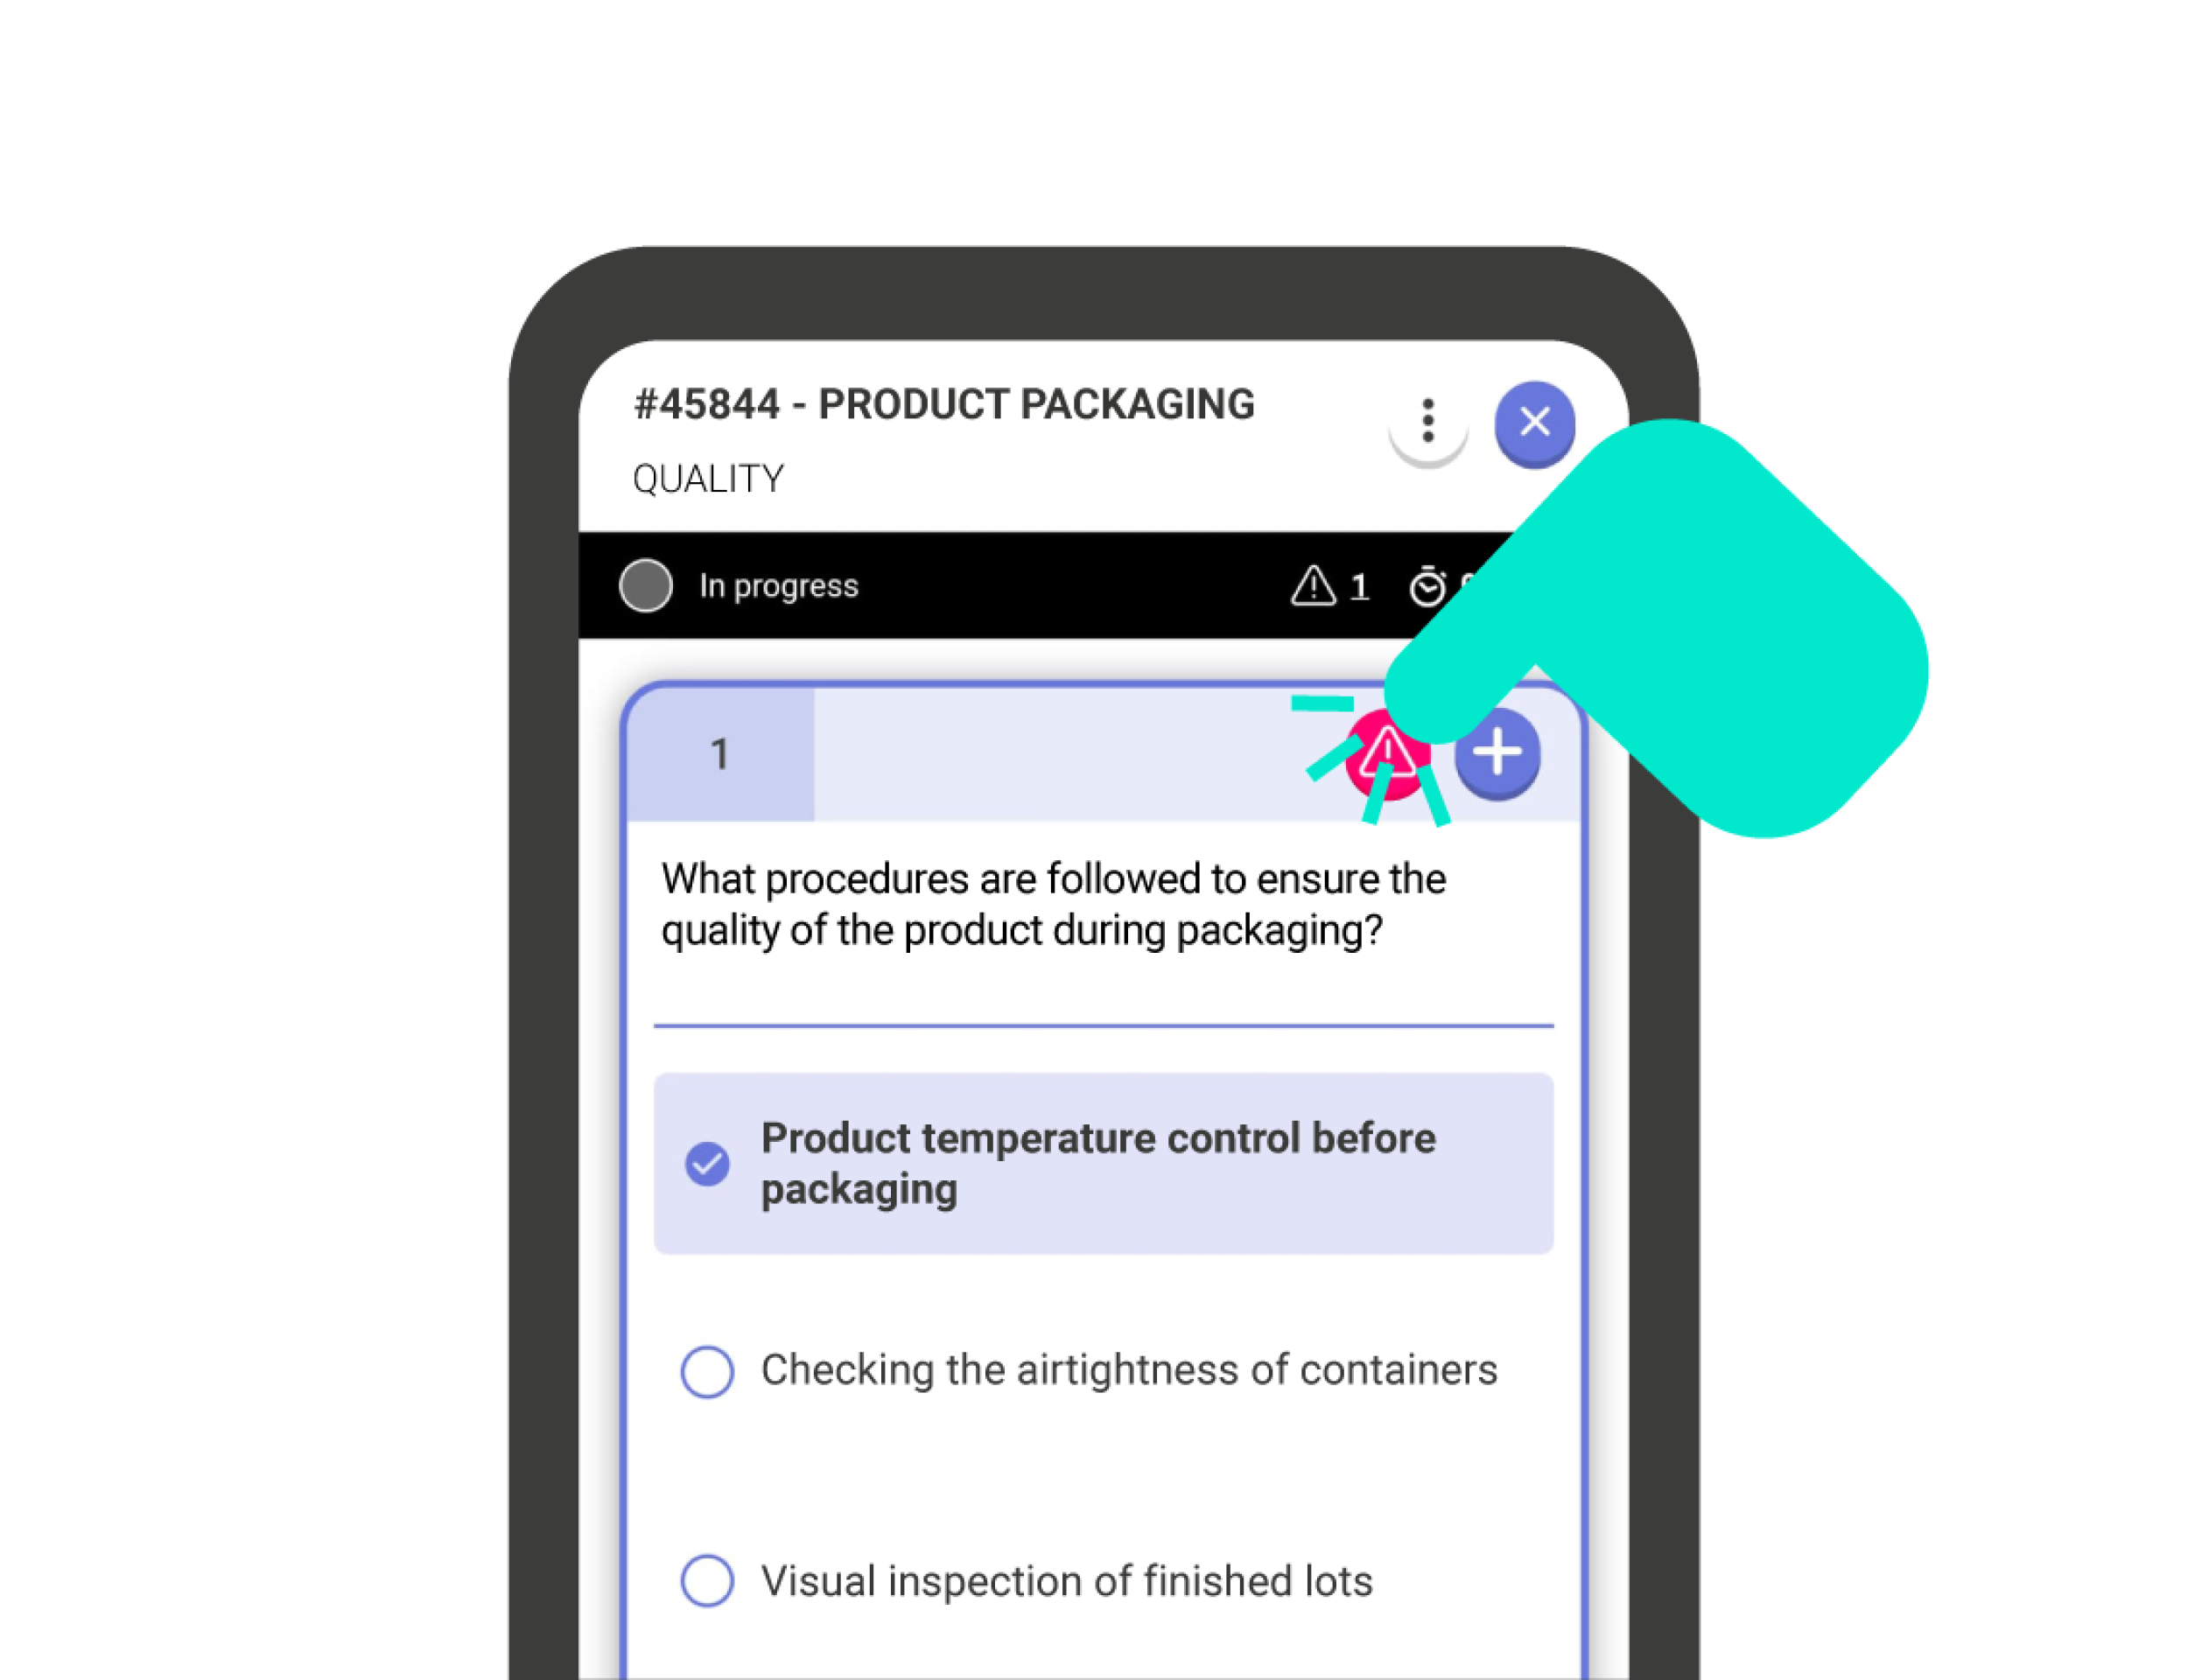
Add Manual Issues #

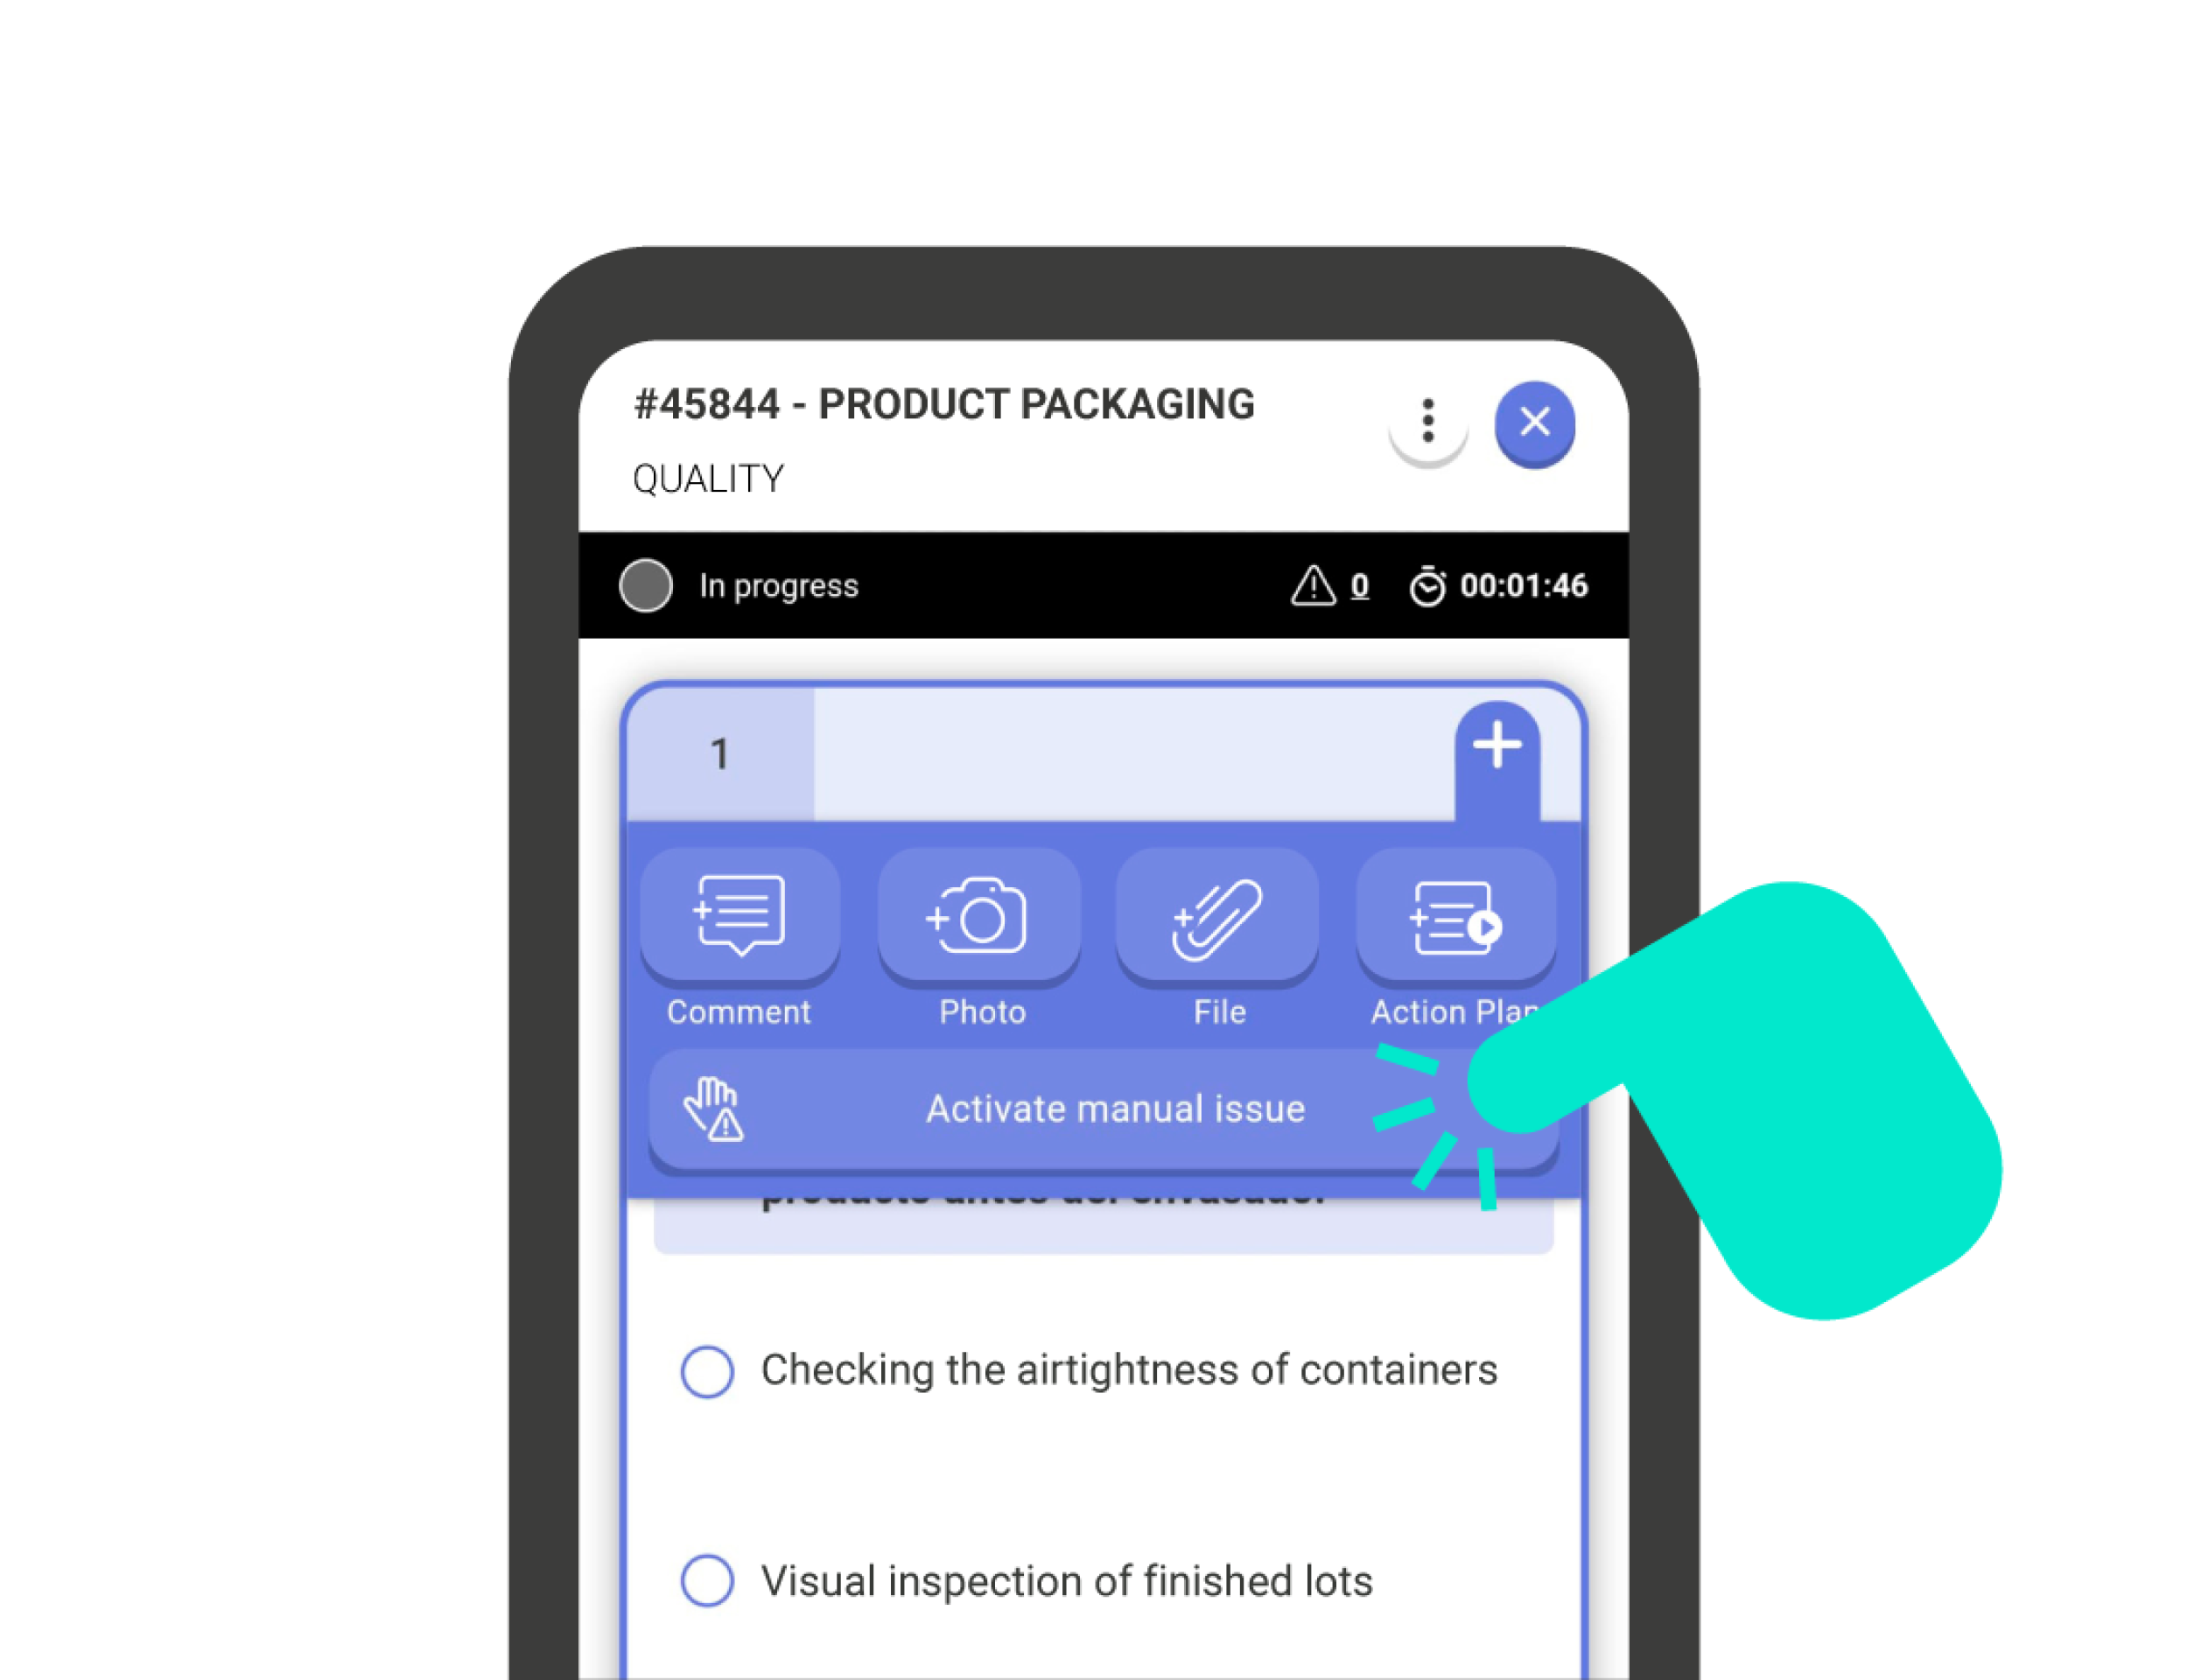
Manual issues allow the user to indicate that, regardless of the question’s outcome, there is something, usually negative, to highlight regarding it.

To activate a manual issue, click the ‘+’ button in the upper right corner of the question card. Next, check the menu bar ‘Activate Manual Issue’. To deactivate it, do the same but click on the ‘Deactivate manual issue’ bar.

Important!: You can review the issues from the checklist in the ‘Results’ menu within the checklist description.

Managing the Status of Issues #

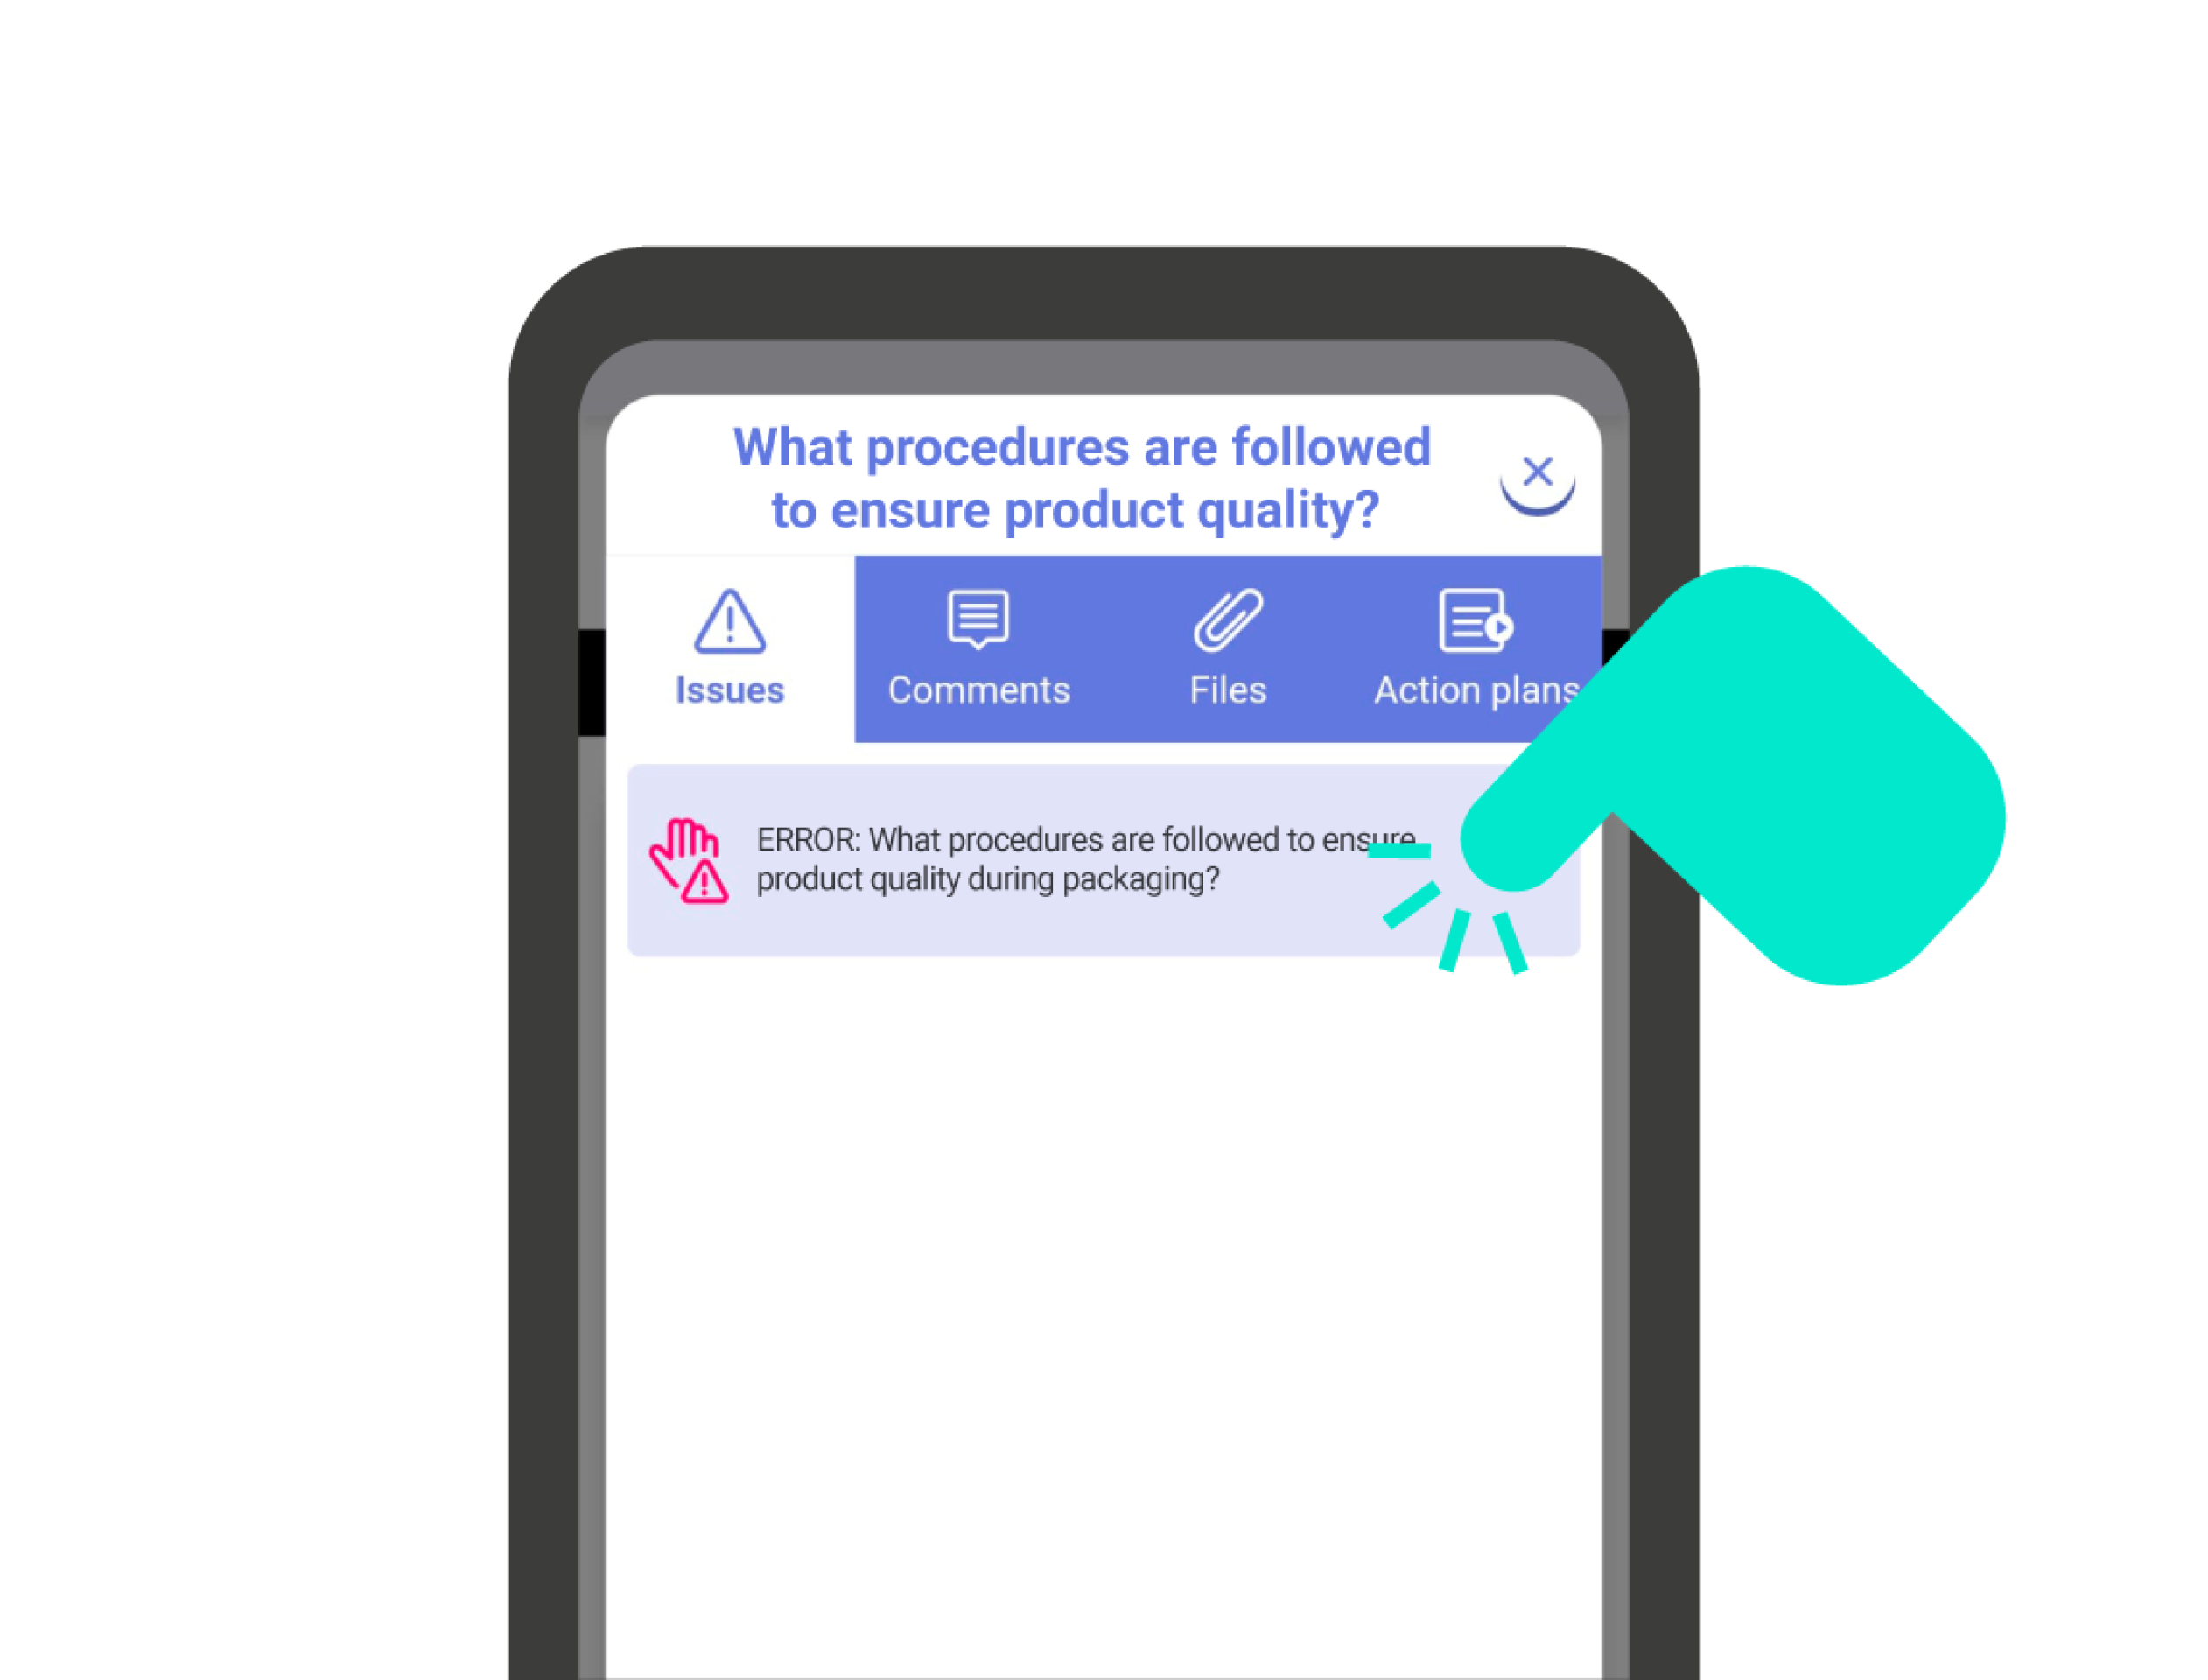
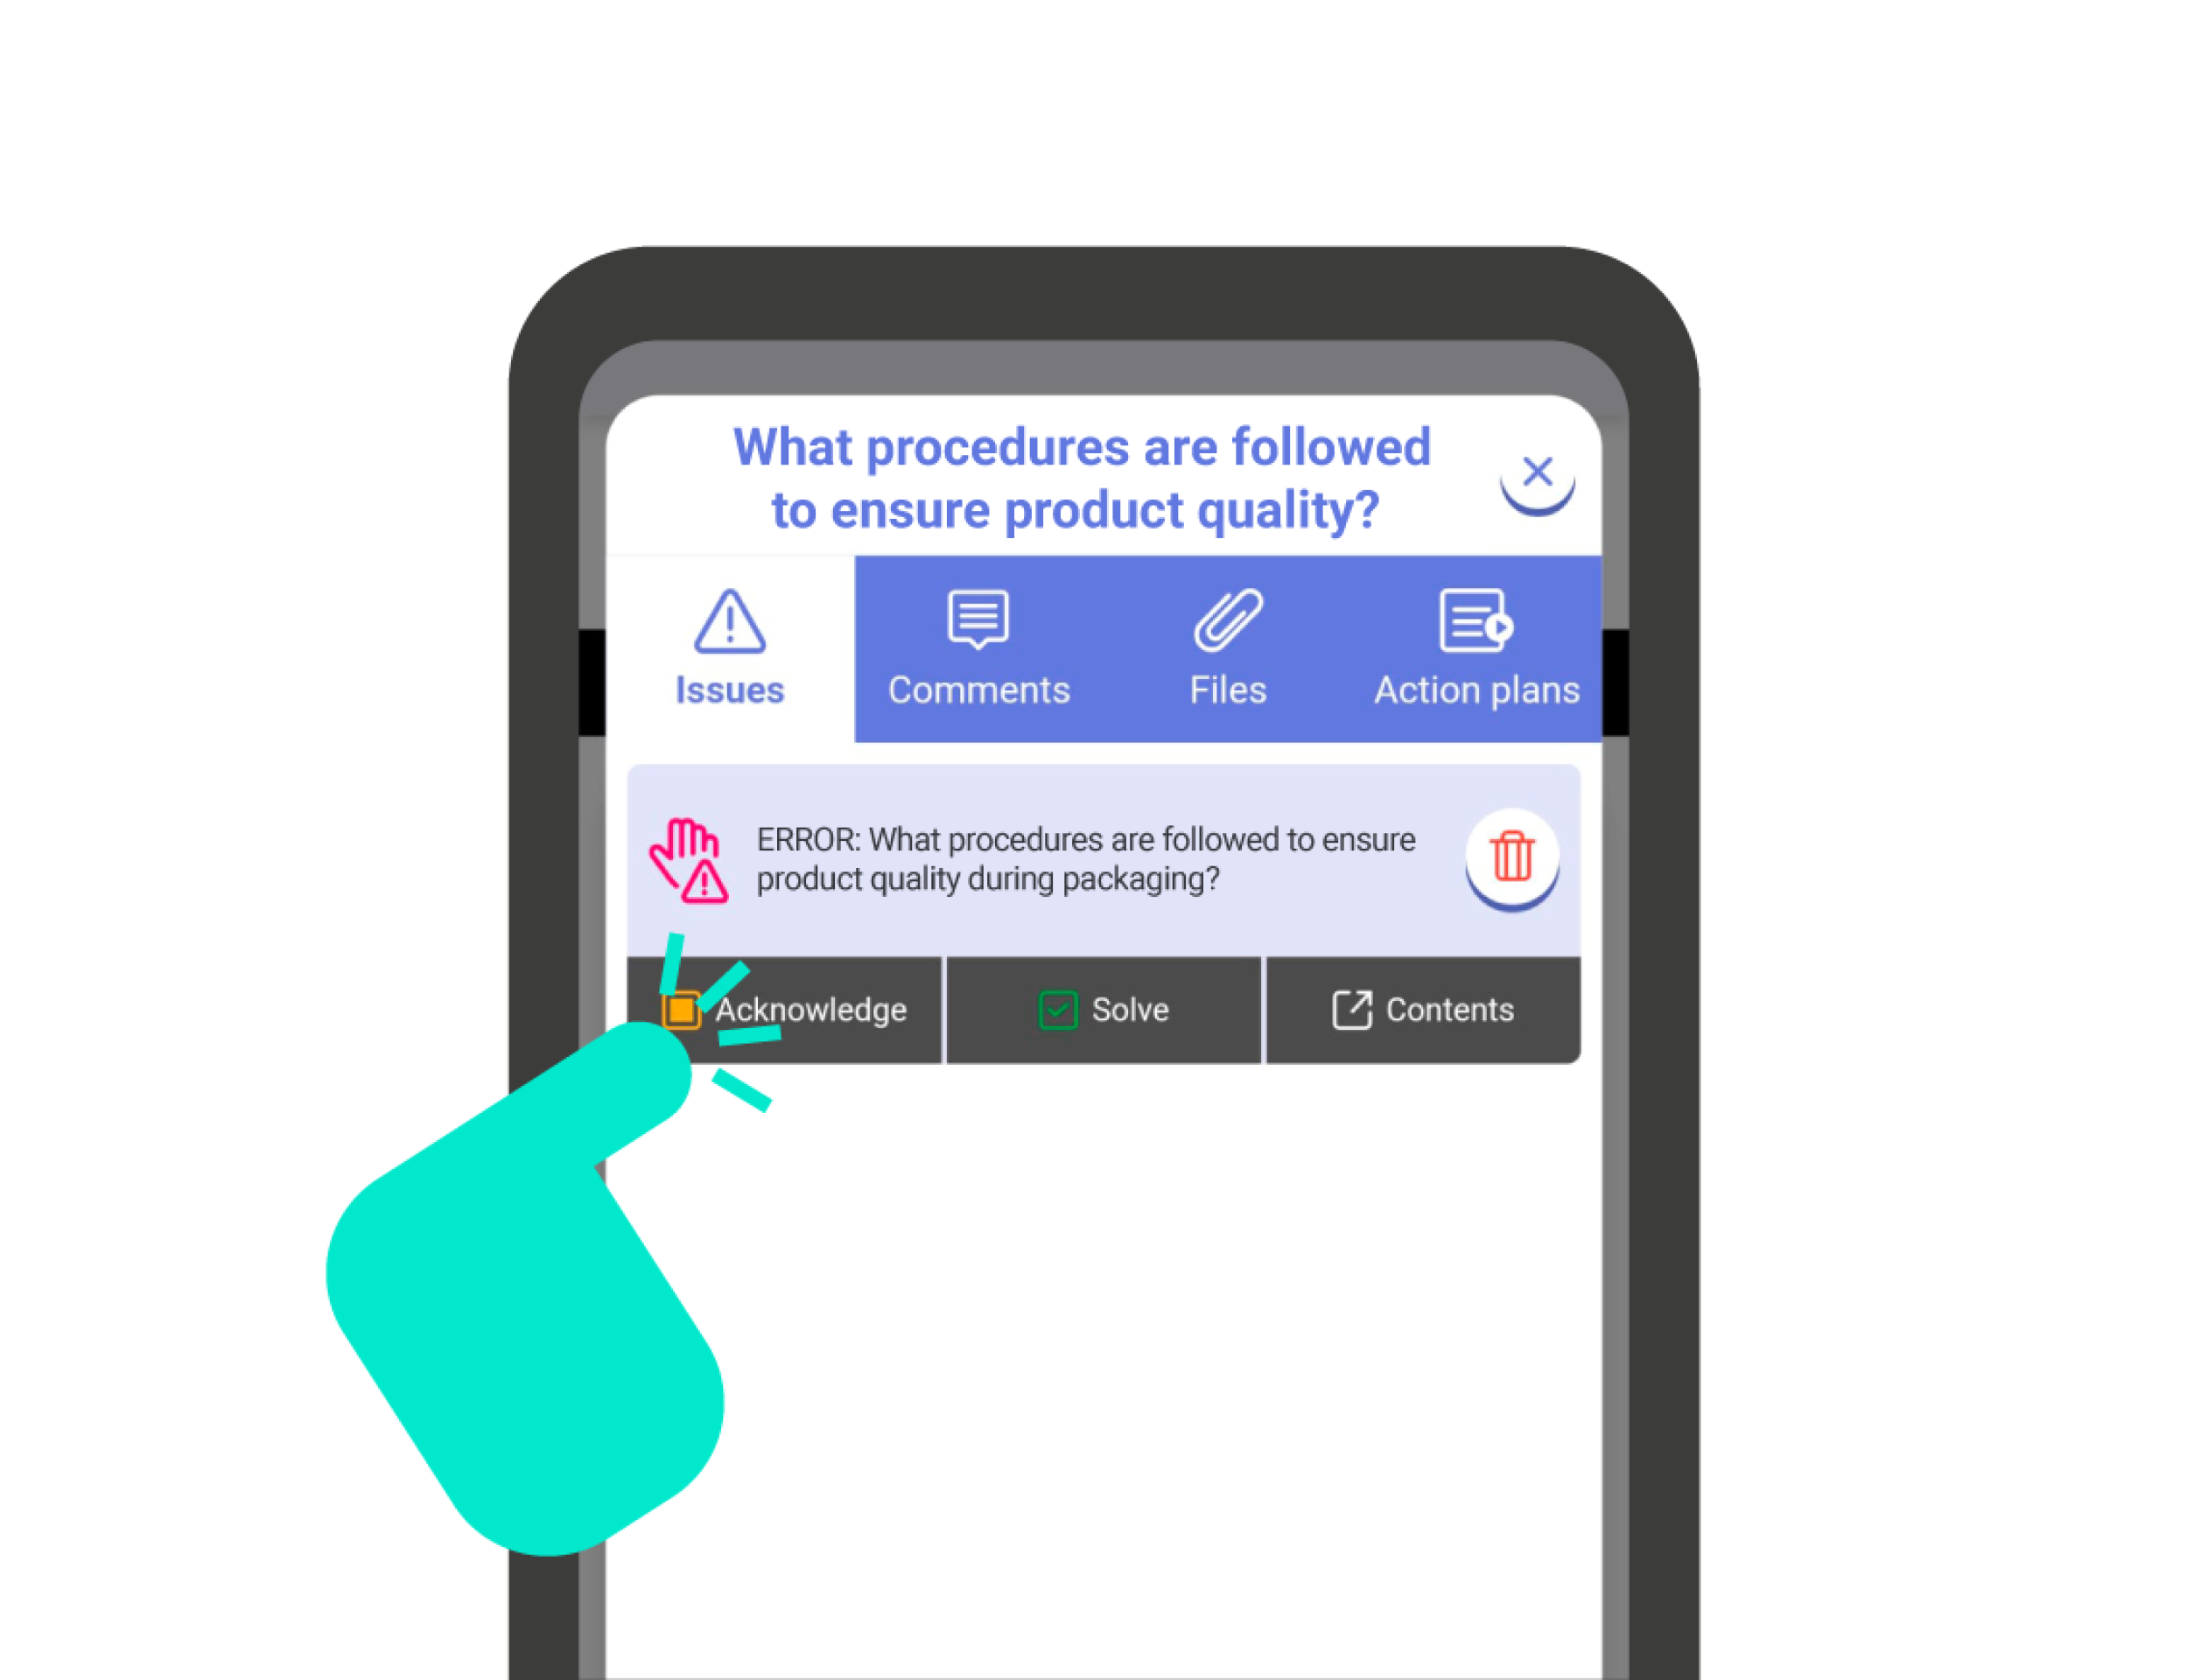
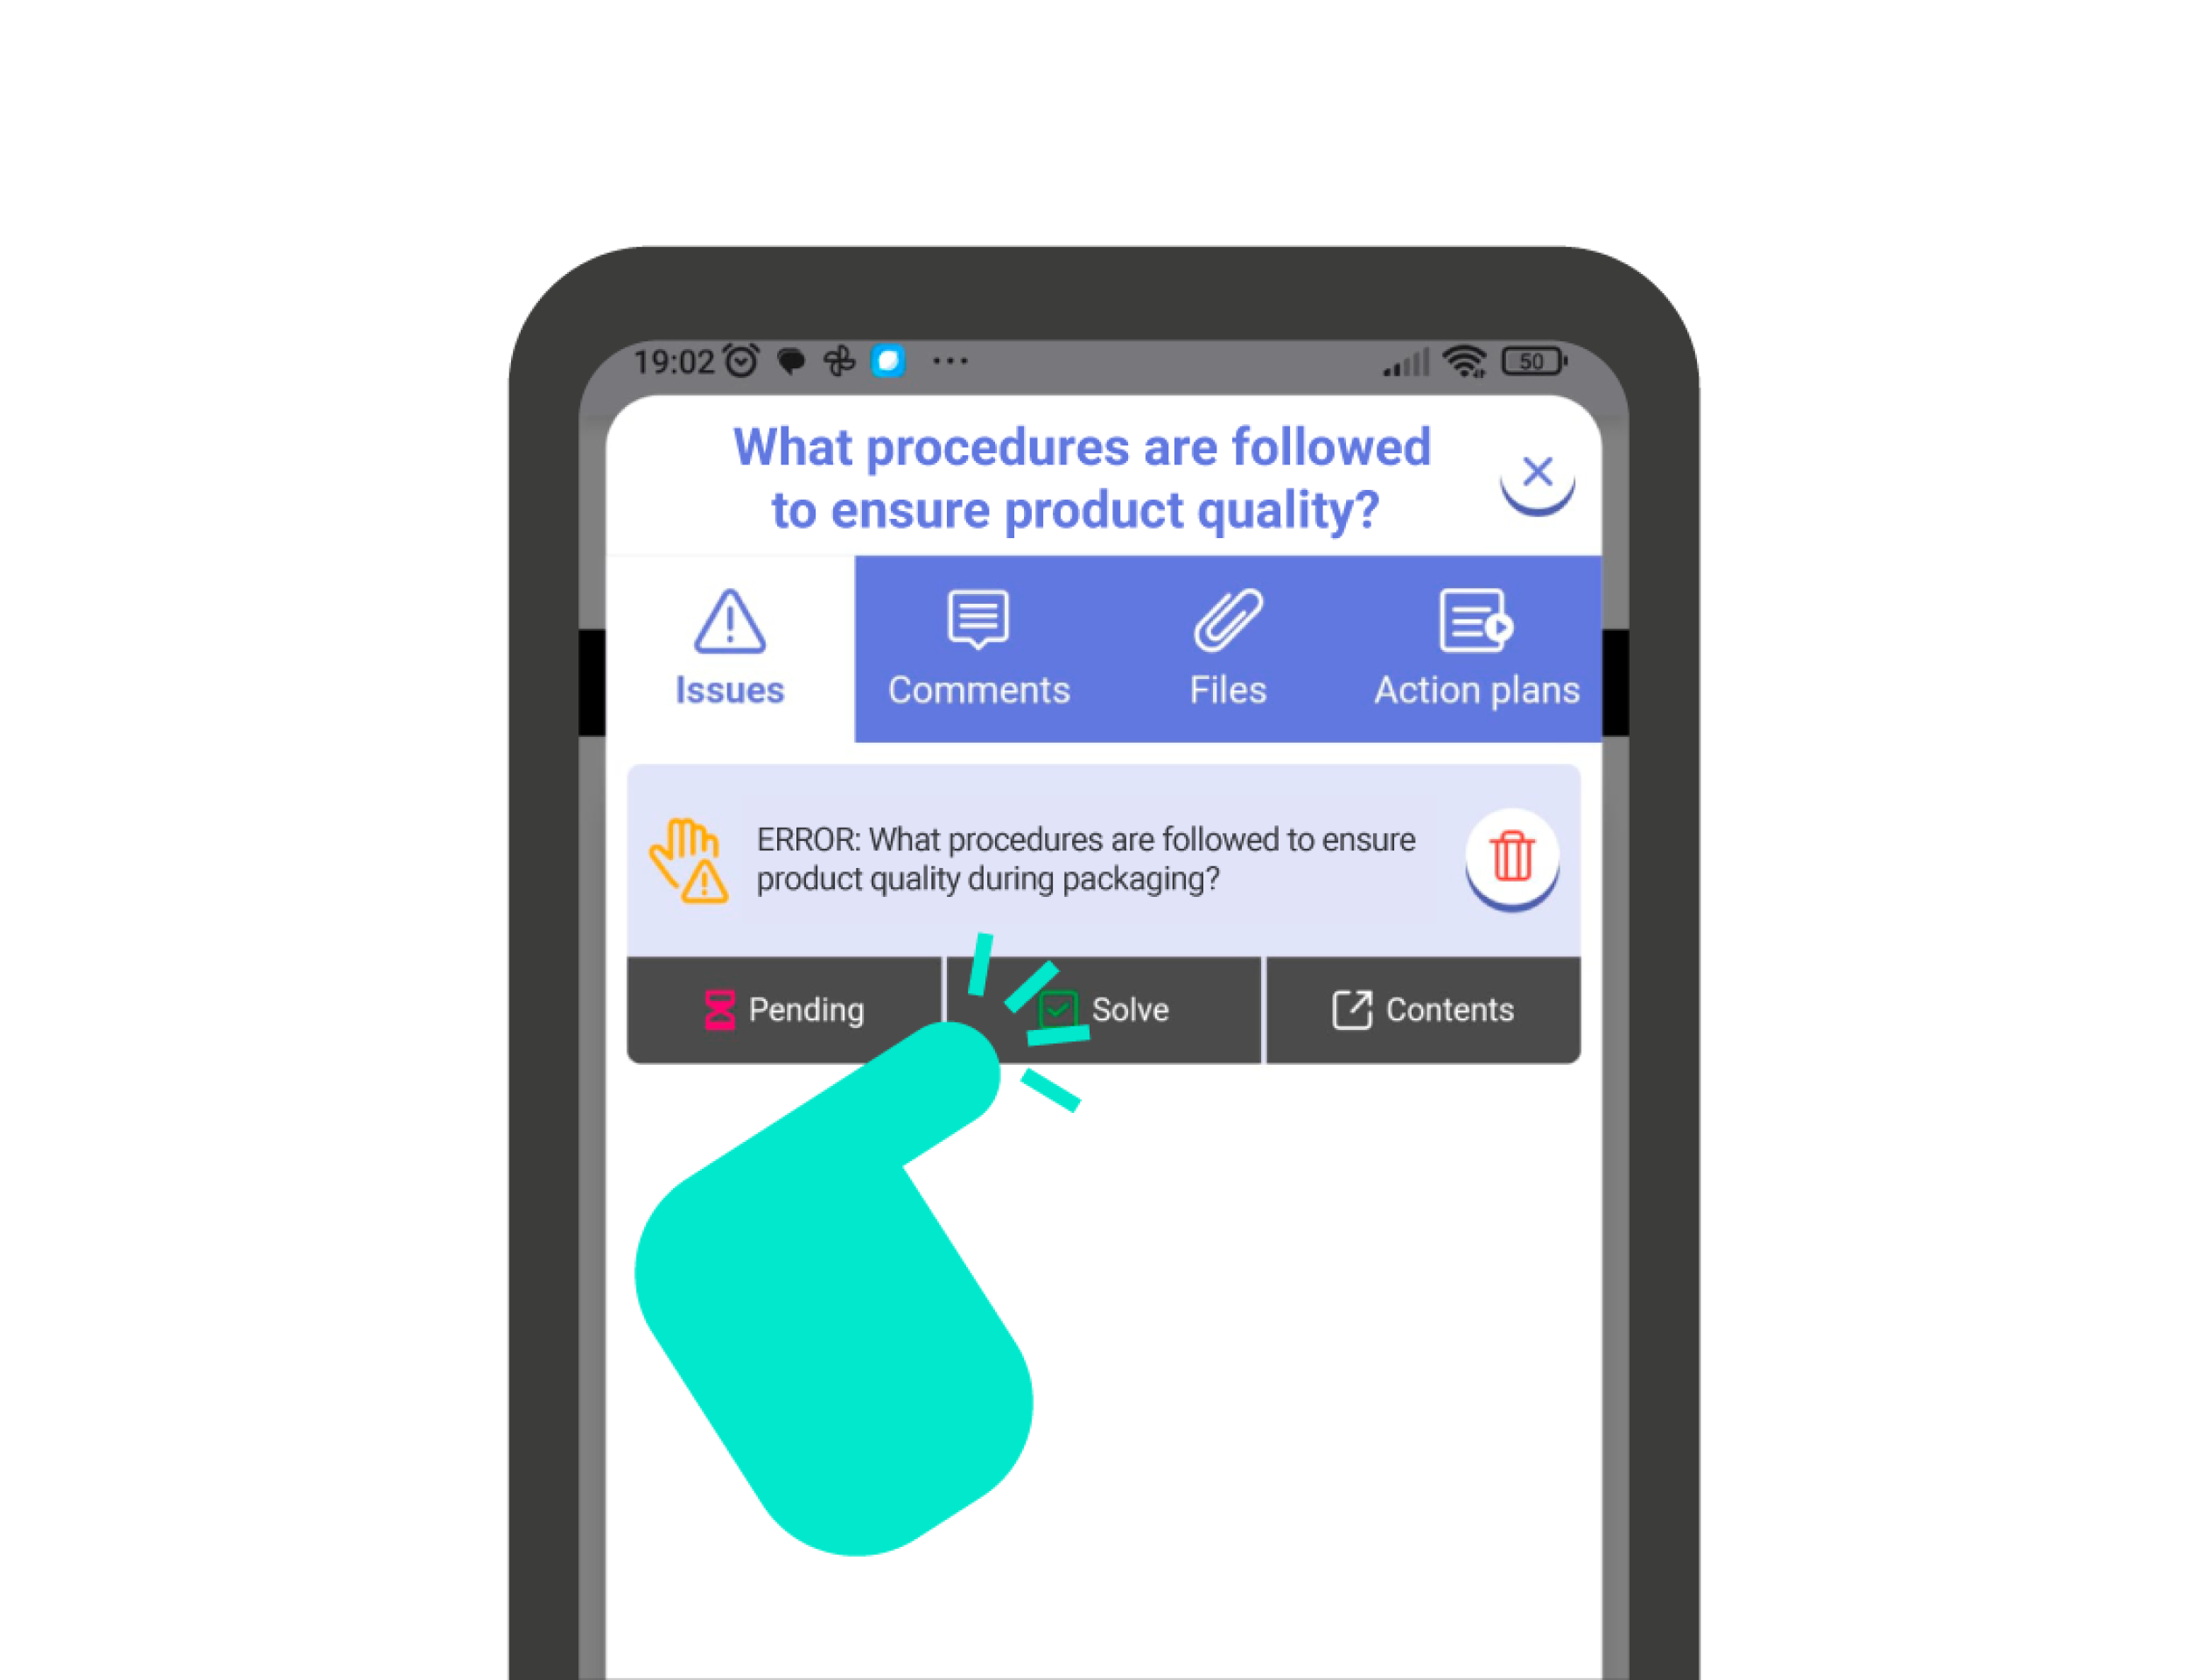
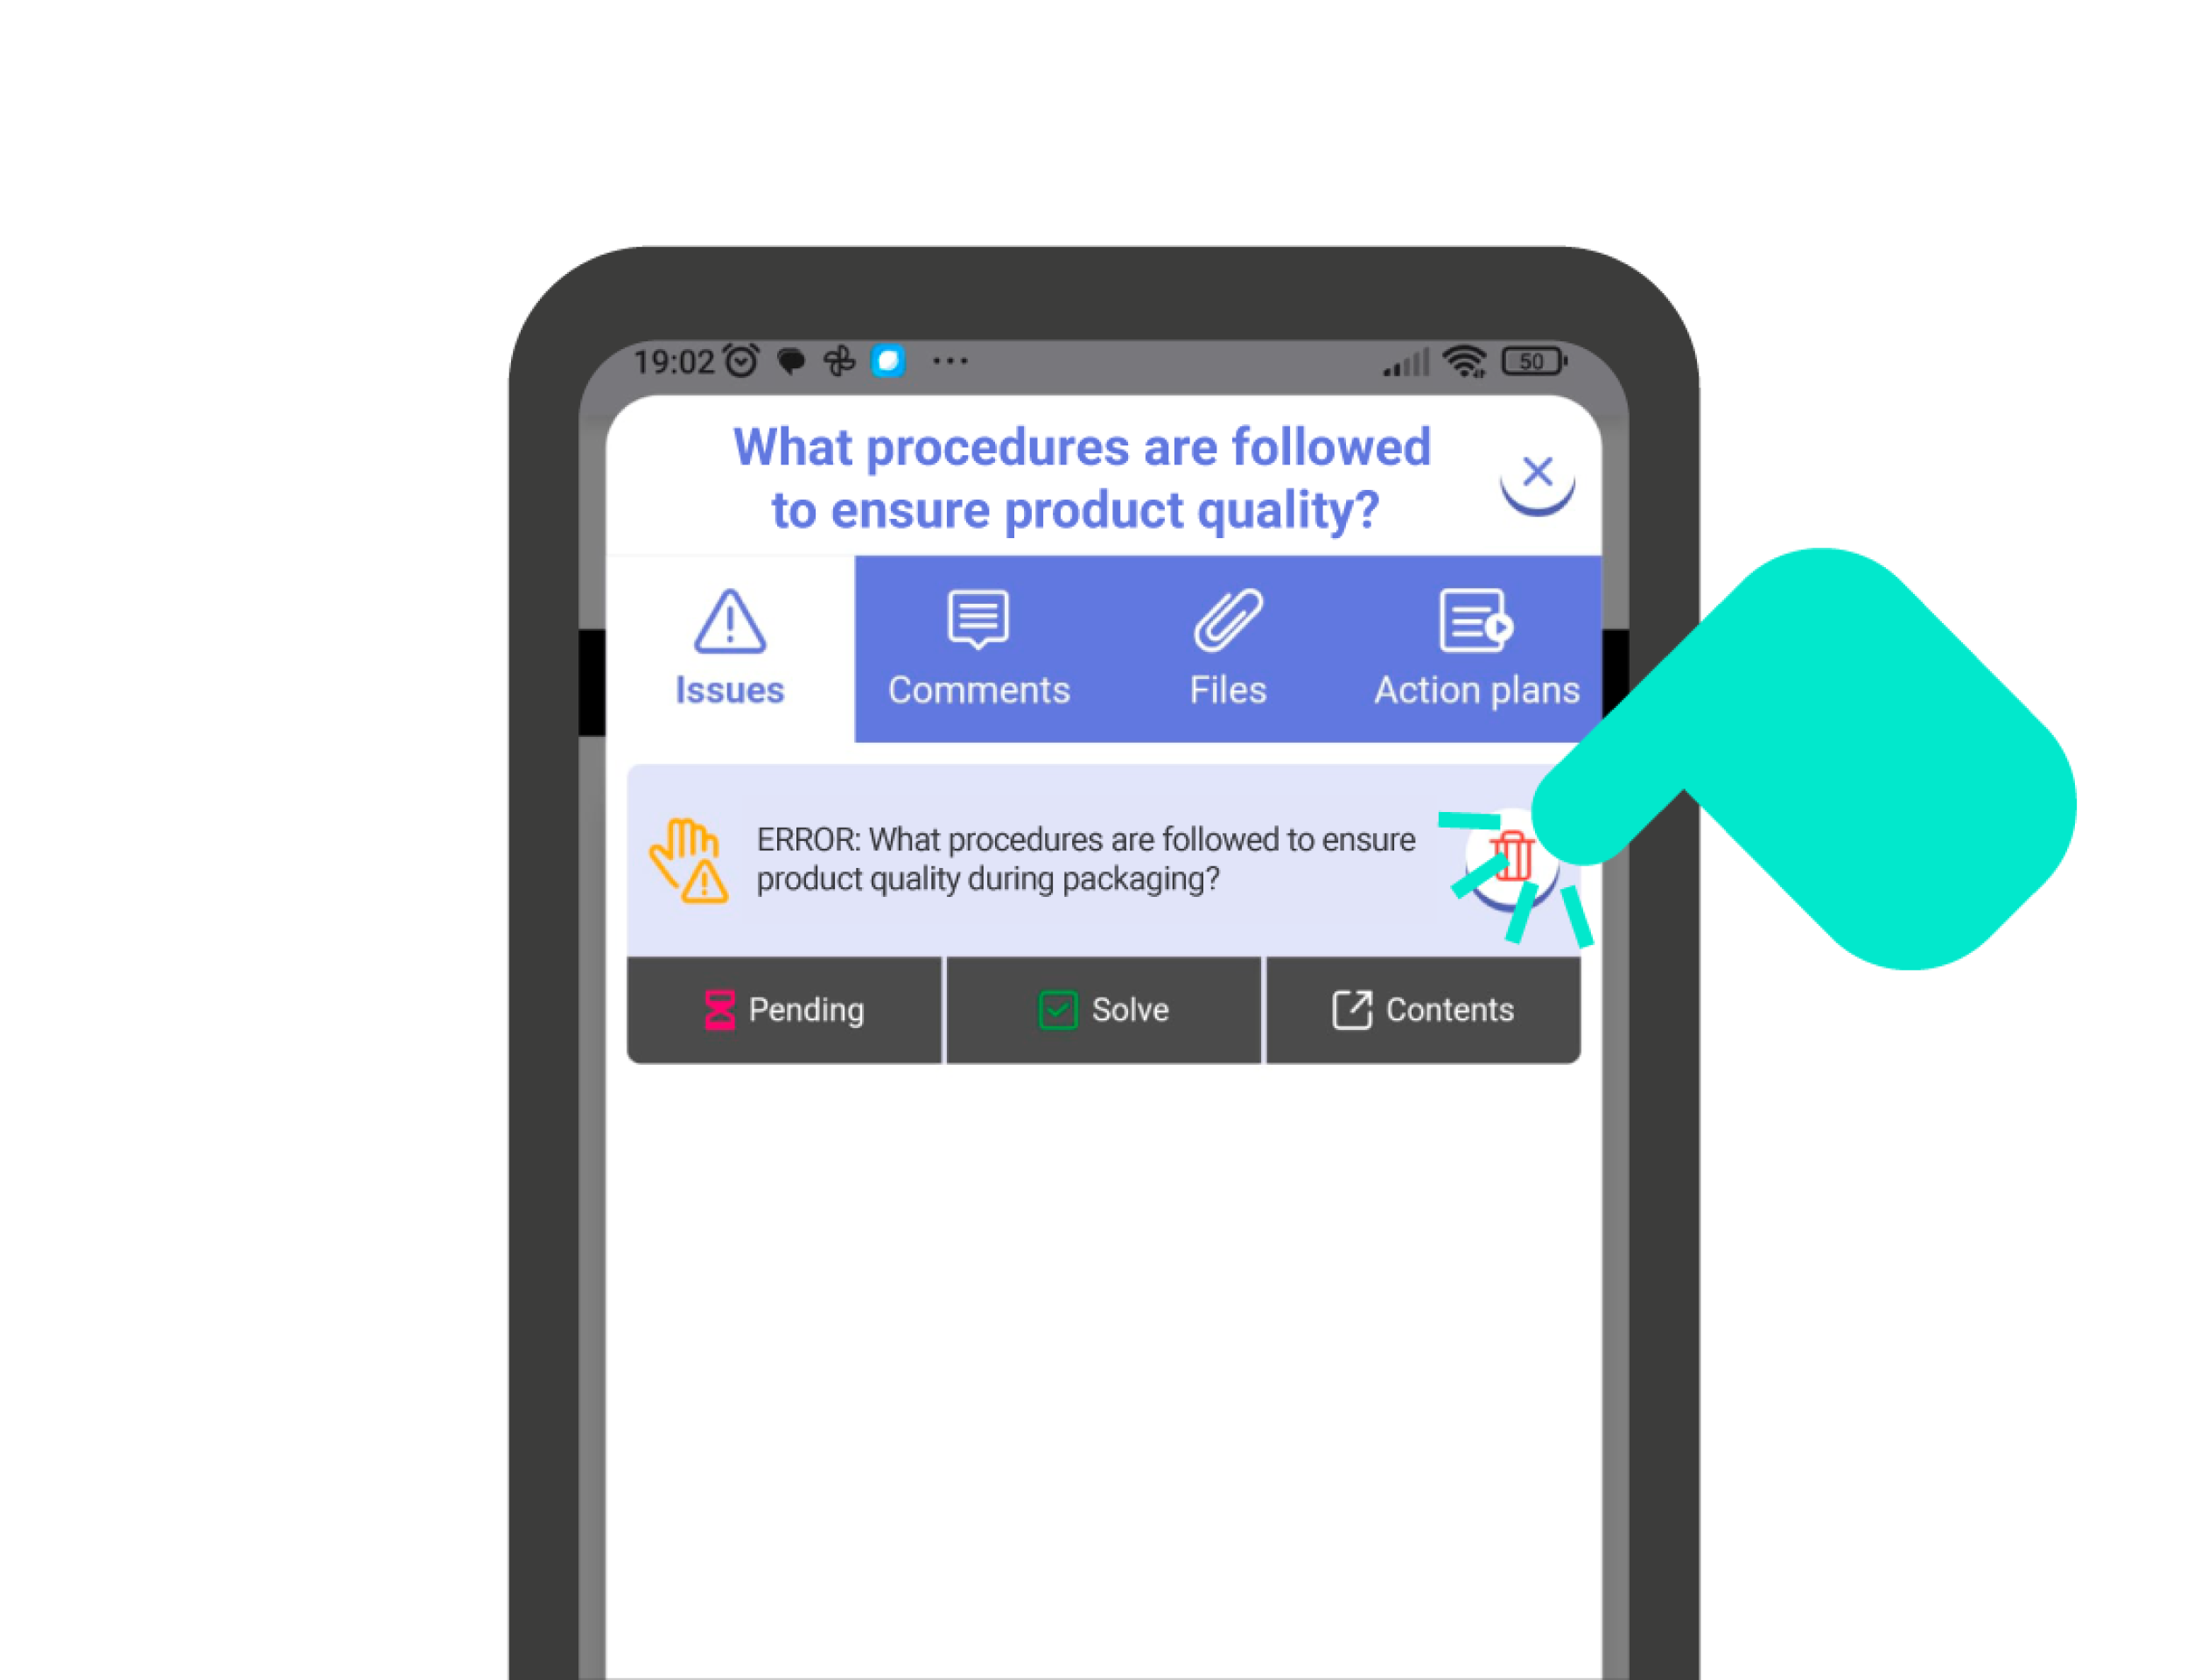
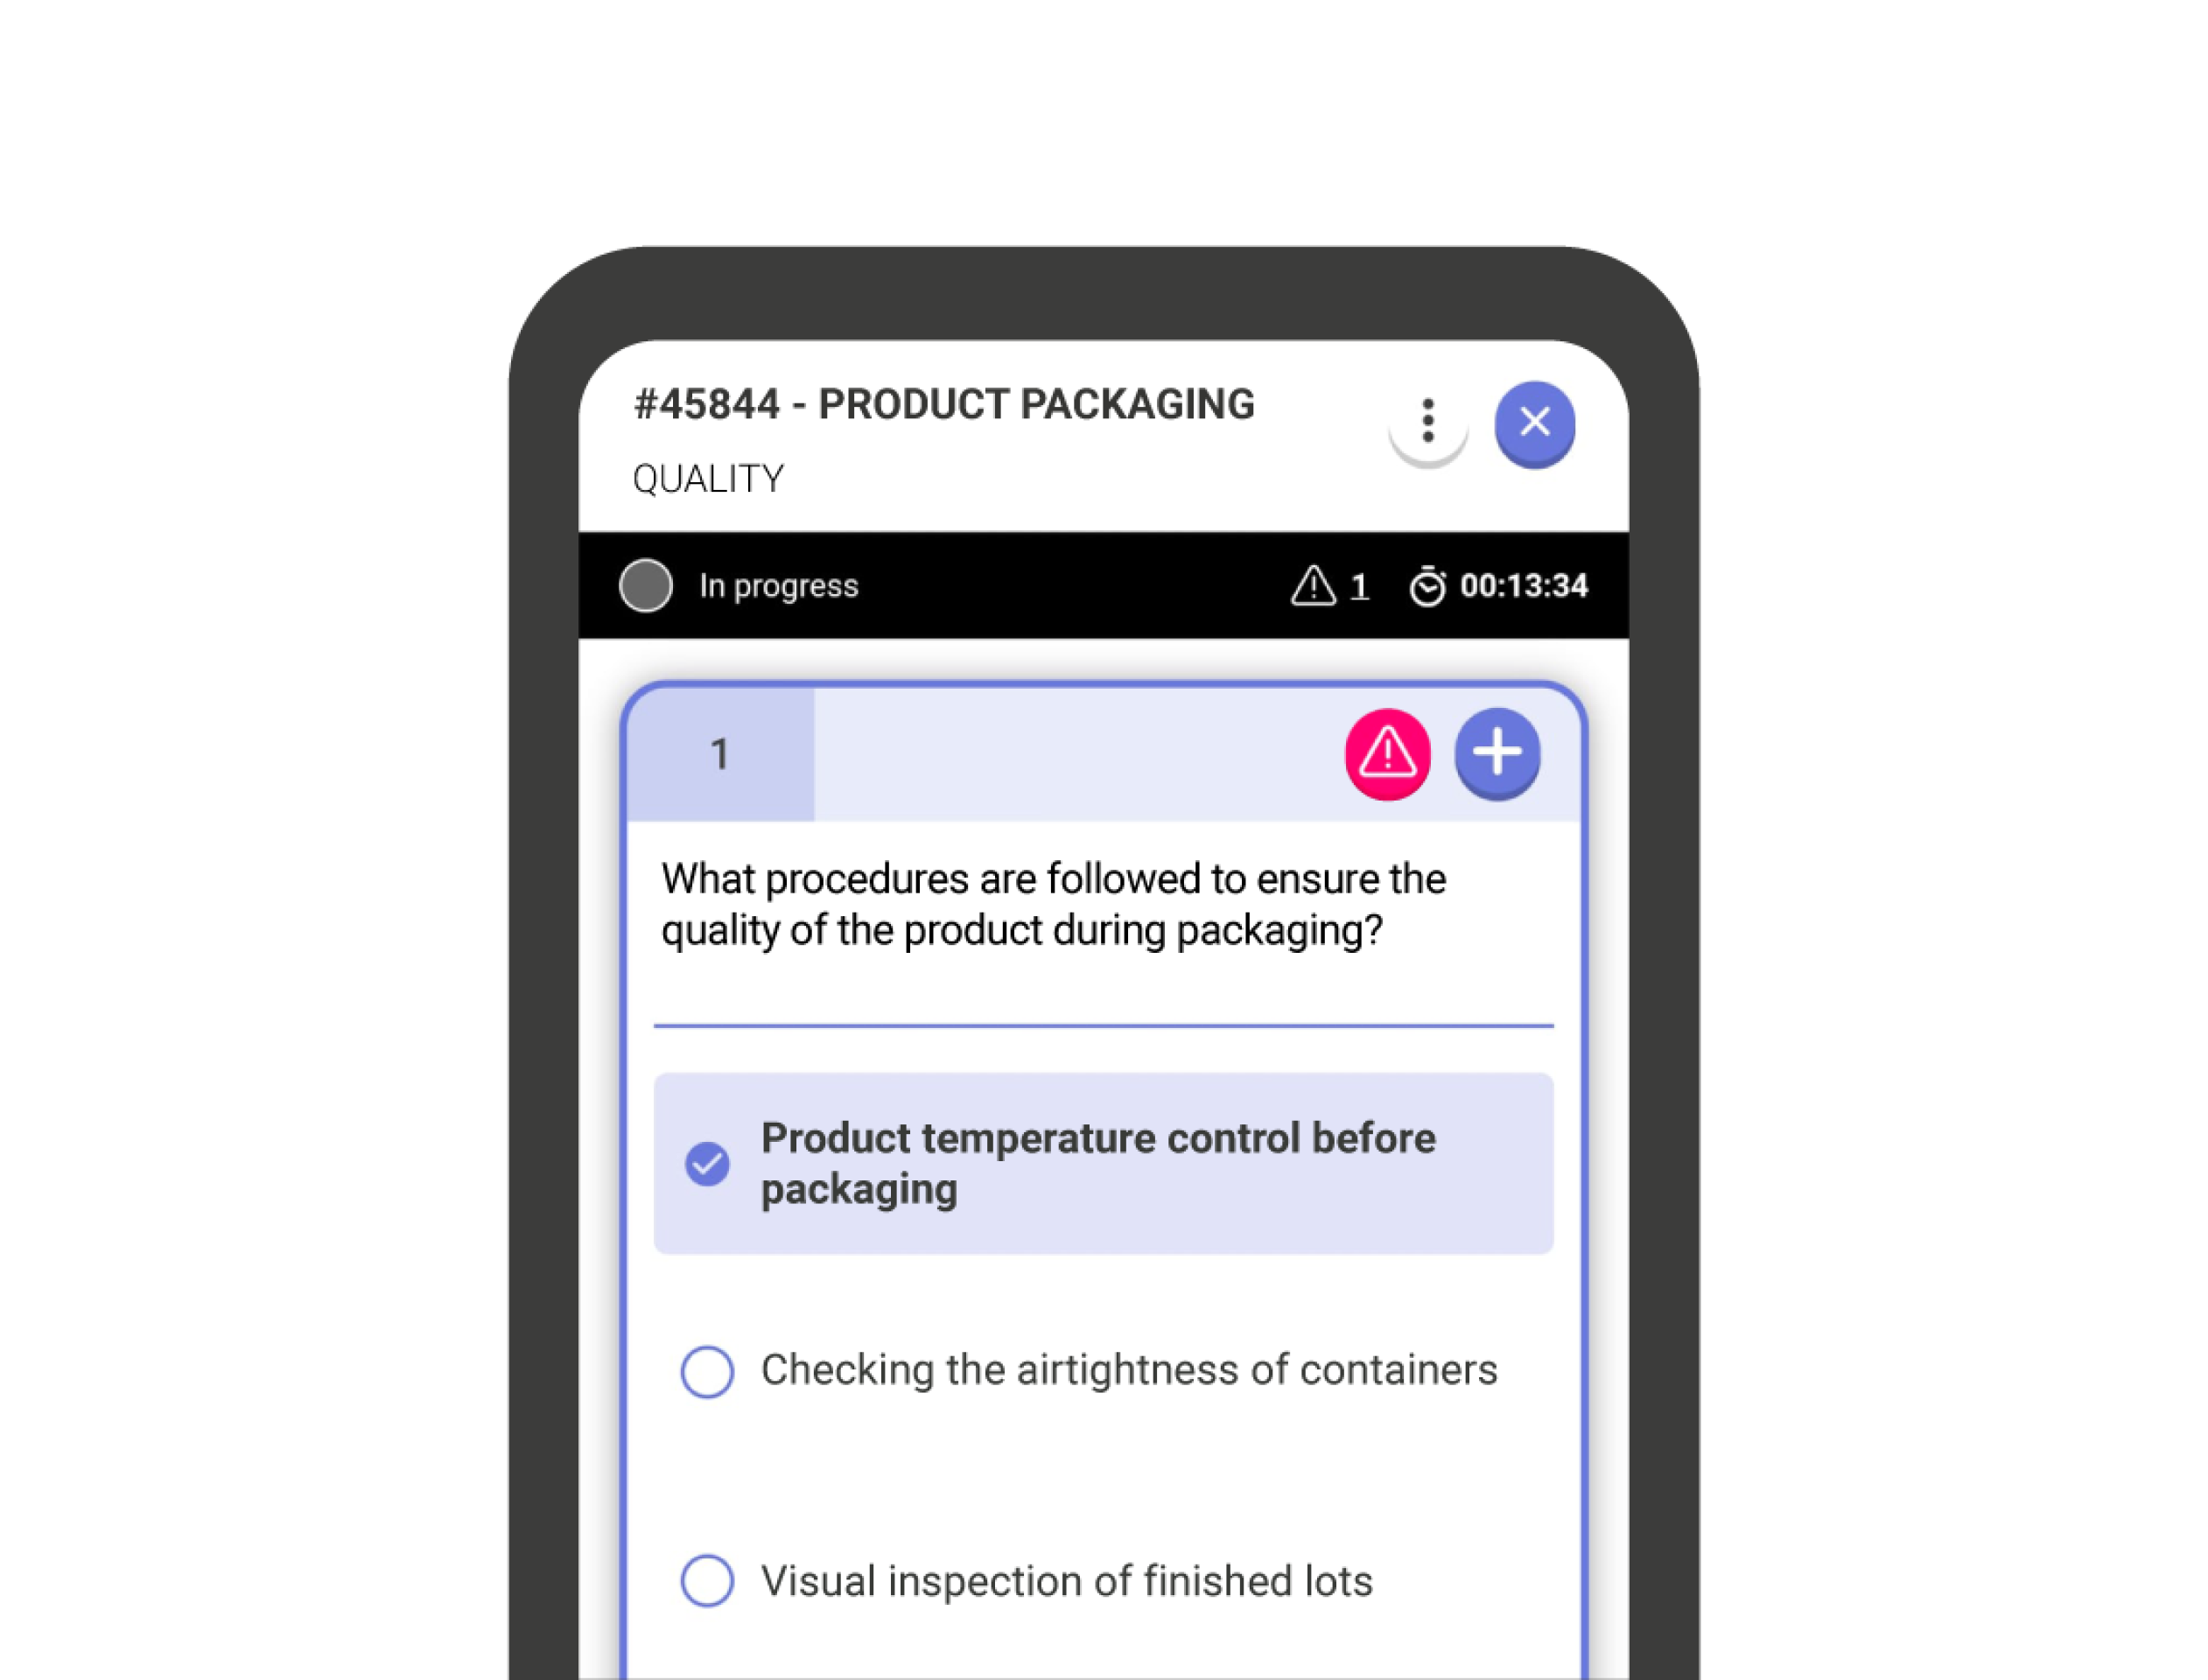
When an issue appears after answering a question, or you manually mark an issue within a question, you should know that you can move that issue through different statuses to indicate its progress.

When an issue is generated, either manually or automatically, it appears in an ‘Active’ state, meaning the issue remains unresolved. The issue can change to two possible states: ‘Reviewed’ or ‘Resolved’, as appropriate.

To change the status of the issue, click on the icon with the triangle and exclamation mark that appears at the top of the card. This will open the ‘issues‘ panel of the question, where you’ll find all the issues that question might have. Now you can click on the different available statuses in the lower bar of the issue.

By clicking the ‘Contents’ button, you’ll access all attachments related to the issue (coming soon).

Updated on September 23, 2025

Was this helpful ?

  • Happy
  • Normal
  • Sad
Question typesTables

Powered by BetterDocs

Tabla de Contenido
  • Add comments, photos, and files
  • Add Action Plans
  • Add Manual Issues
  • Managing the Status of Issues
  • English
  • Spanish