Date Filters #
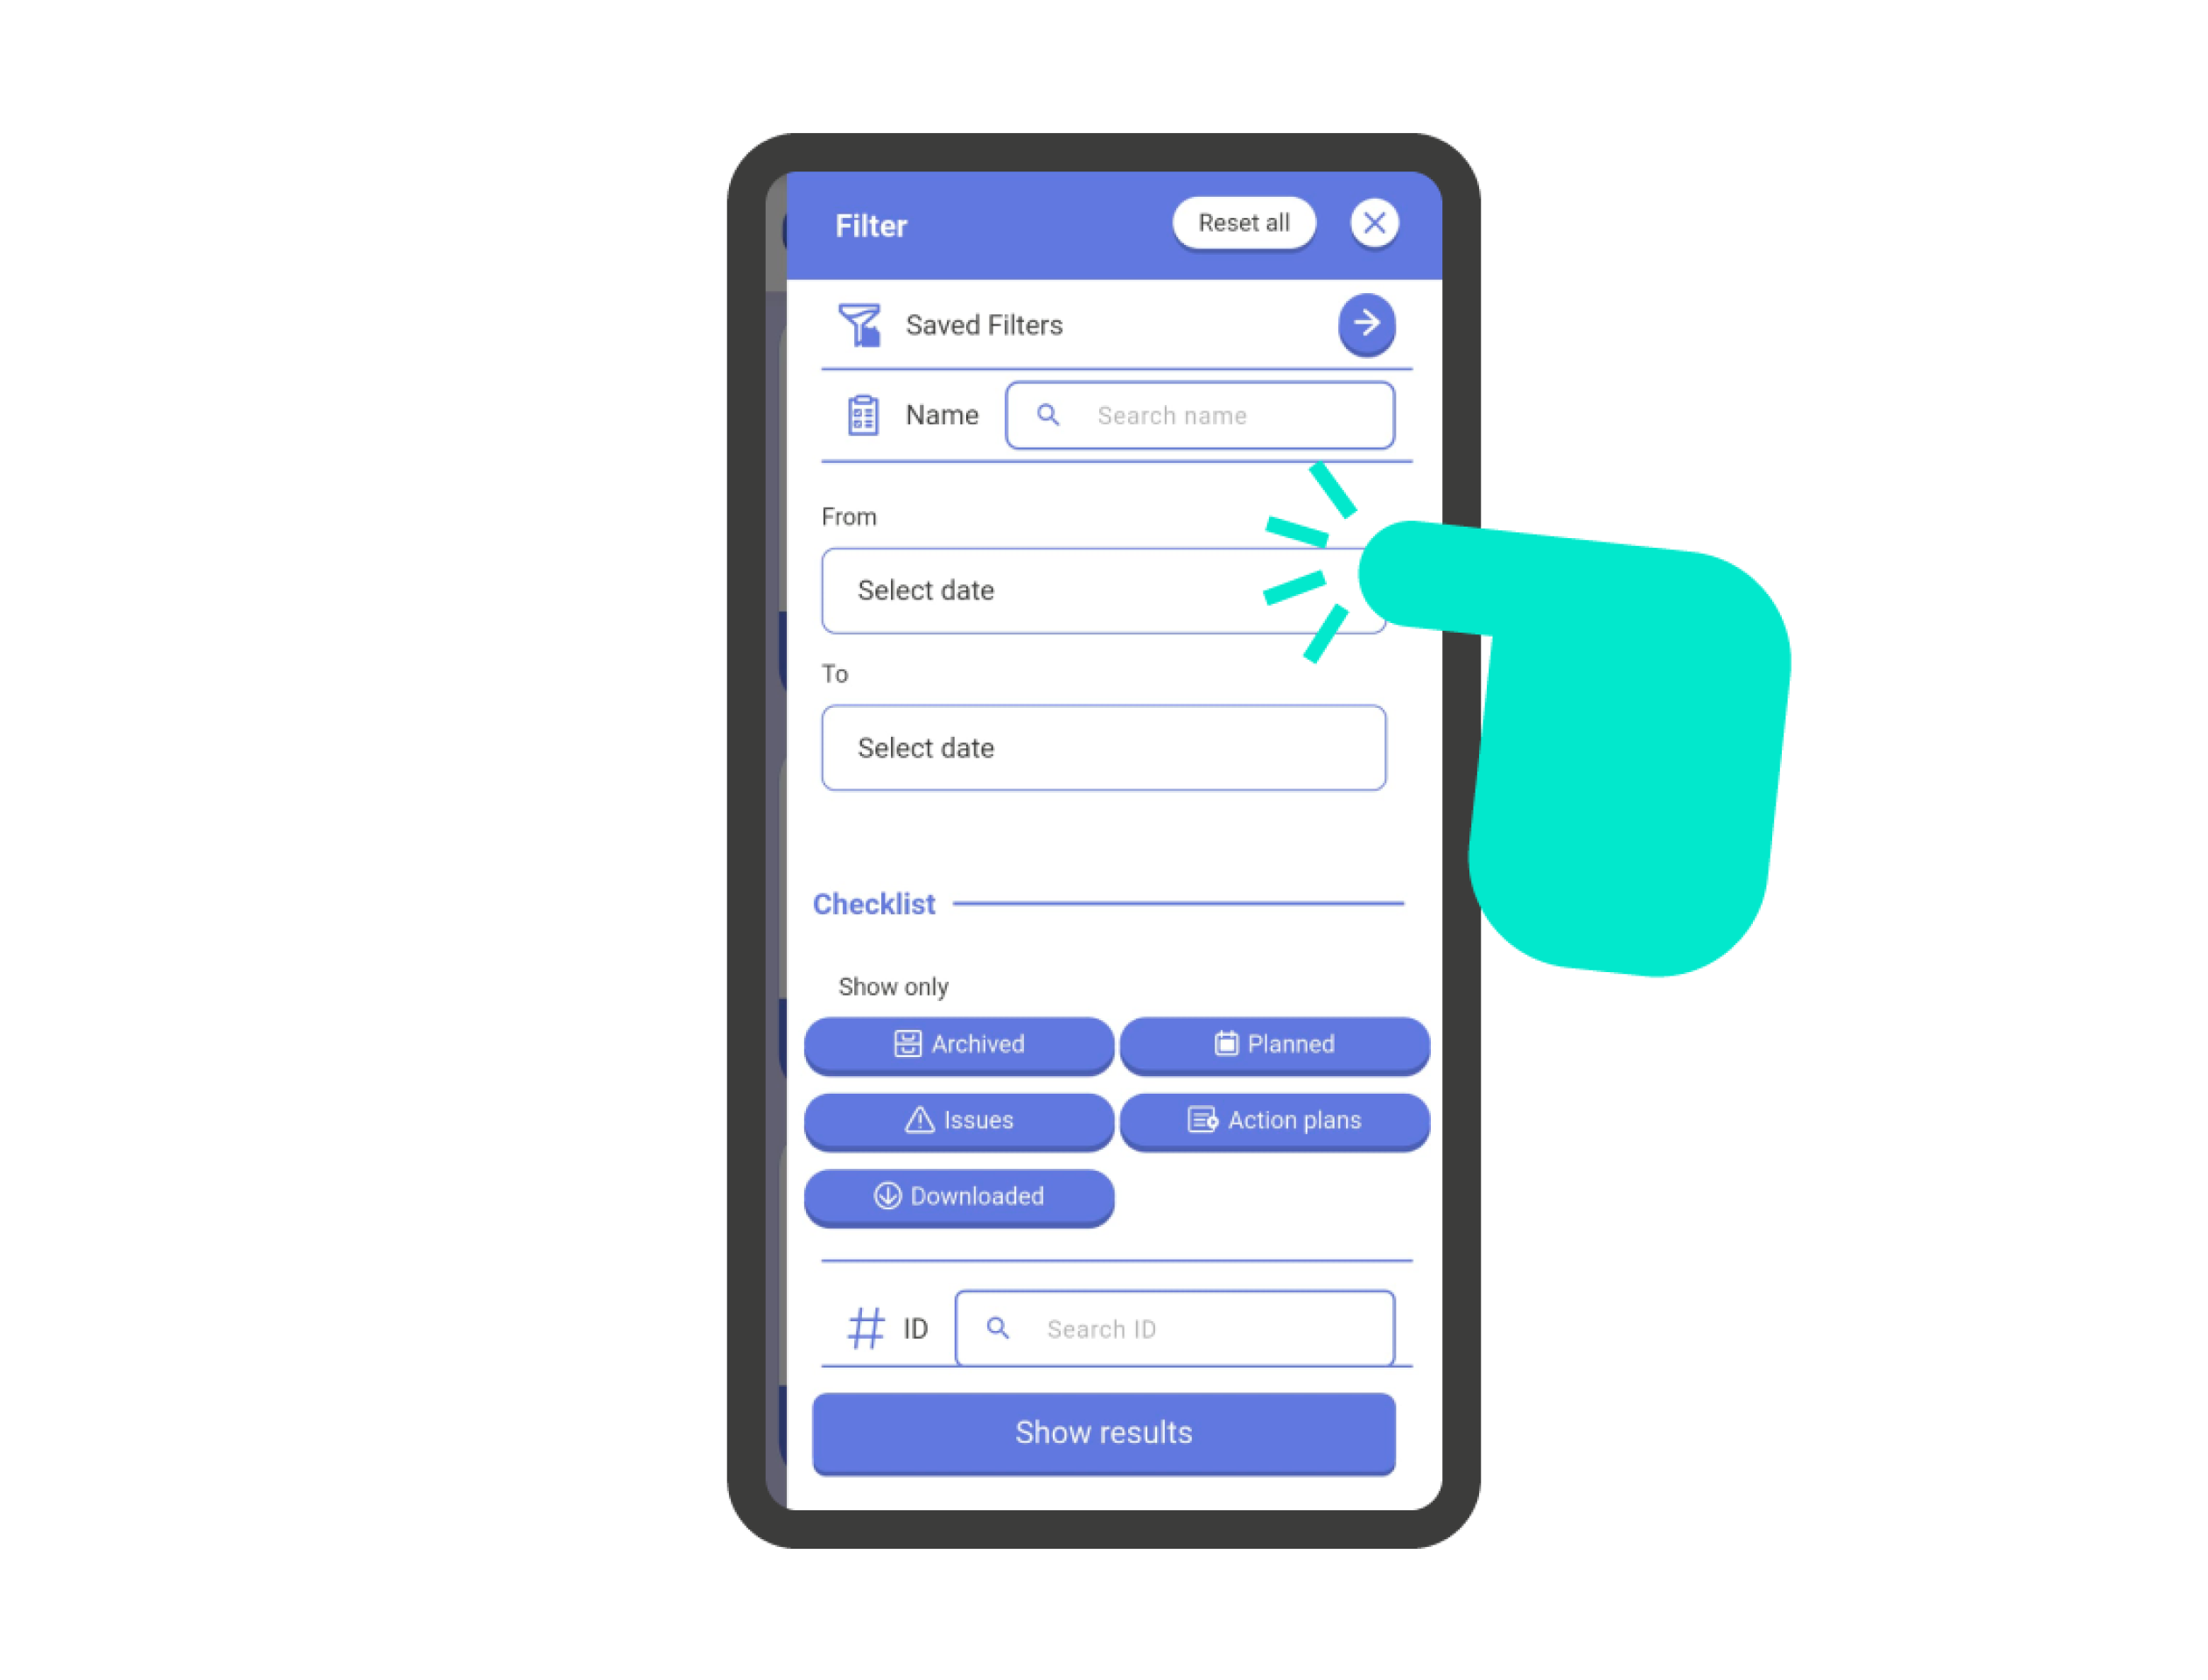
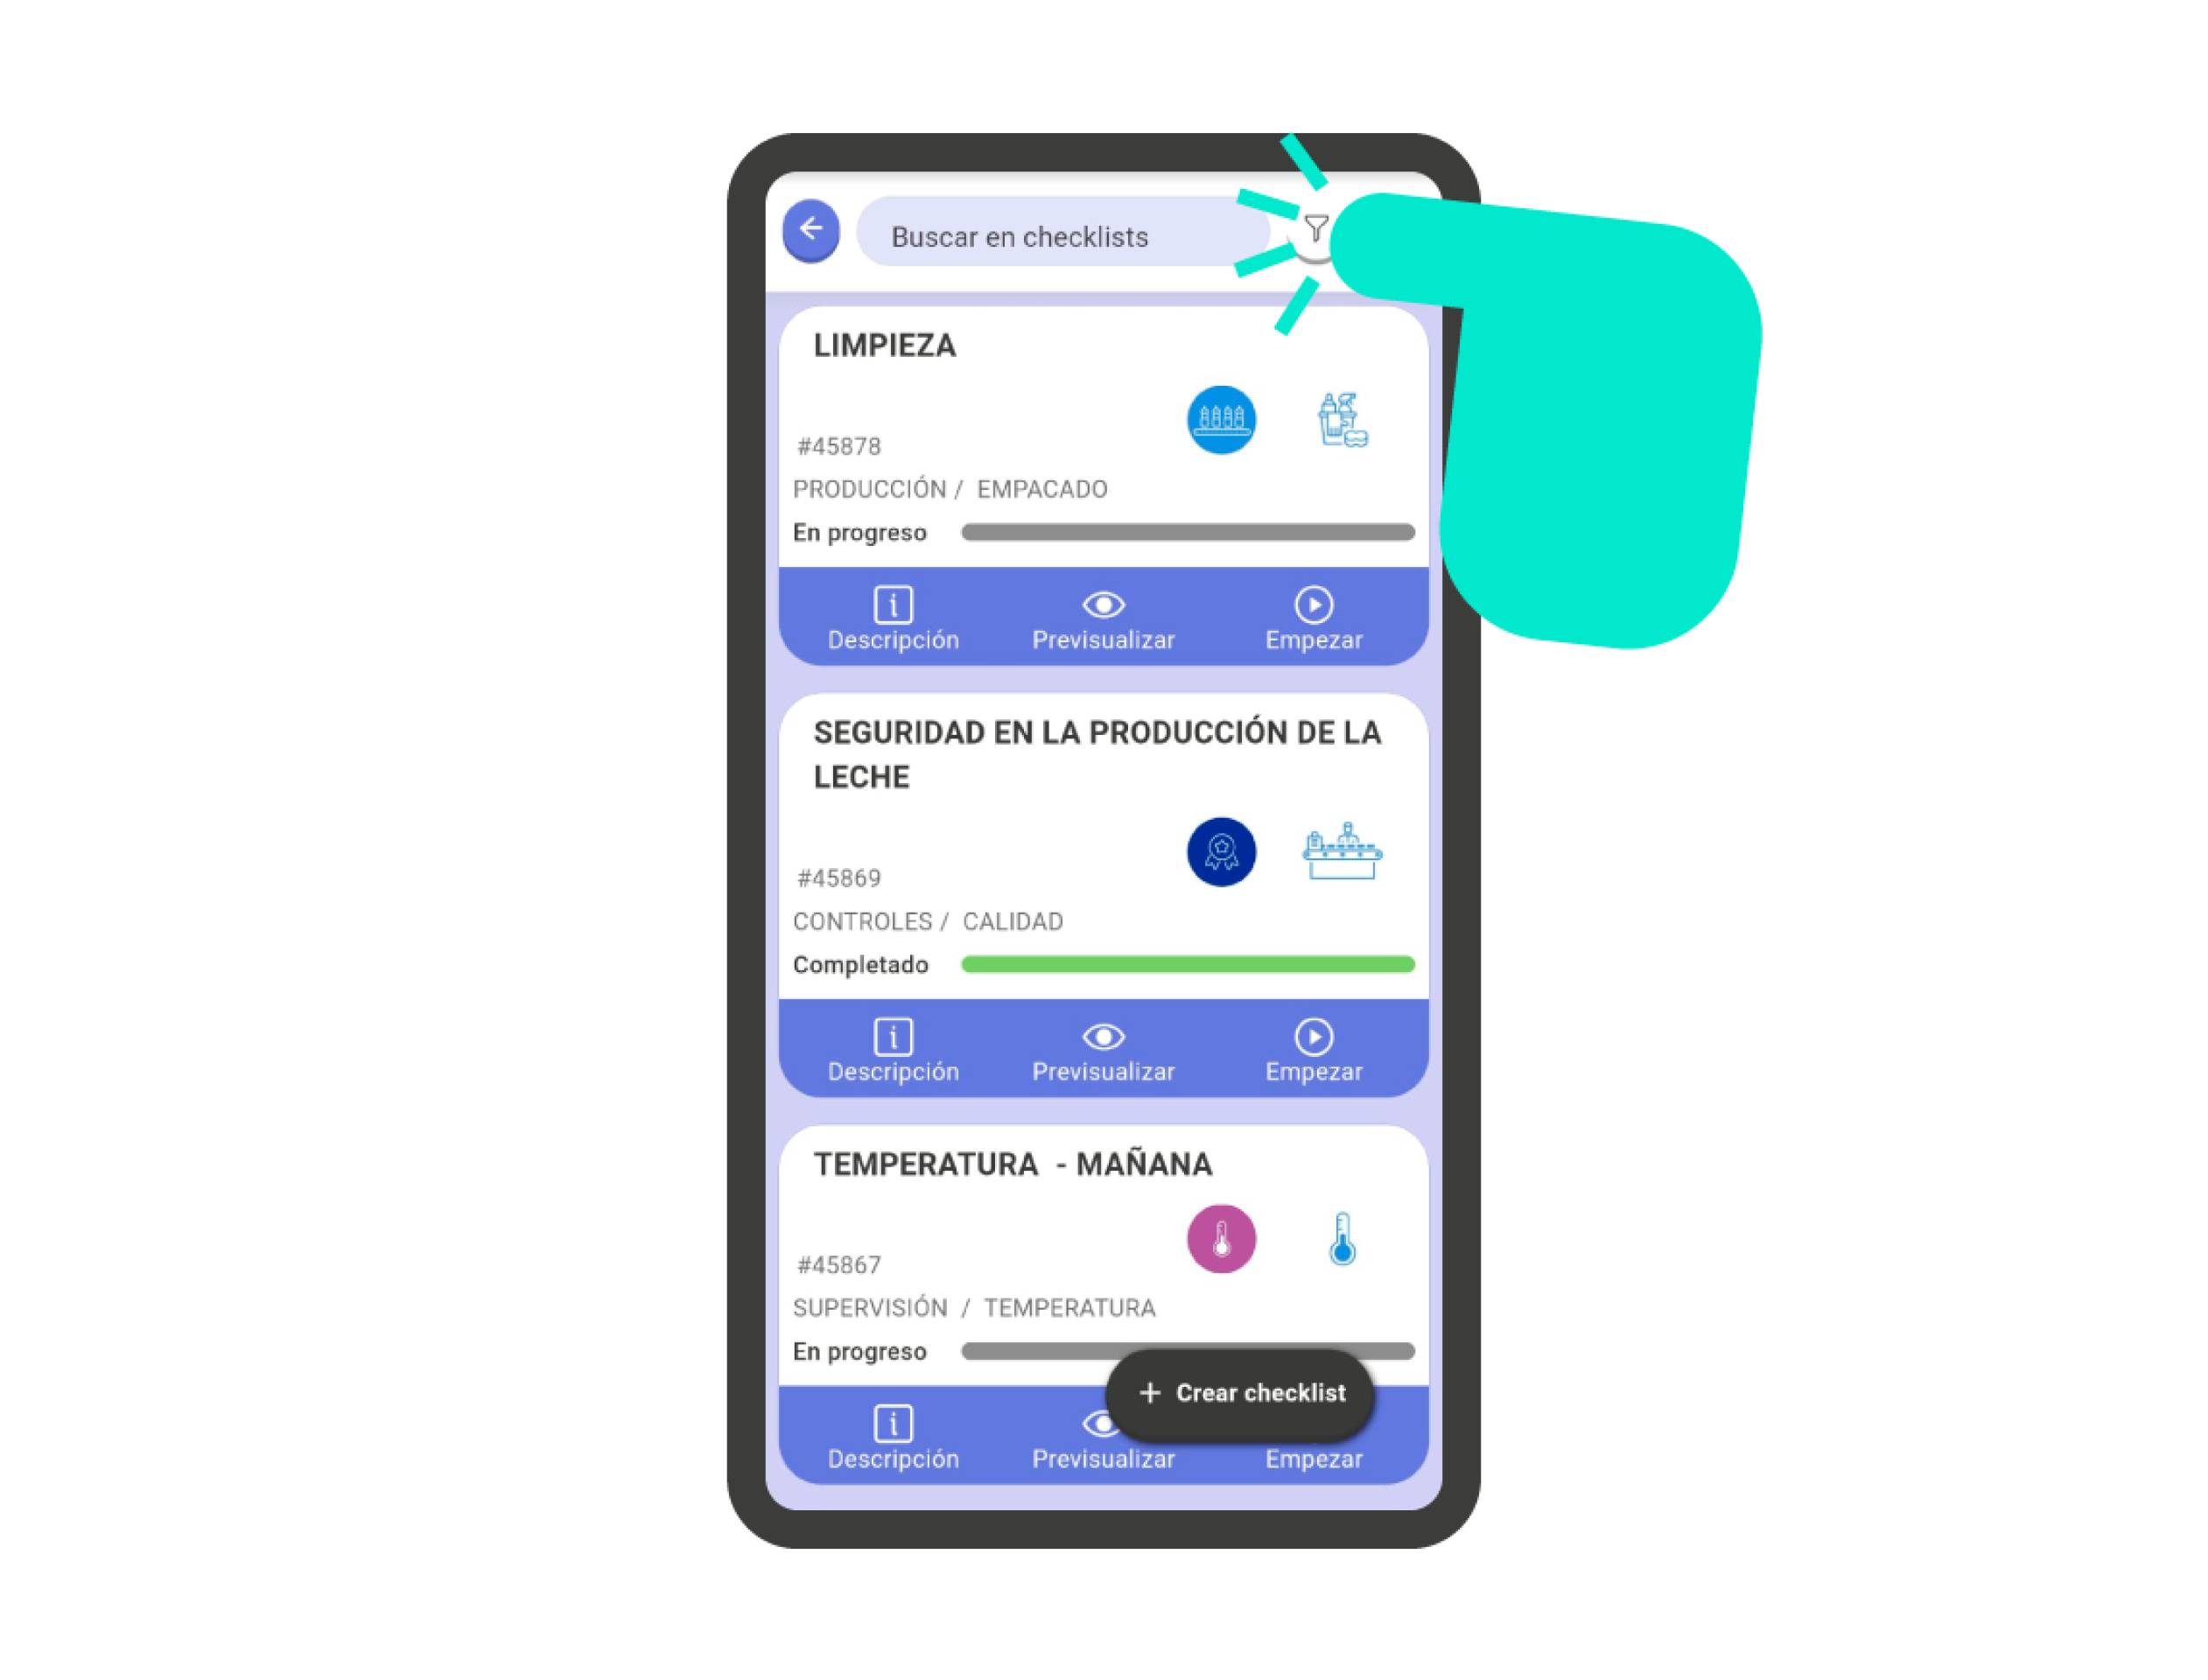
To display checklists within a specific date range, you need to use the filters. To do this, go to the top of the checklist list and click on the ‘Filters’ icon, right next to the search bar.
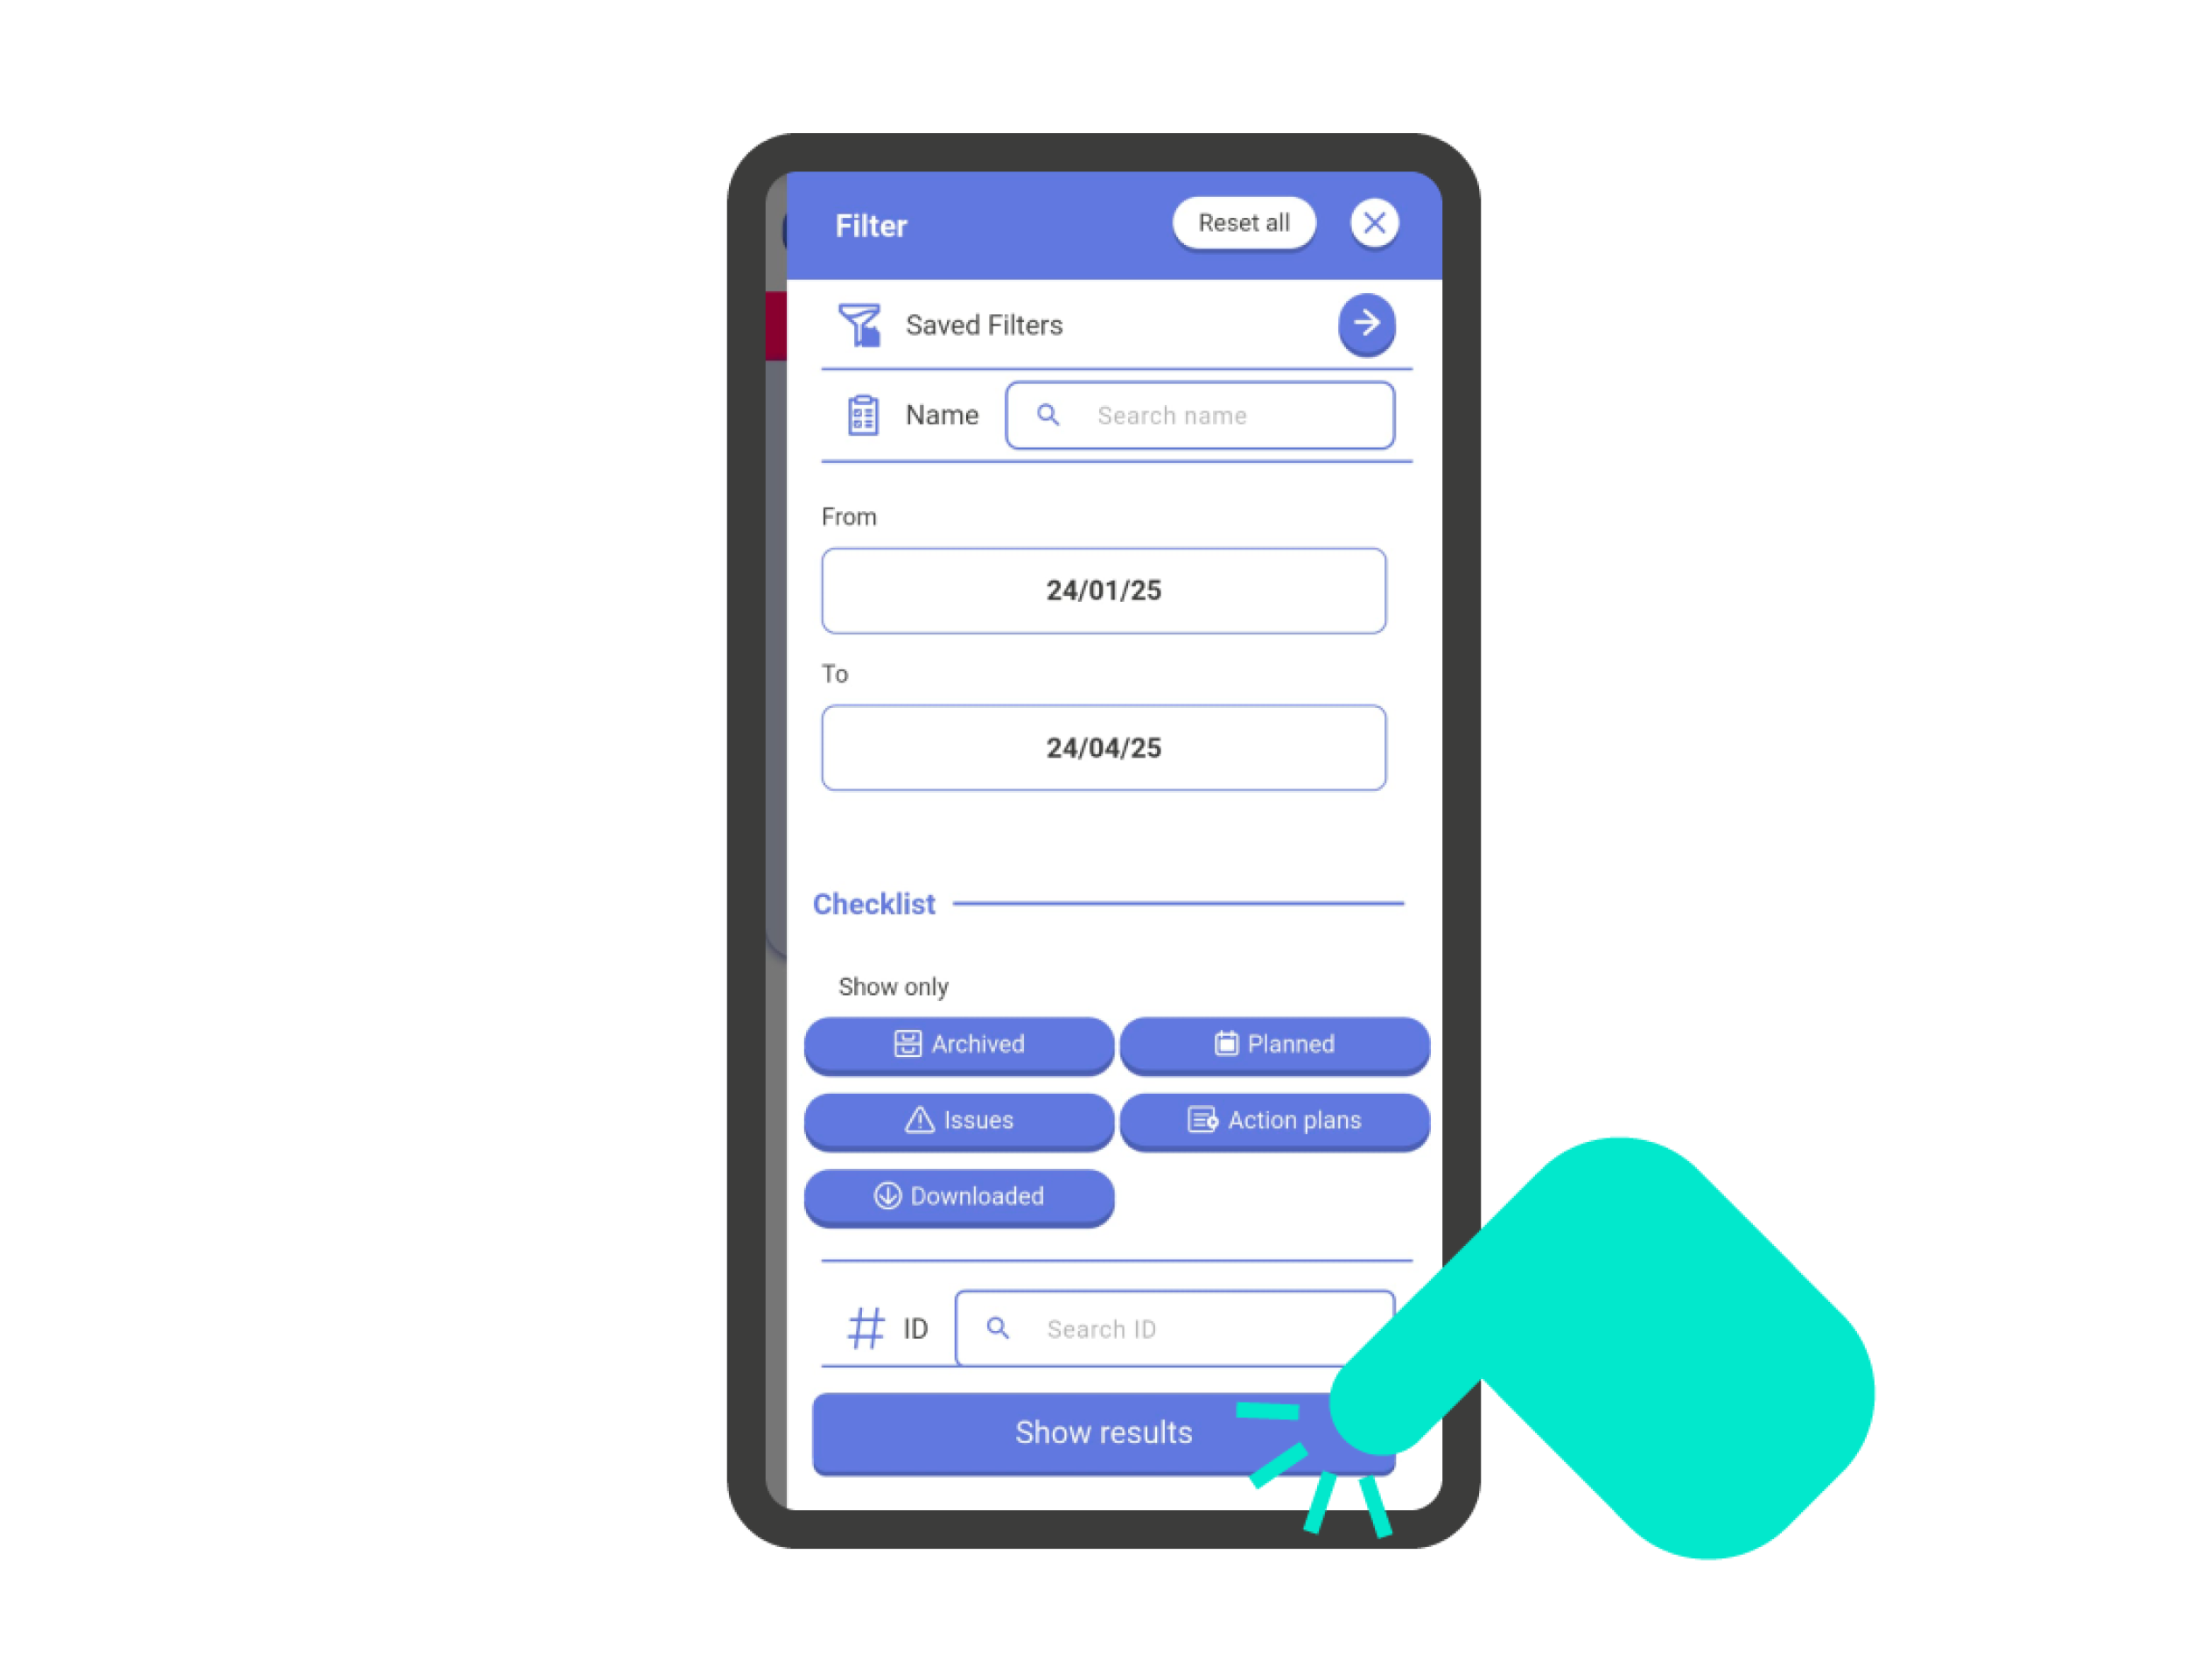
Here you should include the date range within which you want to search. Then, click on ‘View results’. Now you’ll only see the checklists that fall within the selected date range.
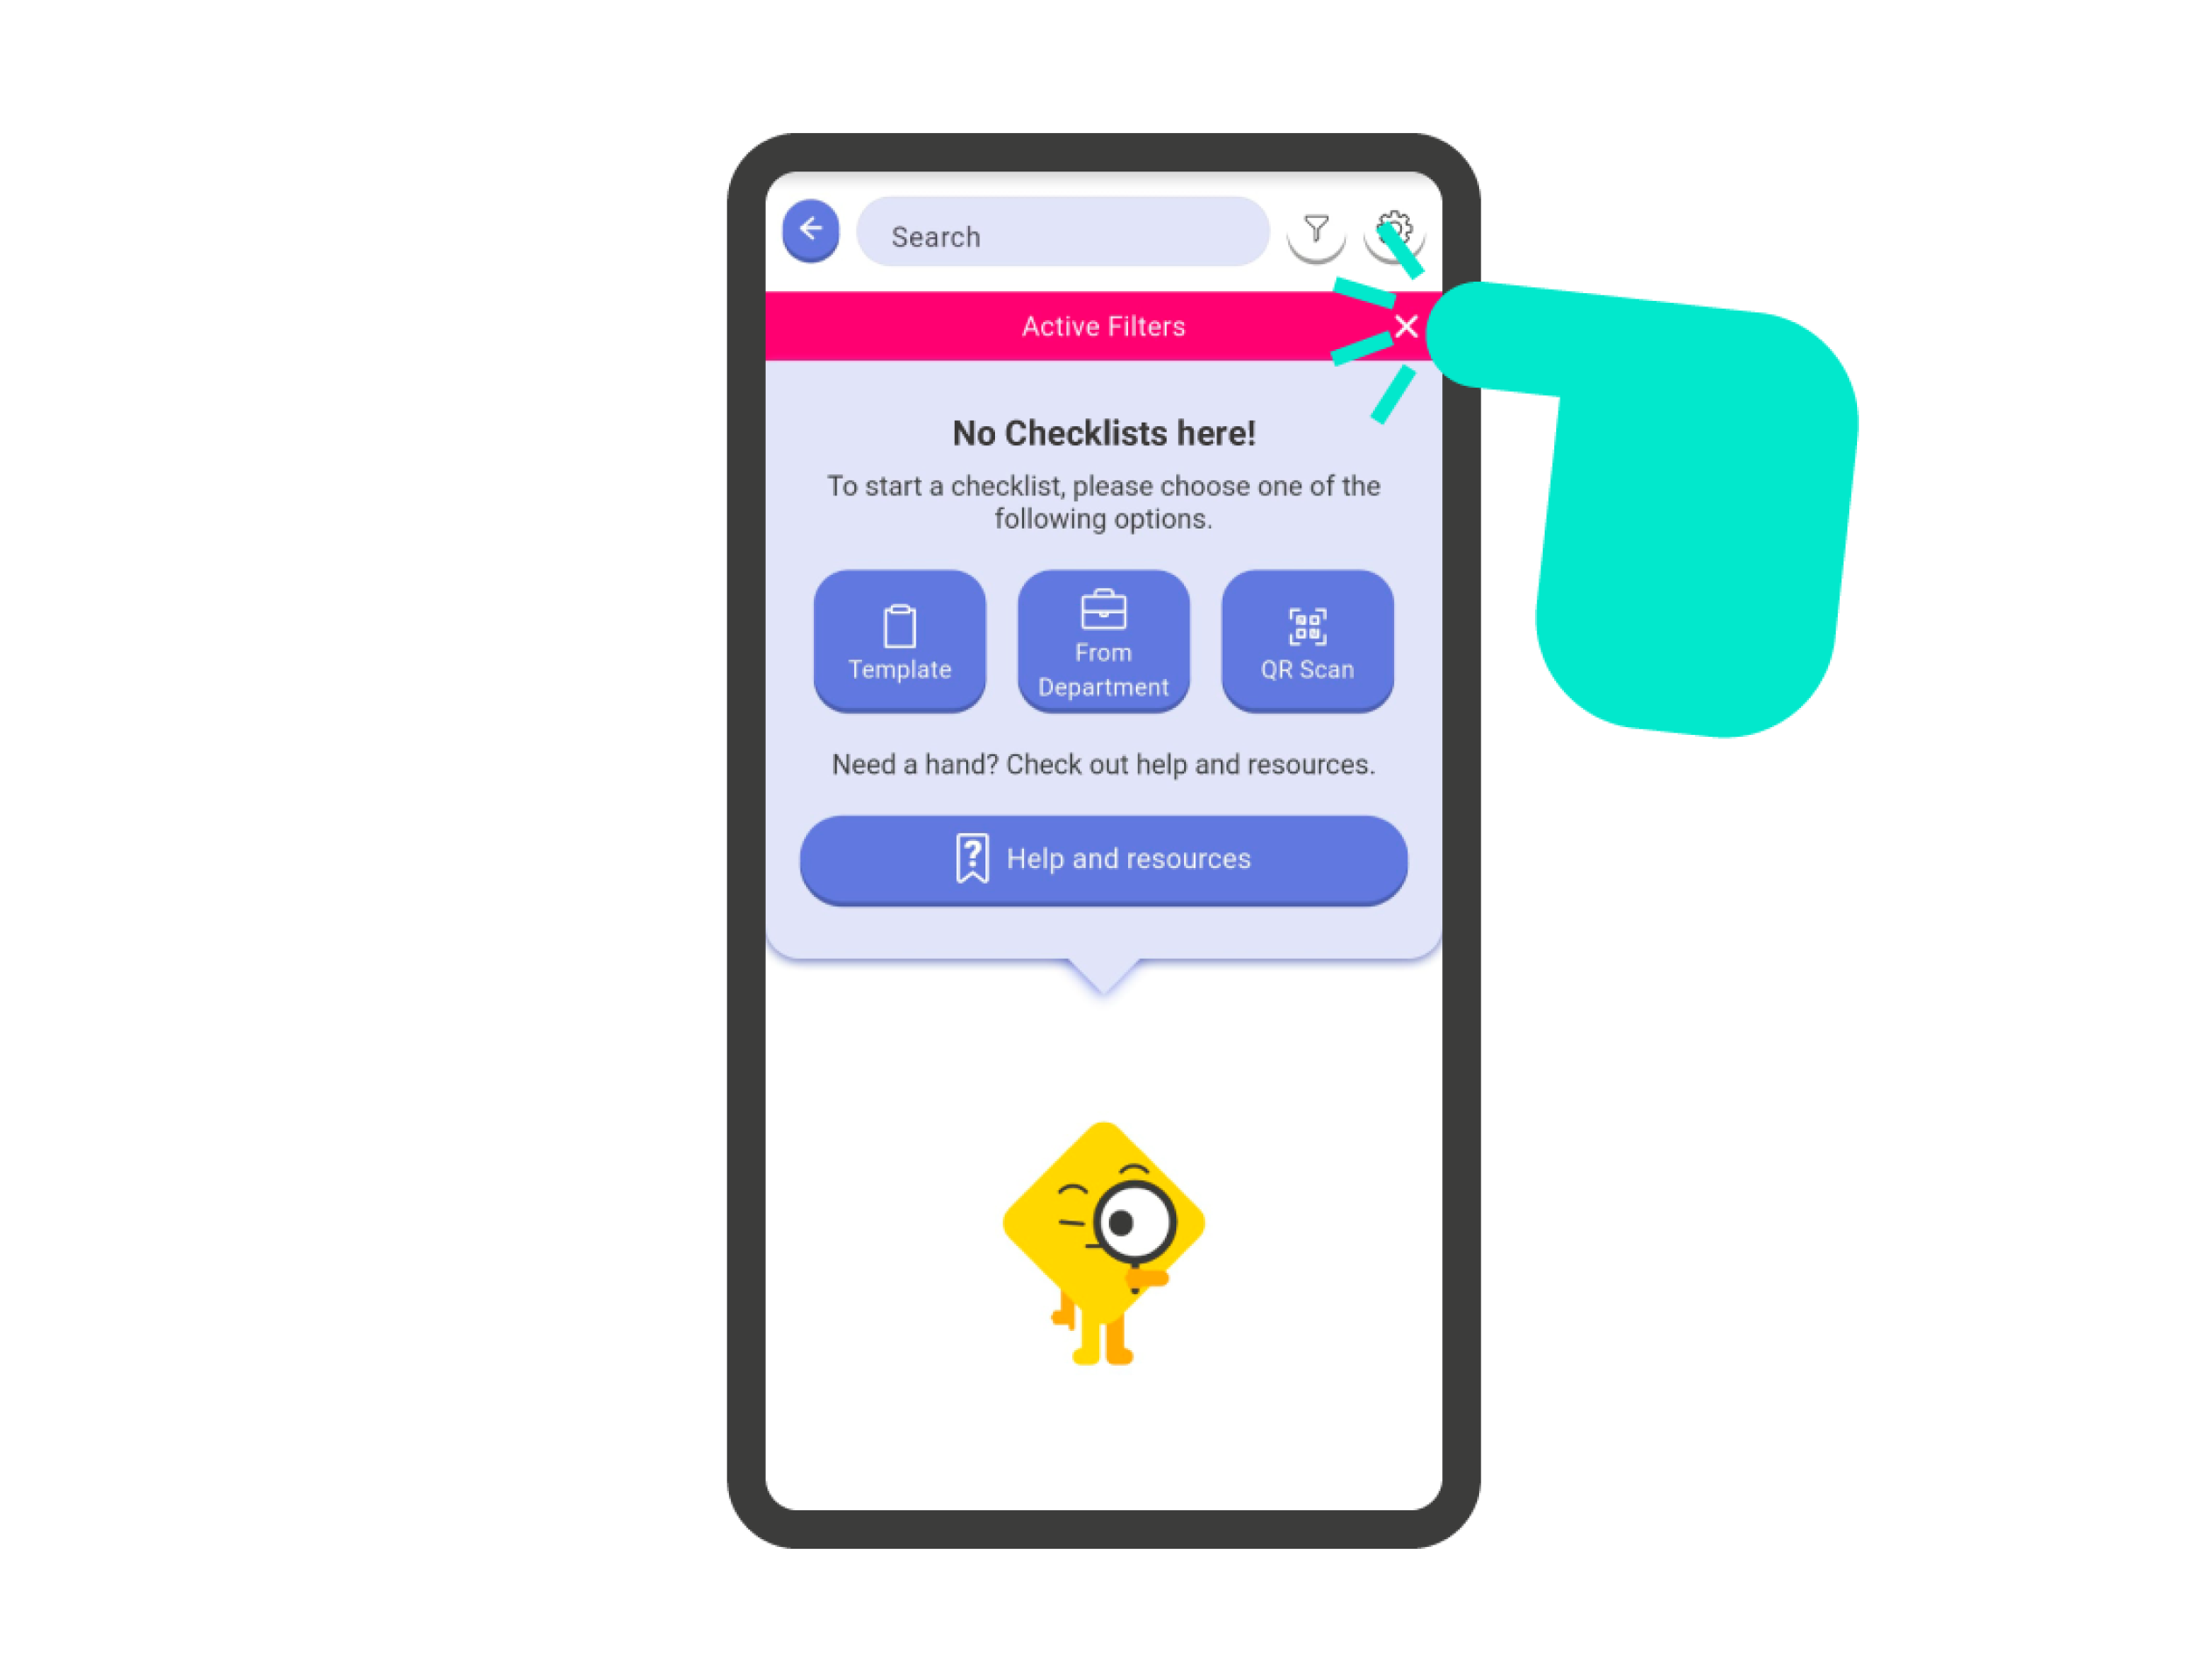
IMPORTANT! If there are no checklists in the defined range, an explanatory message will appear along with the option to start a new checklist.
IMPORTANT! If you want to disable the applied filters, click on the ‘X’ icon in the filters information bar located under the search field at the top of the screen.


Filters: Checklist Specifications #
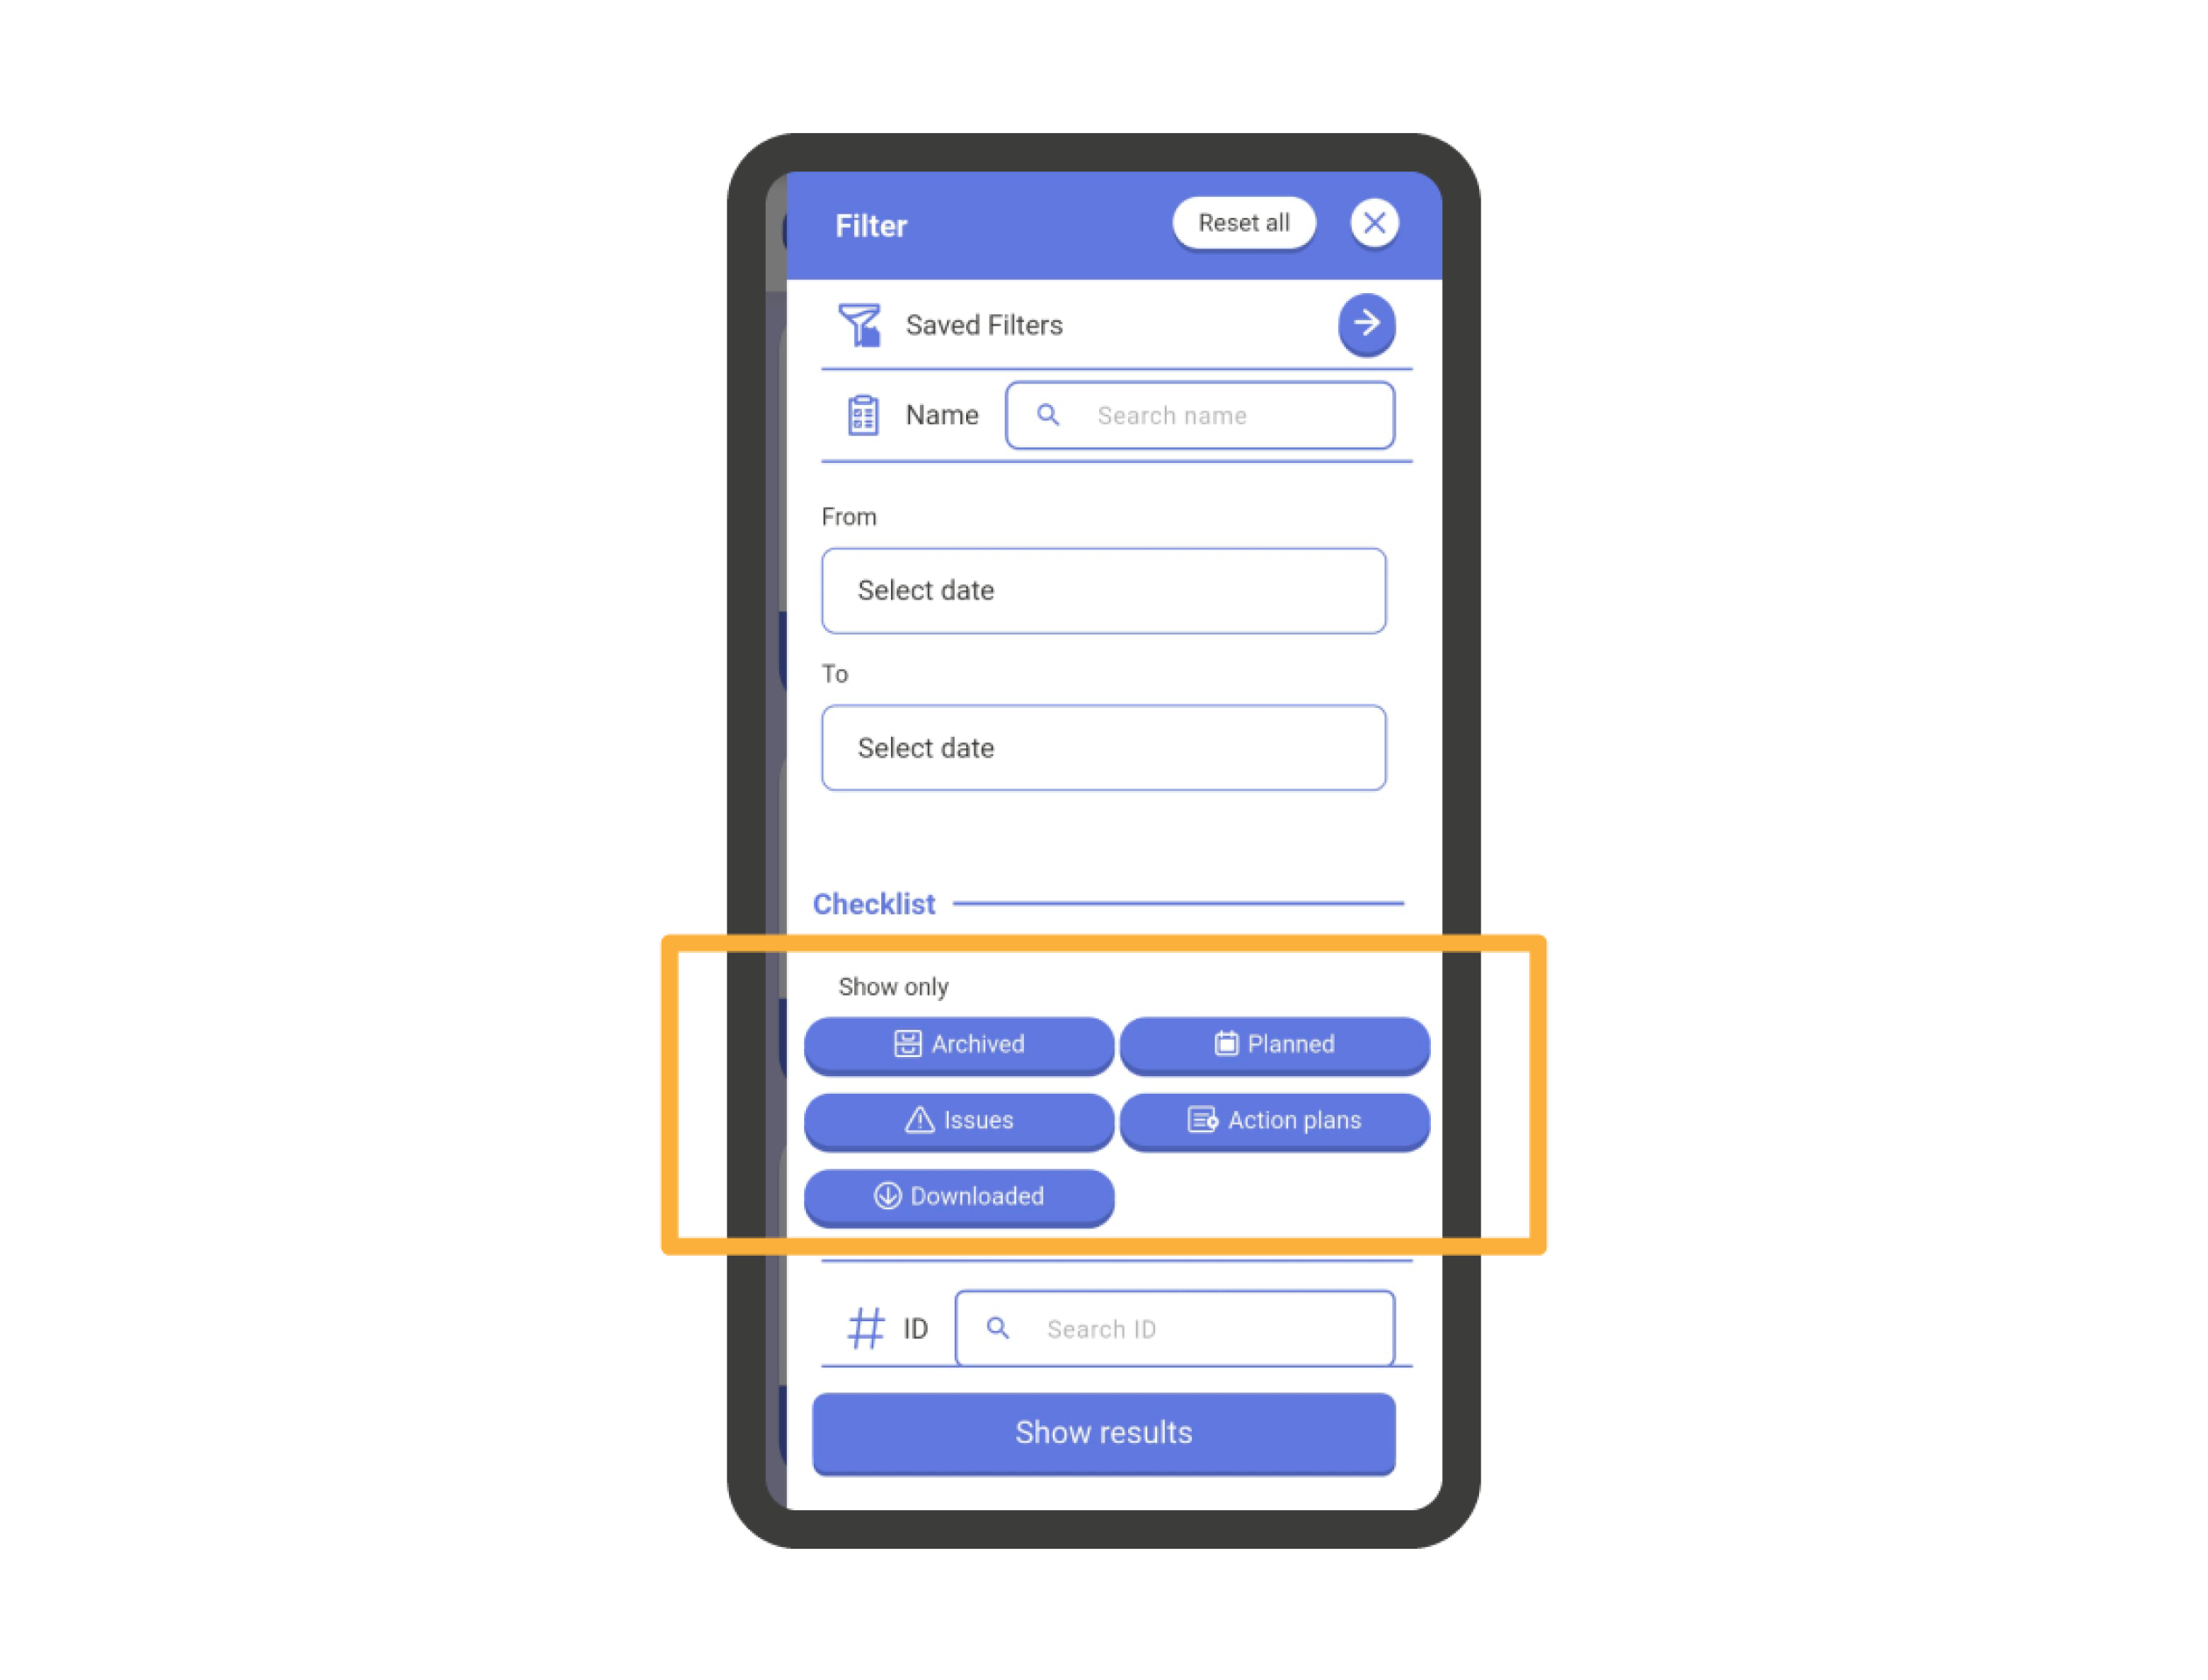
Within the filters of the checklist list window, you can filter by the checklist specifications:
- Archived: It will only show the archived checklists in the search.
- Planned: It will only search among the planned checklists.
- Incidents: The search will be limited to checklists with incidents.
- Action Plans: The search will be limited to checklists that are action plans.
- Downloaded: The search will be limited to checklists downloaded on the device.
IMPORTANT: In the search for Action Plans, checklists that INCLUDE action plans will NOT be shown; only action plans as such will be displayed.

Filtros: Estado de la checklist #
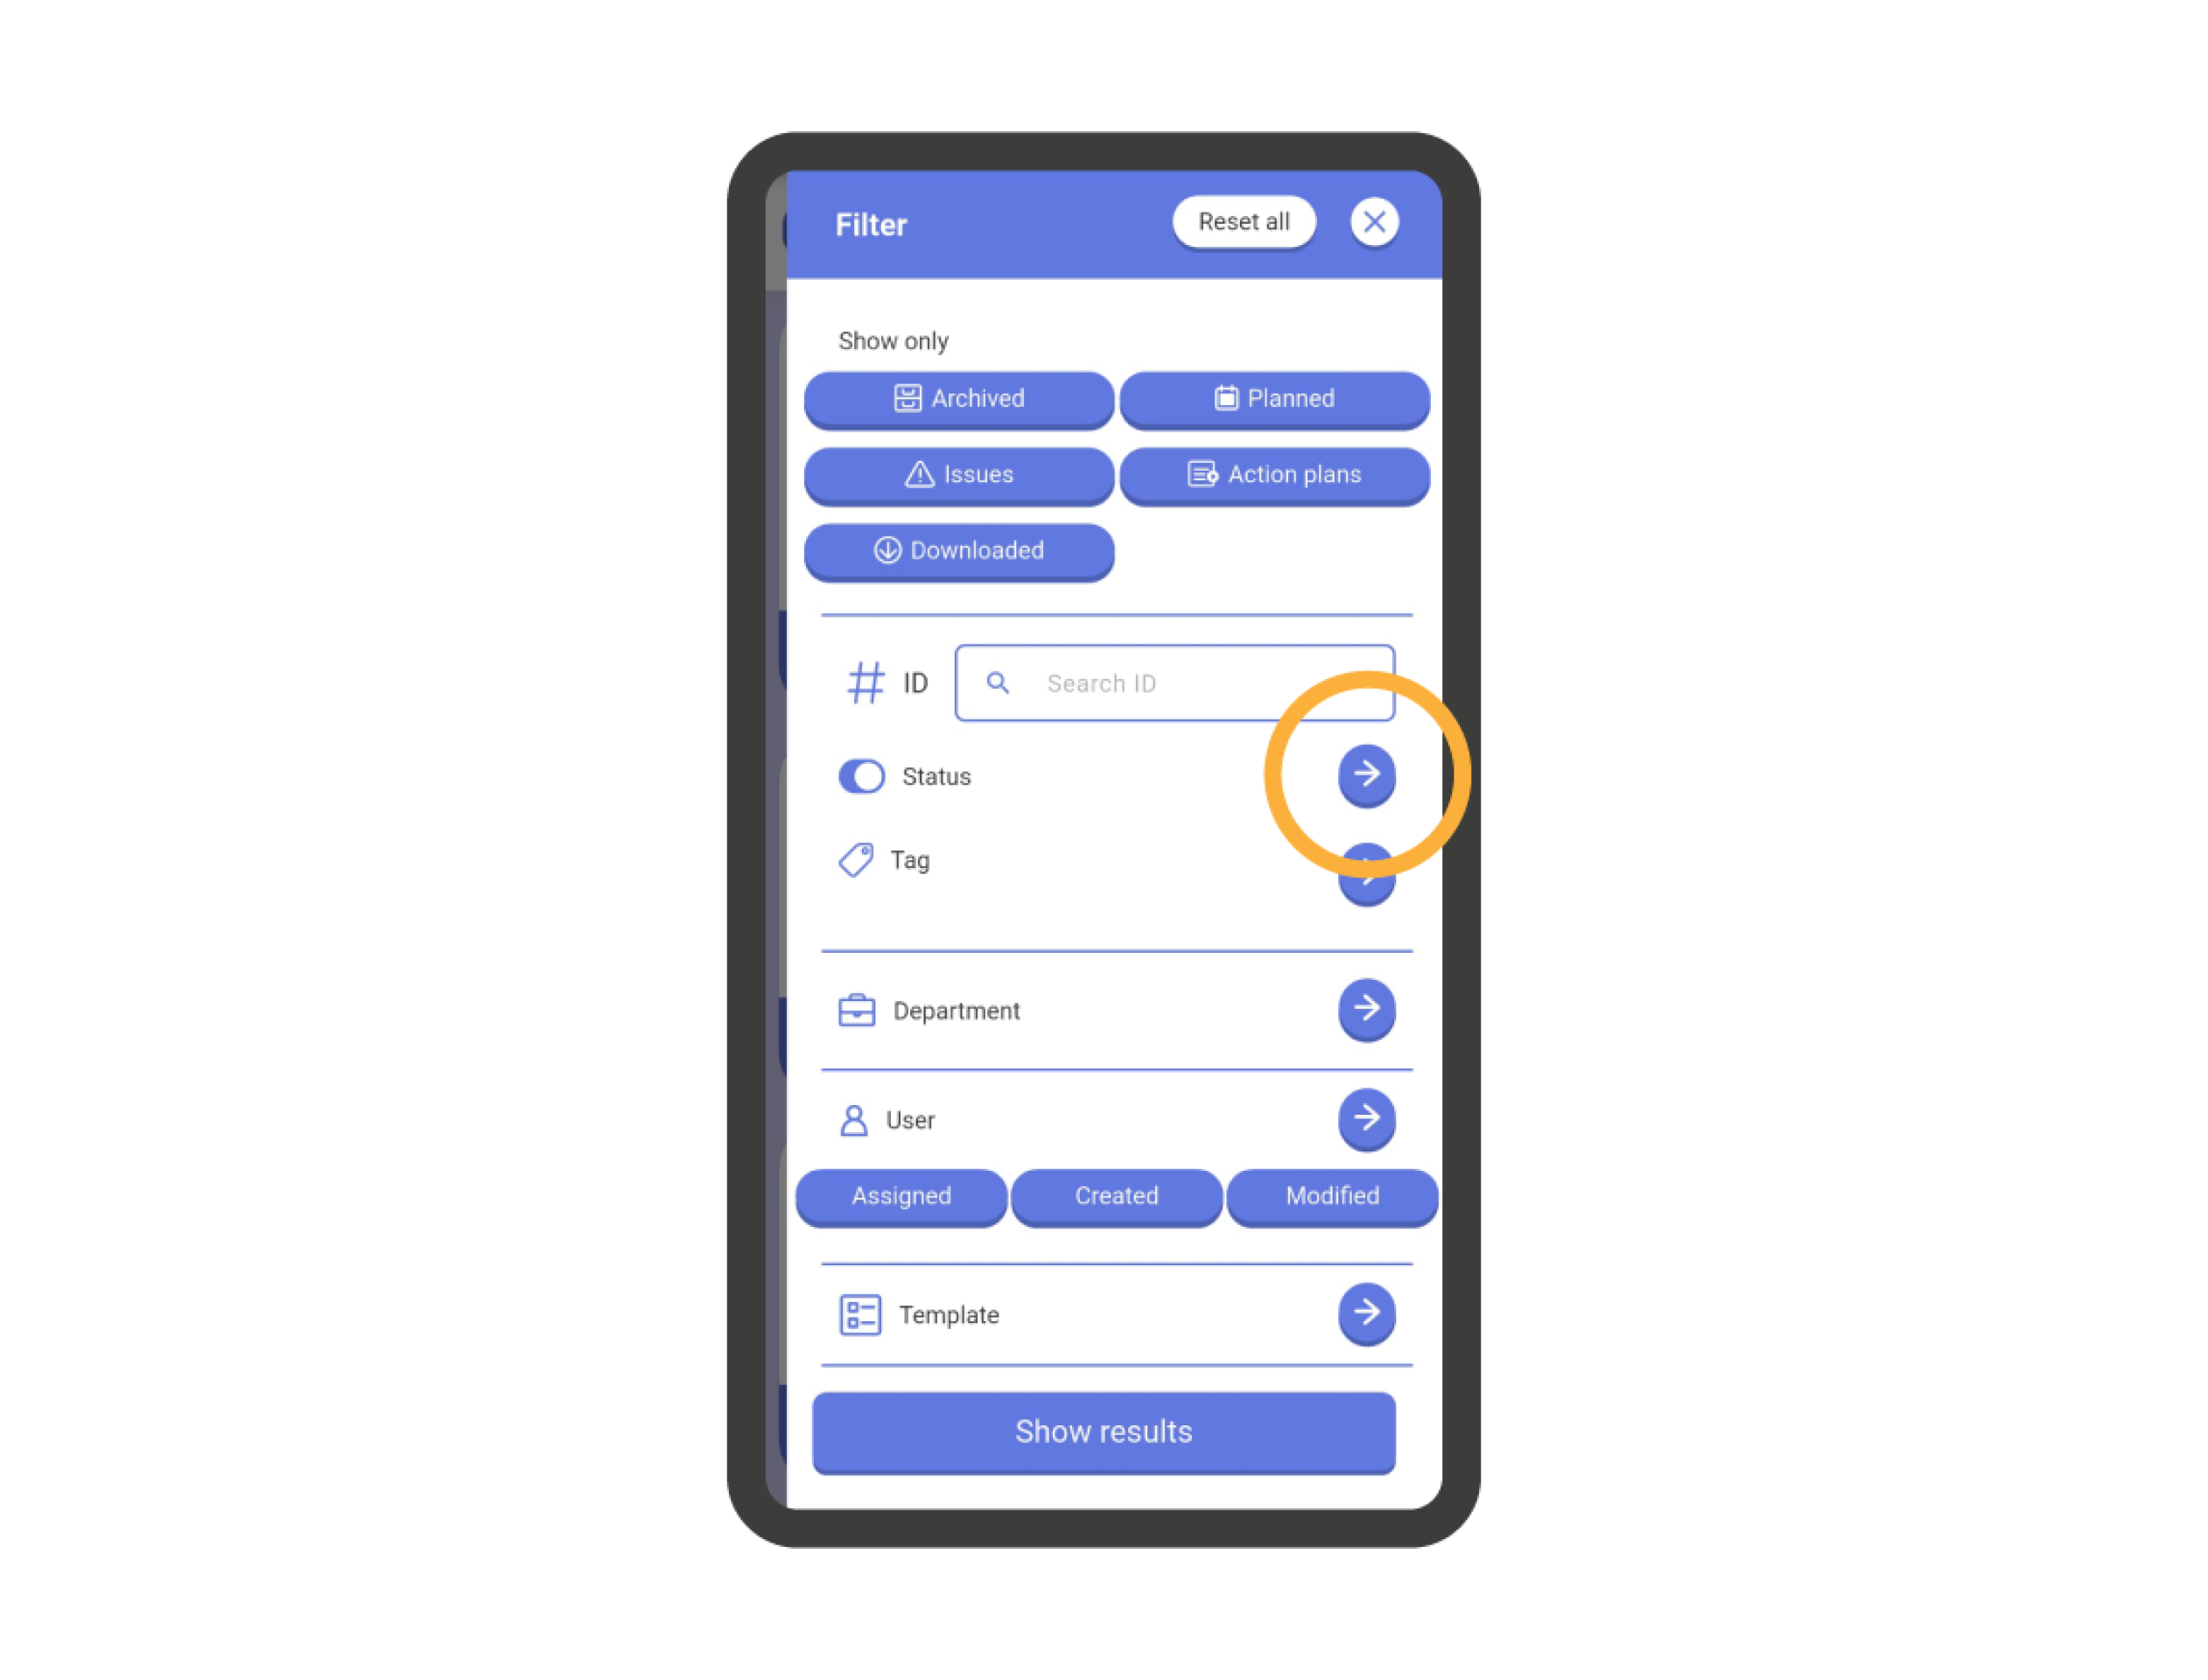
To apply filters on the status of checklists, go to the ‘Status’ section within the filters tab of the checklist list.
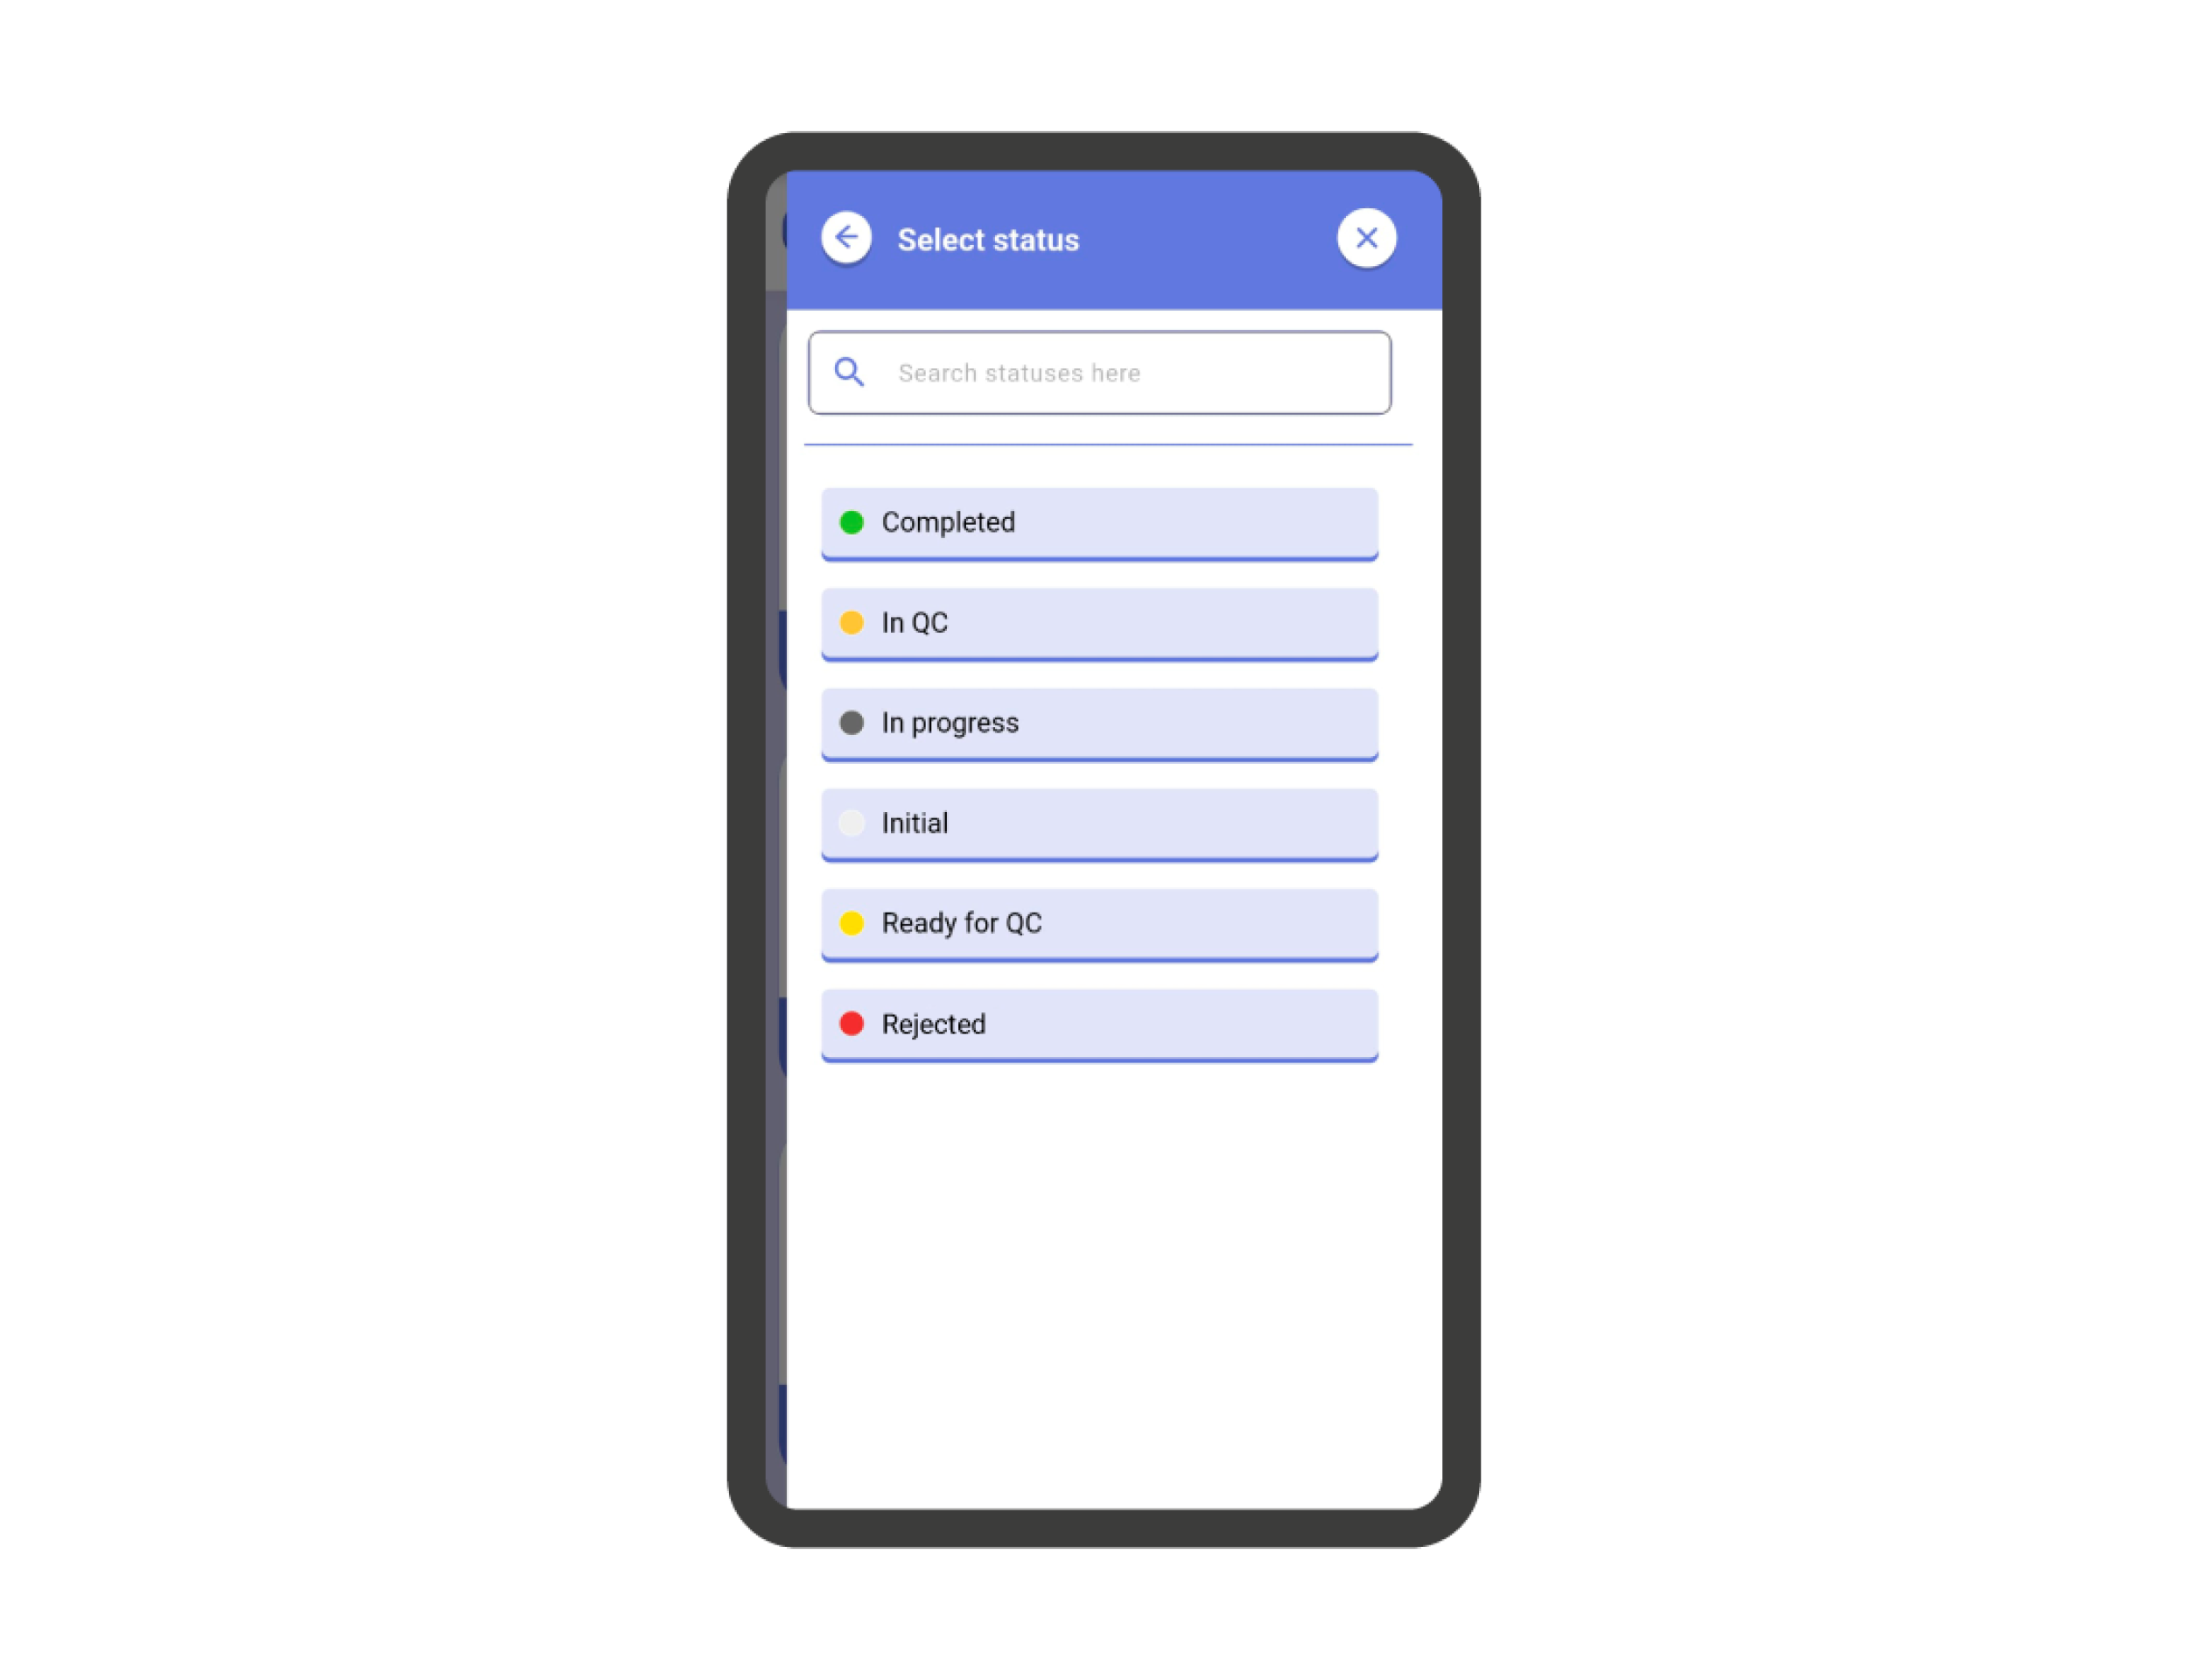
Once inside the ‘Status’ screen, you must choose the statuses you want to limit the search to. Then, go back to the previous screen using the arrow icon at the top left and click on the ‘Show results’ button.
IMPORTANT: You can choose more than one status when limiting the search by status.

Filters: Tags #
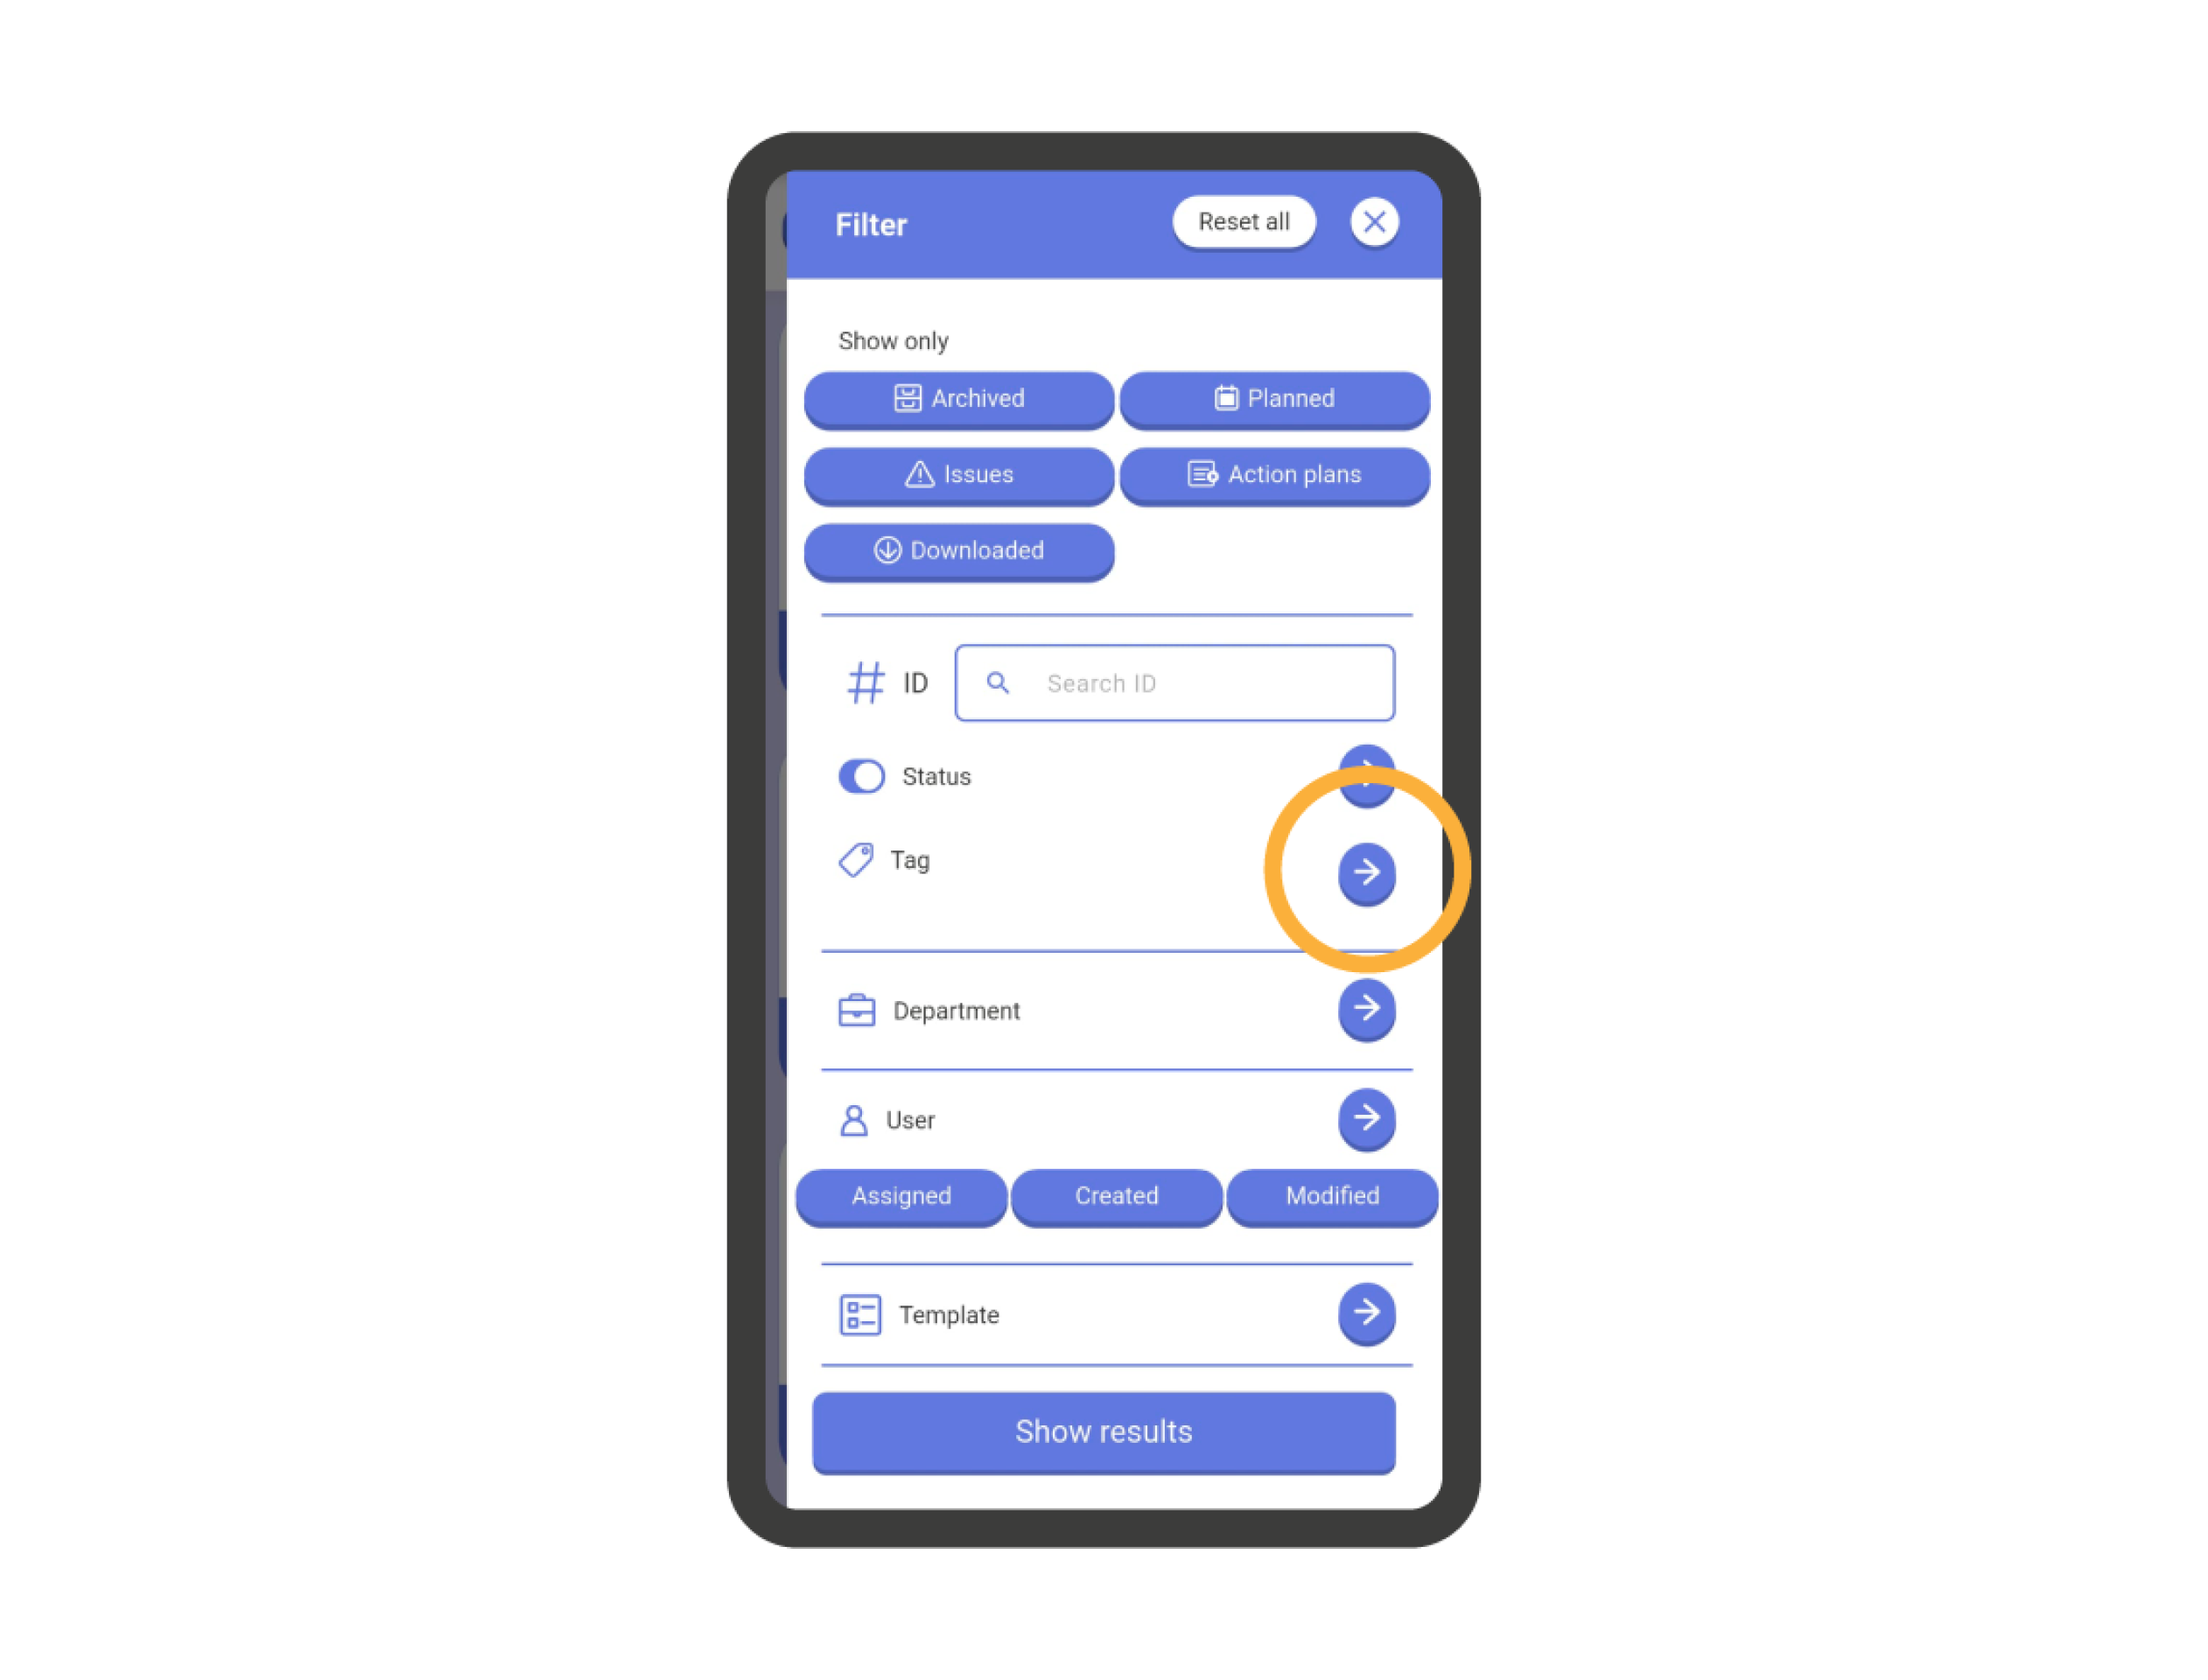
To apply filters on checklist tags, go to the ‘Tags’ section within the filter tab of the checklist list.
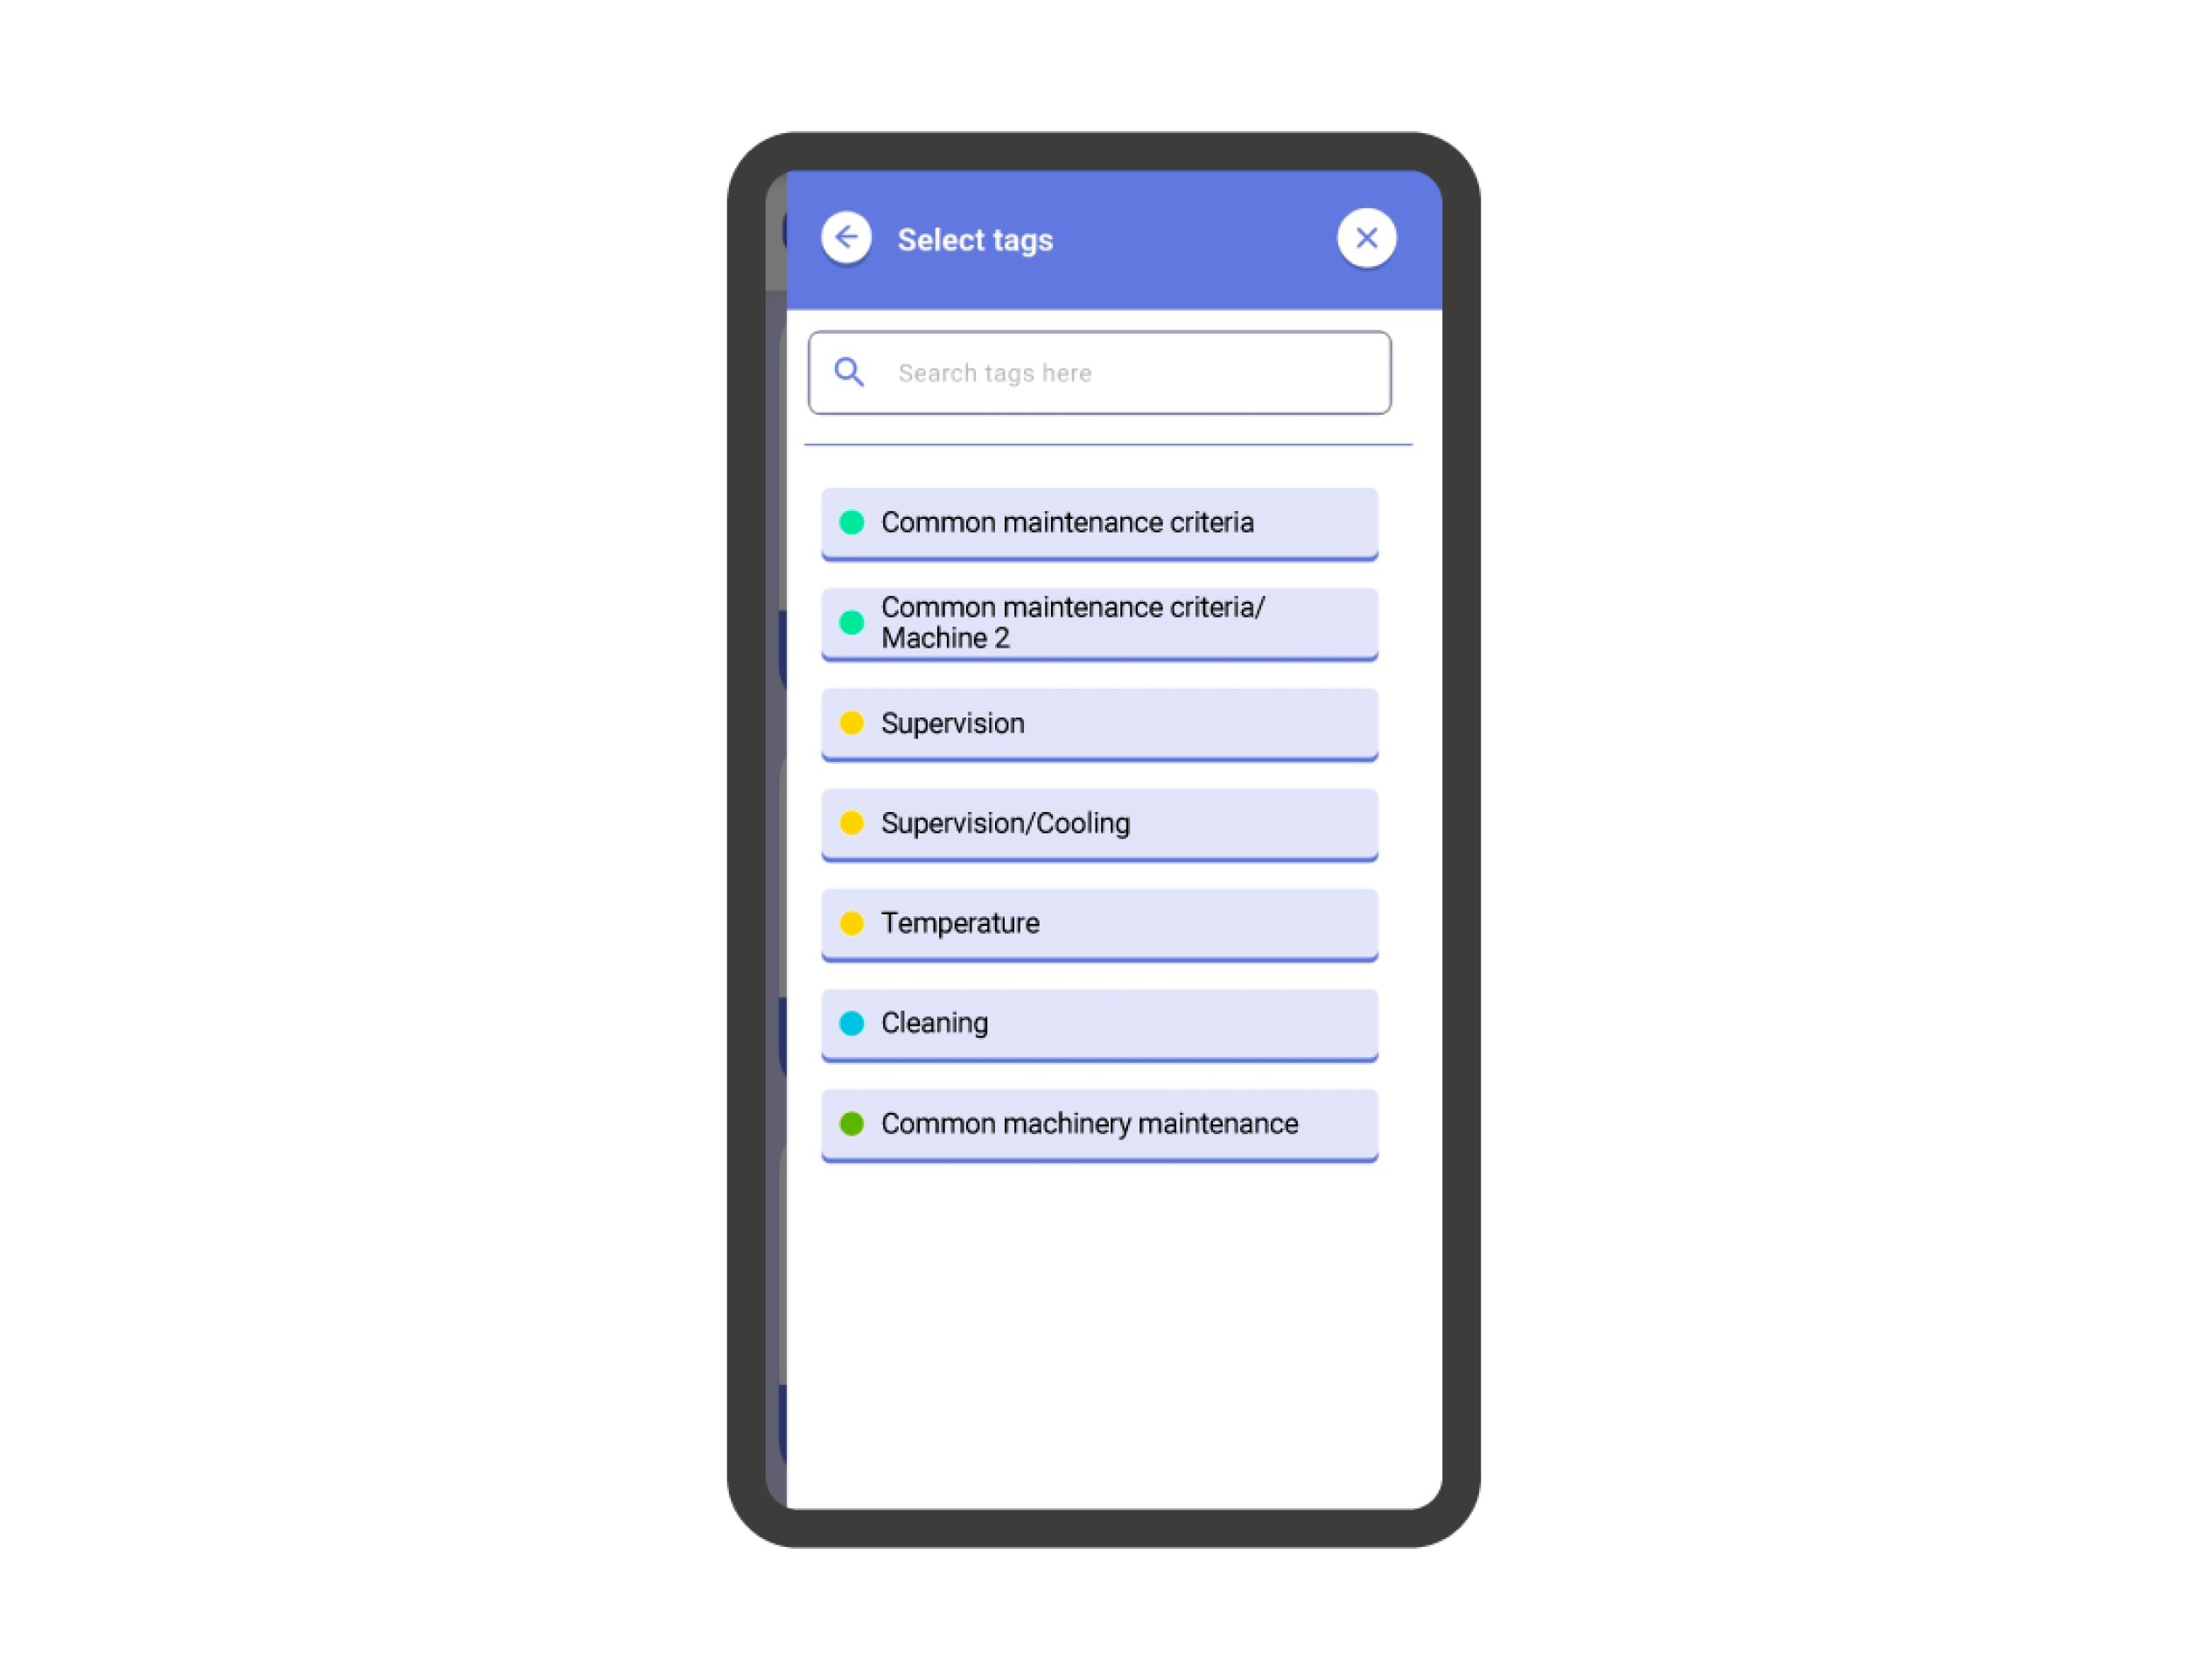
Once you’re on the ‘Tags’ screen, you need to select the statuses you want to limit the search to. Then, return to the previous screen using the arrow icon in the top left corner and click on the ‘Show results’ button.
IMPORTANT: You can choose more than one tag when limiting your search by tags.

Filters: Departments #
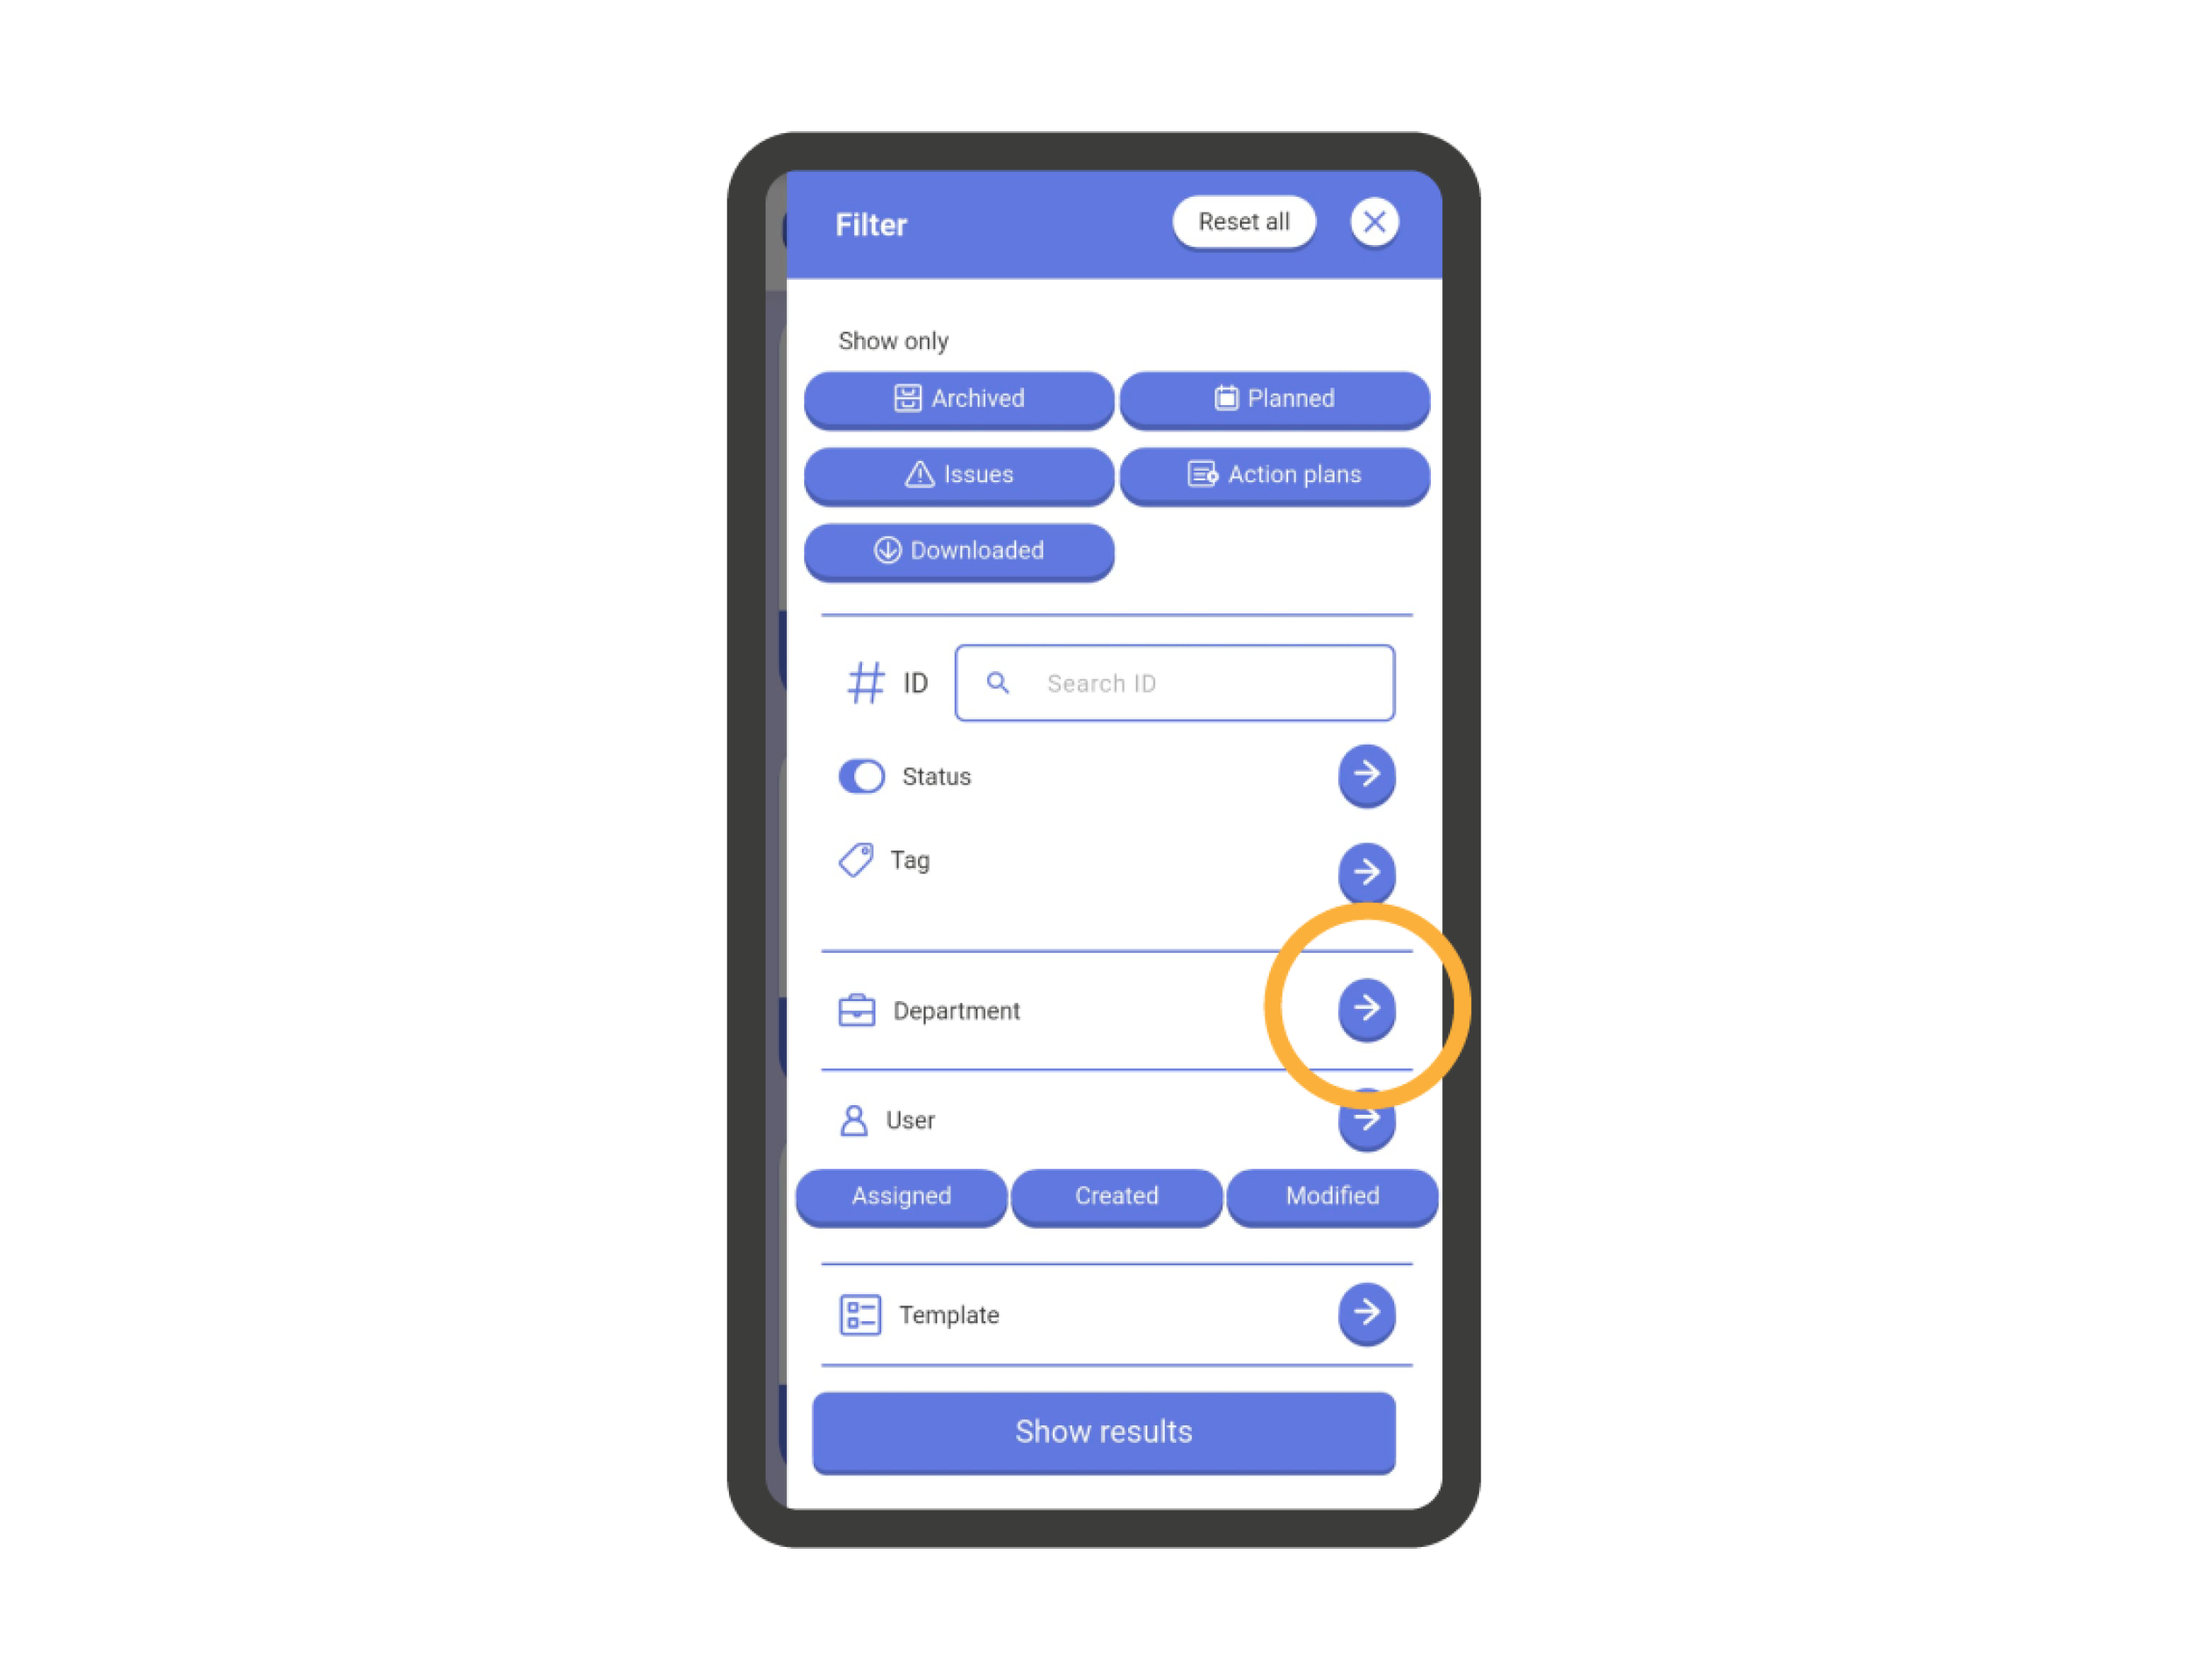
To apply search filters within a specific department, go to the ‘Department’ section within the filters tab of the checklist list.
Once inside the ‘Department’ screen, you can choose ONE SINGLE DEPARTMENT to perform the search. Then, return to the previous screen by using the arrow icon in the upper left corner and click on the ‘Show results’ button.

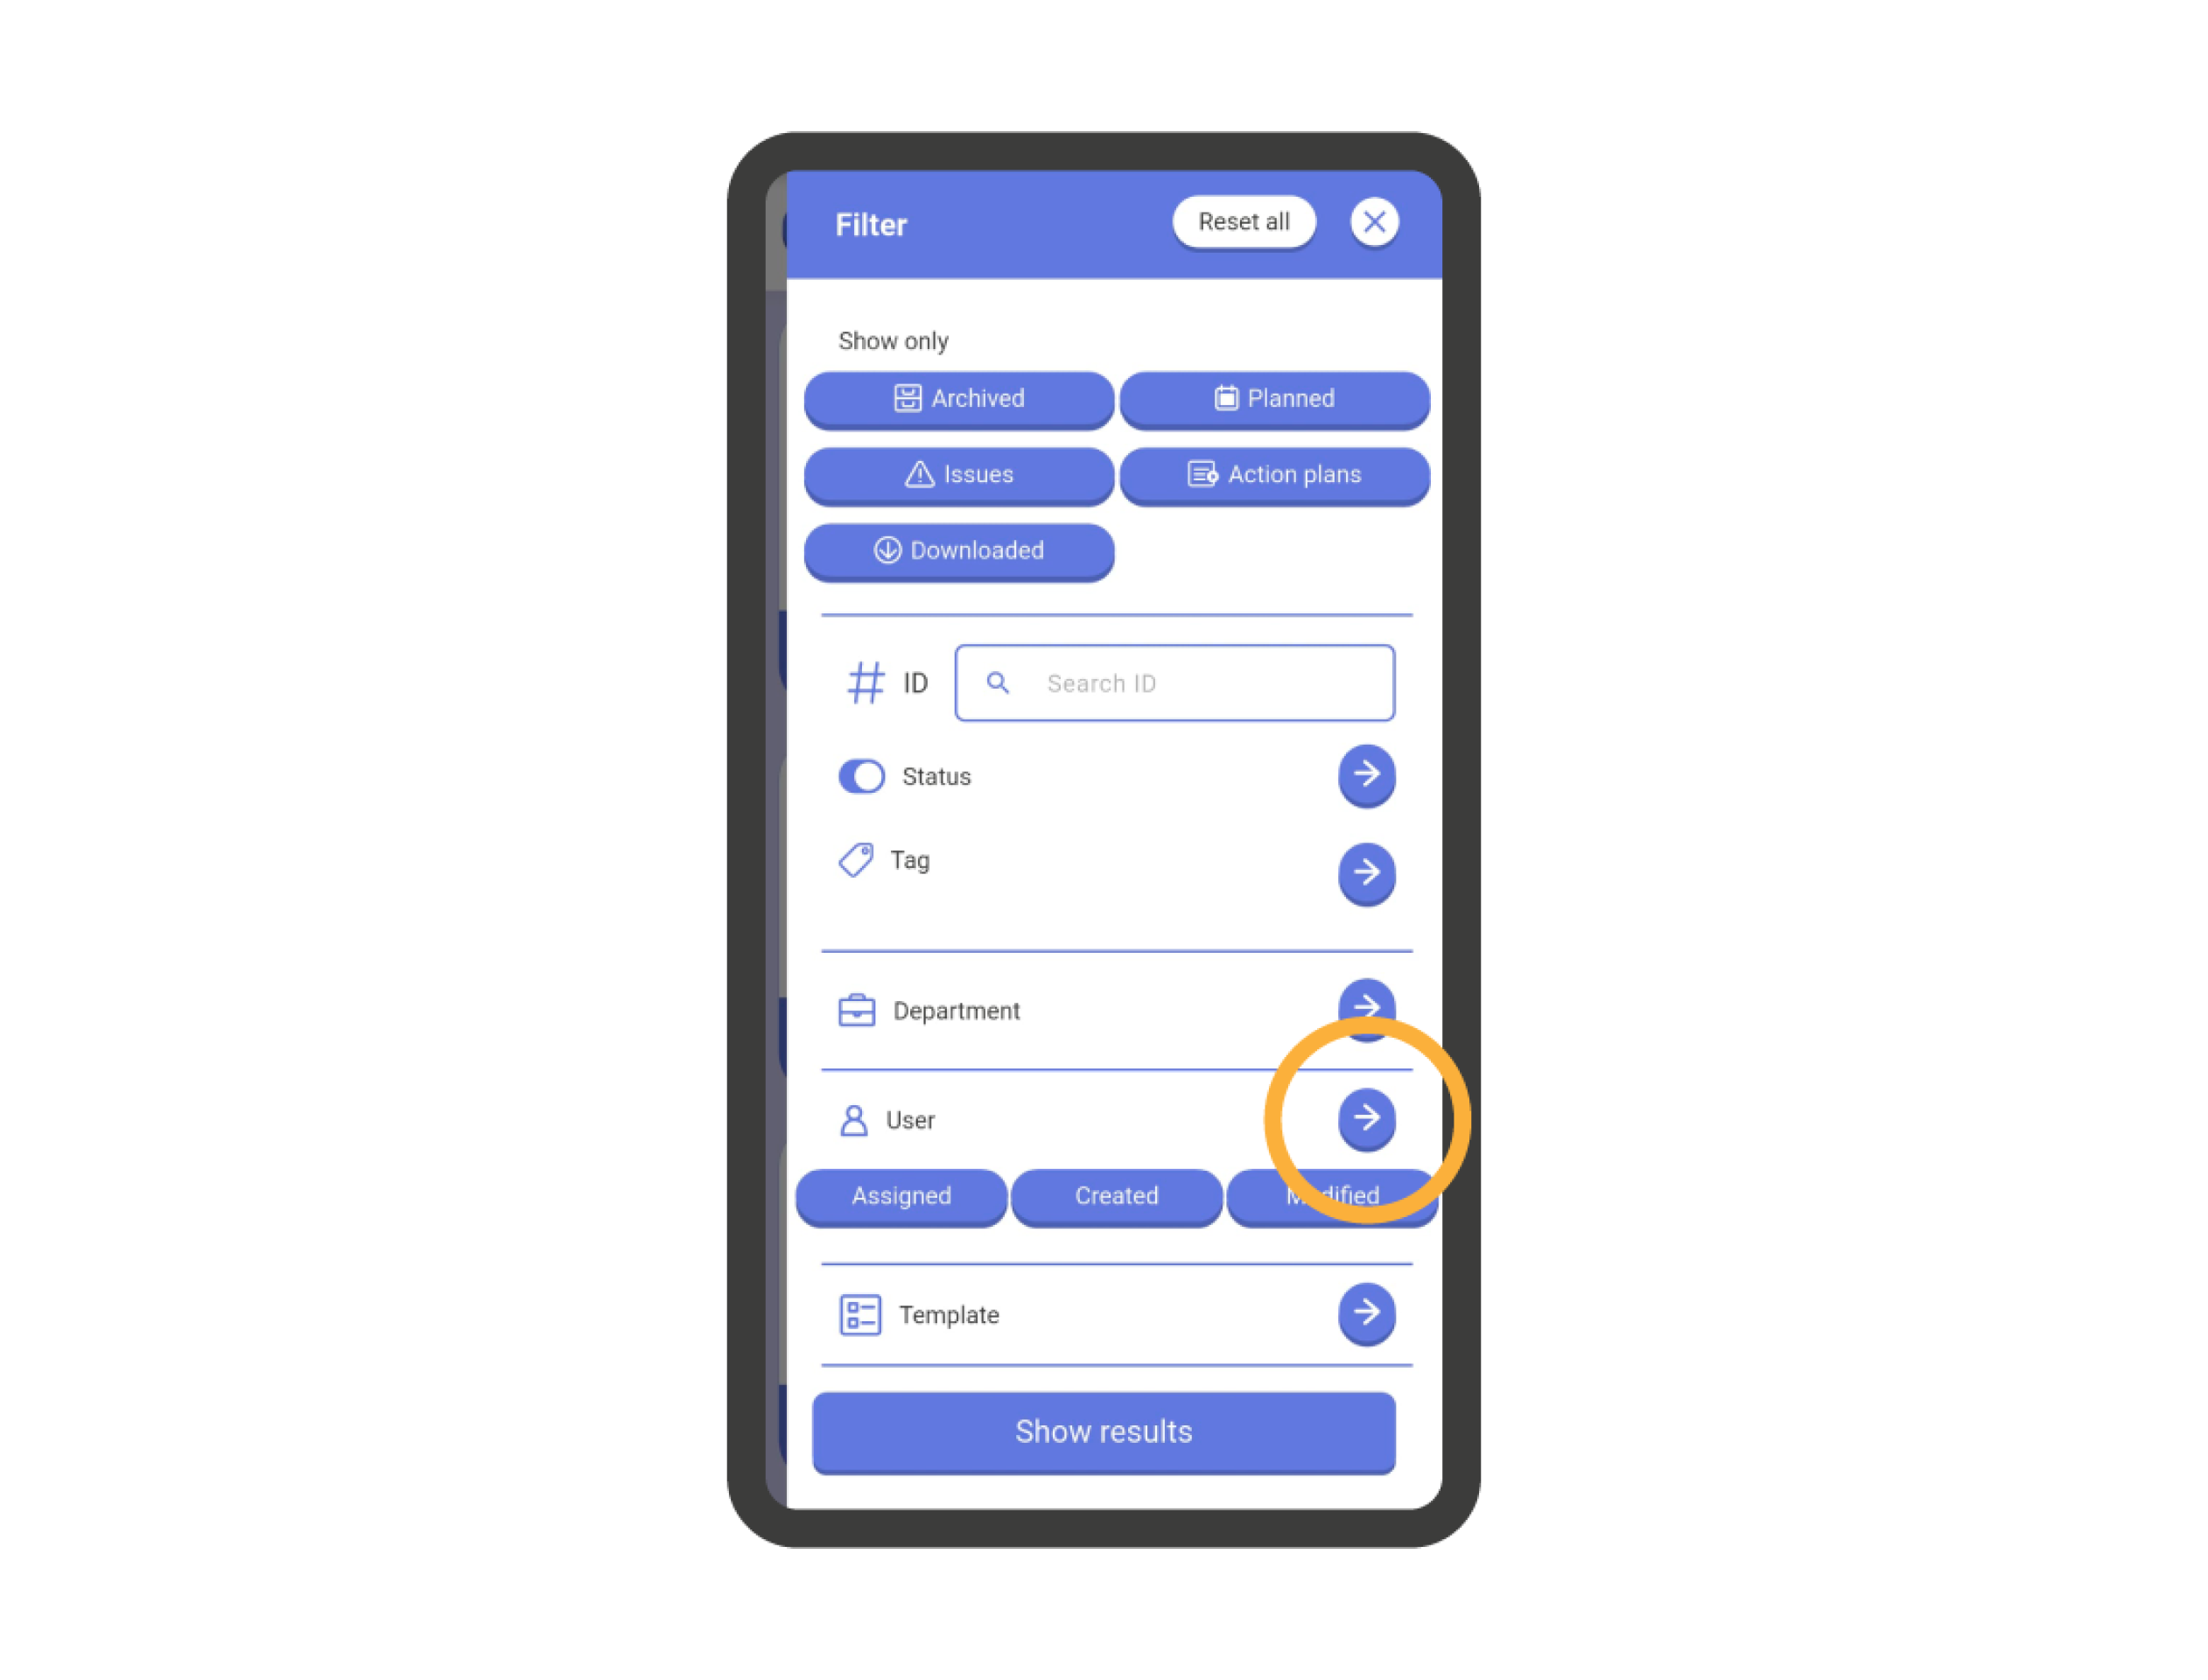
Filters: Users #
To apply user filters, go to the ‘Users’ section within the filters tab of the checklist list.
Here you can select Assigned users (to the checklist), Created (the user to search is the one who created the checklist), or Modified (the user to search has modified a checklist).
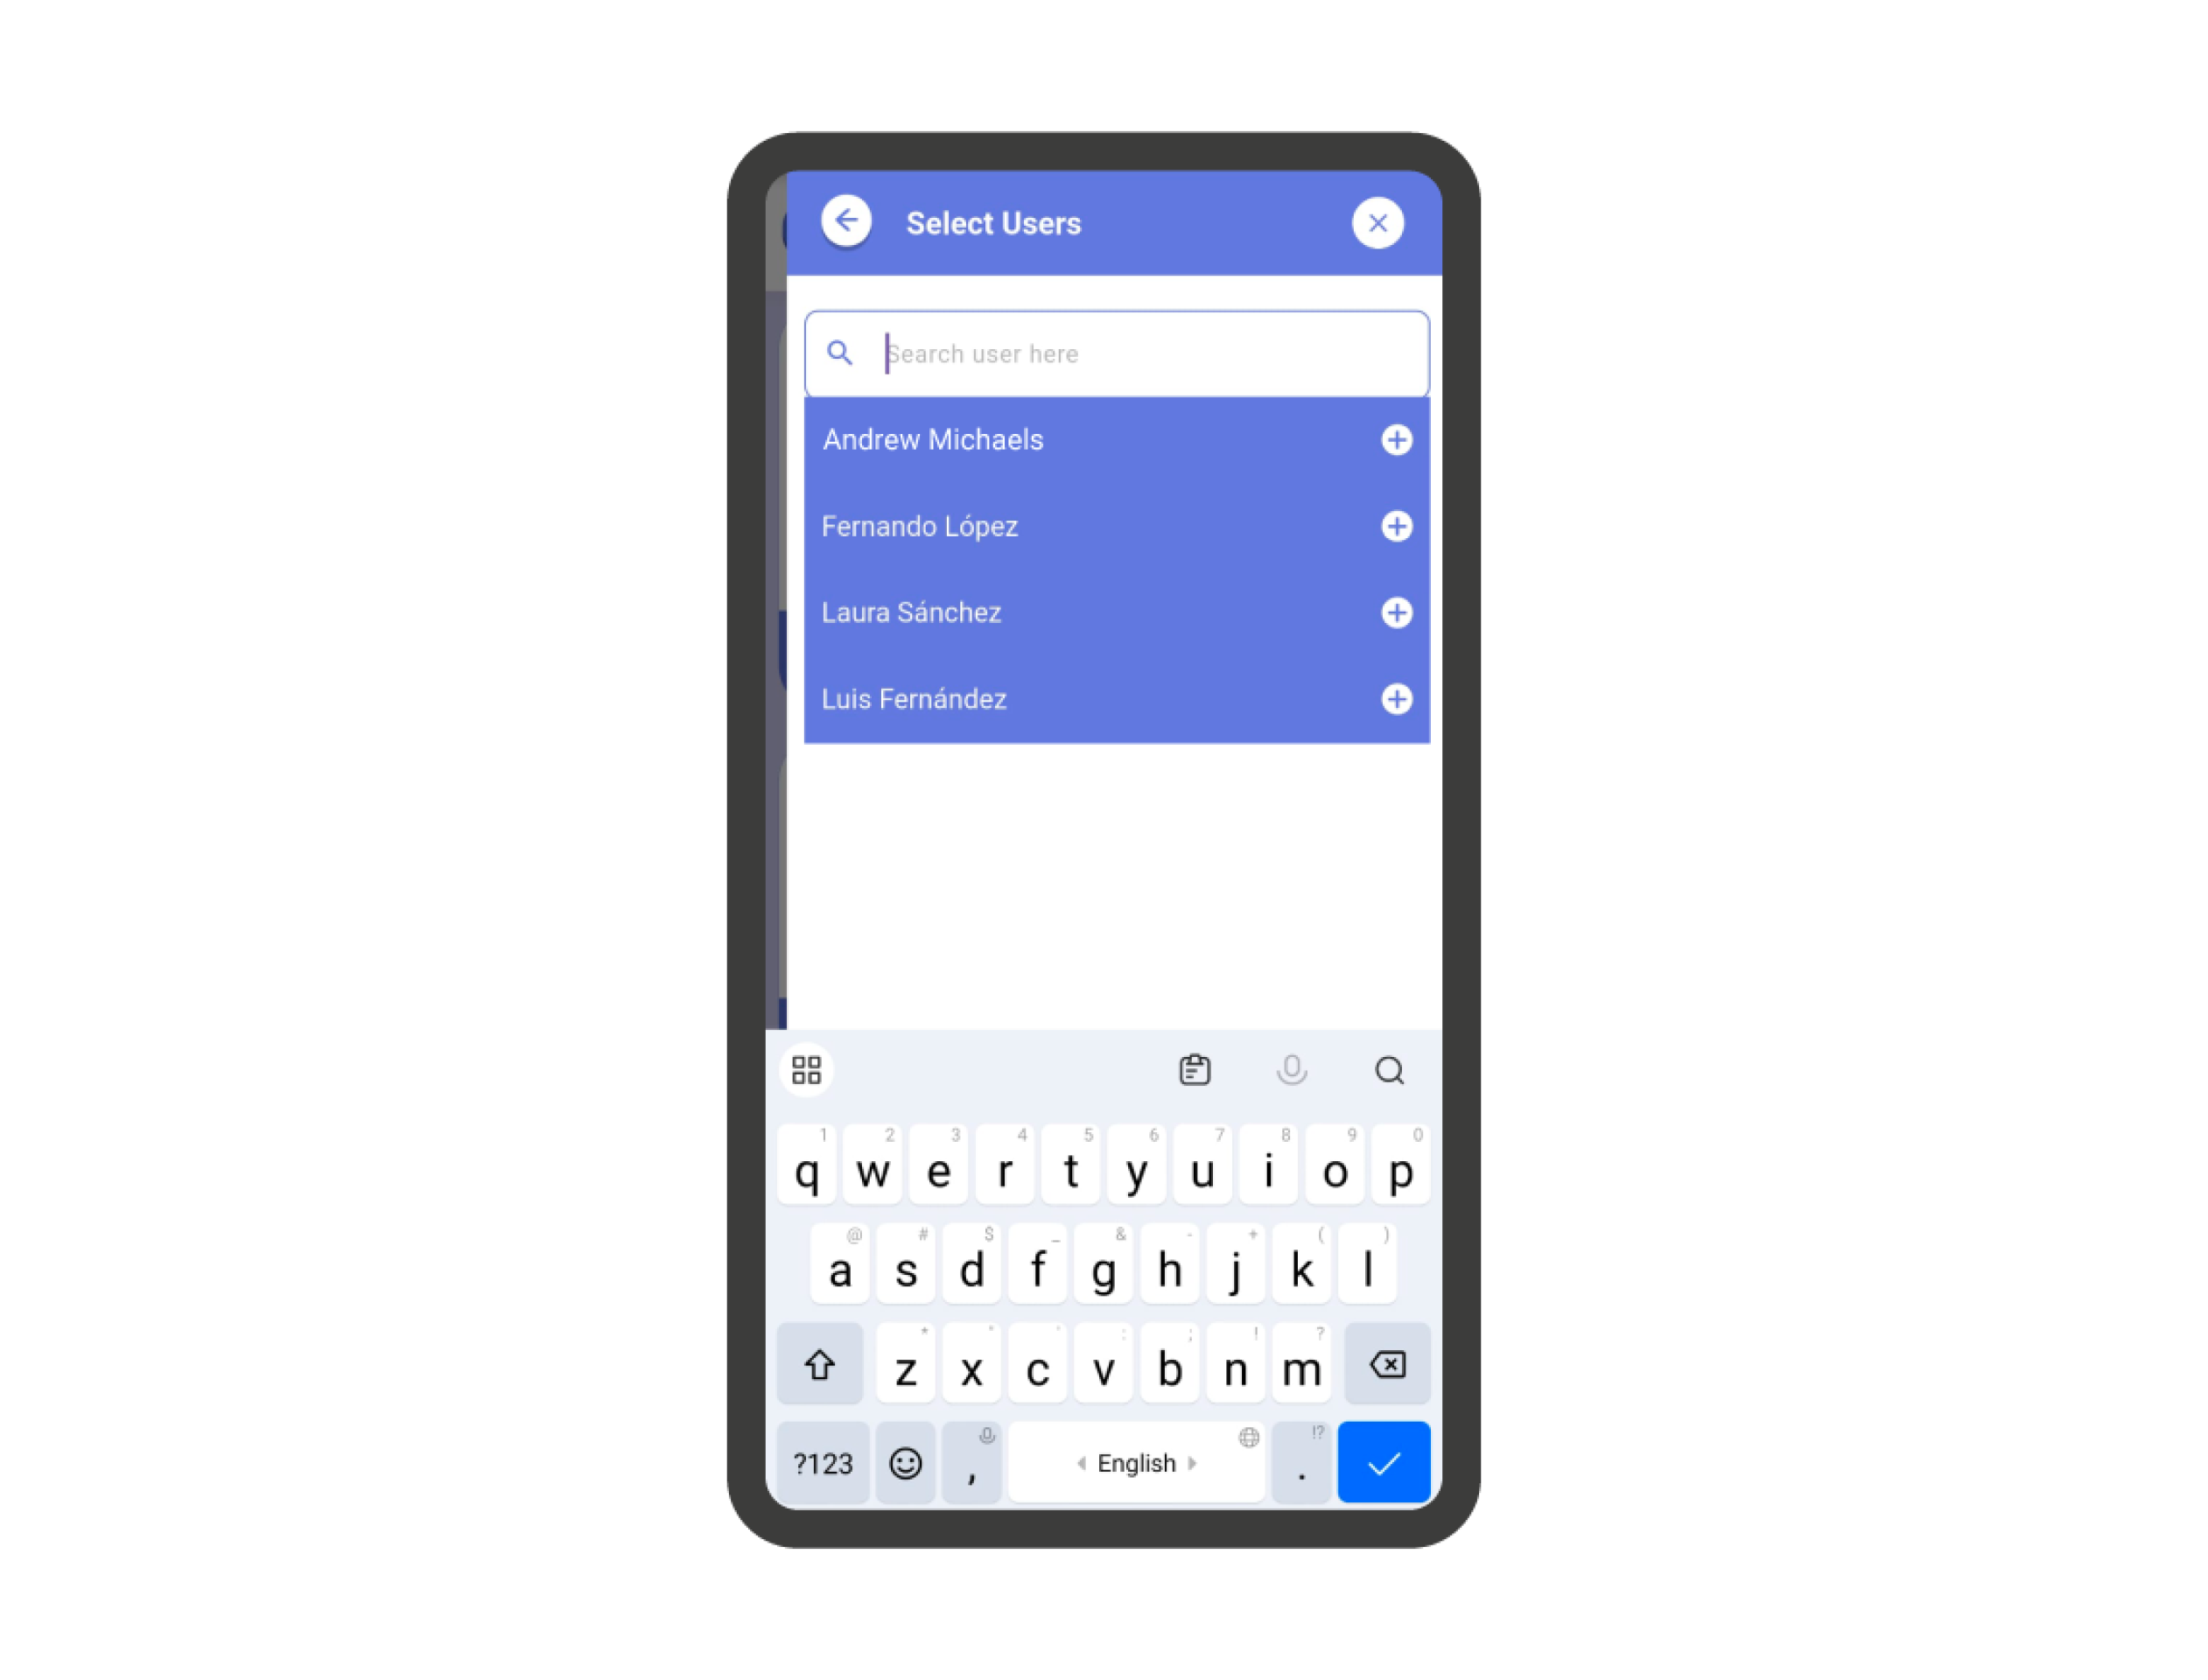
In addition, you can apply filters on specific users by clicking on the arrow in the section. Click on the search field to find the available users.
IMPORTANT: You can only filter by user if you have the ‘View users’ permission. If you have trouble locating a user, please contact your account administrator.

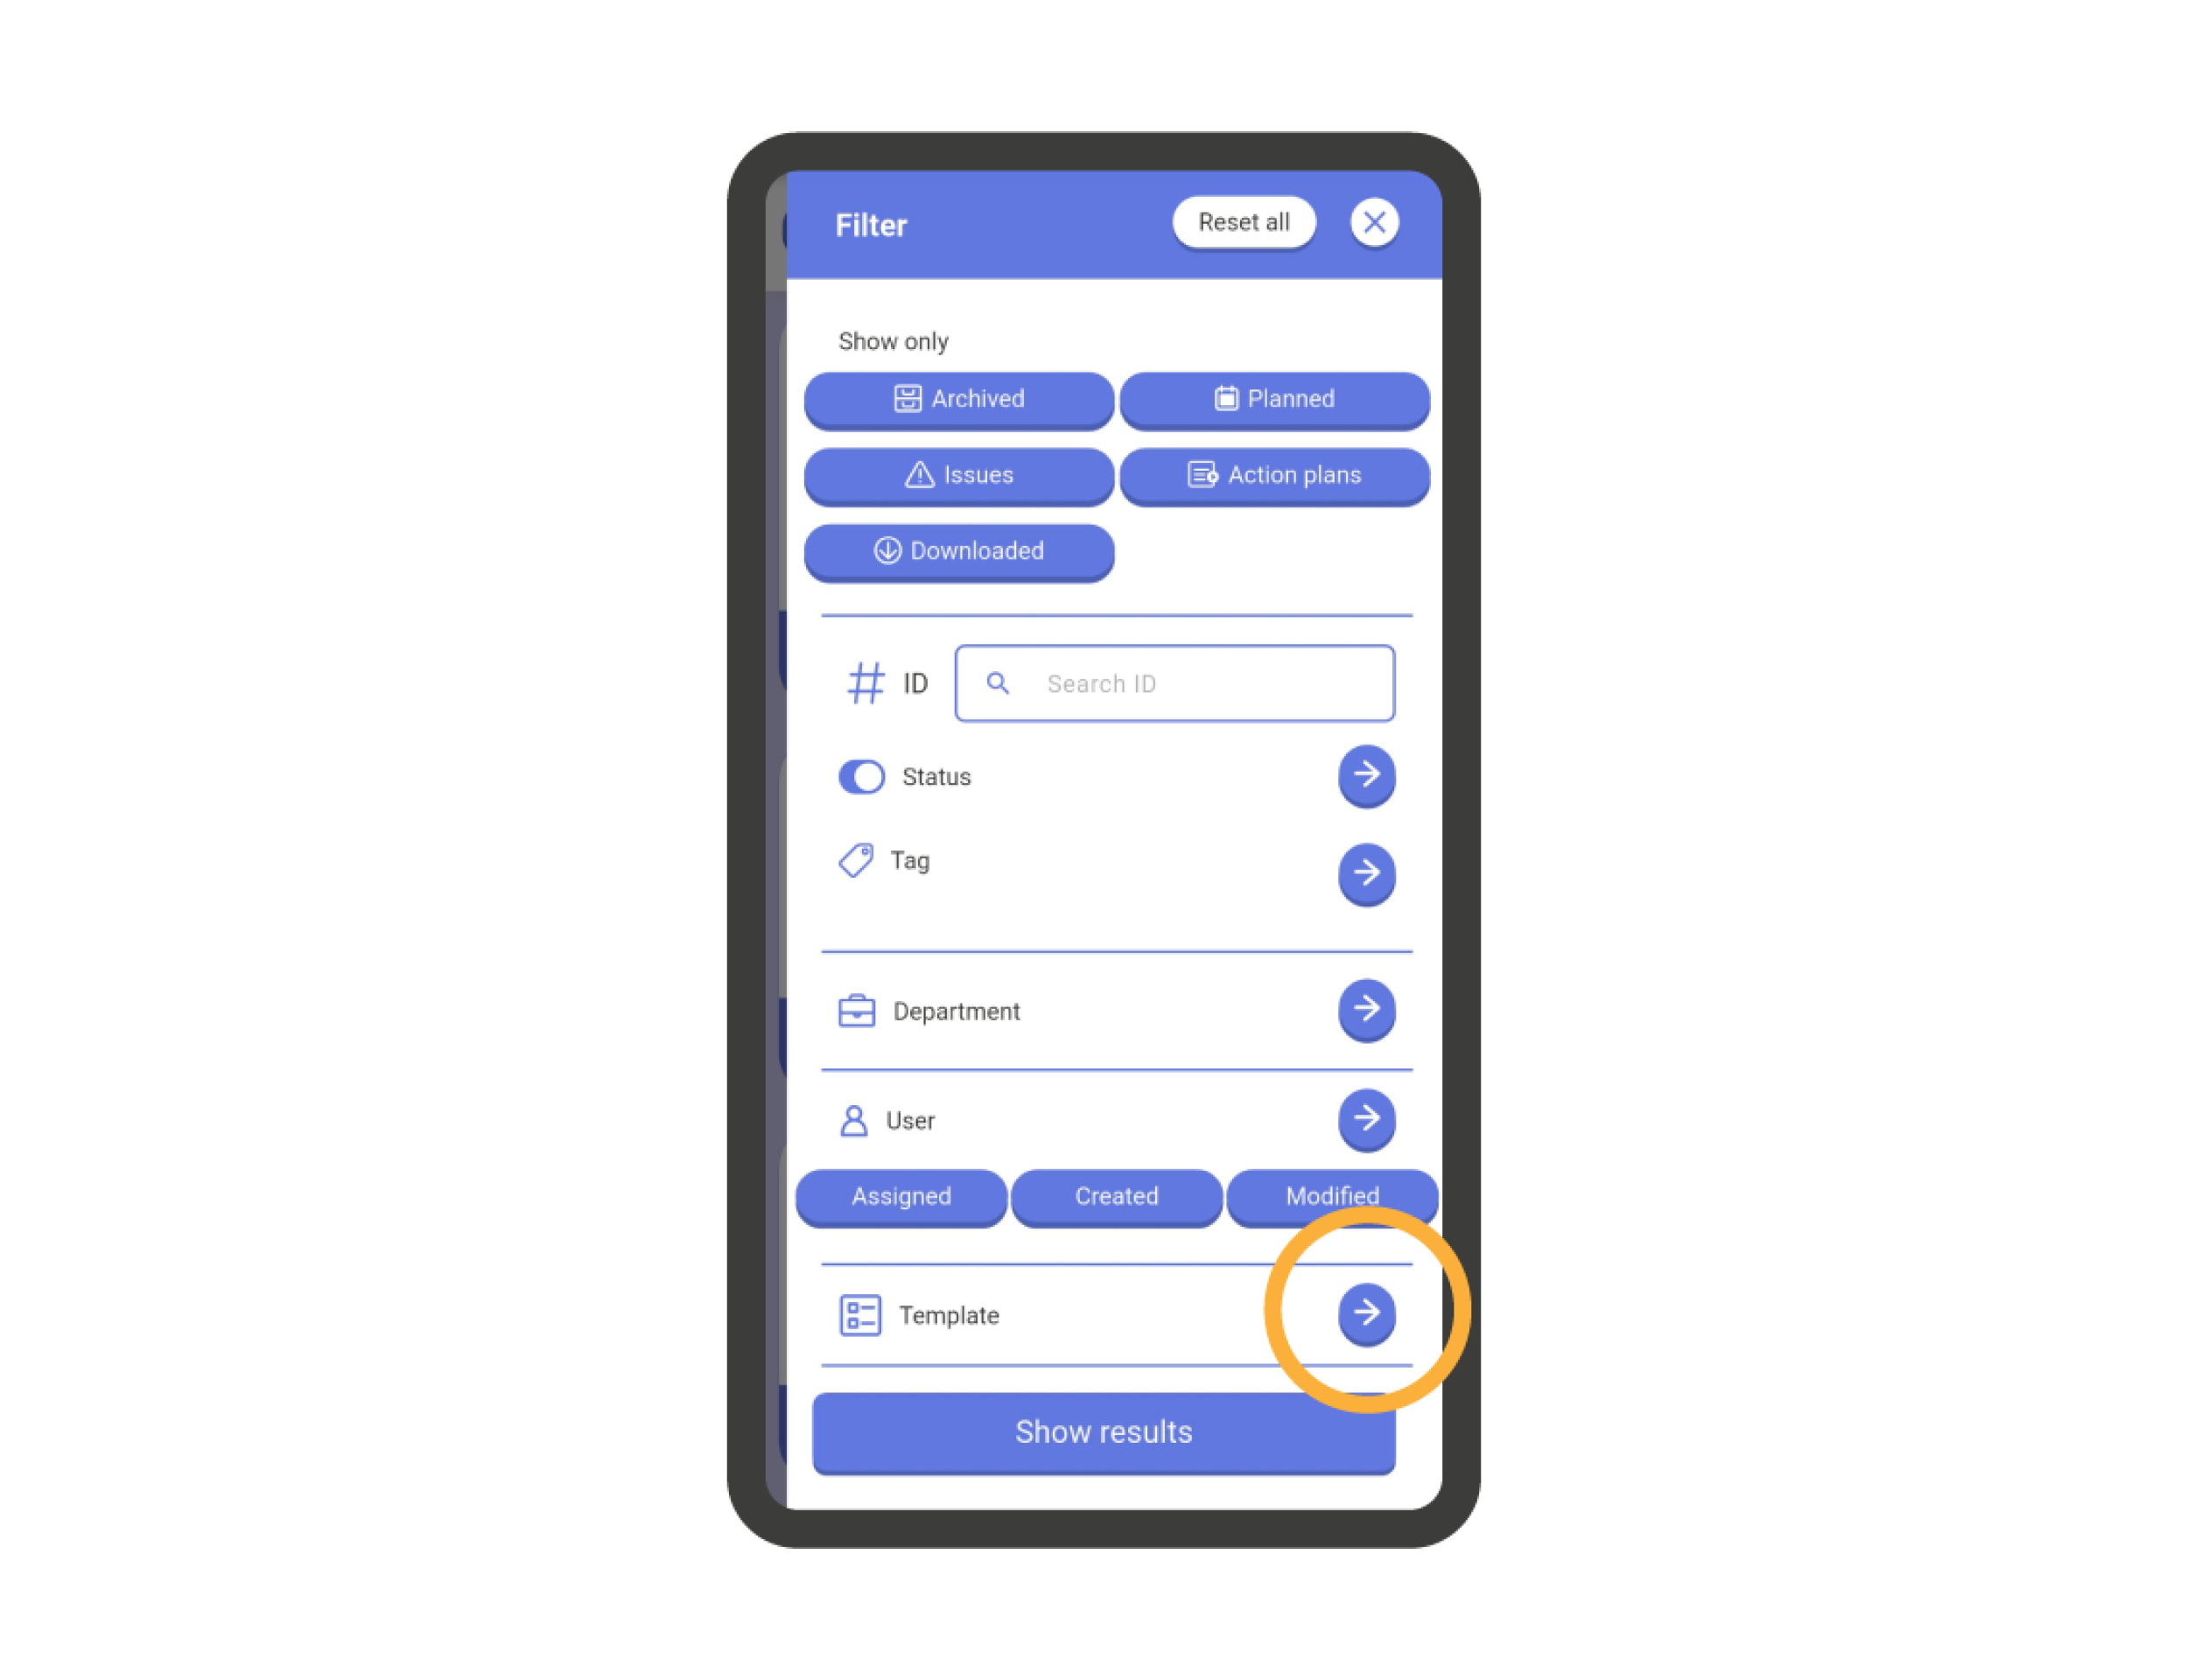
Filters: Templates #
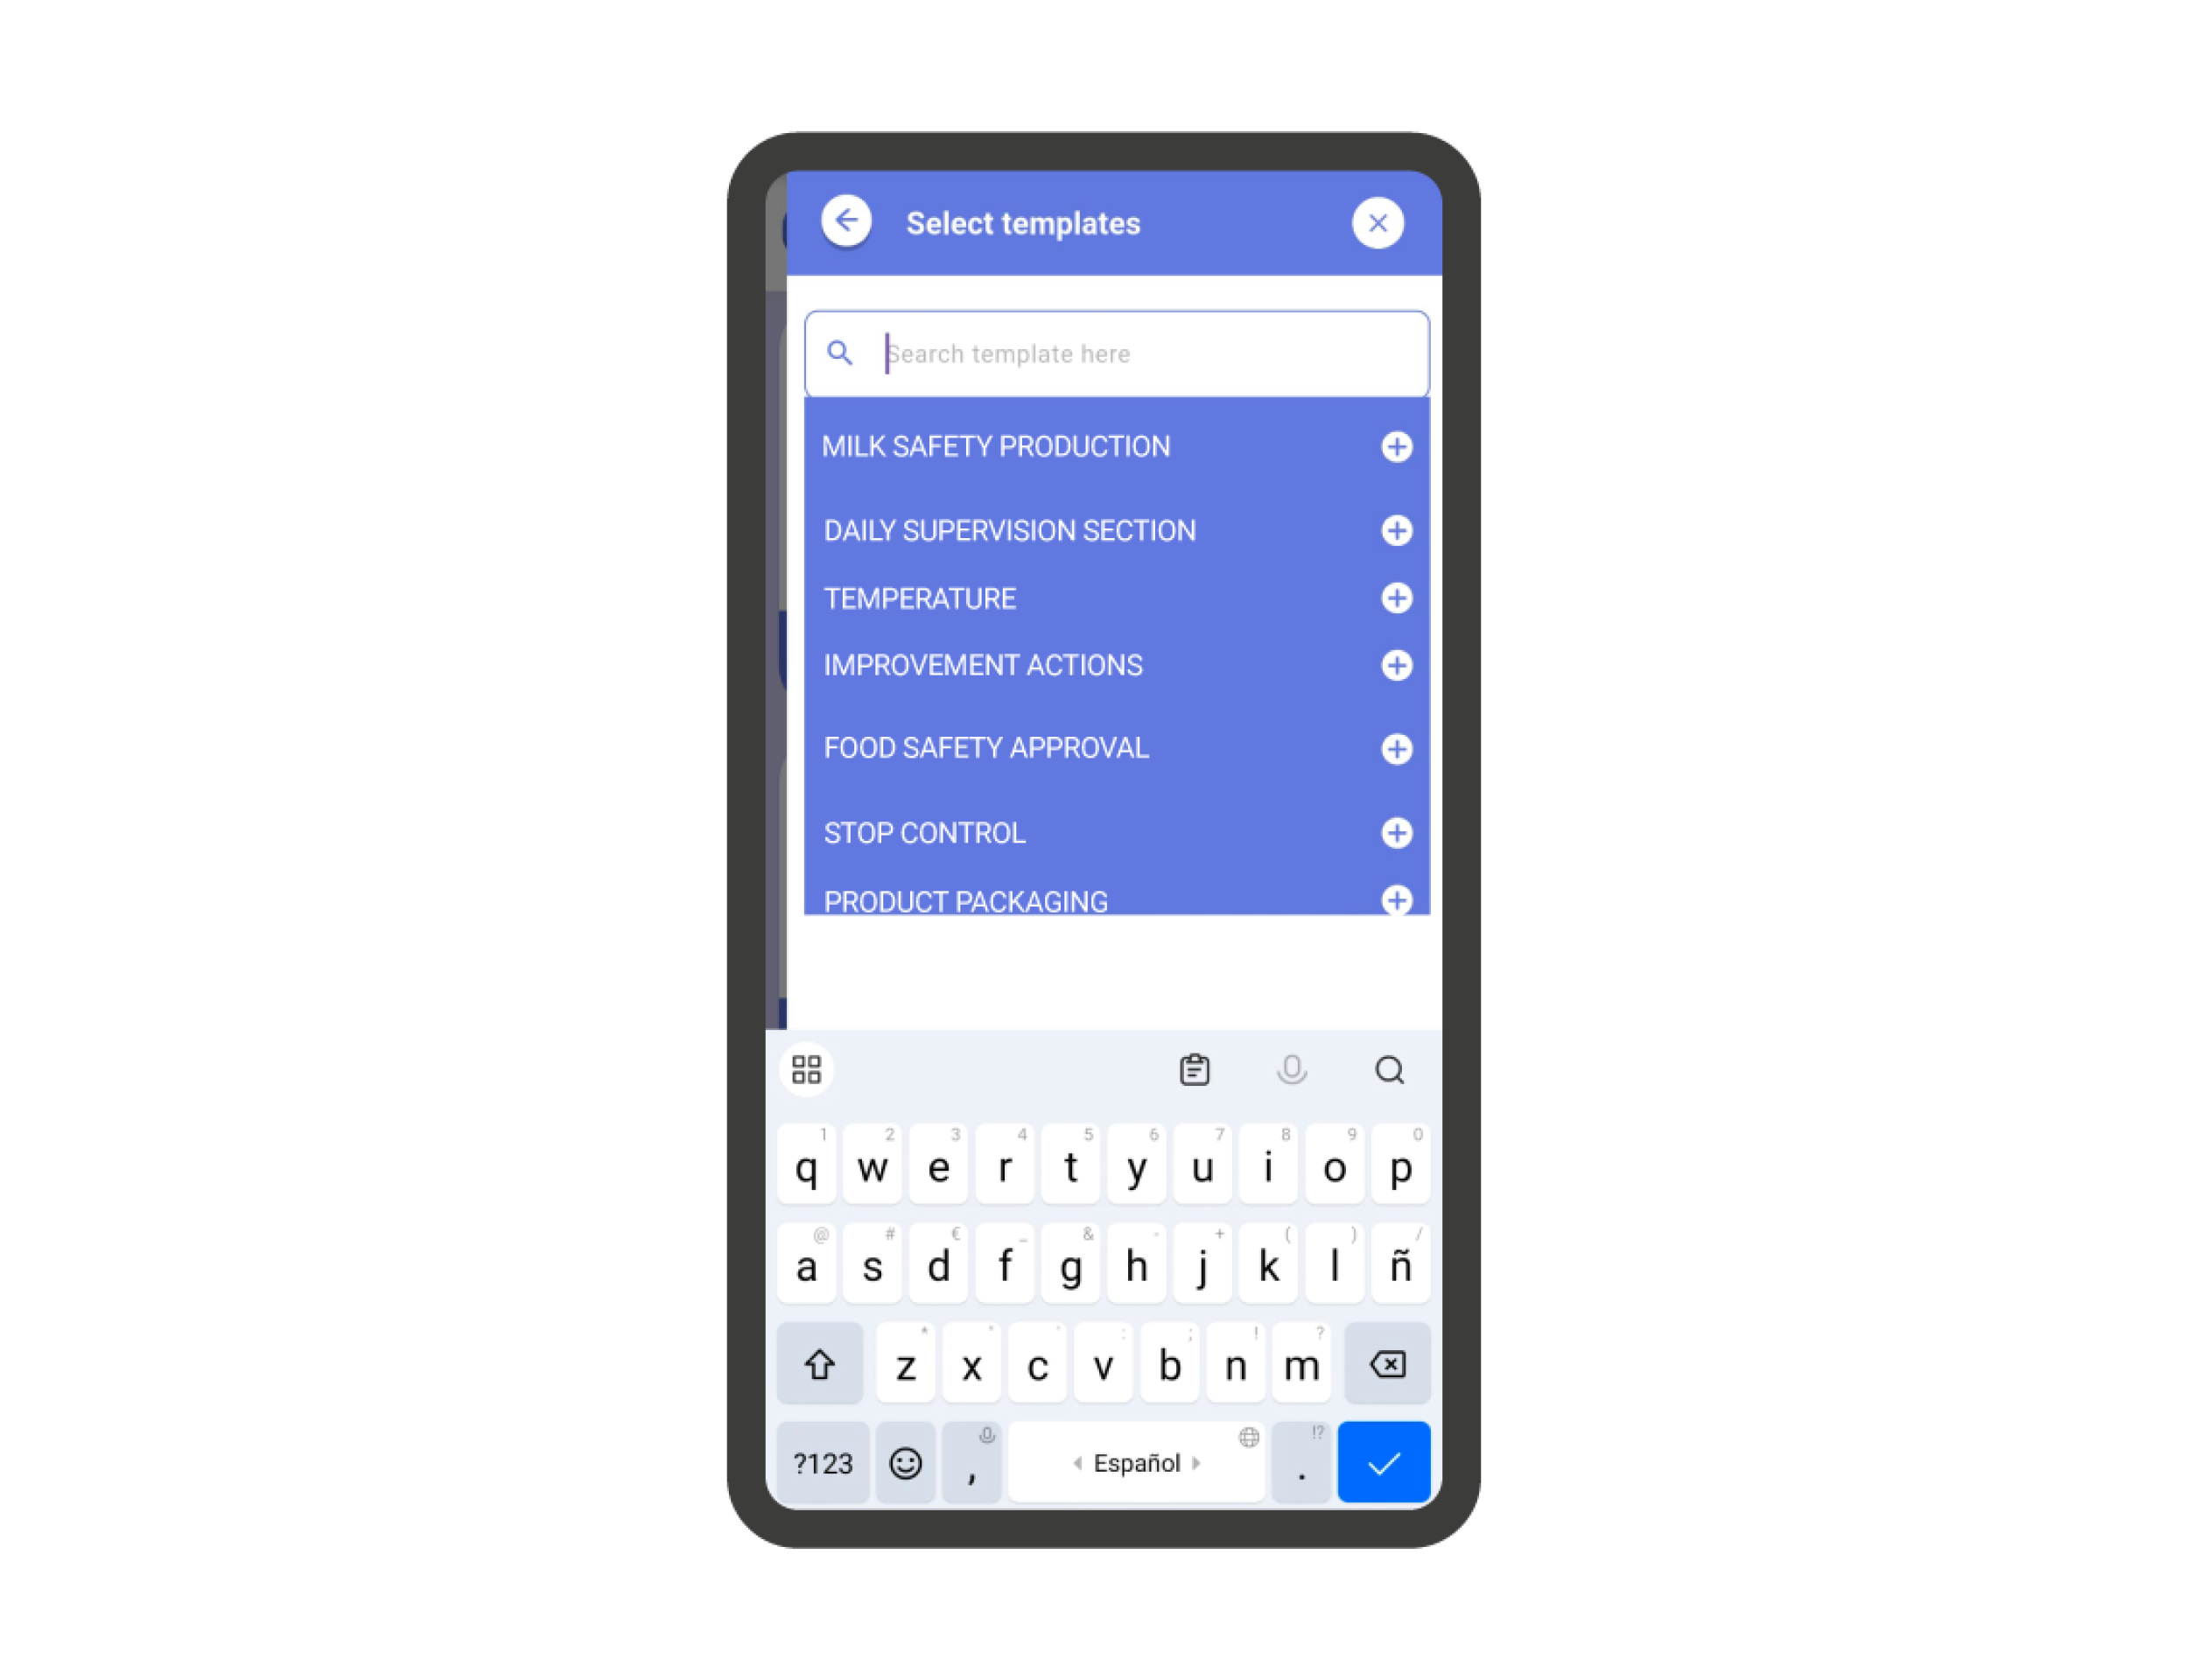
To apply filters by templates, go to the ‘Templates’ section within the filters tab of the checklist list.
By clicking in the search box, you can select the available templates to filter.

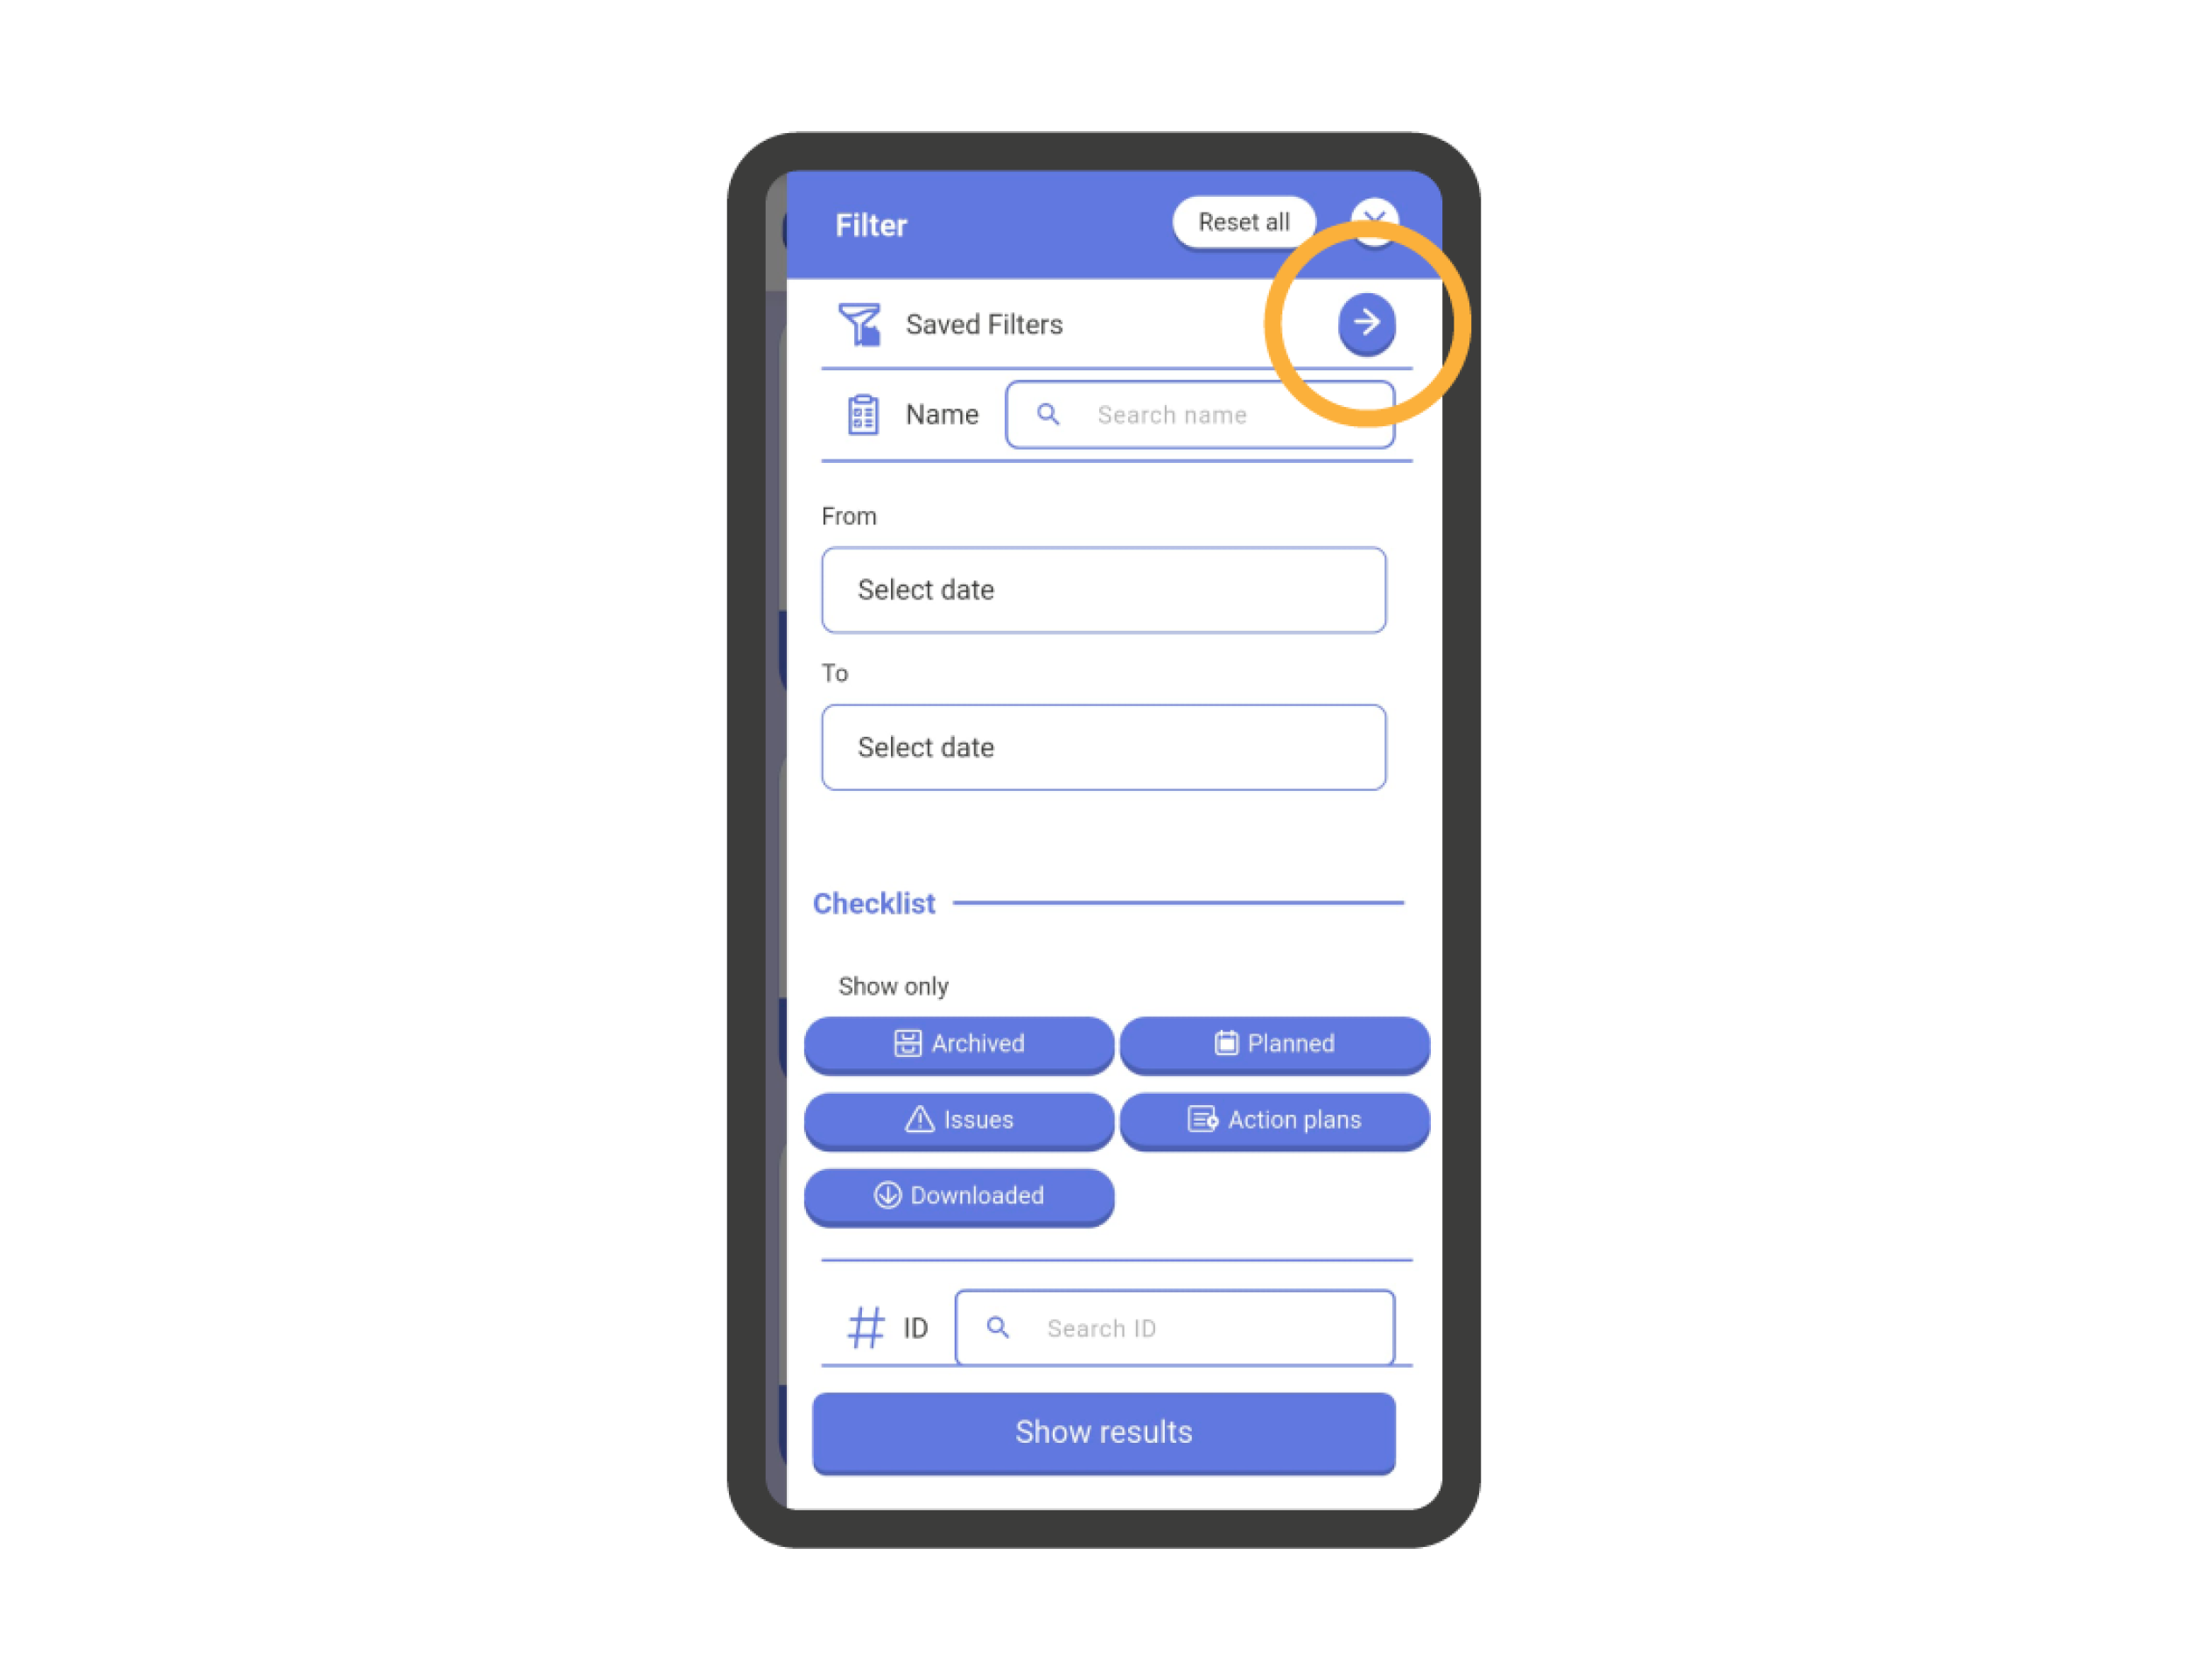
Saved Filters #
Saved filters are a feature that is still IN DEVELOPMENT in the mobile version of IRISTRACE.
Currently, it is not possible to save a filter from the IRISTRACE mobile app for later use.
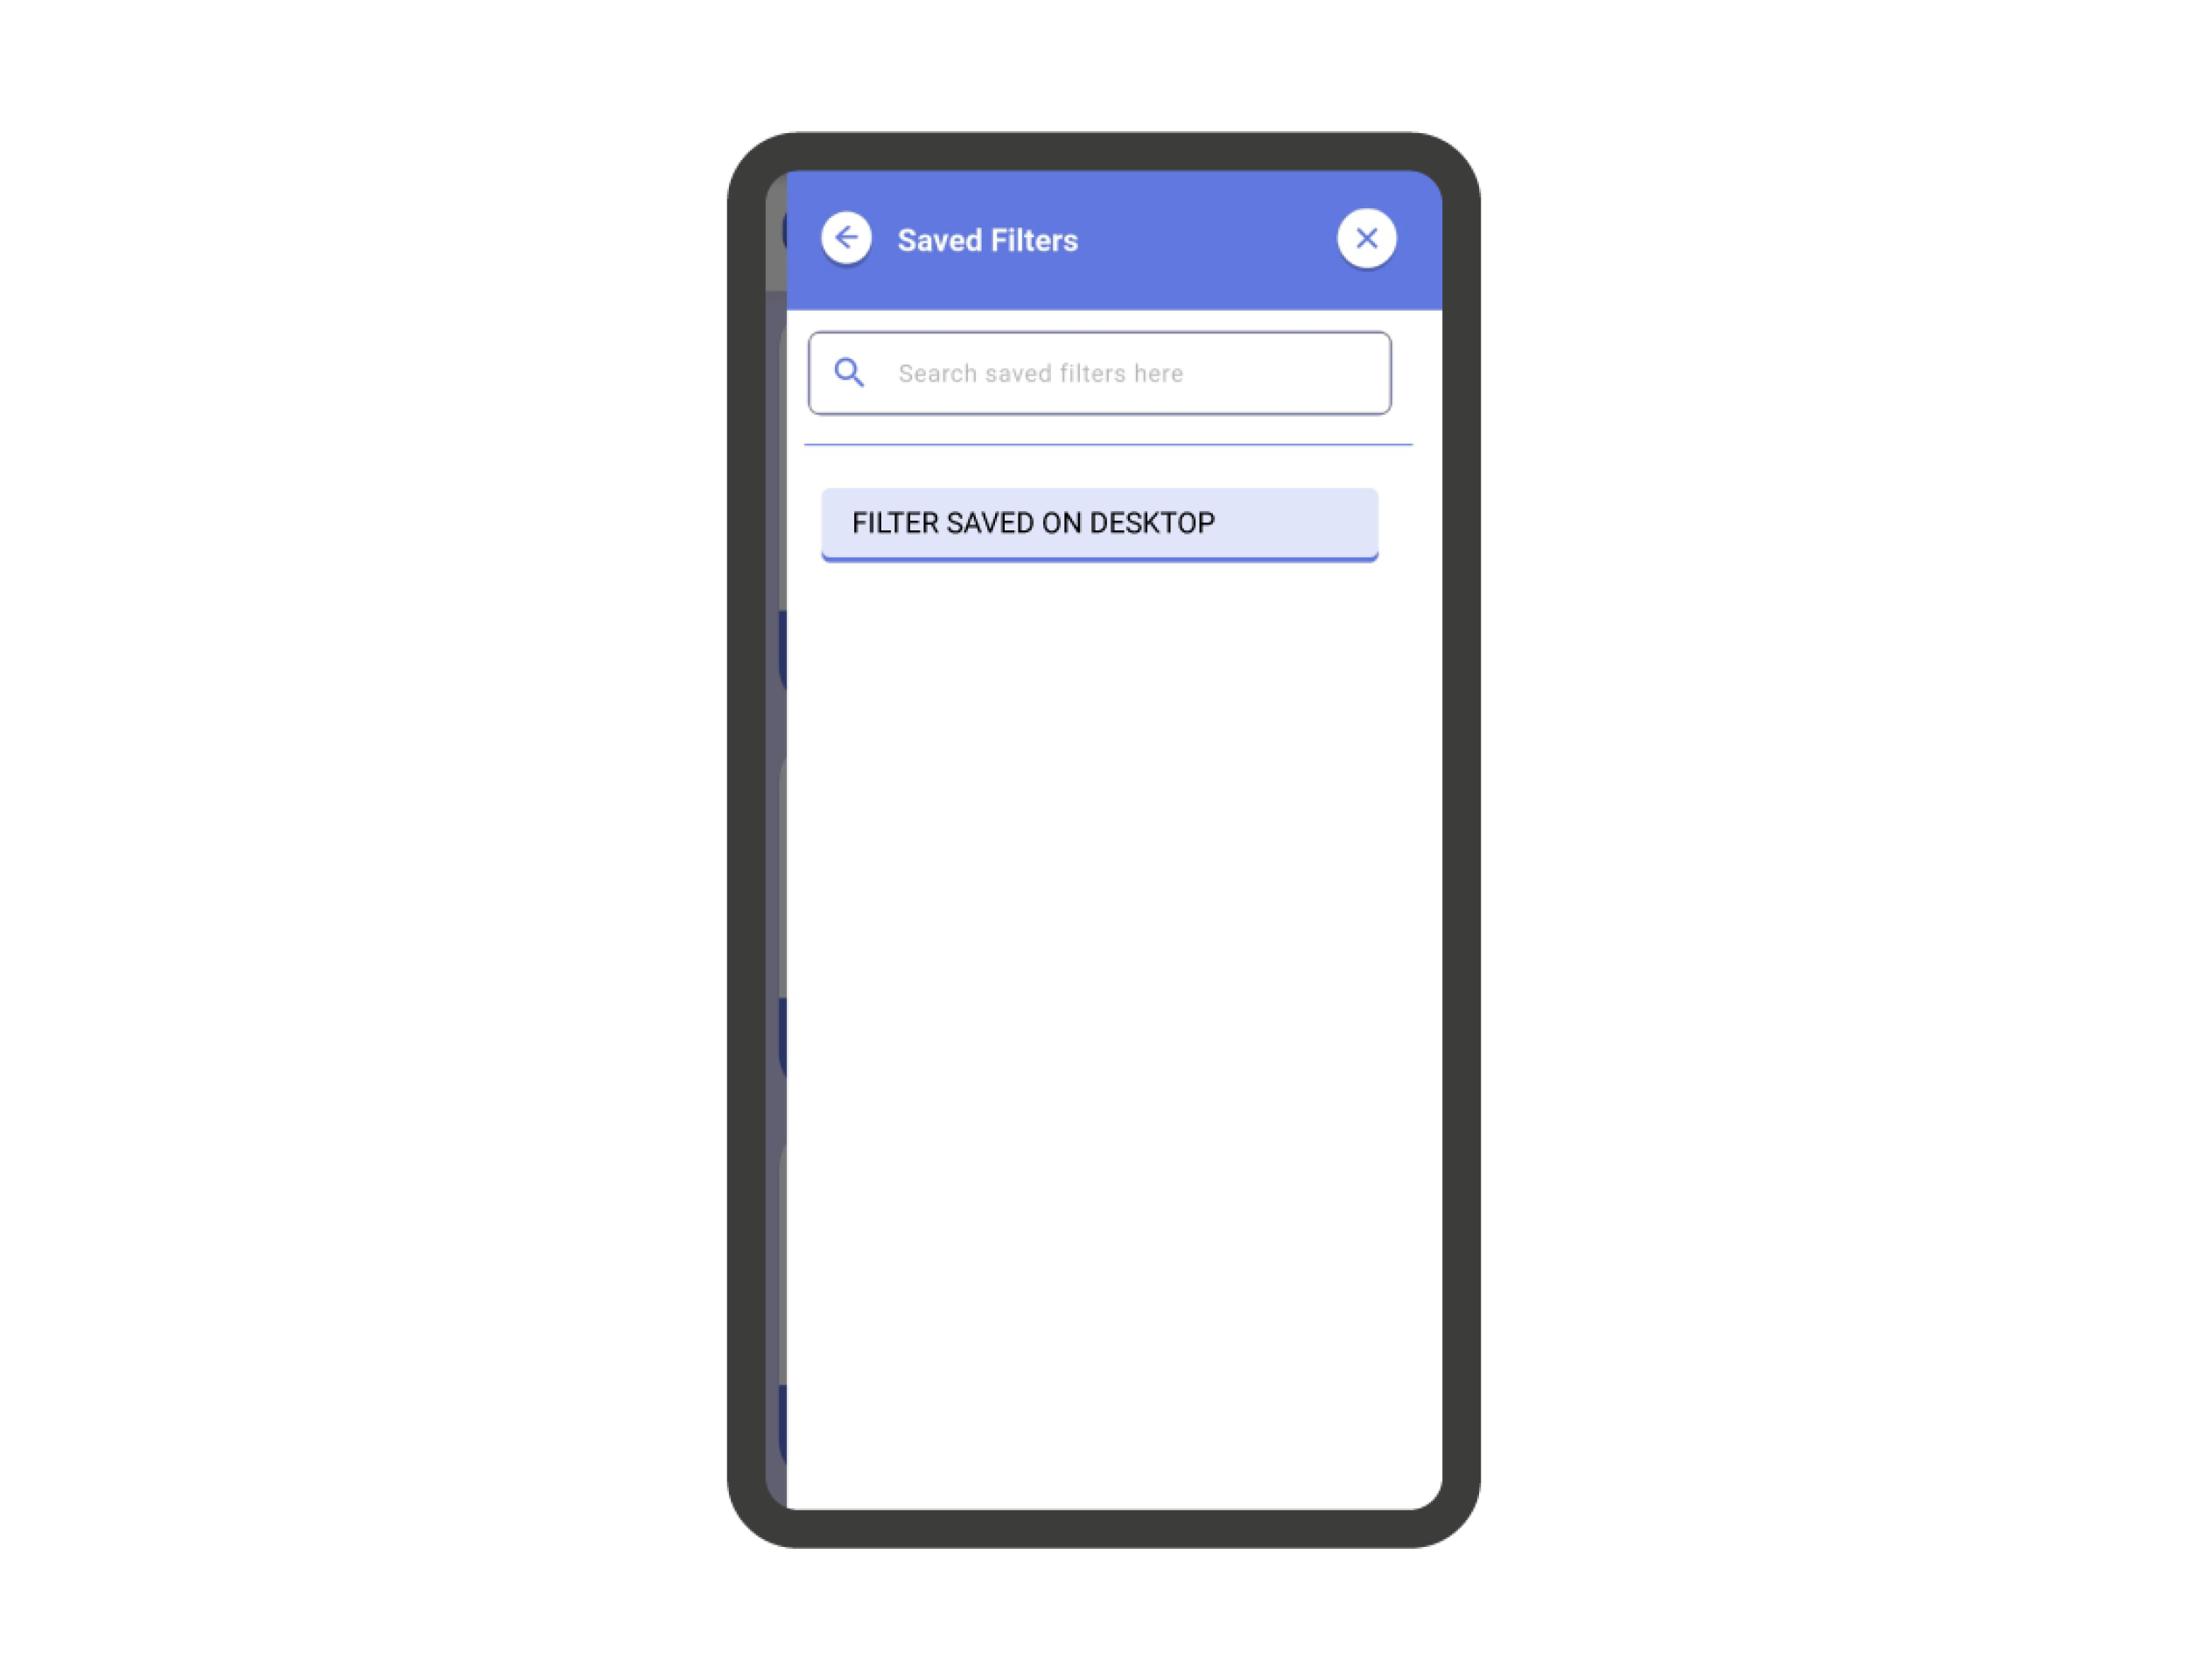
Tip: You can set up a filter from the IRISTRACE web version, save it, and load it from the mobile app.