Find out how to reassign the department to which a checklist was originally assigned in Iristrace.
The department to which a checklist is originally assigned can be changed.
It is necessary to execute the following indications.
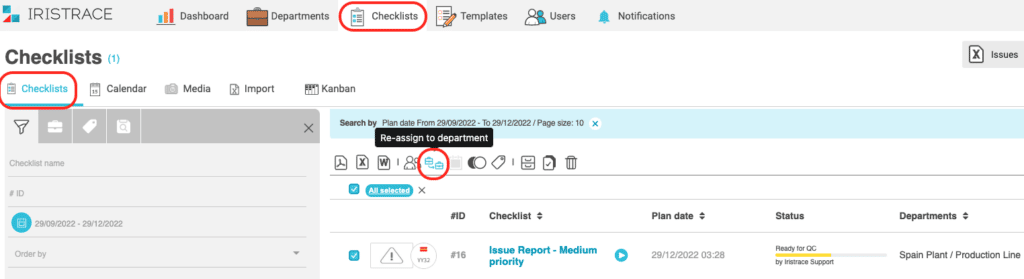
1. Select option “Reassign department” in the Checklists menu #
In the “Checklists” menu, in the list of checklists, select the checklist to be reassigned and click on the option to reassign the department to which it is assigned.
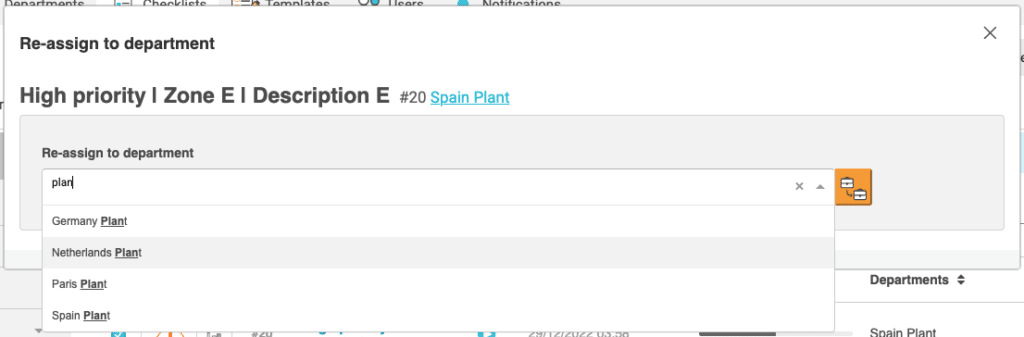
2. Select the department to be reassigned #
Then, using the search engine on the screen, select the department to reassign the checklist to.
3. Press the reassign button #
Once the new department has been selected, click on the change icon and the checklist will be reassigned to the new department.
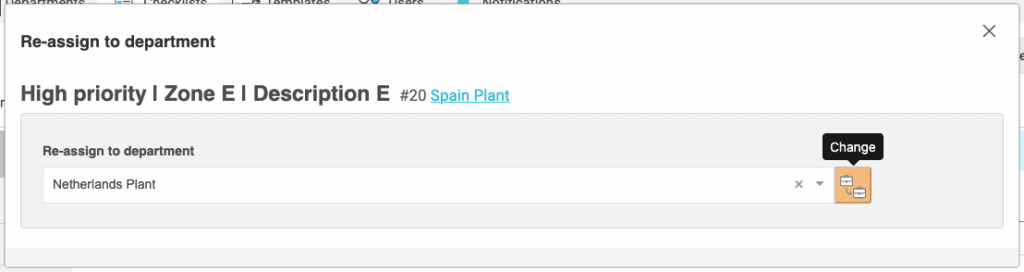
Once this is done, the checklist will be assigned to the new department.
IMPORTANT – This reassignment can be done with departments and sub-departments.
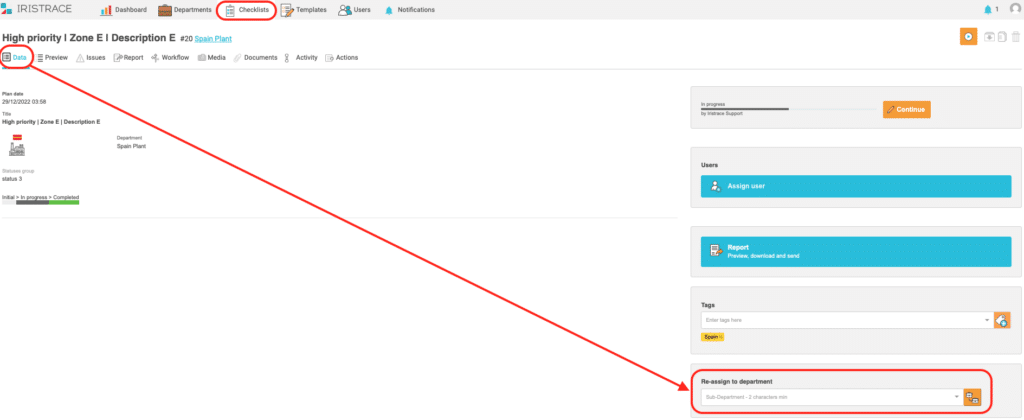
4. Additional screen from which to reassign the checklist #
Department reassignment can also be performed within the checklist details, in the “Data” tab, using the “Reassign department” option.