Skip to content
Iristrace Helpdesk
  • First steps
  • Checklists
  • Templates
  • Workflows
  • Users
  • Departments
  • Reports
  • Notifications
  • Data download
  • Dashboard
  • Recommendations for use
  • Integrations & BI
  • Glossary
Popular Search como

First steps

  • Add Additional Company Contact Fields
  • Accessing Iristrace’s web/desktop platform
  • Accessing Iristrace on mobile
  • Customizing Iristrace with your corporate image or logo
  • Customize your Iristrace environment
  • Changing the language of your account in Iristrace
  • Iristrace Menu Interface
  • Creating and answering a checklist in the web version of Iristrace

Checklists

  • How to View Checklists in the Kanban View
  • Creating and answering a checklist in the web version of Iristrace
  • How to answer a checklist from the Iristrace mobile app
  • How to create and answer a checklist from the web version of Iristrace
  • What additional options are available to the user when answering a checklist?
  • How to answer a checklist without connectivity (offline mode)
  • How to browse checklists in web version
  • How to filter the list of checklists in the web version
  • How to create an action plan in a checklist
  • How to set up a dynamic title per checklist
  • How to mass import checklists into Iristrace
  • How to manage incidents recorded in Iristrace
  • How to download an Excel file of incidents
  • Create and download checklist reports
  • How to assign a checklist to a user
  • How to change the department of a checklists

Templates

  • How to configure the visibility of a category of questions in a checklist based on its status
  • Archive Templates
  • How to create templates in Iristrace
  • What types of questions can be configured
  • What additional options can be configured in questions Excerpt
  • How to create default responses and reuse response structures
  • How to configure default responses
  • How to create statuses and status groups
  • How to create templates for action plans
  • How to examine the metadata in your templates
  • What are the additional functionalities of the templates?
  • How to customize a template
  • How to set basic scoring in templates
  • How to set up conditional questions
  • How to set up an advanced scorecard
  • How to Create a Random Question Template
  • How to set score thresholds for multiple choice questions

Workflows

  • How to create a Workflow to send notifications by email
  • How to create a Workflow to create checklists

Users

  • Checklist Access Control: Restrict Checklist Visibility by User and Template
  • “View Users” Permission
  • How to create a user
  • Managing Custom Permissions
  • How to mass customize user permissions

Departments

  • How to create a department
  • What are departments in Iristrace
  • How to create subdivisions
  • How to assign users to departments
  • How to customize the title “Departments”.

Reports

  • Exporting a report in Word format
  • How to customize PDF reports

Notifications

  • Creating a Notification Based on an Automatic Event
  • How to Generate a Notification According to a Time Periodicity
  • How to set up an automatic instant message (notifications)
  • How to download the requested reports

Data download

  • How to download an Excel file of incidents

Dashboard

  • How to create a dashboard

Recommendations for use

  • How to solve the most common web application stability issues
  • How to solve the most common problems with Iristrace access
  • How to resolve text mismatches in the calendar

Integrations & BI

  • Intermediate Database Iristrace
  • Data model
  • Connecting MariaDB with Microsoft Power BI
  • Conectar MariaDB con JDBC
  • ODBC data source
  • Connecting MariaDB with Google Looker Studio
  • Direct connection to MySQL Workbench
  • Connecting MariaDB to SAP Datasphere
  • Connection between MariaDB and Tableau
  • Connecting from Azure Synapse via local connection
View Categories
  • Home
  • Iristrace Help Desk
  • Checklists
  • How to create and answer a checklist from the web version of Iristrace

How to create and answer a checklist from the web version of Iristrace

Learn how to create, answer and operate a checklist with the web version of Iristrace. Remember that on a mobile terminal or tablet you also have an app to improve your user experience.

1. Create a checklist #

Once you have your templates set up, there are several ways to create a checklist.

1.1. From the list of templates in the section “Templates”. #

From the “Templates” tab by clicking on the “Create” button.

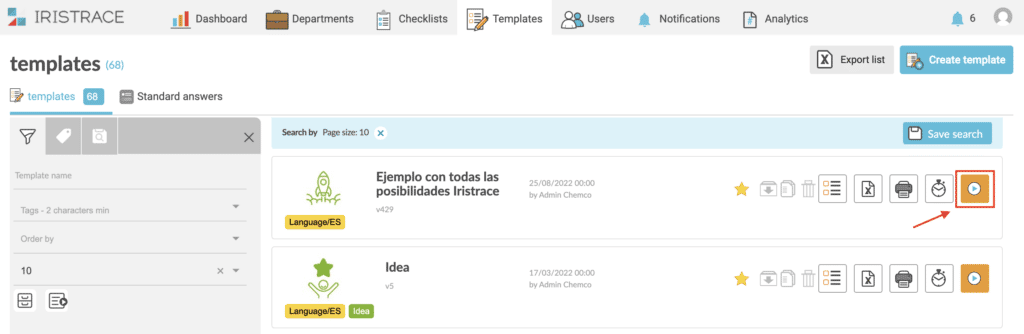
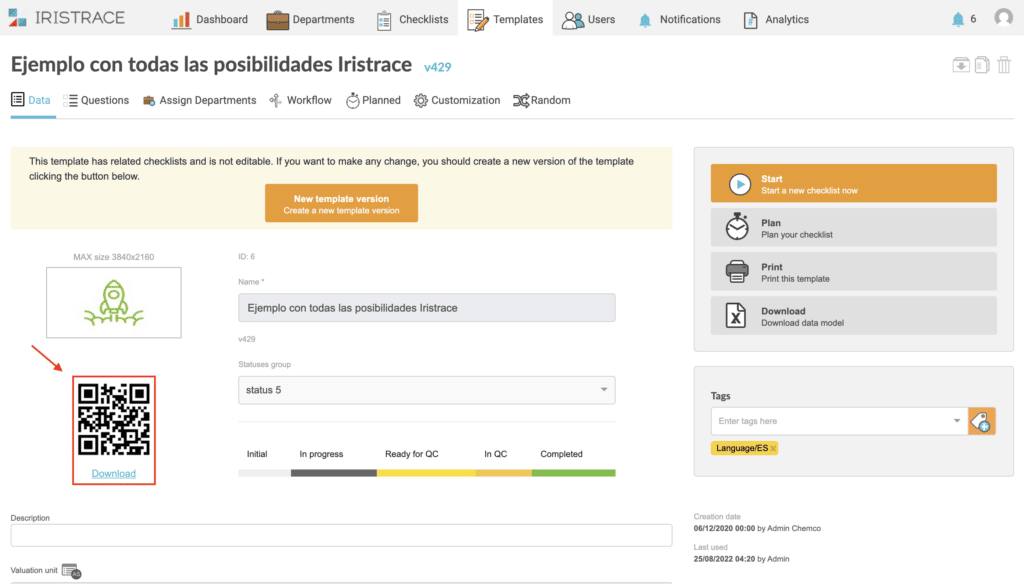
1.2. From the template details in the section “Templates”. #

From the “Templates” tab, click on the name of the template you want to start and once inside click on the “Start” button.

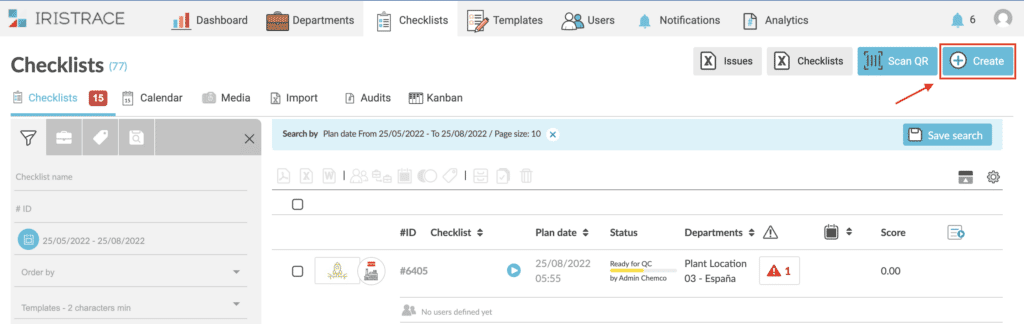
1.3. From the “Checklists” section #

From the “Checklists” tab, clicking on “Create”, choose the template and the department where you want to complete the checklist and start answering.

1.4. Scan a QR code #

There is also the possibility to scan a QR to start a checklist.

1.4.1. Scan the code with your device #

This QR code is associated with a template and can be placed in the locations where the checklist is to be made.

1.4.2. Select template #

Once you start the action of creating a checklist, a window will open with the list of existing templates and you can choose the one you need.

1.4.3. Select the department #

Next, you will need to choose the department you want to assign it to.

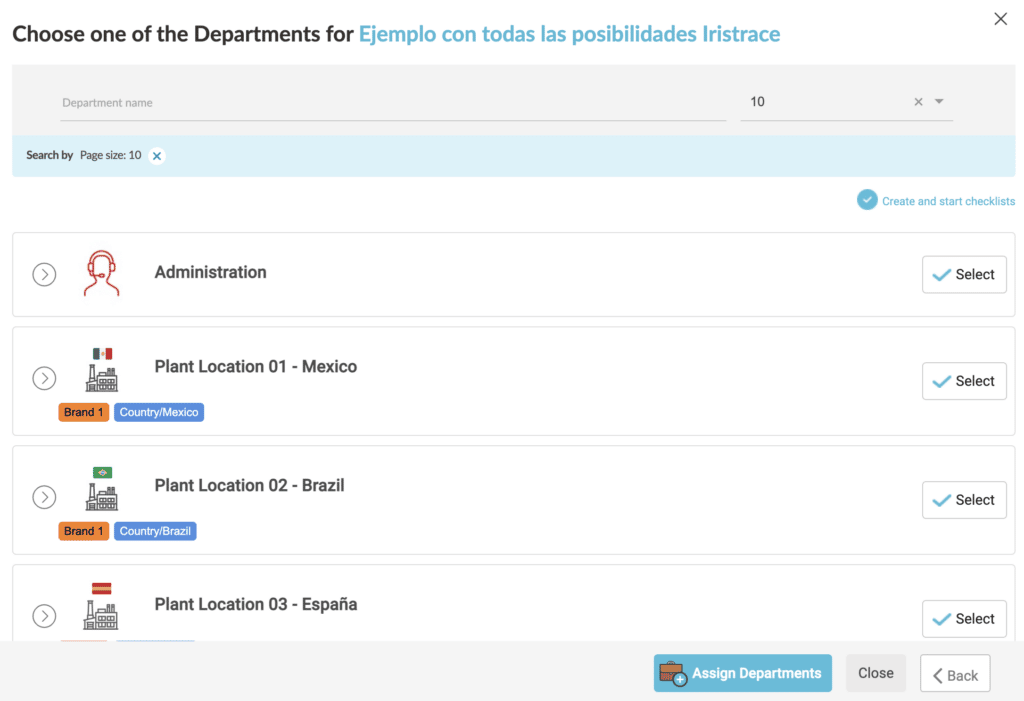
If the account has only one department, Iristrace will automatically assign the chosen template to the department.

In the same way, if there is only one template, when clicking on “New checklist” the template will be selected giving way to the following department selection screen.

2. Answer a checklist #

When you start a checklist you have the possibility to answer the questions according to the structure defined in the original template.

Additionally, each question has the possibility to have an attachment:

  • One comment
  • An image
  • One file
  • A manual immediate alert, which will cause an impact the moment it is pressed.
  • Create an action plan

3. State flow of a checklist #

In Iristrace the flow of the states that a checklist can go through is determined by the group of states that the original template has configured.

By default, there are two groups of states that can be associated to a template.

In any case, it is possible to add your custom statuses and status groups from the admin user configurator and assign them during the configuration of your template.

3.1. Group 3 states #

Initial #

The checklist has been planned, but has not been started.

In Progress #

The checklist has been started and is in the process of being answered.

Completed #

The checklist has been completed and finalized.

3.2. Group 5 states #

Initial #

The checklist has been planned, but has not been started.

In Progress #

The checklist has been started and is in the process of being answered.

Ready for review #

The checklist data collection is complete and you are ready for a supervisor to review the checklist result.

Under Review #

The checklist is being reviewed by the person in charge.

Completed #

The checklist has been completed and finalized.

4. Close a checklist #

When finalizing a checklist there are two options that you can choose, depending on the group of states that you have configured.

4.1. End for review #

You finalize it, but allow the supervisor or manager to review it and finalize the report.

4.2. Exit checklist #

It is the user himself who finalizes and completes the checklist.

checklists, estados, web
Was this helpful ?
Do you still need help?

How can we help?

Updated on November 10, 2022
How to answer a checklist from the Iristrace mobile appWhat additional options are available to the user when answering a checklist?

Powered by BetterDocs

Table of Contents
  • 1. Create a checklist
    • 1.1. From the list of templates in the section "Templates".
    • 1.2. From the template details in the section "Templates".
    • 1.3. From the "Checklists" section
    • 1.4. Scan a QR code
      • 1.4.1. Scan the code with your device
      • 1.4.2. Select template
      • 1.4.3. Select the department
  • 2. Answer a checklist
  • 3. State flow of a checklist
    • 3.1. Group 3 states
      • Initial
      • In Progress
      • Completed
    • 3.2. Group 5 states
      • Initial
      • In Progress
      • Ready for review
      • Under Review
      • Completed
  • 4. Close a checklist
    • 4.1. End for review
    • 4.2. Exit checklist
  • English
    • EspaƱol
    • Deutsch
  • English
  • Spanish
  • German