
The Department list lets you browse the departments you have access to directly from the mobile app. For each department you can see its key information at a glance, check its most recent checklist activity, review which users belong to it, and start a new checklist for that department.
Table of Contents #
- Requirements
- Accessing the Department List
- Understanding a Department Card
- Browsing Subdepartments
- Searching, Filtering, and Display Options
- The Department Data Popup
- Viewing a Department’s Checklists
- Creating a Checklist from a Department
Requirements #
To use the Department list, you need the View departments permission. You see only the departments you are assigned to.
To see the users of a department in the Department data popup, you additionally need the View users permission.
Accessing the Department List #
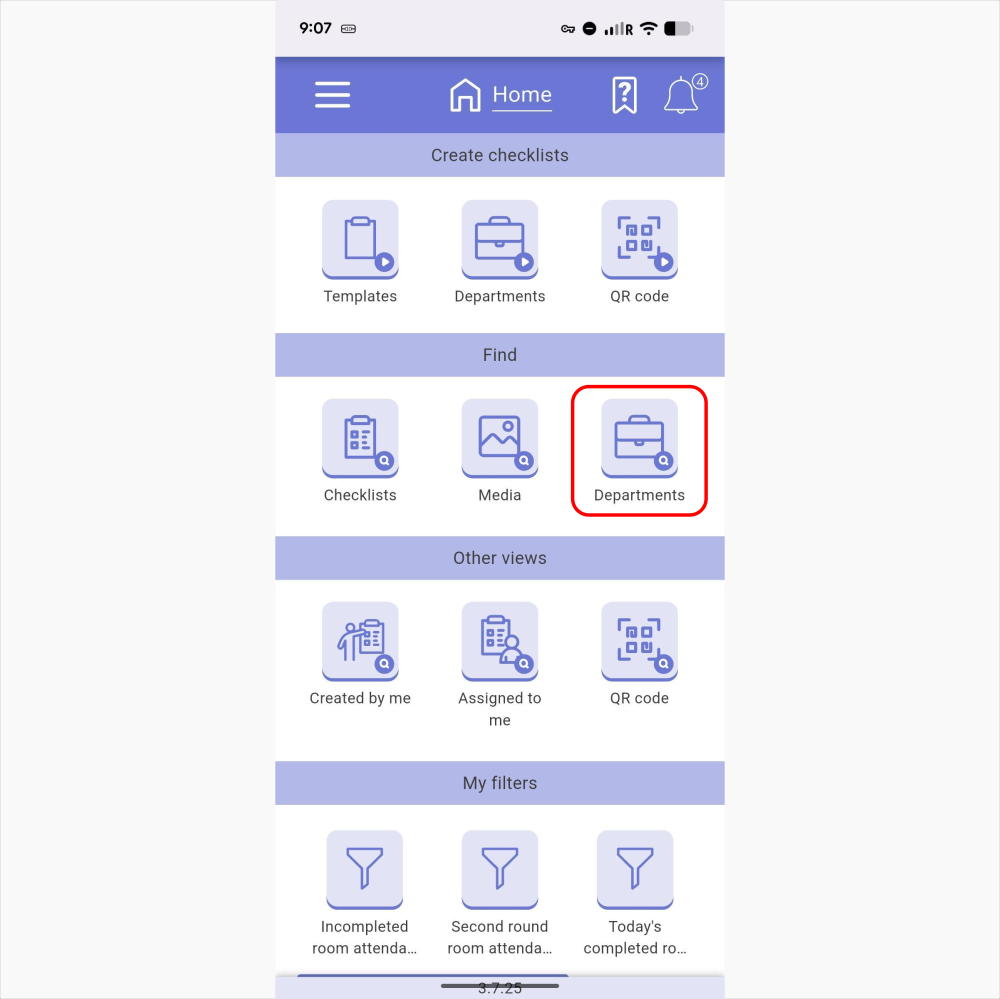
- Open the mobile app. You land on the Home screen.
- Scroll to the Find section.
- Tap Departments.
The Department list opens, showing all departments available to you as cards.
Understanding a Department Card #
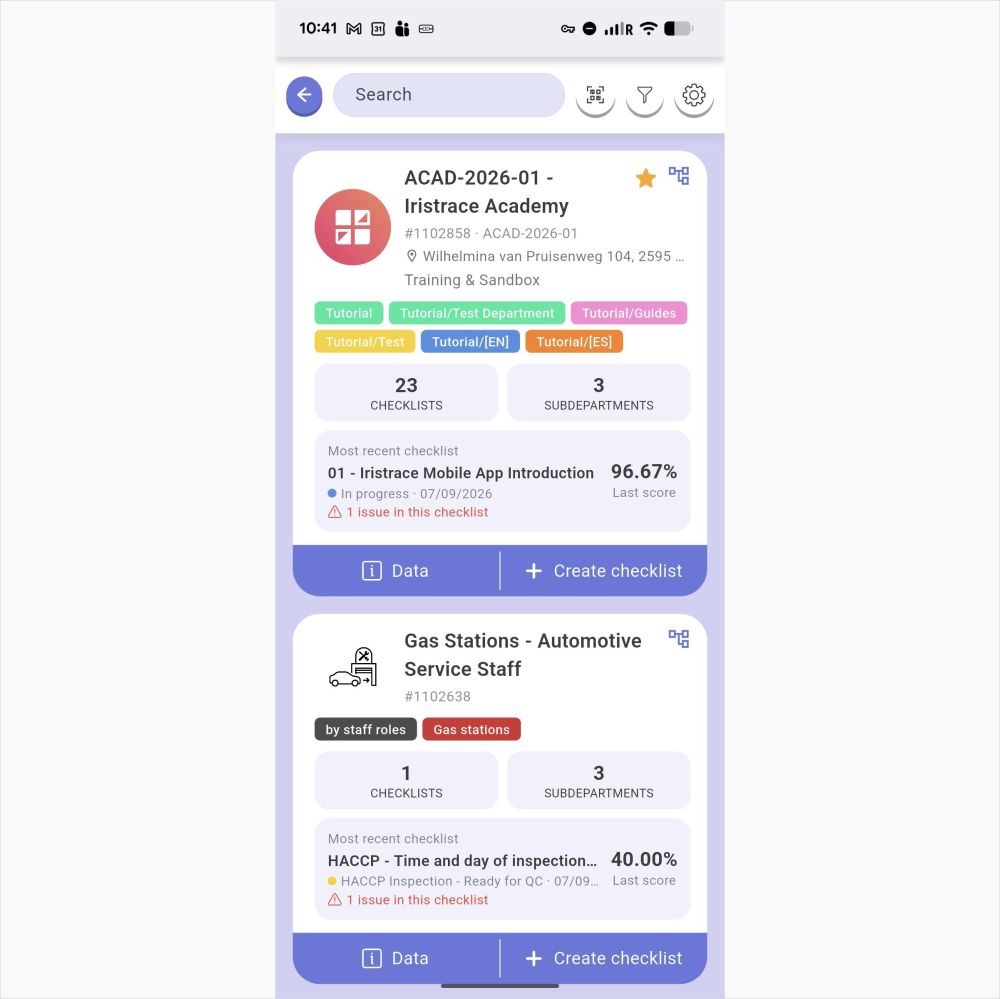
Each department is displayed as a card. Depending on the information filled in for the department, a card can show:
- Department image — the custom image or icon set for the department.
- Name — the department’s name.
- ID and code — the internal ID (e.g., #1101873) and, if defined, the department’s custom code.
- Location — the department’s location or address, if set.
- Tags — the department tags, shown as colored chips.
- Checklists counter — the total number of checklists in this department. Tap it to open the checklist list filtered to this department.
- Subdepartments counter — shown only for parent departments, the number of subdepartments it contains. Tap it to browse the subdepartments.
- Most recent checklist — the name, status, and date of the latest checklist in the department. If that checklist uses scoring, its Last score is shown as a percentage, and if it has open issues, a red warning shows the number of issues (e.g., “8 issues in this checklist”). Tap this section to open the checklist in preview mode.
Parent departments are also marked with a hierarchy symbol in the top corner of the card. This symbol is purely informational — it tells you the department contains subdepartments.
At the bottom of every card you’ll find two actions:
- Data — opens the Department data popup with the department’s details, insights, and users.
- + Create checklist — starts a new checklist for this department. See Creating a Checklist from a Department.
Browsing Subdepartments #
Departments can have one level of subdepartments.
- On a parent department’s card, tap the Subdepartments counter.
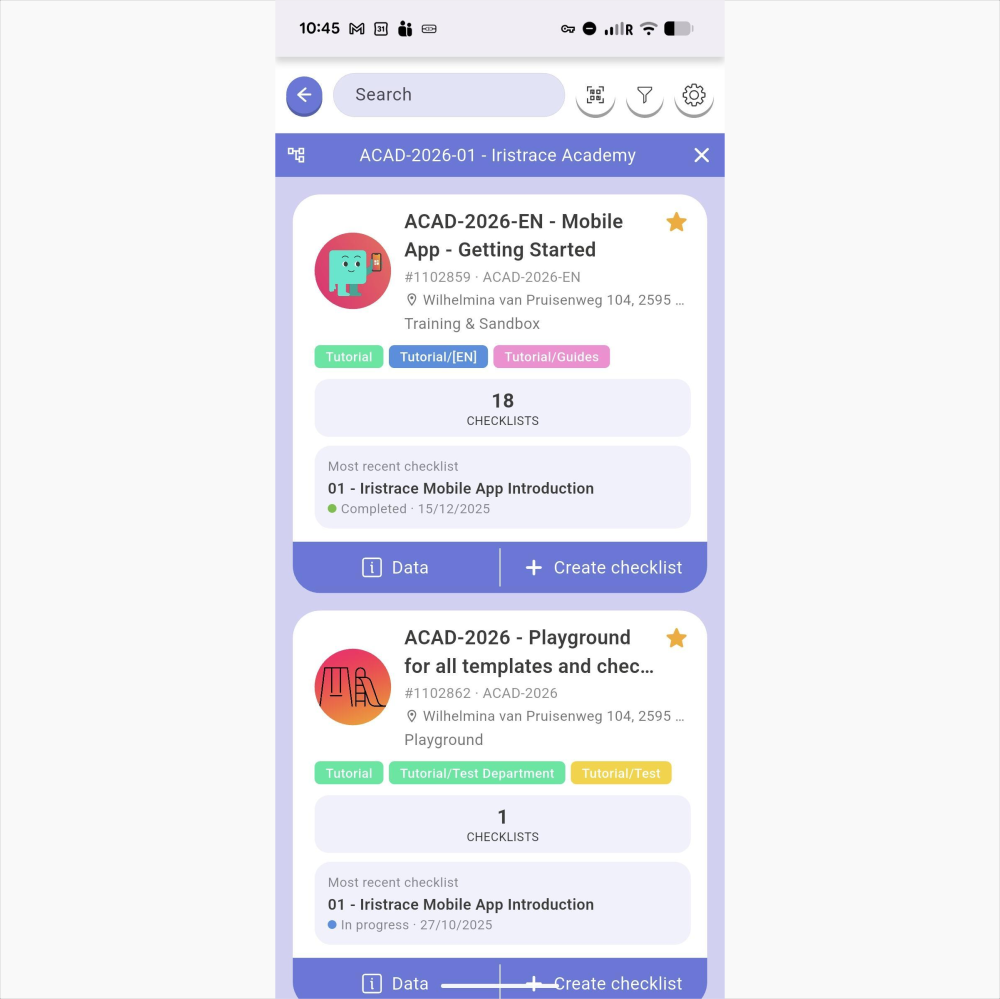
- A colored banner appears at the top of the list showing the parent department’s name. The list below now shows that parent’s subdepartments.
- Subdepartment cards show the same information as parent cards, except the subdepartments counter — subdepartments cannot contain further departments.
- Tap the X on the banner to return to the full department list.
Searching, Filtering, and Display Options #
At the top of the Department list you’ll find:
- Search bar — search departments by name or by their custom code. The search looks across all levels at once, so subdepartments are found without opening their parent first.
- QR scan button — scan a department’s QR code to filter the list down to that single department. From there you can create a checklist for it or open its checklists directly.
- Filter button — filter the list (for example by name or tags, including archived departments) and change the sorting. You can also apply your saved filters here.
- Display settings (gear) — choose which elements are shown on the cards: image, ID, name, location, tags, checklists counter, and most recent checklist.
The Department Data Popup #
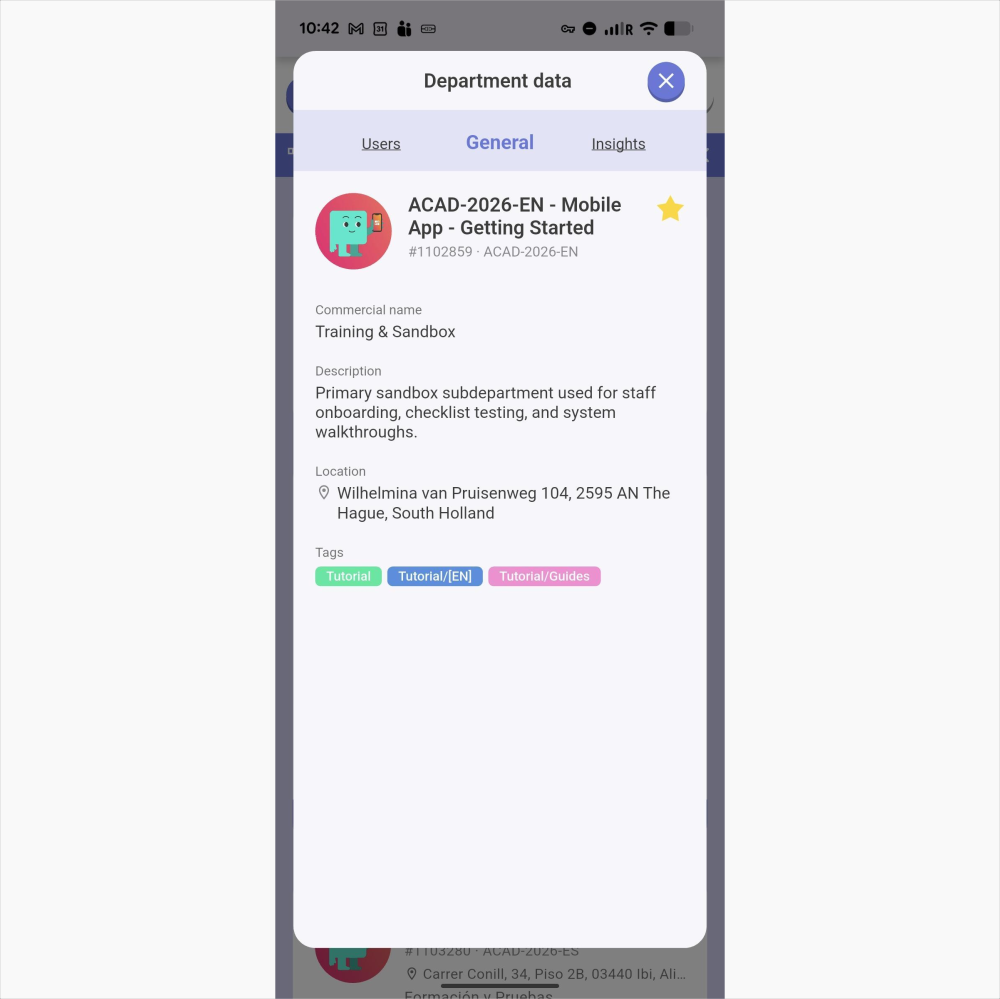
Tap Data on any department card to open the Department data popup. The popup has three tabs — General, Insights, and Users — which you can switch between at the top.
General #
The General tab shows the department’s identity:
- Department image, name, and ID.
- Badges — Favorite and, for departments that contain subdepartments, Parent.
- Location — the department’s location, if set.
- Tags — all tags assigned to the department.
From this tab you can also mark the department as a favorite or remove it from your favorites.
Insights #
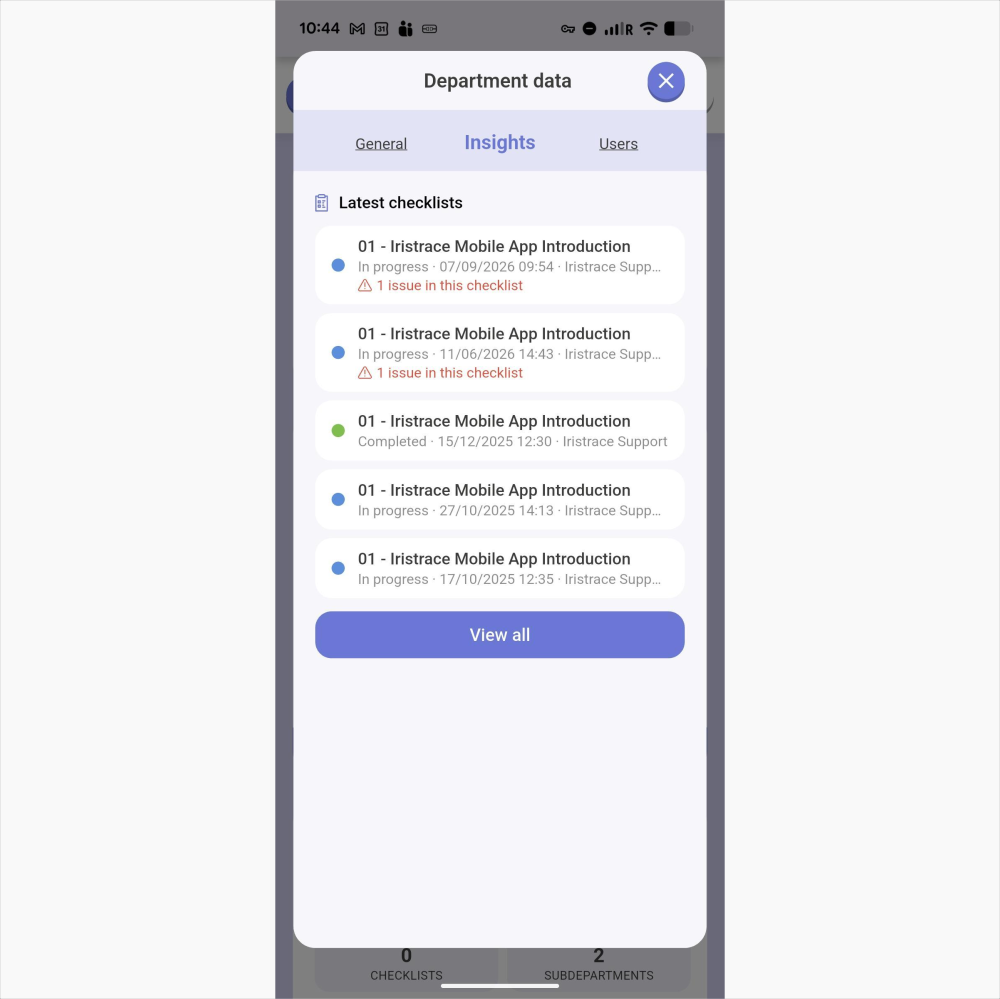
The Insights tab shows the department’s Latest checklists: for each one you can see its status, date and time, its creator, and a red warning with the issue count if the checklist has open issues.
Tap View all to open the full checklist list filtered to this department. See Viewing a Department’s Checklists.
Users #
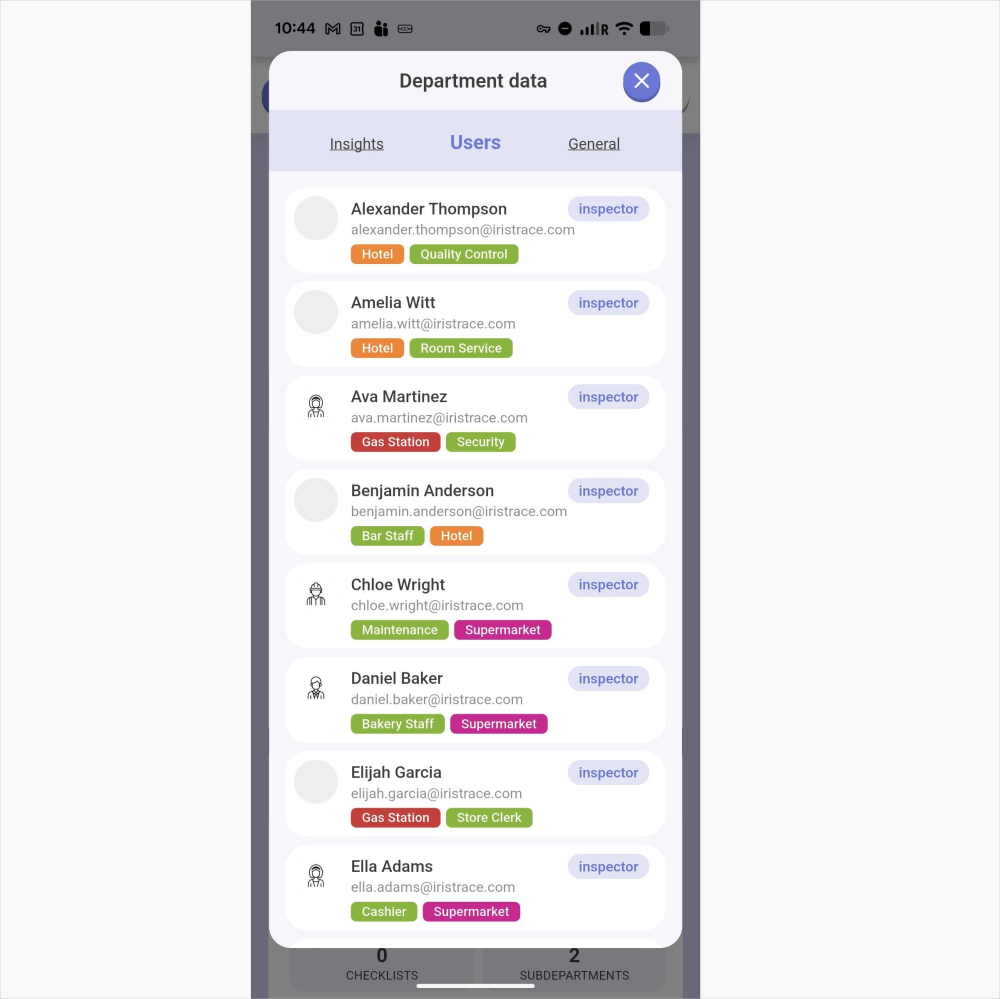
The Users tab lists the users assigned to this department. For each user you can see their name, role, email, and their tags and departments as colored chips.
Viewing this tab requires the View users permission.
Viewing a Department’s Checklists #
You can open the checklist list filtered to a department in two ways:
- Tap the Checklists counter on the department’s card, or
- Tap View all in the Insights tab of the Department data popup.
An Active Filters banner at the top reminds you that the list is filtered — tap the X on the banner to clear the filter and see all checklists.
From here, each checklist card works as usual: Data, Preview, and Start.
Creating a Checklist from a Department #
Tap + Create checklist on a department card to start a new checklist with that department already preselected. The creation flow is the same as usual — if you have access to more than one template, you still choose the template for your checklist.

